
Deployment steps | Prerequisites, Azure managed image, INI configuration, and network validation
Introduction
This guide walks through deploying Omnissa Unified Access Gateway (UAG) 2609 on Microsoft Azure Native using PowerShell. UAG provides secure remote access to Horizon virtual desktops and applications. The deployment uses a UAG VHD, Azure PowerShell, an Azure managed image, and a deployment INI file.
The example uses macOS with PowerShell 7 to prepare Azure resources, and a Windows PowerShell environment to run the UAG deployment script. Follow the supported client platform guidance for your UAG release.
Prerequisites
Prerequisite 1: Prepare the Microsoft Azure Environment
Prepare an Azure subscription with sufficient permissions to manage resource groups, storage, managed images, virtual machines, network interfaces, and public IP addresses. Create or reuse a Storage Account and Blob Container for staging the UAG VHD.
| Azure resource | Example | Status |
| Resource group | ushrestha-rg | Existing |
| Storage account | storageaccountuag2412 | Manually created |
| Blob container | uag2412-vhd | Manually created |
| Azure region | westus2 | Selected |
| Azure subscription | Your Azure subscription | Existing |
Prepare the Virtual Network and Subnets
This example uses the two-NIC UAG deployment option, with a public-facing interface and a management interface. Ensure the VNet, subnets, routing, DNS resolution, and firewall rules are in place.
| Interface | Subnet | Purpose |
| eth0 | Subnet_DESKTOP | Internet-facing UAG traffic |
| eth1 | Subnet_MGMT | Management traffic |
Note Subnet names are illustrative. For production use, segment external and management access appropriately.
Prerequisite 2: Download UAG 2609 Files
From the Omnissa Customer Connect download page, download “Unified Access Gateway (UAG) 2609 for Microsoft Azure” (choose FIPS or Non-FIPS as required) and “Unified Access Gateway (UAG) 2609 PowerShell Scripts.
- euc-unified-access-gateway-26.09.0.0-40481840070_OVF10.vhd
- Unified Access Gateway (UAG) 2609 PowerShell Scripts
UAG Deployment Steps
Step 1: Navigate to the Homebrew Directory on macOS
Open Terminal and navigate to Homebrew, then start PowerShell.
>cd /opt/homebrew
>pwsh
>PS /opt/homebrew>
Note The Homebrew directory is used only for this example; PowerShell commands can run from any directory.
Step 2: Install the Azure PowerShell Module
Install the Azure Az module, which provides commands for authentication and resource operations.
>Install-Module -Name Az -Force

>Get-InstalledModule -Name Az
Step 3: Connect to Microsoft Azure
Step 3.1: Clear the Existing Azure Context (Optional)
If needed, clear an existing Azure context to avoid selecting the wrong subscription. Skip this step if you are already connected to the correct context.
Clear-AzContext
Step 3.2: Connect to Your Azure Account
Authenticate interactively, or use device-code authentication.
>Connect-AzAccount

# Alternative

>Connect-AzAccount -DeviceCode
Step 3.3: Select the Correct Azure Subscription
>Set-AzContext -SubscriptionName "your_subscription_name"

>Get-AzContext
If you have multiple Azure subscription associated with your email account, verify the current subscription and tenant before uploading the image or deploying resources.
Step 4: Define the Azure Deployment Variables
Specify the source VHD file path, destination Azure blob URL, region, and resource group.
# UAG 2609 – Azure Deployment Variables
>$imageURI = "https://storageaccountuag2412.blob.core.windows.net/uag2412-vhd/euc-unified-access-gateway-26.09.0.0-40481840070_OVF10.vhd"

>$imagePath = "/Users/ushrestha/Downloads/euc-unified-access-gateway-26.09.0.0-40481840070_OVF10.vhd"

>$location = "westus2"

>$resourceGroup = "ushrestha-rg"
| Variable | Description |
| $imageURI | Destination blob URL for the VHD |
| $imagePath | Local VHD file path |
| $location | Azure region |
| $resourceGroup | Target resource group |
Step 5: Upload the UAG VHD Image to Azure Blob Storage
Use Add-AzVhd to upload the local UAG image to the Blob Container.
>Add-AzVhd -ResourceGroupName $resourceGroup -LocalFilePath $imagePath -Destination $imageURI -NumberOfUploaderThreads 32
In the Azure Portal, browse to Storage Accounts → storageaccountuag2412 → Containers → uag2412-vhd and confirm the VHD is present.
Step 6: Create an Azure Managed Image
Create an Azure managed image from the uploaded UAG VHD. This is part of the current managed-disk deployment workflow following Azure’s retirement of unmanaged disks.
- Open Azure Portal and search for Images; select Create.
- Select the correct subscription, resource group and Azure region.
- Provide a managed image name.
- Configure the image source using the uploaded UAG VHD (or create a managed disk from that VHD first if required by the Portal workflow).
- Set the Linux OS properties, OS state, and Hyper-V generation according to the supplied UAG image.
- Review the settings, create the image, and verify it appears under Images.
Managed Image Name : UAG2609-ManagedImage
Resource Group : ushrestha-rg
Azure Region : westus2
Operating System : Linux
Source : UAG 2609 VHD
Note Use the exact managed image name in the deployment INI file. Verify the image source and generation settings against your UAG VHD.
Step 7: Create the UAG Deployment INI File
Create the file uag12-azure.ini with the following configuration. Replace all placeholder values with your Azure environment details. Below is the sample with minimal parameters. You can modify as neded.
[General]

# Name of the Azure virtual machine
name=H8-UAG02

# Enable SSH access if needed
sshEnabled=true
sshPasswordAccessEnabled=true

# UAG OS hostname: use the same name as the Azure VM
uagName=H8-UAG02

# Two-NIC deployment option
deploymentOption=twonic
honorCipherOrder=true

[Azure]

# Azure subscription and deployment location
subscriptionID=your_azure_subscription_ID
resourceGroupName=your_azure_rg_name
location=westus2

# Managed image created in Step 6
managedImageName=UAG2609-ManagedImage

# VM size and Azure virtual network as needed
vmSize=Standard_A2_v2
virtualNetworkName=your_vnet_name

# eth0: Internet-facing network
subnetName0=Subnet_DESKTOP
publicIPAddressName0=UAG_Public_IP

# eth1: Management network
subnetName1=Subnet_MGMT

# Optional: NSG can be associated after deployment
#networkSecurityGroupName0=UAGInternetSG
Step 8: Deploy UAG Using PowerShell
Step 8.1: Register the Azure Standard Security Type Feature (optional)
Check or register UseStandardSecurityType, if required for the selected deployment script and Azure subscription. Perform this check before running the deployment.
>az feature register --namespace Microsoft.Compute --name UseStandardSecurityType
Alternatively, use Azure PowerShell:
>Get-AzProviderFeature -FeatureName UseStandardSecurityType -ProviderNamespace Microsoft.Compute

>Register-AzProviderFeature -FeatureName UseStandardSecurityType -ProviderNamespace Microsoft.Compute

>Get-AzProviderFeature -FeatureName UseStandardSecurityType -ProviderNamespace Microsoft.Compute

>Register-AzResourceProvider -ProviderNamespace Microsoft.Compute
Wait until the registration state shows Registered. Registration is generally a one-time subscription operation.
Step 8.2: Execute the UAG Deployment Script
Navigate to the directory containing the UAG deployment script and uag12-azure.ini, then execute the script.
>.\uagdeployaz_ps.ps1 .\uag12-azure.ini
Follow the script prompts, including administrator and root password prompts where applicable. The script creates the VM and associated resources defined in the INI file.
Note A deployment may overwrite an existing VM with the same name. Check VM names carefully, especially in production.
Step 9: Associate the Network Security Group (NSG)
Once UAG is deployed, associate the appropriate NSG with the internet-facing network interface (eth0), where the public IP is attached. In Azure Portal, open Virtual Machines → H8-UAG02 → Networking, identify the public-facing network interface, and associate the NSG.
Network Interface : eth0
Subnet : Subnet_DESKTOP
Public IP : UAG_Public_IP
NSG : UAGInternetSG
Configure only those inbound rules required by the protocols enabled in your Horizon deployment.
| Protocol | Port | Purpose |
| TCP | 443 | HTTPS / Horizon XML-API |
| UDP | 443 | UDP tunnel, when configured |
| TCP | 8443 | Blast Extreme |
| UDP | 8443 | Blast Extreme |
| TCP | 4172 | PCoIP |
| UDP | 4172 | PCoIP |
| TCP | 9443 | UAG Admin UI — management networks only |
| TCP | 22 | SSH — trusted networks only |
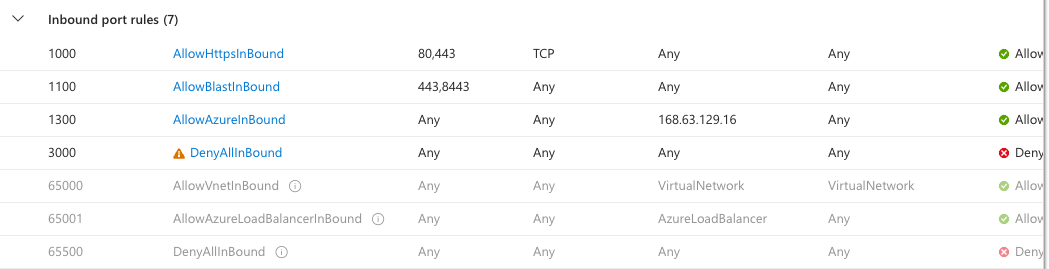
Note Associating an NSG does not, by itself, enable remote access. UAG edge services, routes, DNS, and necessary firewall rules must also be configured.
Step 10: Verify the UAG Deployment
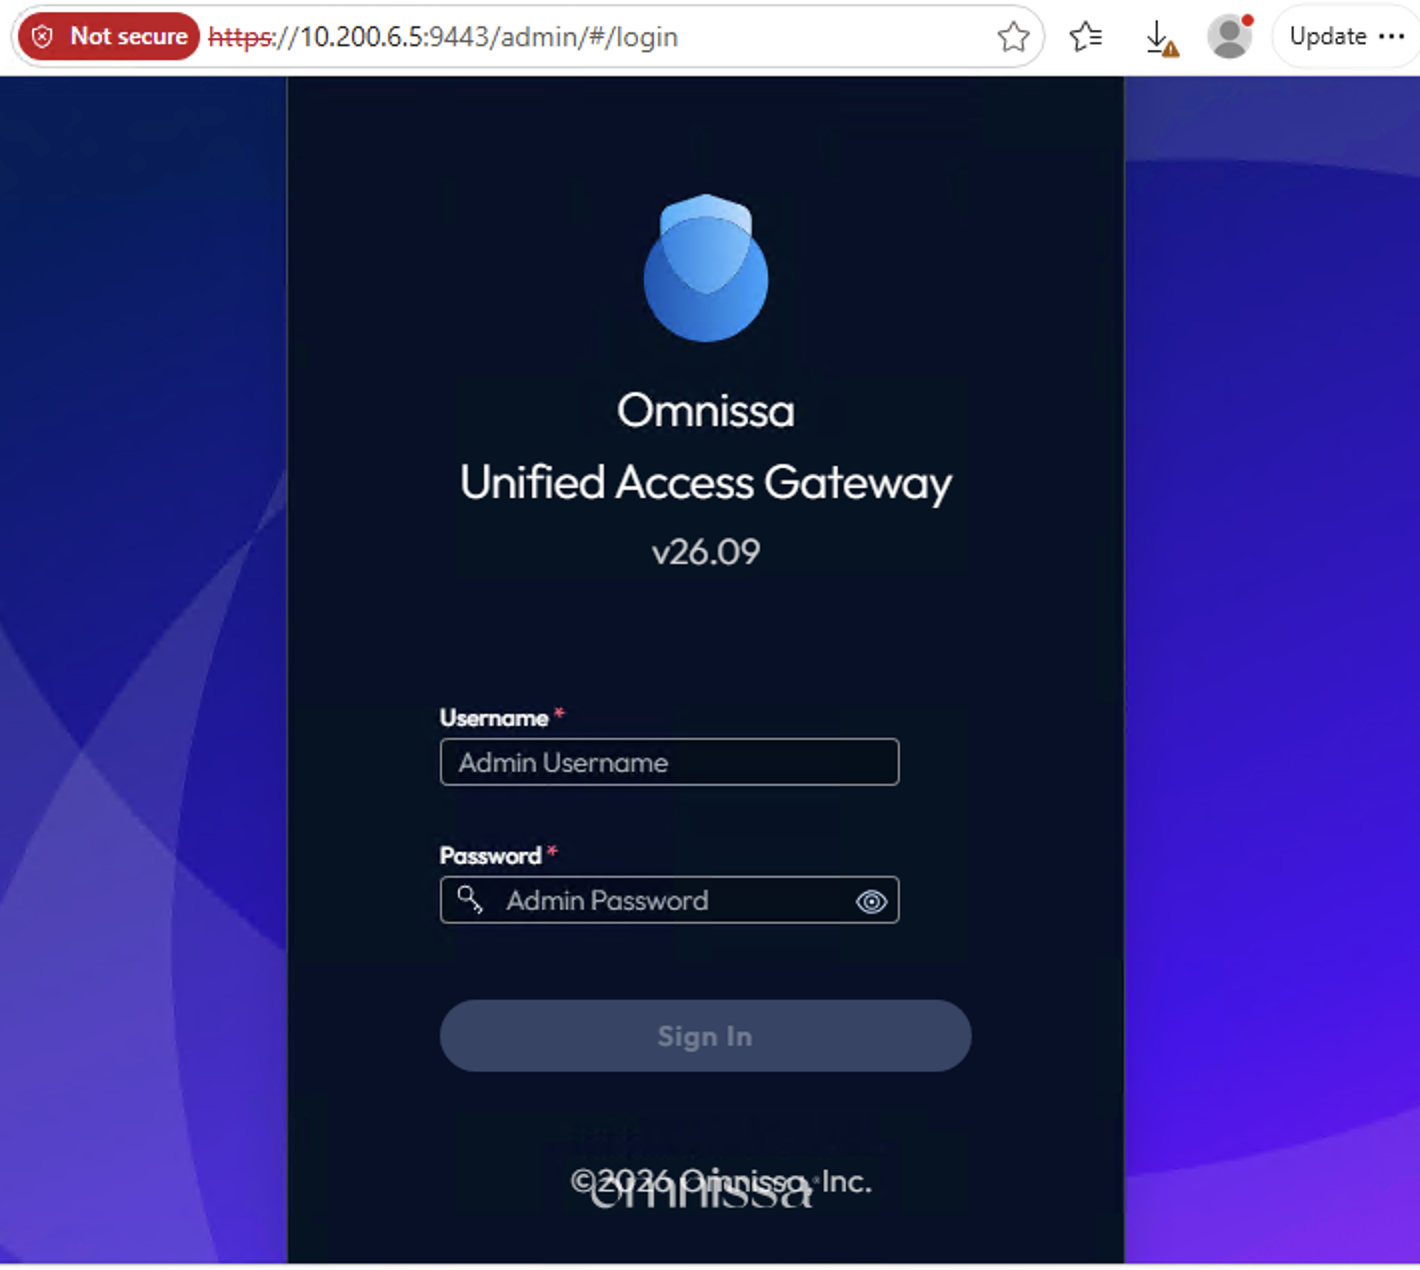
Verify that the UAG VM is running, both NICs are configured, the public IP is assigned to the intended NIC, and the NSG permits the necessary traffic. Access the UAG Admin UI from an authorized management network:
https://<UAG-IP-Address>:9443/admin
Configure Horizon Settings, Connection Server connectivity, TLS certificates and the Blast and Tunnel external URLs as needed. Then test Horizon Client connectivity from an external client.
References
Omnissa UAG 2609 — PowerShell deployment to Microsoft Azure:
https://docs.omnissa.com/UnifiedAccessGatewayDeployandConfigure-V2609/PowerShelldeploymenttoMicrosoftAzure
Omnissa UAG — Prepare the Client:
https://docs.omnissa.com/bundle/UnifiedAccessGatewayDeployandConfigureV2412/page/PreparetheClient.html
Microsoft Learn — Add-AzVhd:
https://learn.microsoft.com/en-us/powershell/module/az.compute/add-azvhd