Overview
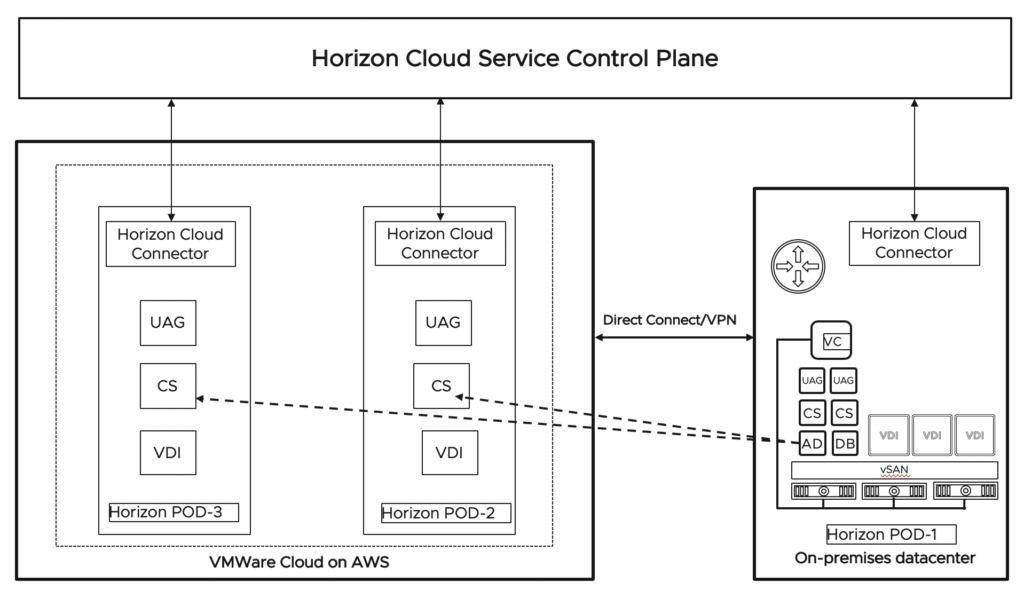
Horizon Cloud Connector connects Horizon PODs to Horizon Cloud Service control plane. The PODs can be Horizon hosted in on-premises datacenter, hosted in VMware cloud on AWS or mix of both. The main purpose of Horizon Cloud connector is to activate Horizon Subscription license but it also adds the capability of health monitoring and helpdesk service of cloud-connected PODs within a single Horizon Cloud Service management console. Multiple PODs can be connected to a single Horizon Cloud Service account however every individual POD should have dedicated connector. High availability configuration of Cloud Connector is not supported in current version 1.3.0.
In this post, I will provide the step by step guidance to deploy, configure and upgrade of the Horizon Cloud Connector.
Planning
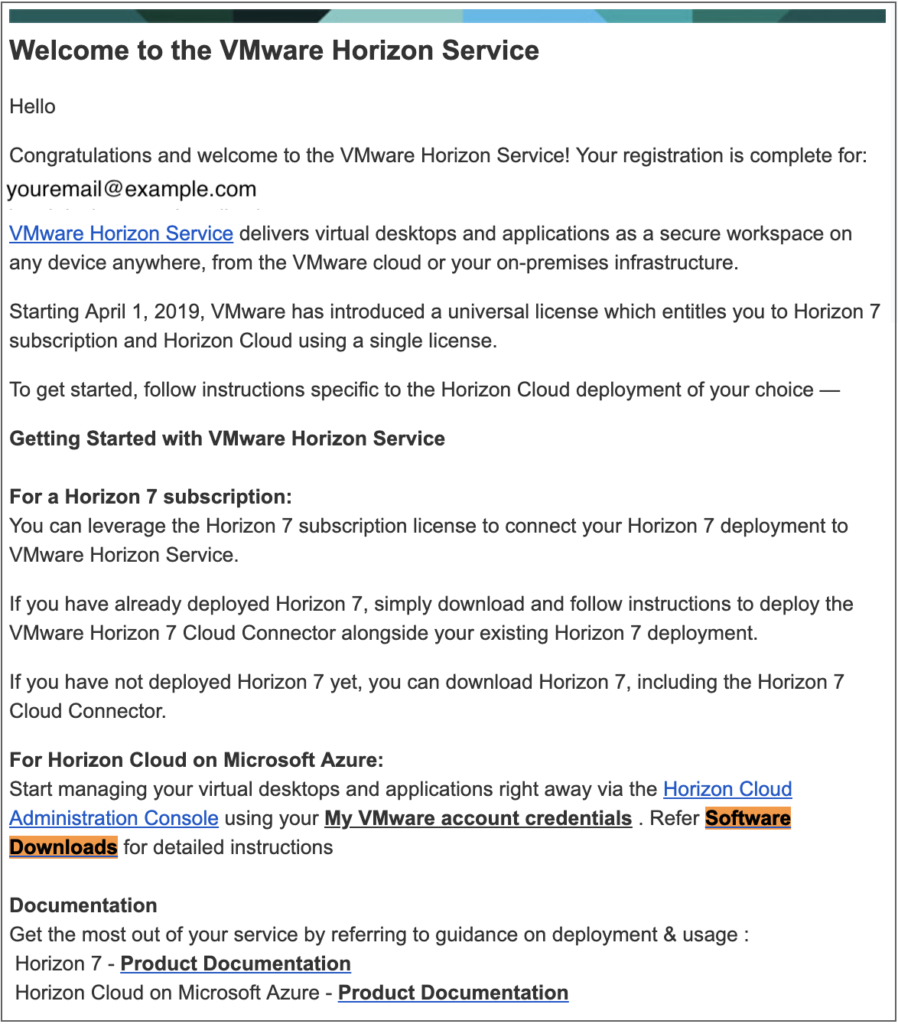
1. When you purchase the VMware Horizon Cloud Service, you will receive a ‘Welcome’ email from ‘VMware Horizon Team’ with the download link for Cloud Connector OVA template. You will need a valid MYvmware account to be able to download connector OVA.
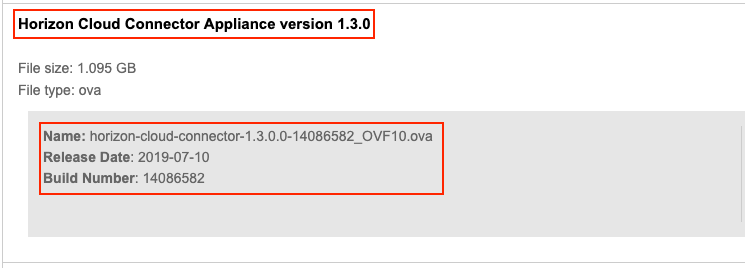
2. Download the latest version of Horizon Cloud connector. As of end of July 2019, the latest version of Horizon Cloud Connecter is 1.3.0.
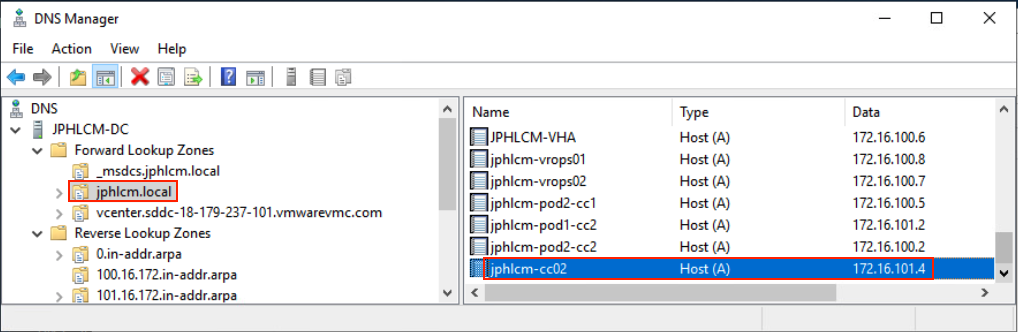
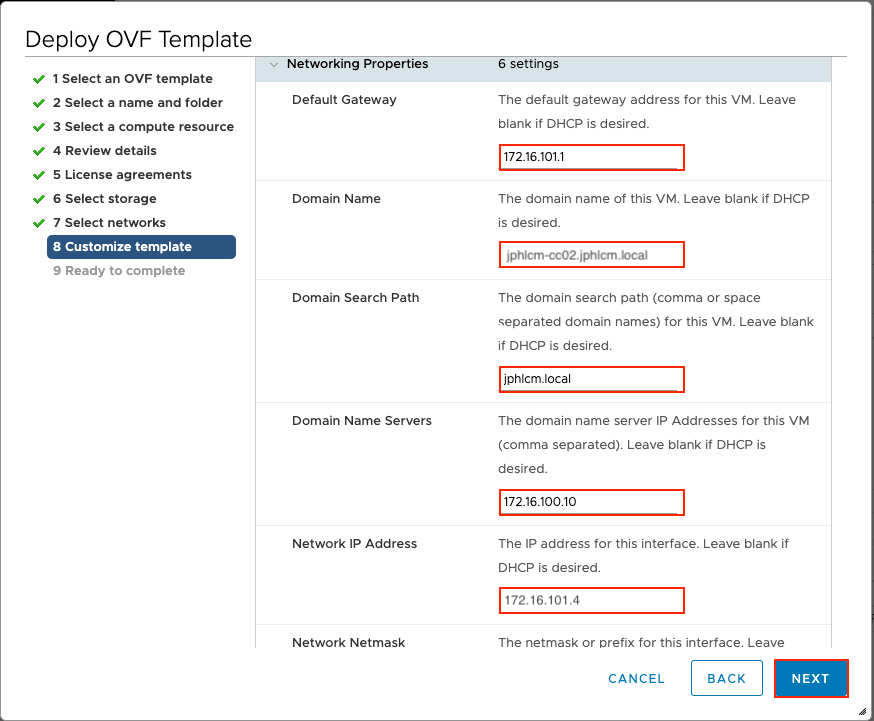
3. Decide a IP and FQDN for your Cloud Connector deployment and create a Forward Lookup ‘A’ record in DNS server. Also Reverse Lookup Zone should be configured.
Horizon Cloud Connector 1.3.0 New Deployment
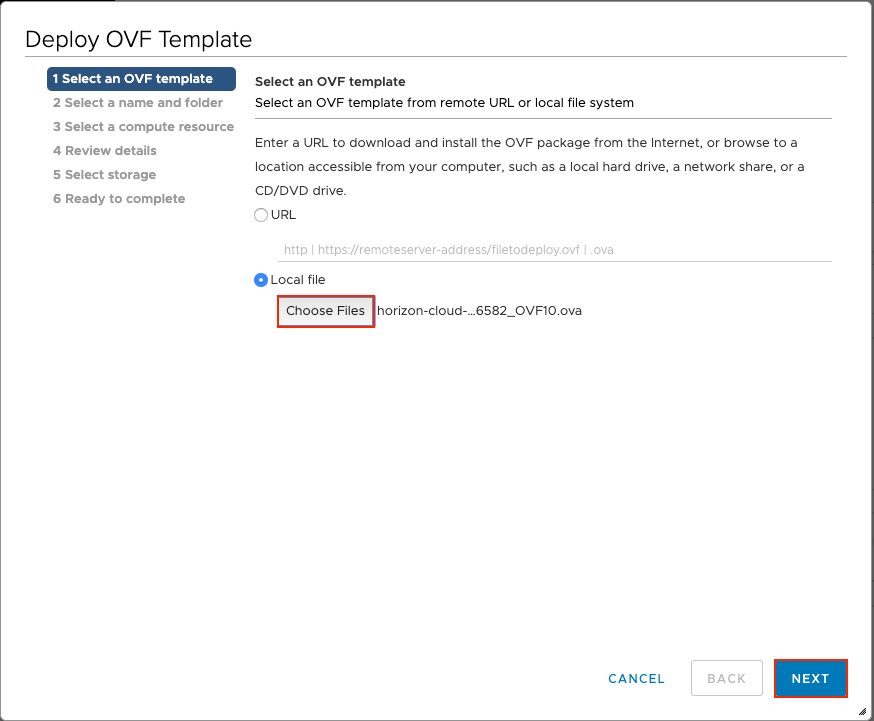
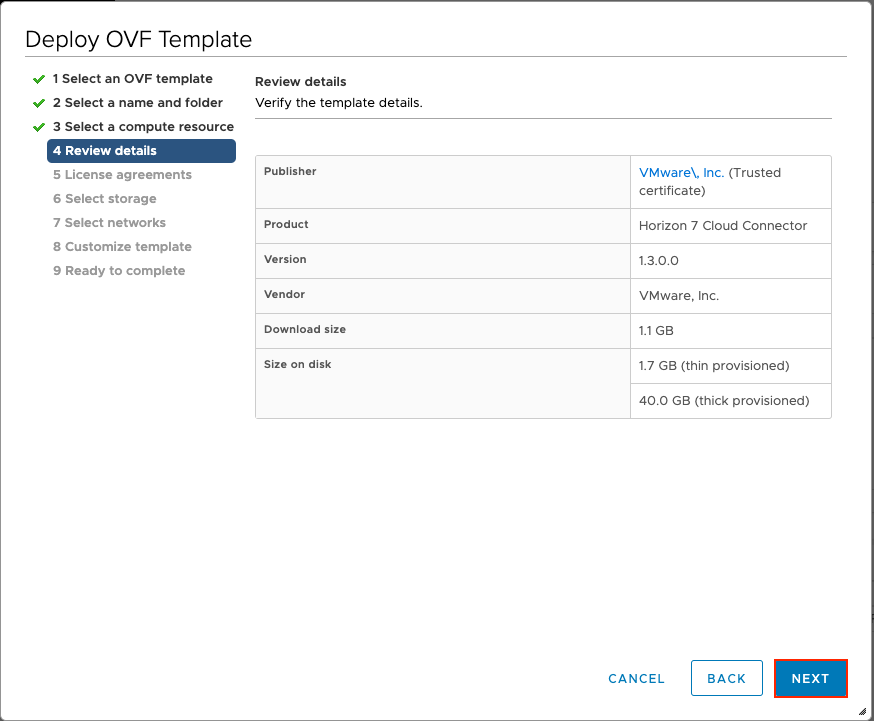
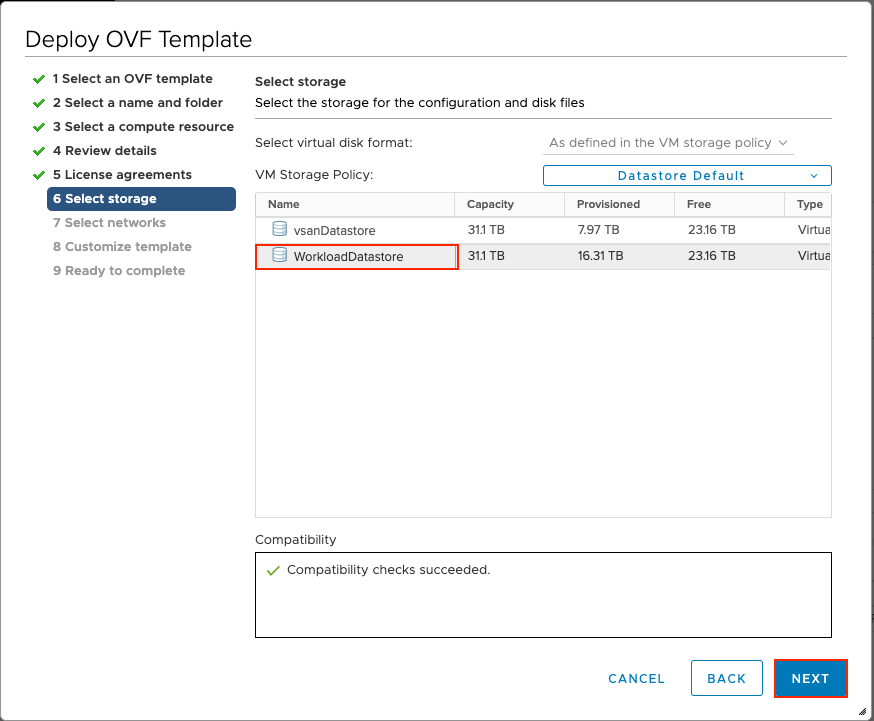
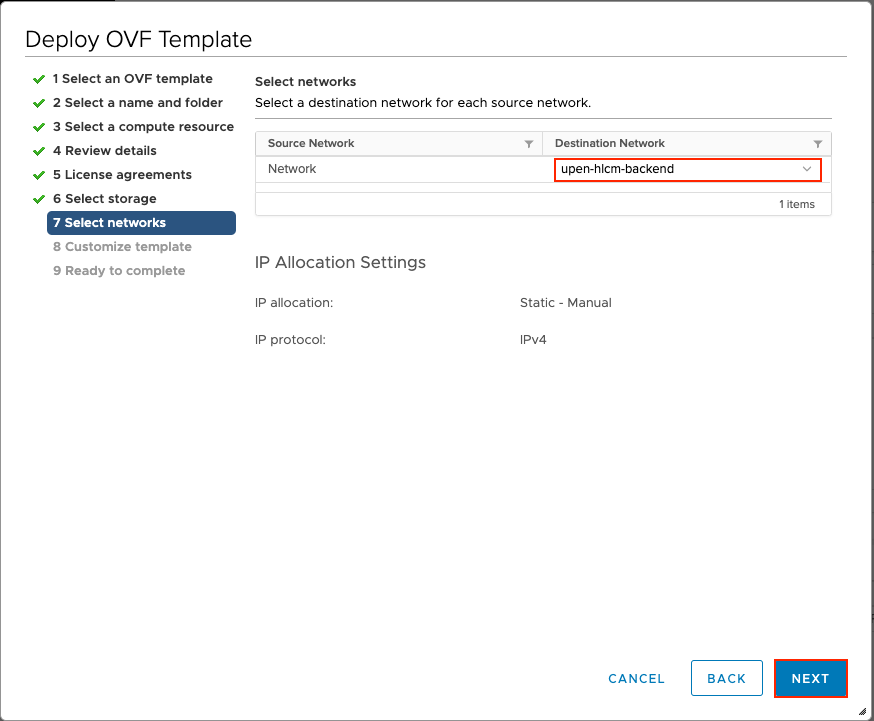
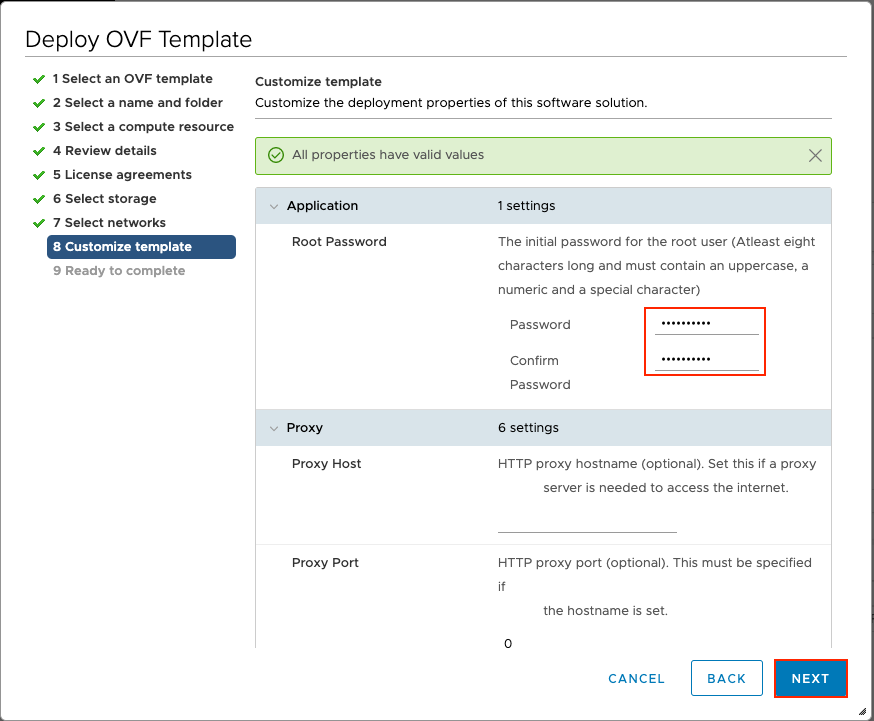
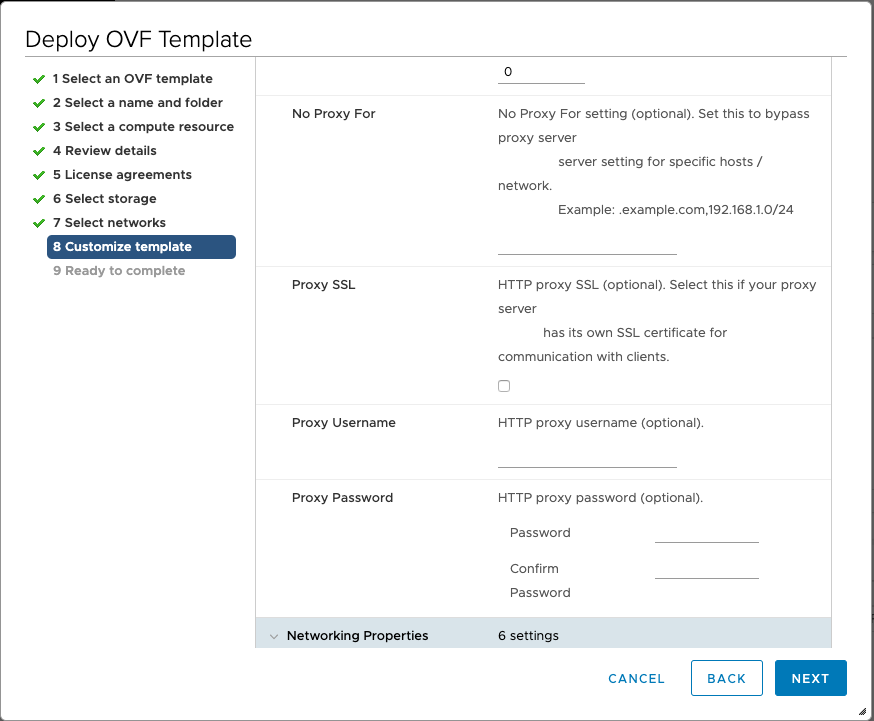
4. Log in to your vCenter web client and initiate OVF deployment wizard. Locate the connector OVA file and follow the on-screen instructions.

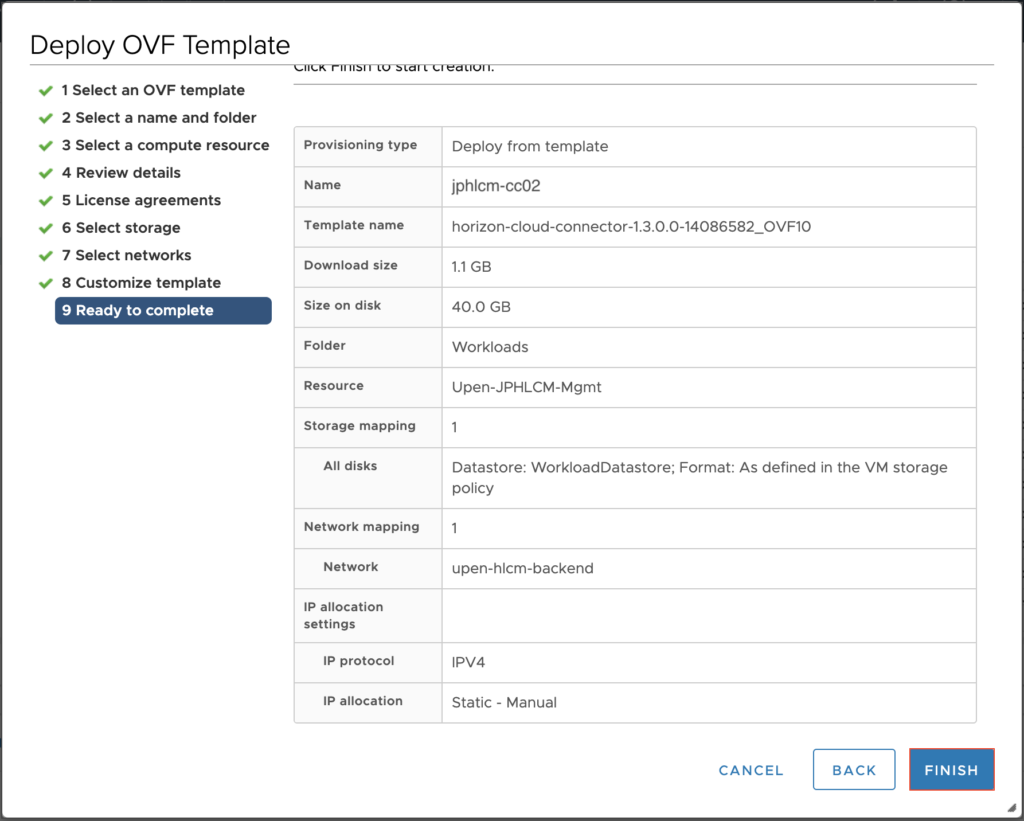
5. Once the Connector deployment is completed, power on the VM and confirm the ip address of connector VM which you defined during OVF deployment.
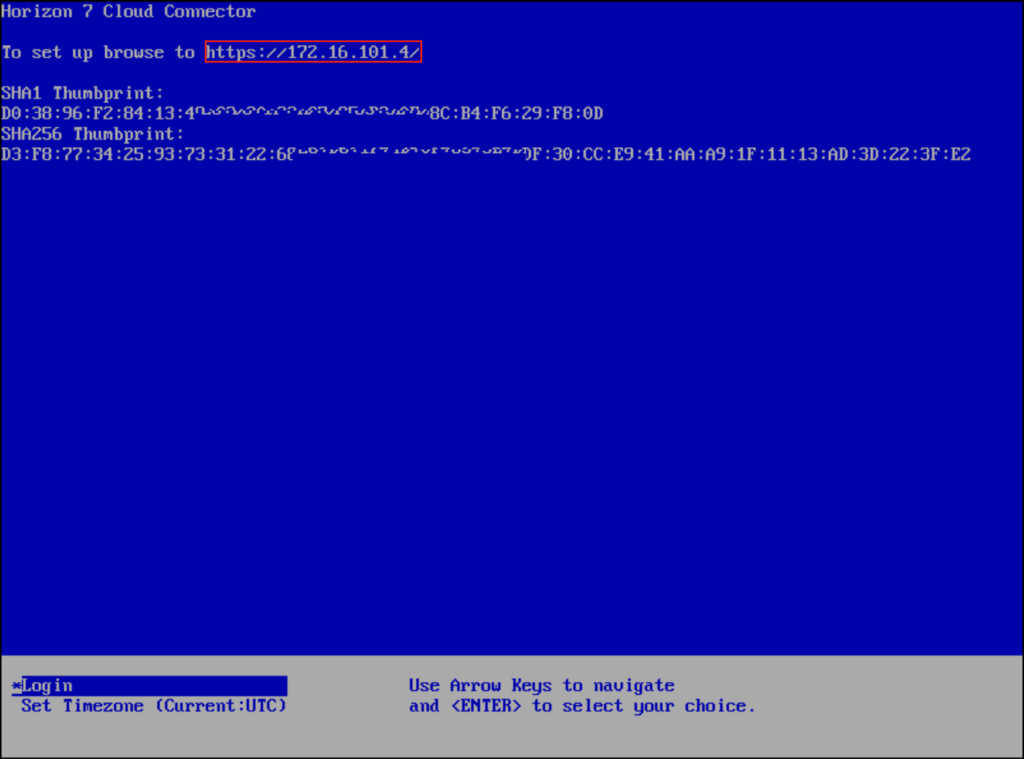
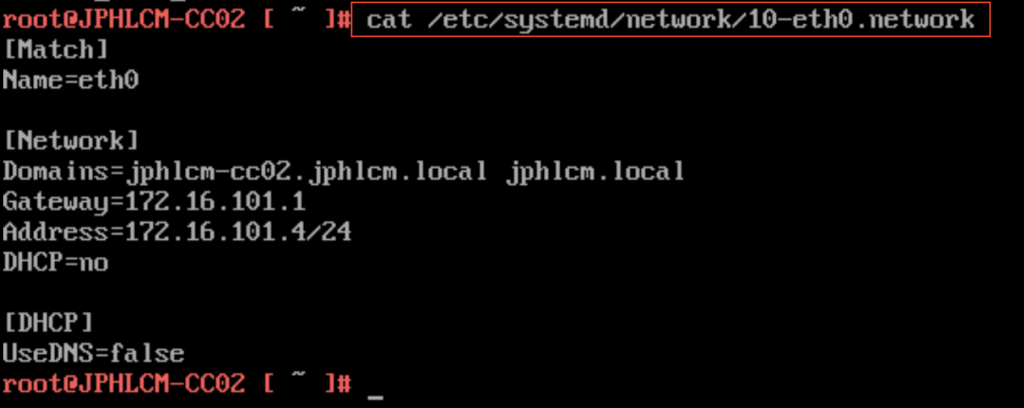
6. Log into connector appliance with root/password and execute below command to verify host configuration.
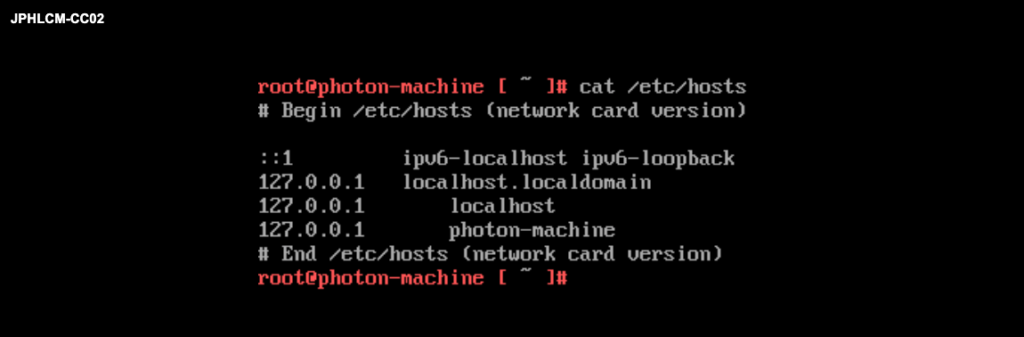
7. If you didn’t configure DNS Forward Lookup for connector in step #3, you must add the connection server/s hostname to ‘hosts’ file of connector. Perform below if step #3 is not done. (Skip this step if you have done #3.)
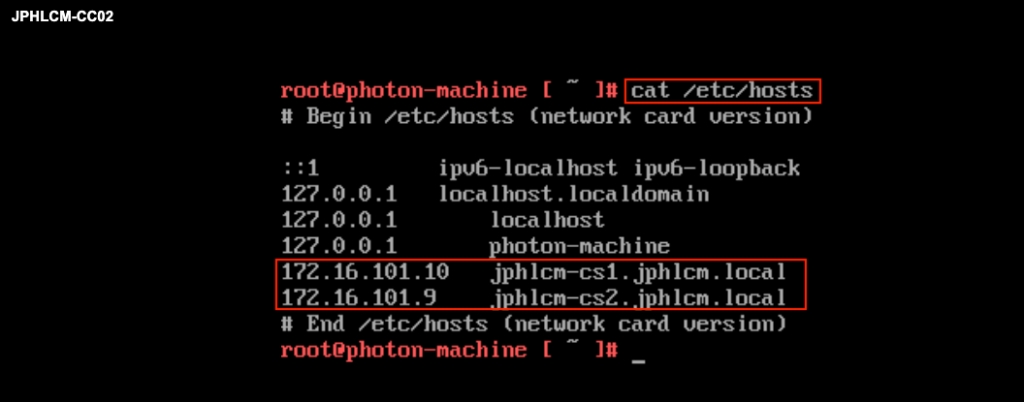
Add the IP and FQDN of all connection servers which exist in the POD. In my case there are 2 connection servers.
#vi /etc/hosts
>press 'i' key to insert the entry of Horizon connection server
>Add Horizon connection servers' IP and FQDN.
>Press 'ESC' key
>press ':wq' to save change.
Execute ‘cat /etc/hosts’ command and confirm Horizon connection servers exist in hosts file.
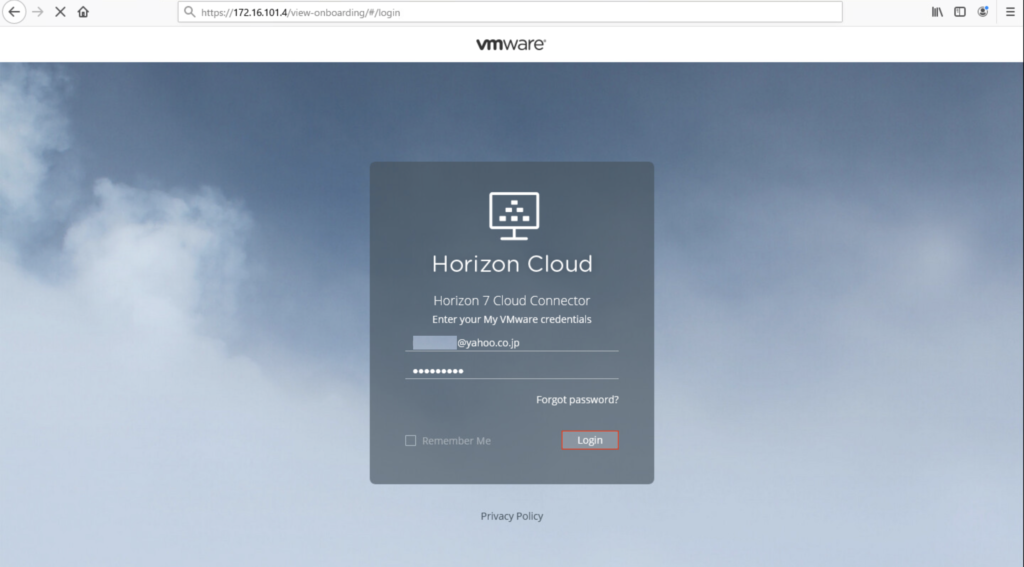
8. Access Horizon Cloud Connector admin console with https://connector-IP or FQDN and login with MYvmware account which is associated with your Horizon Cloud service.
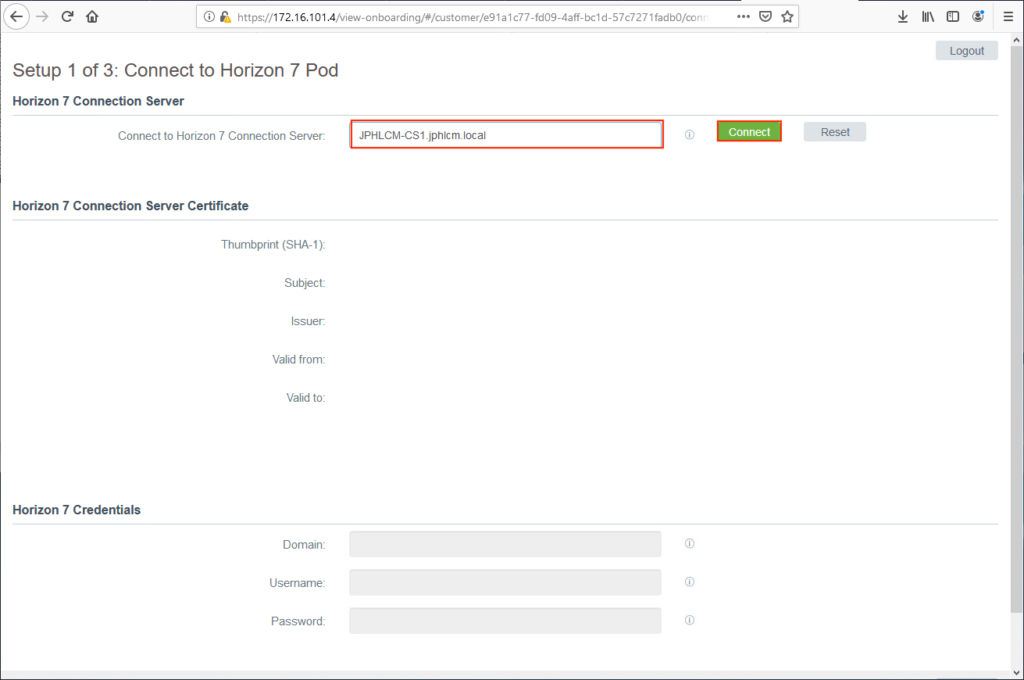
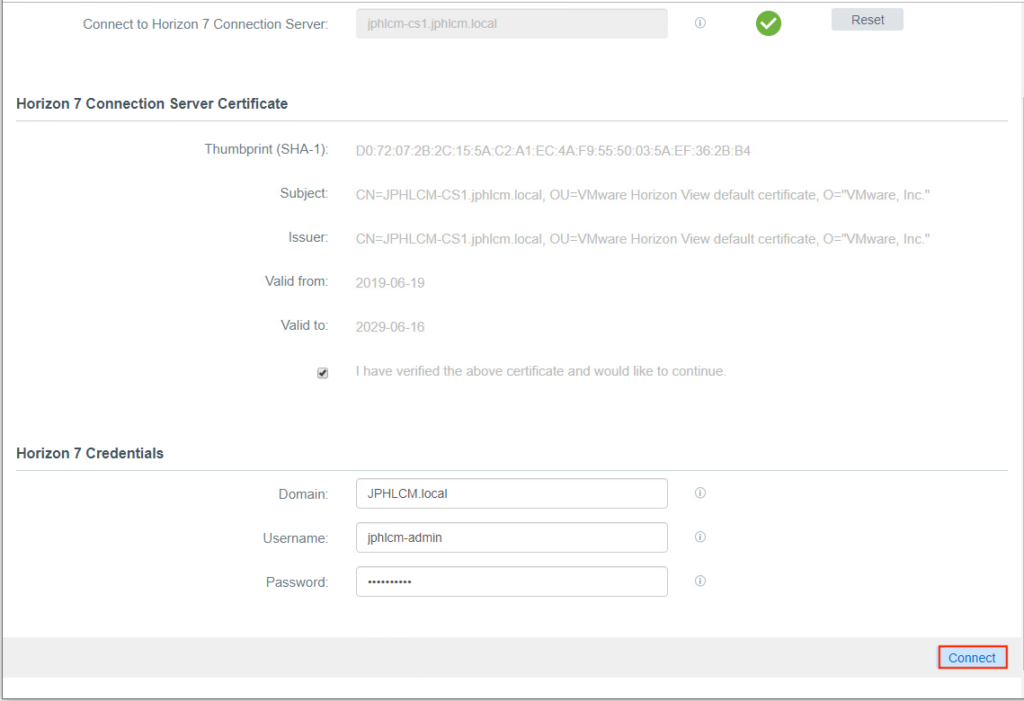
9. Define Horizon 7 Connection Server FQDN and select [Connect].
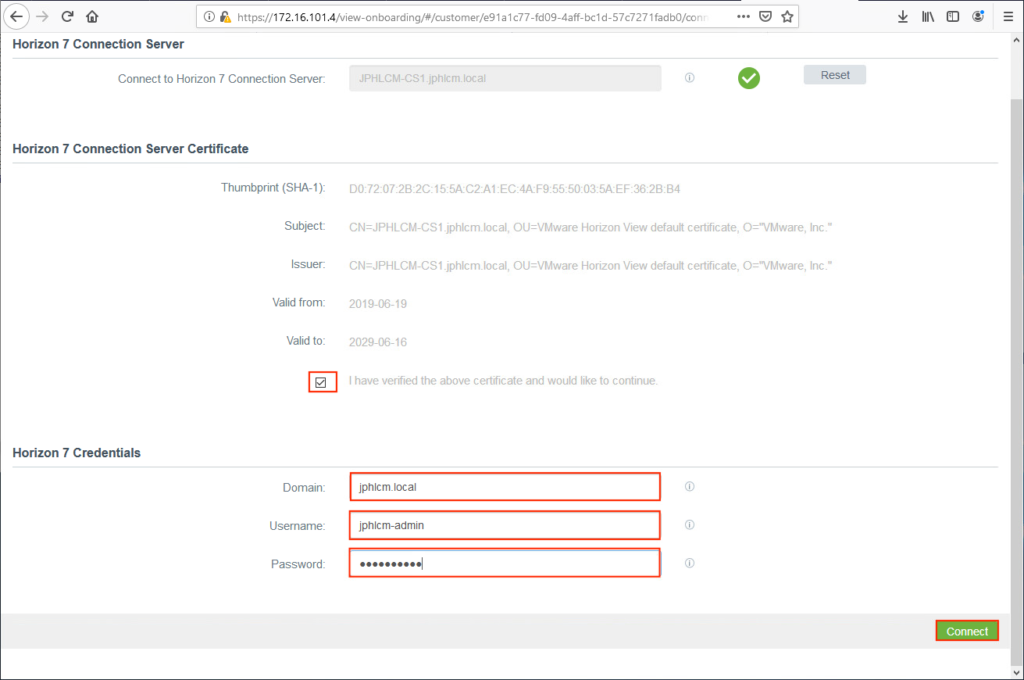
10. Put the check mark in ‘I have verified the above certificate and would liek to continue’ , enter Horizon 7 Credential (Domain, Username, Password) and select [Connect] to continue.
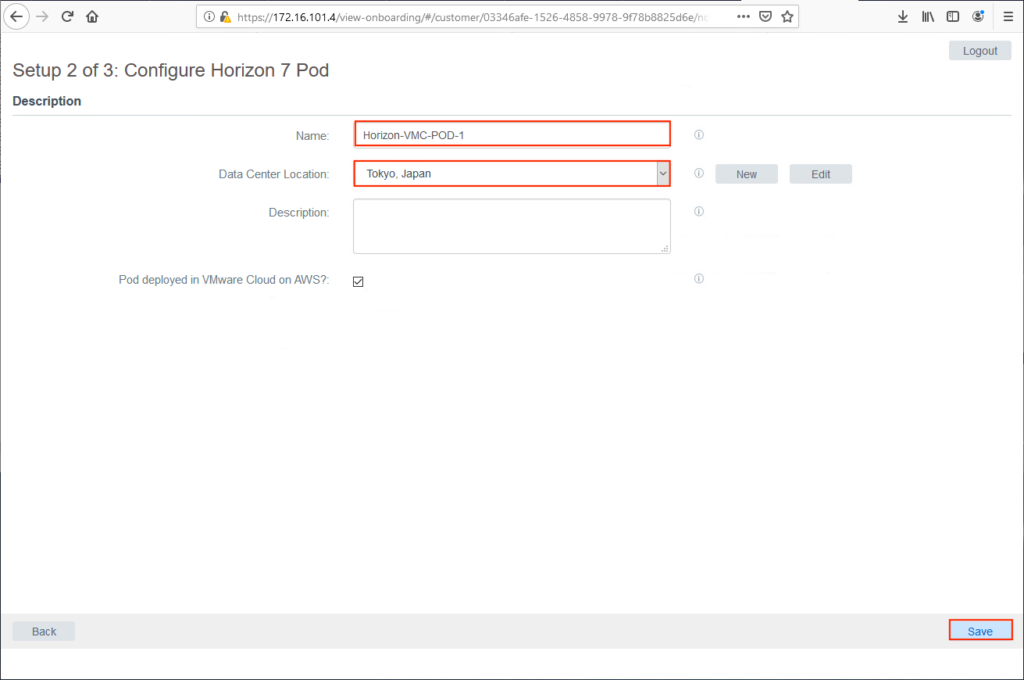
11. In Horizon 7 Pod description page: enter the name, datacenter location, put the check on ‘Pod deployed in VMware Cloud on AWS‘ if it applies and select [Save].
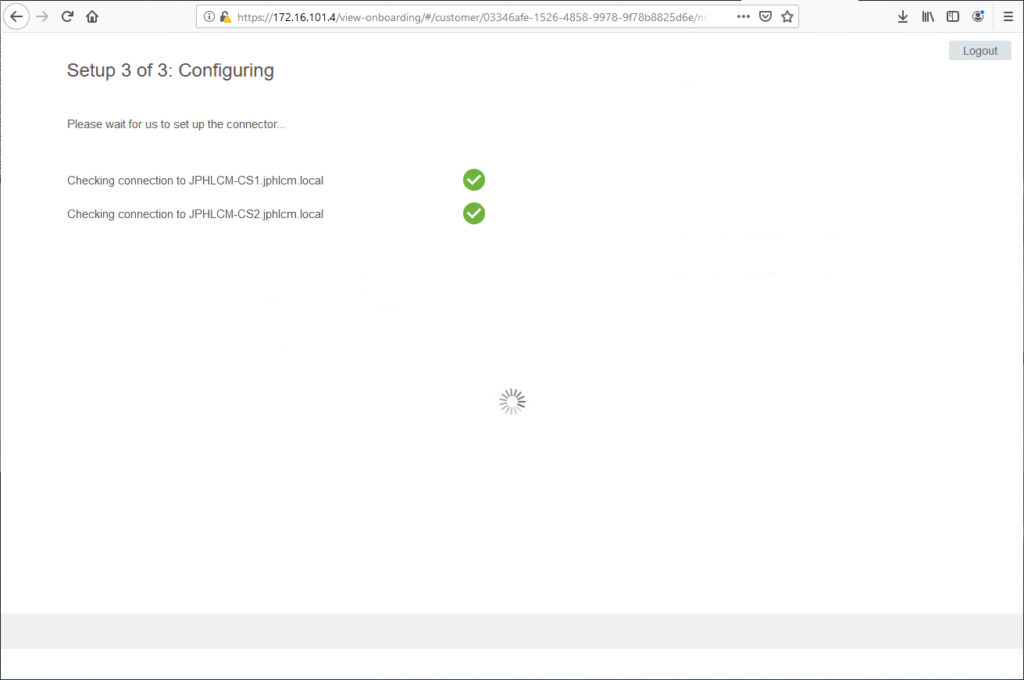
12. Horizon Cloud Connector pairing initiates.
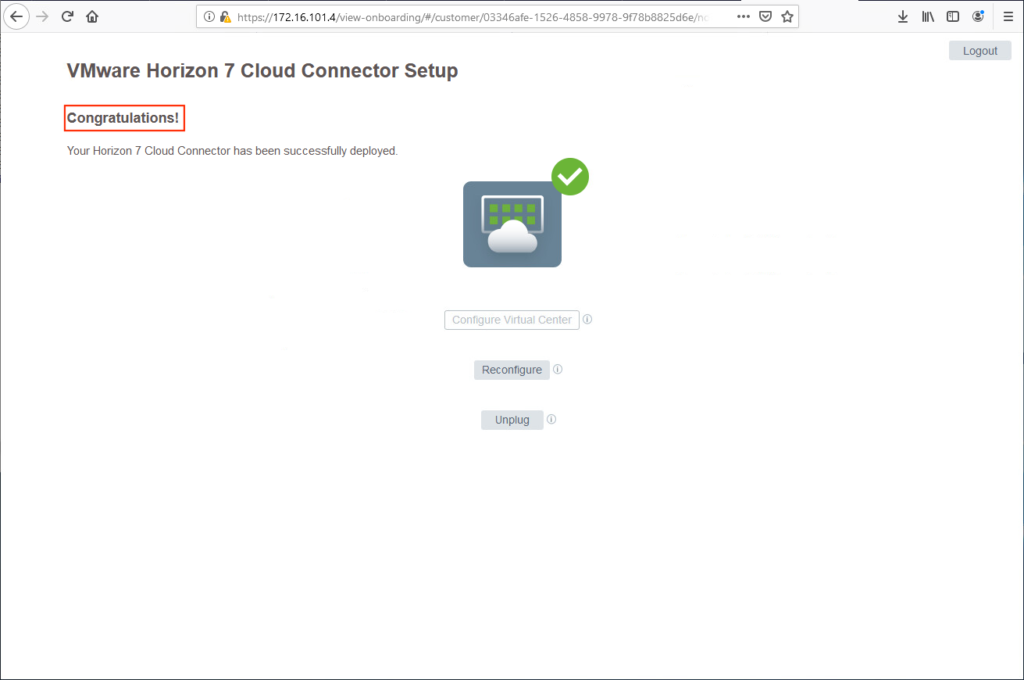
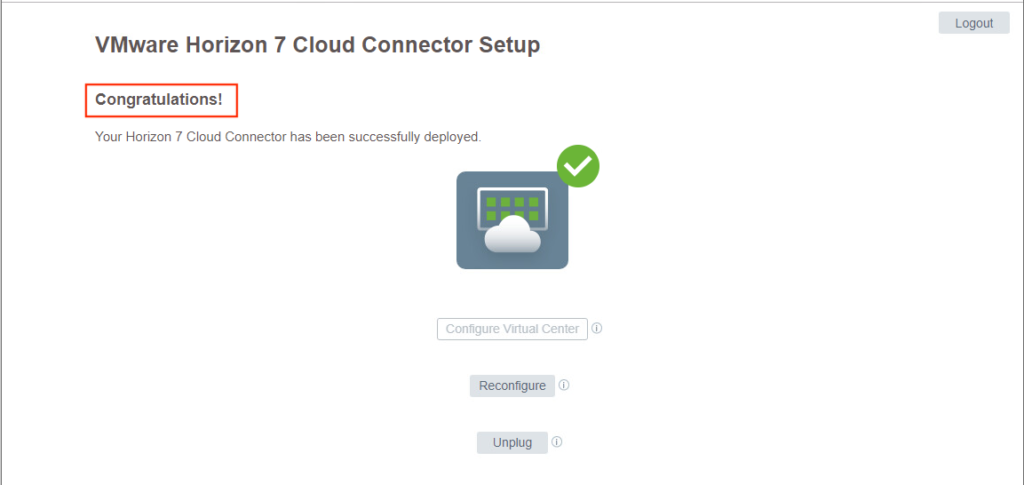
13. Once the pairing is completed, you will see a message ‘Congratulations!’ as below. Now, Horizon Cloud Connector deployment is completed.
Active Directory Binding
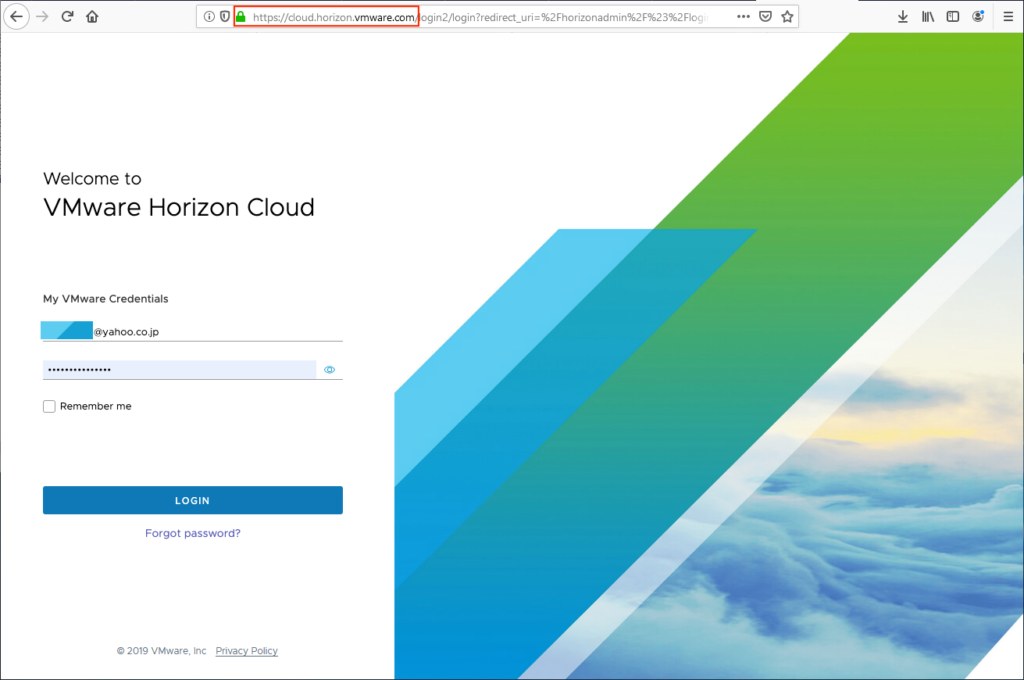
14. Access ‘https://cloud.horizon.vmware.com’ and login with MYvmware account which you used in step#8. If you are logging in for the first time, you will see the pop-up message of ‘Terms of Service’, select ‘Accept’ to proceed.

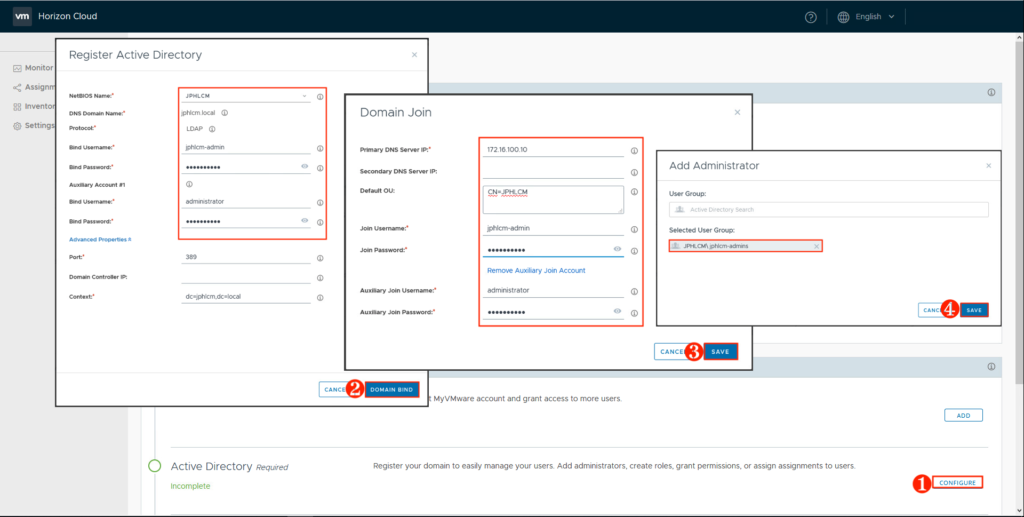
15. When you logged into horizon cloud management console, you will be prompted to ‘Getting Started’ page. Under the ‘General Setup’ section, select ‘CONFIGURE’ at the right of ‘Active Directory’ configuration and register domain bind, domain join and administrator groups.
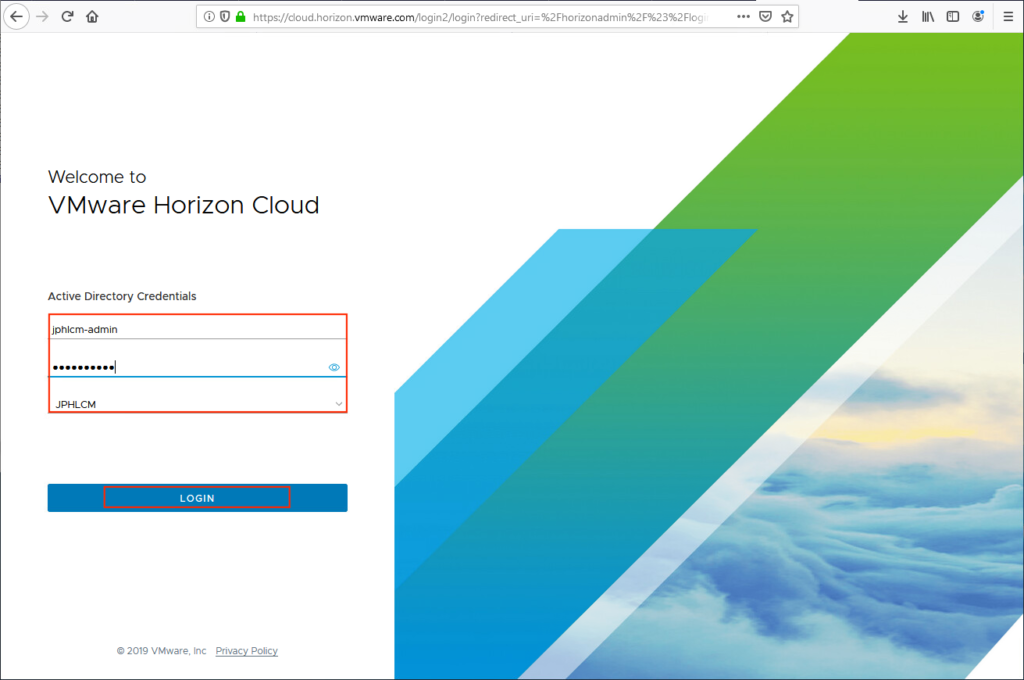
15. After the ‘Active Directory’ is configured, you will be prompted for horizon cloud console login window. Log in with MYvmware account and you will get second login window for AD login. Log in with an AD user which is the part of administrator group registered in previous step.
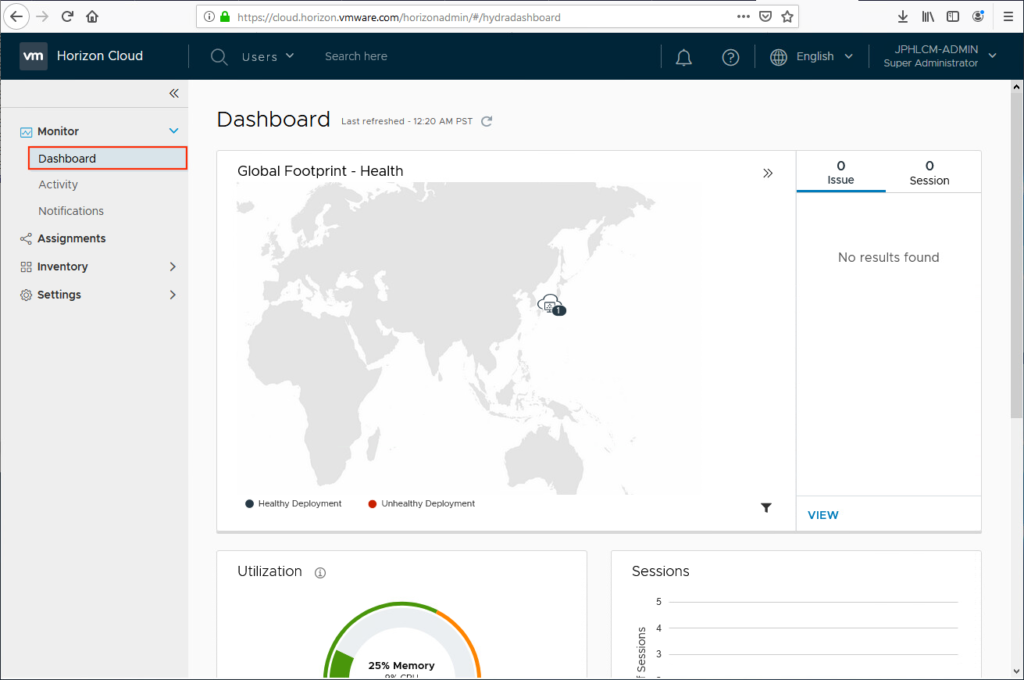
16. Once you logged in to Horizon Cloud management console, you will see ‘Dashboard’ showing your datacenter location, footprint health and utilization.
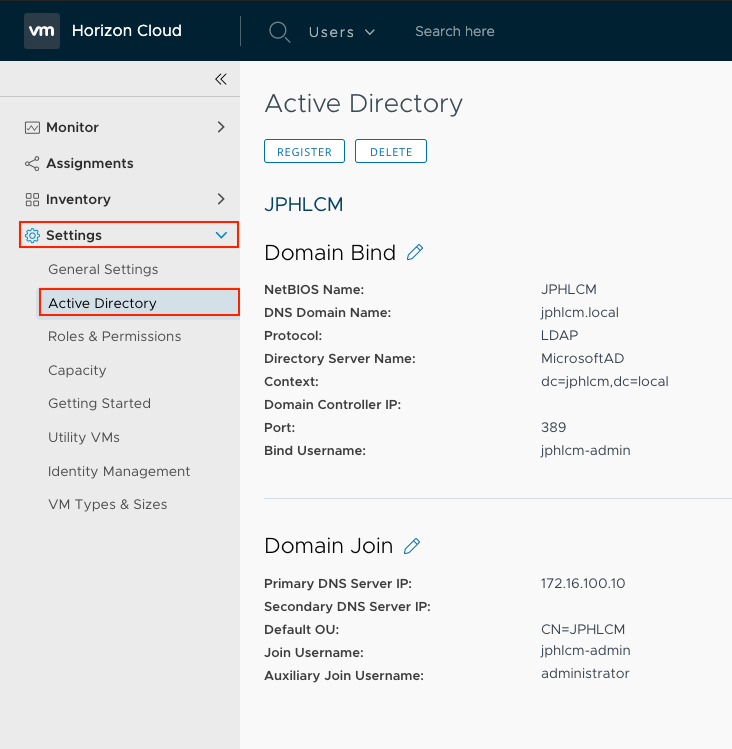
17. Expand ‘Settings’ and select ‘Active Directory’. Verify recently registered active directory detail in middle of the page. You can add, edit & delete the active directory information from here.
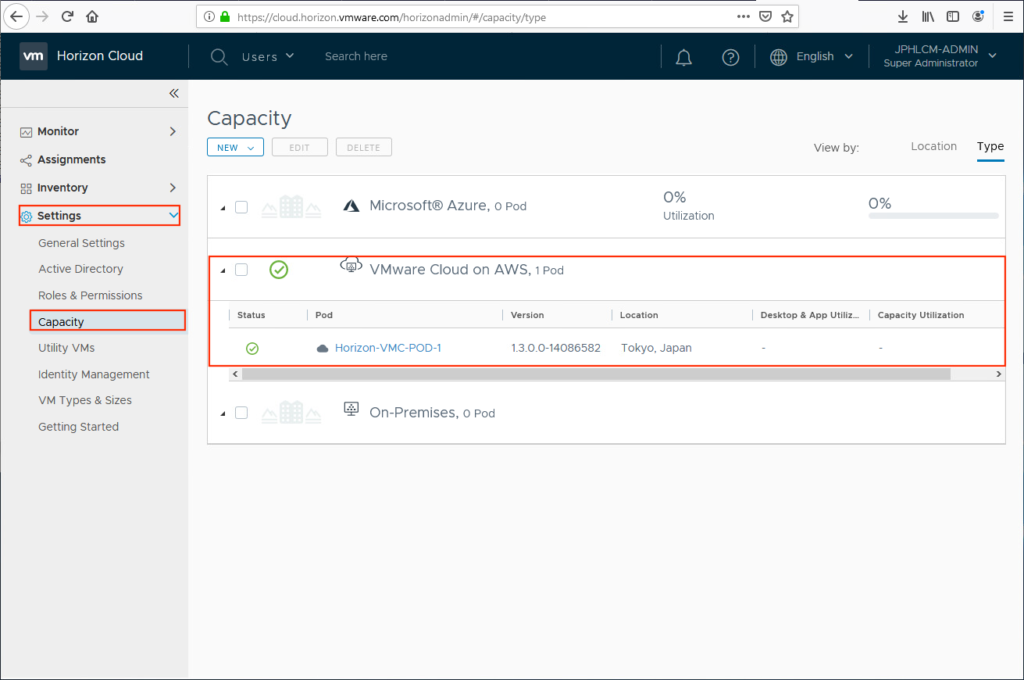
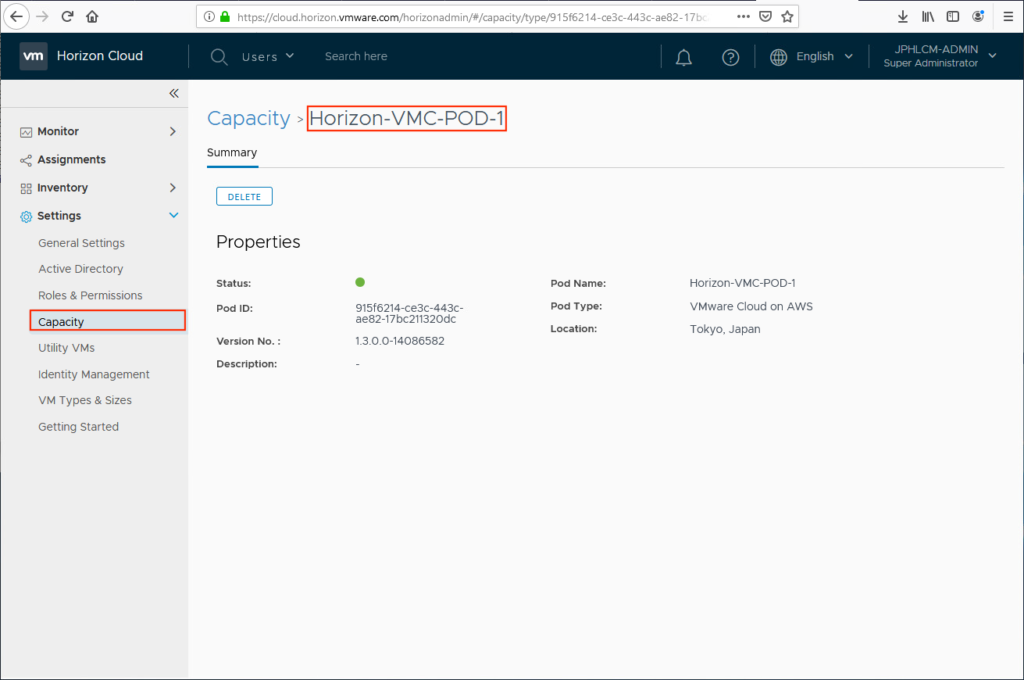
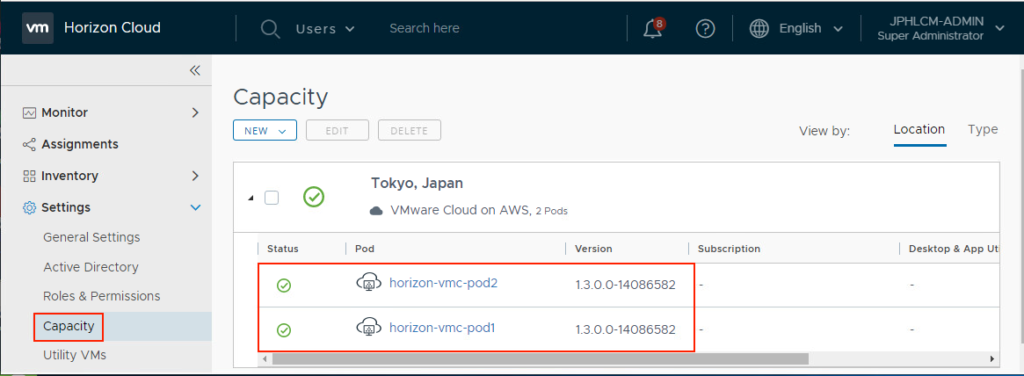
17. Expand the ‘Settings’ tab in left pane and choose ‘Capacity’, you will see your active Pod information. In my case, I only have a single POD at this time. (See at step#26 for how the multi PODs environment look like)
18. Click on Pod name to view the status and detail information of your Horizon POD and Cloud Connector.
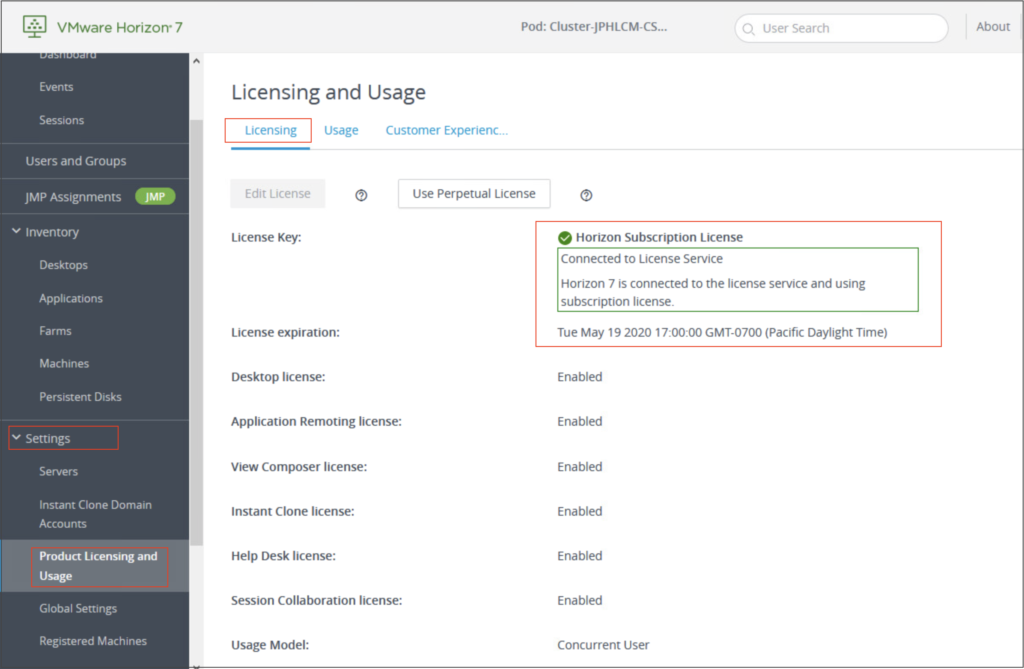
19. Now, log in to your Horizon Connection Server administration console and confirm your Horizon Subscription license is activated.
Note: Sometime Horizon license activation may take upto 24 hrs from connector pairing complete.
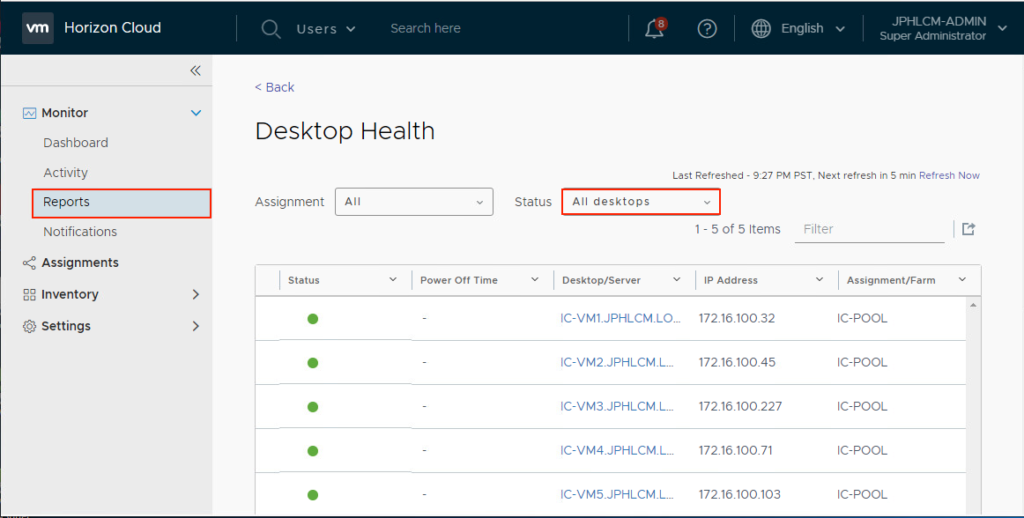
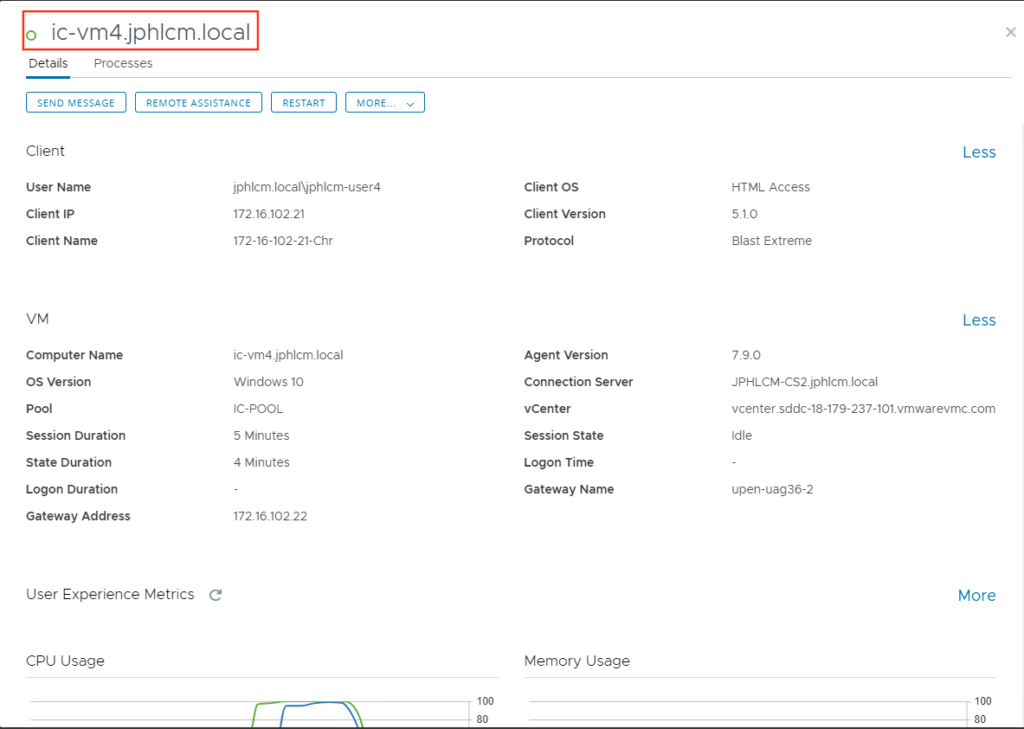
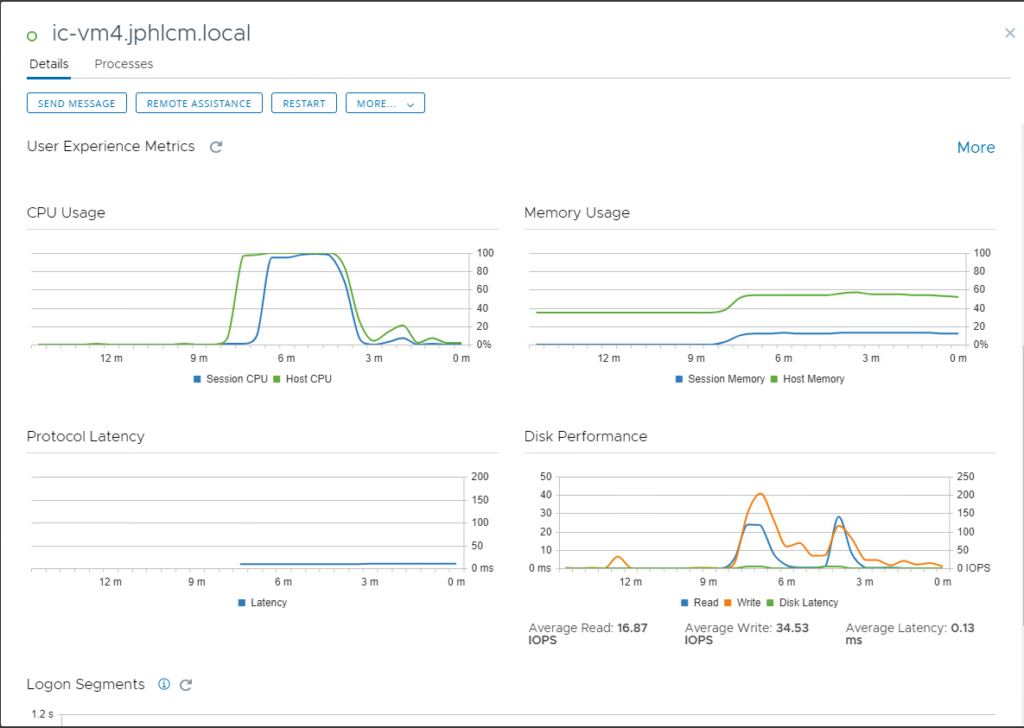
20. Return to Horizon Cloud Service management console, select ‘Reports’ under ‘Monitor’ in left pane. You will see the list of desktops. Click in the name of desktop to see the performance, health and detail of desktop.
Horizon Cloud Connector Upgrade
If you already have previous version of cloud connector (1.2.0) in your environment, you can deploy a new version (1.3.0) of cloud connector and transfer the config from existing to new connector.
21. Follow the steps #1-8 to deploy a Cloud Connector with new version.
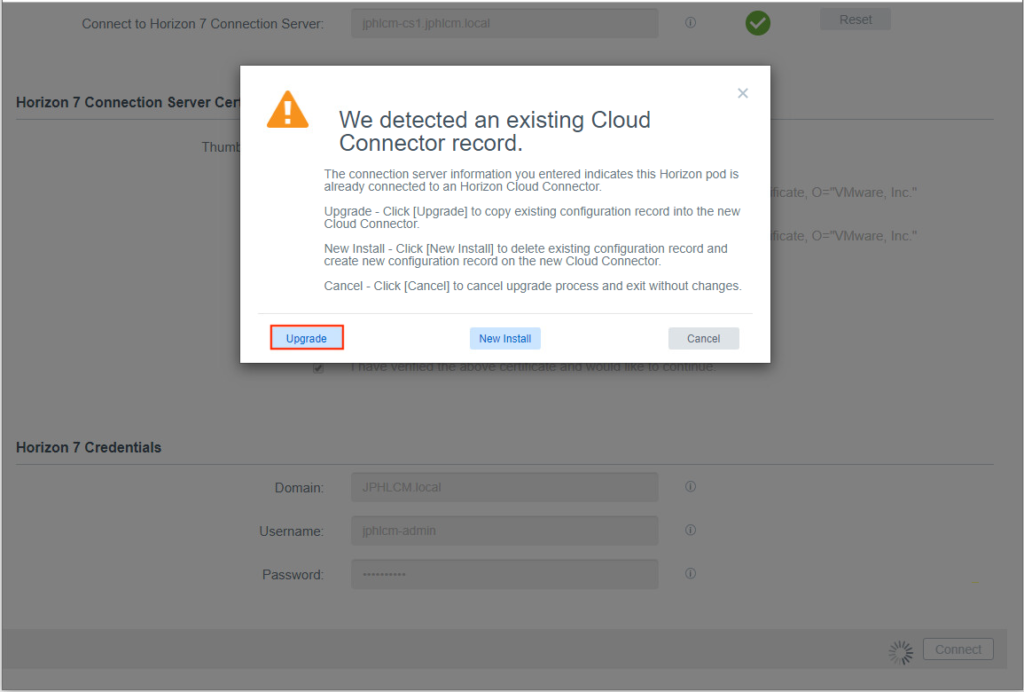
22. If there is already an active connector is paired with your Horizon Cloud account, you will see a pop up message to choose either ‘Upgrade’ or ‘New Install’. Choose ‘Upgrade’.
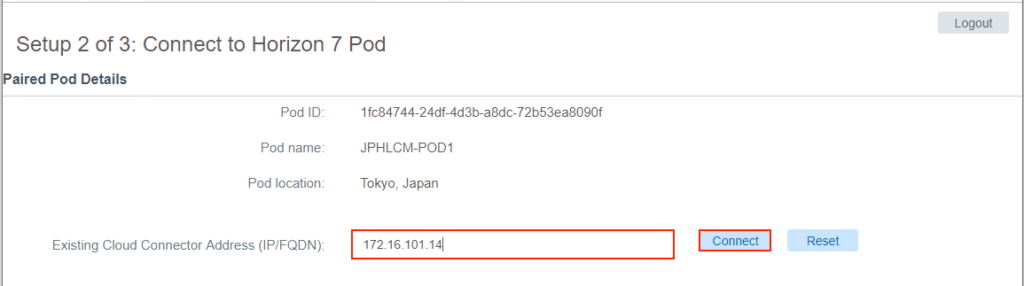
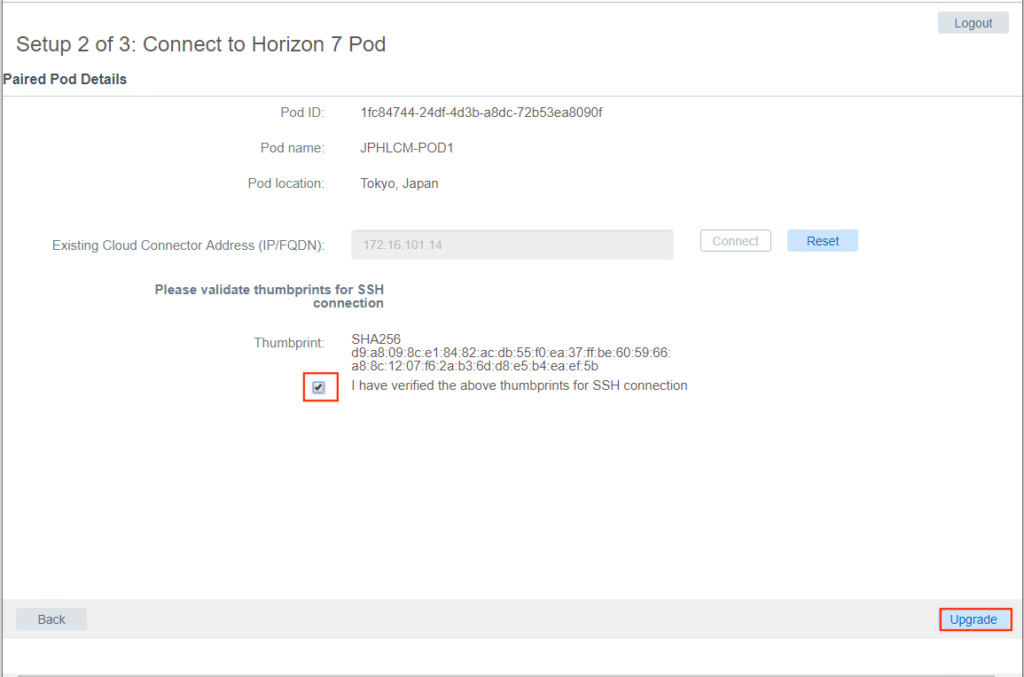
23. Enter the ip address or FQDN of existing connector and select ‘Connect”.
24. Put the check mark on ‘I have verified the above thumbprints for SSH connection’ and select upgrade.
25. If the upgrade went well, you will see the upgrade completion message with “Congratulations!’. Log in to Horizon Cloud management console and confirm the POD status is green.
Deployment of Cloud Connector for multi POD environment
Each individual Horizon POD should have dedicated connector, either it could be Horizon hosted on on-premises datacenter, hosted on VMware Cloud on AWS or mix of both. To deploy and configure multiple Cloud Connector, follow the same procedure as first connector.
26. Once the 2nd connector deployment and configuration is completed, you will see the new POD in Horizon Cloud Service management console under Setting>Capacity.
![]()