New version of VMware Unified Access Gateway (UAG) 3.6 has been released on 02 July 2019. As of released date, version 3.6 is only supported for Horizon 7.9.
VMware Unified Access Gateway 3.6 Release Notes Docs VMware
VMware Unified Access Gateway 3.6 Compatibility Notes Doc VMware
what’s New in This Release
VMware Unified Access Gateway 3.6 provides the following new features and enhancements:
- Secure Email Gateway (SEG) integration with Unified Access Gateway
- Unified Access Gateway support for RADIUS authorization restriction based on the class attribute
- Support public keys for validation of JSON web tokens.
- NTP servers for network time protocol synchronization.
- Simple Network Management Protocol (SNMP) support to collect system statistics, memory, and VMware Tunnel server MIB information by Unified Access Gateway.
- REST API and Admin UI support to add, modify, and delete static routes.
This post provides guidance on upgrading UAG to 3.6 on existing horizon environment as well as deployment as part of new Horizon installation.
Deployment of UAG 3.6
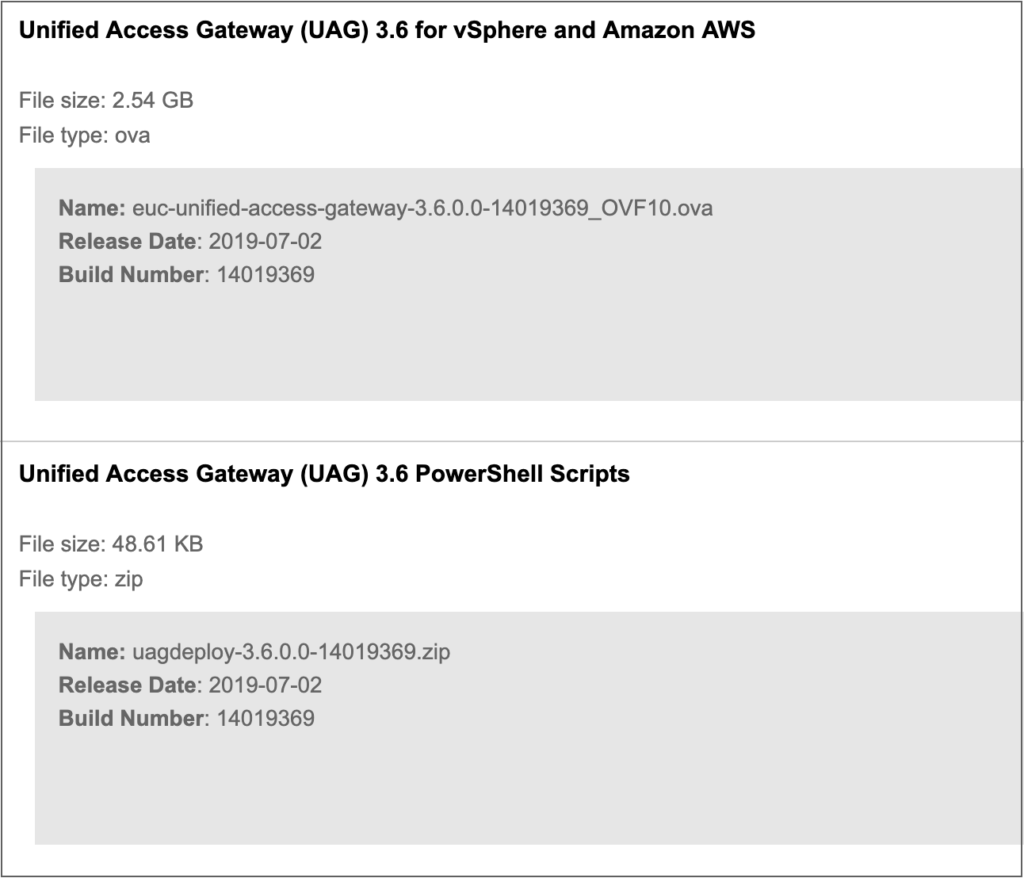
Similar to previous versions of UAG, you can deploy UAG 3.6 either from vSphere client GUI and PowerShell script. Download ova of UAG and PowerShell Scripts from myvmware.com download page.
- Login to vCenter server with vSphere client and initiate the UAG ova deployment.
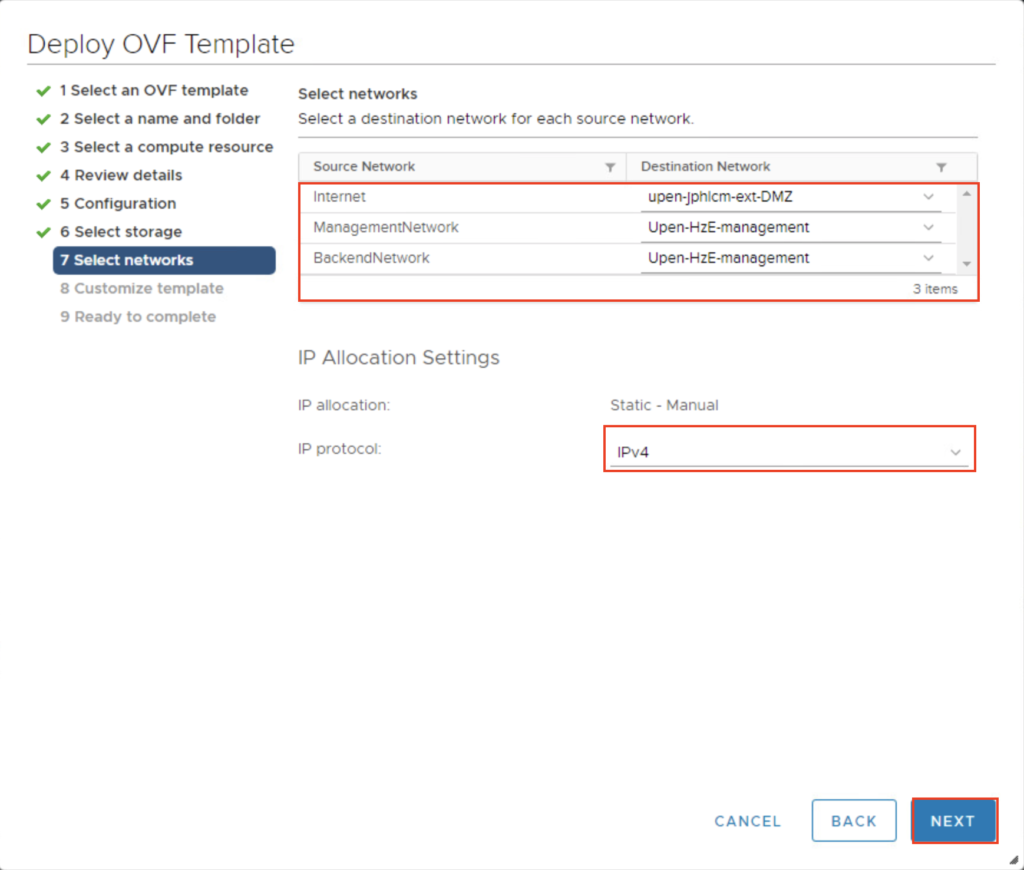
- Depending on your requirement you can choose 1 , 2 or 3 NICs deployment option. In this post I am deploying with 2 NICs option. NIC1 (eth0) for internet access and NIC2 (eth1) for internal management.
- Select the appropriate network segments from drop down.
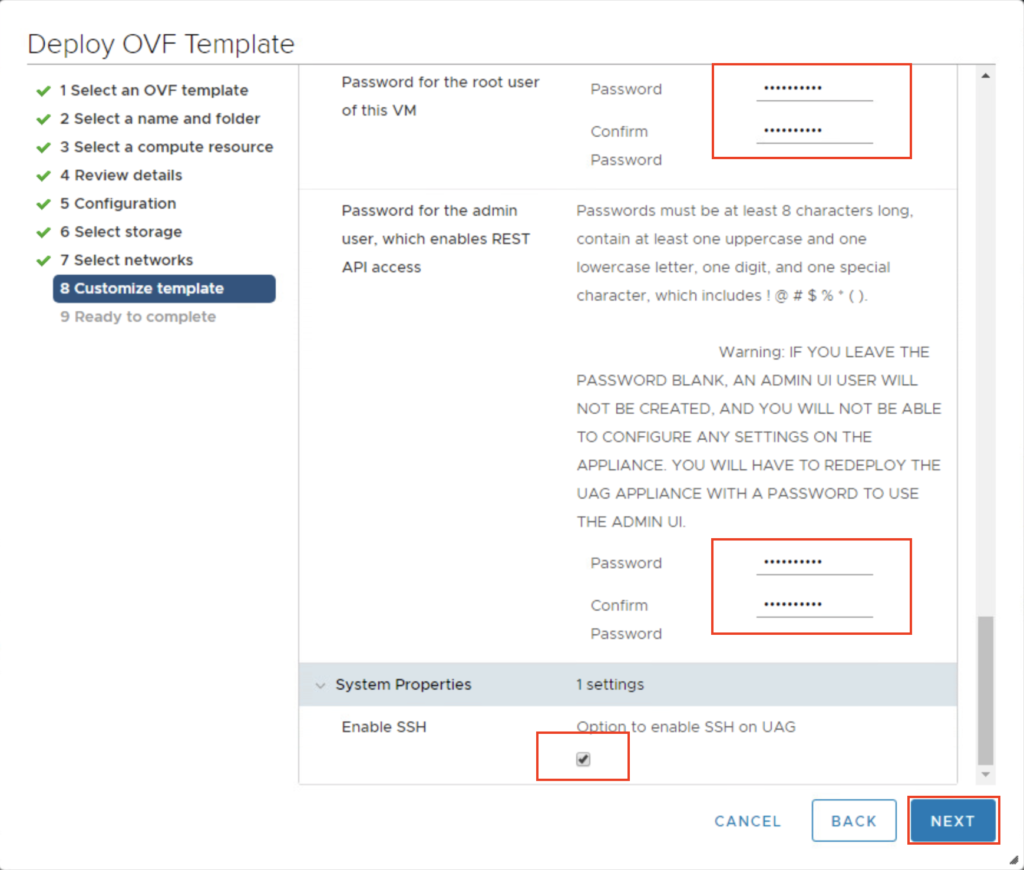
4. Enter the necessary information (IP, gateway, route, mask, dns, passwords etc) in deployment propertise page and select next at the bottom. In the next page, verify all the parameters and select finish to initiate the UAG deployment.

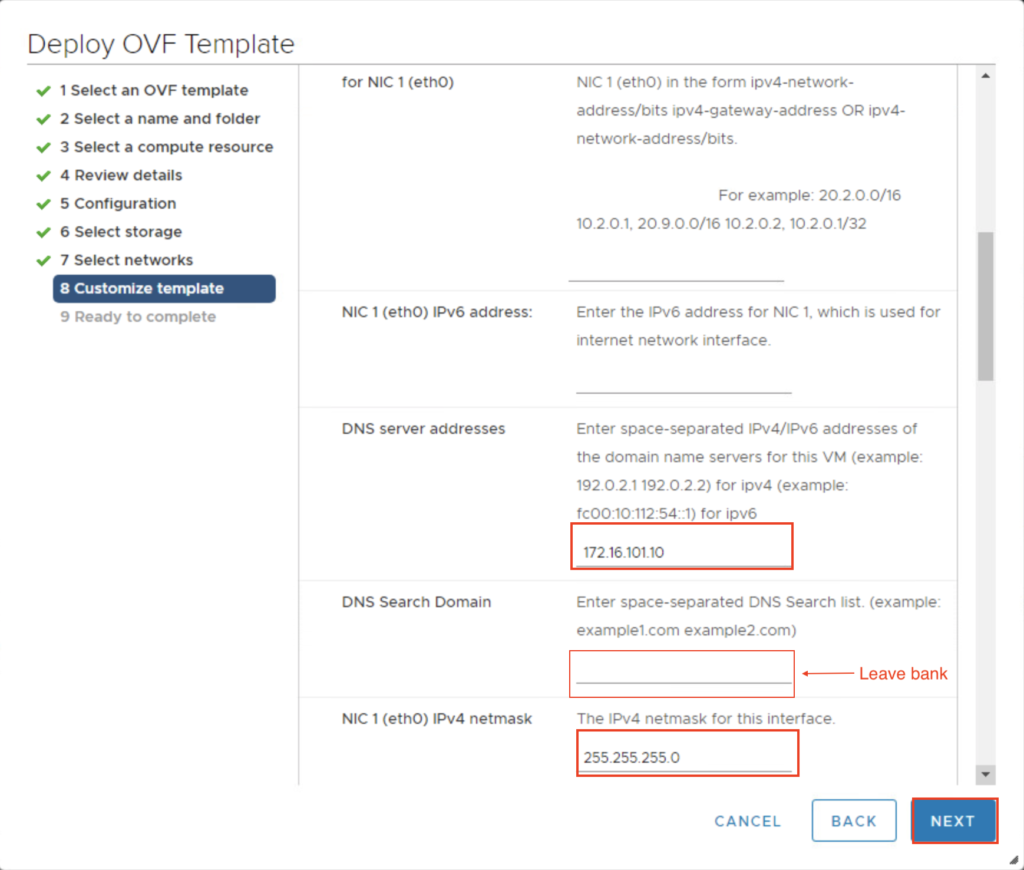
Important: There is an issue with uag 3.6 that uag admin console will become inaccessible if you define the DNS search domain name during the deployment. So “DNS Search Domain” must be blank or leave “DNS Server Address” and “DNS Search Domain” both blank.

5. Confirm the newly deployed UAG virtual machine in vCenter server and power it on.
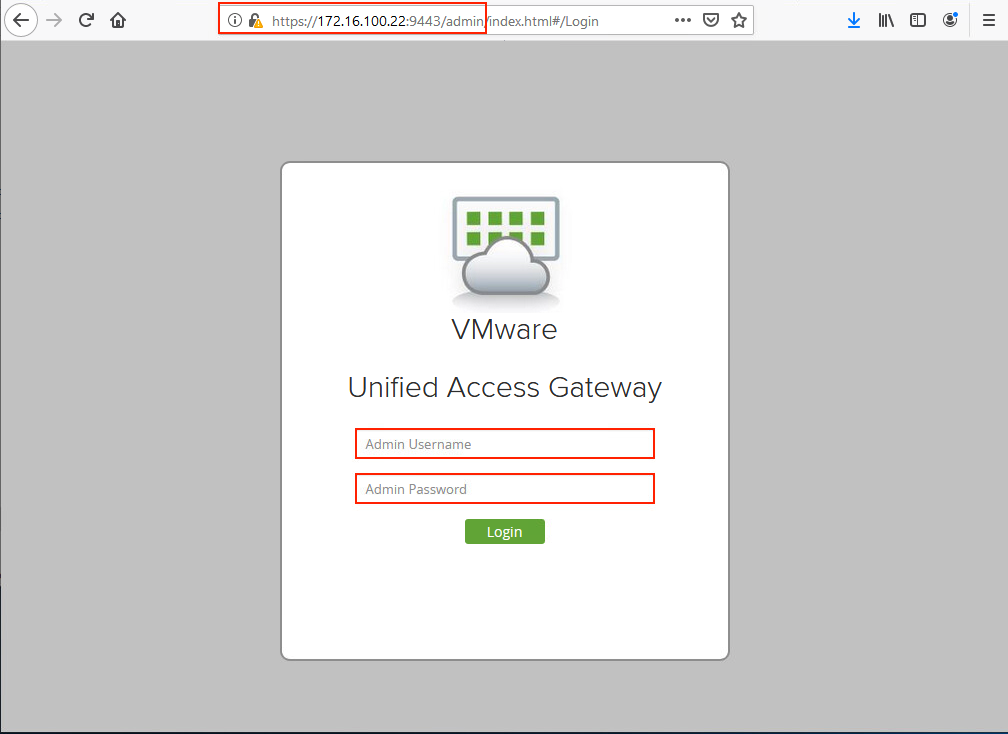
6. Access the UAG admin console from browser (https://ip-address:9443/admin) and log in with admin credentials.
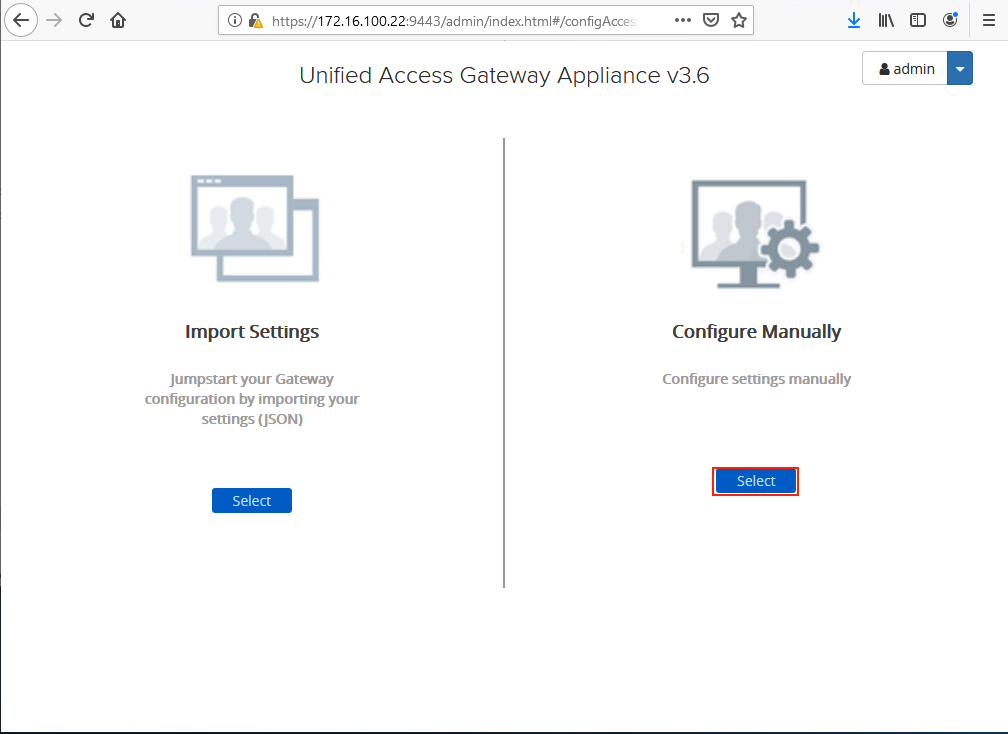
7. Select Configure Manually in right pane.
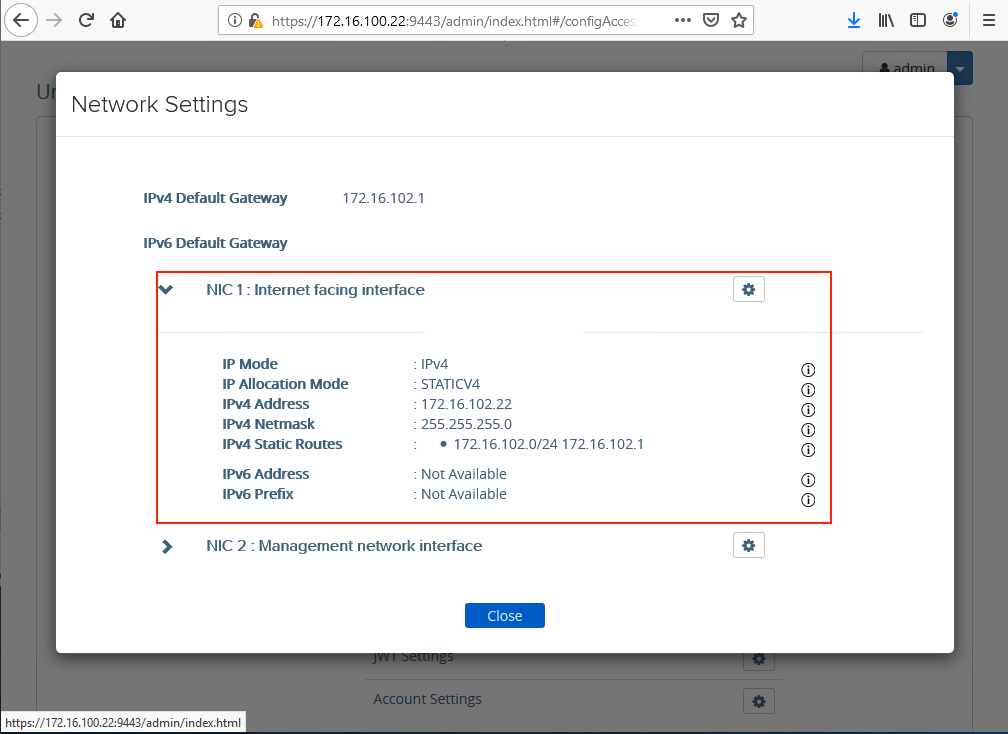
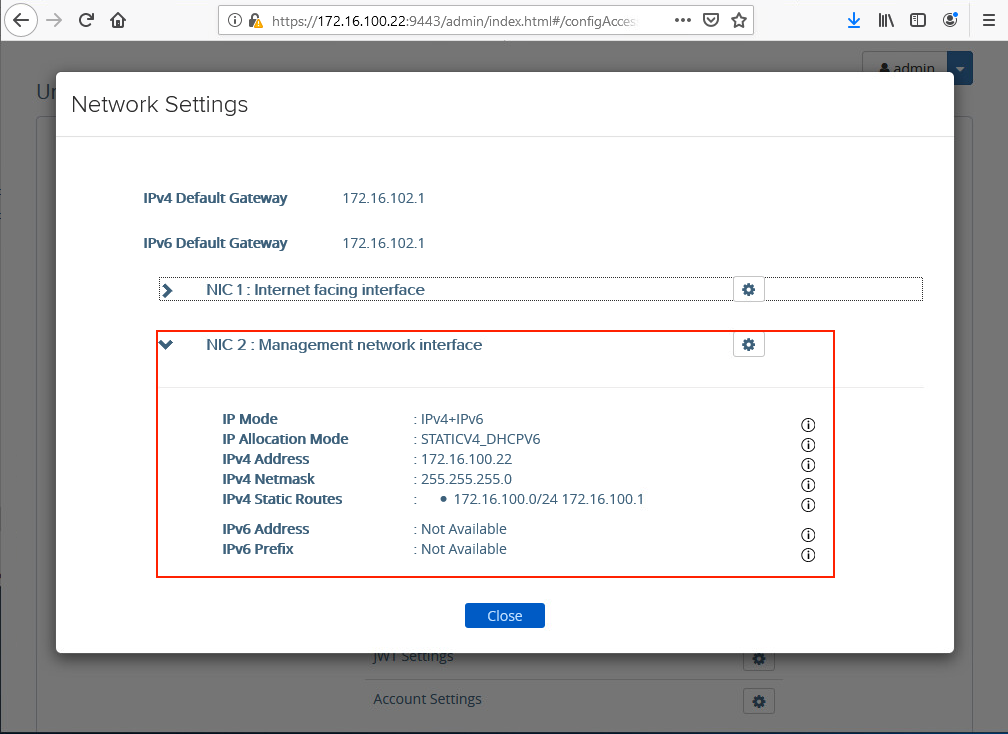
8. Select Network Settings and verify the settings for internet facing and management interfaces respectively.
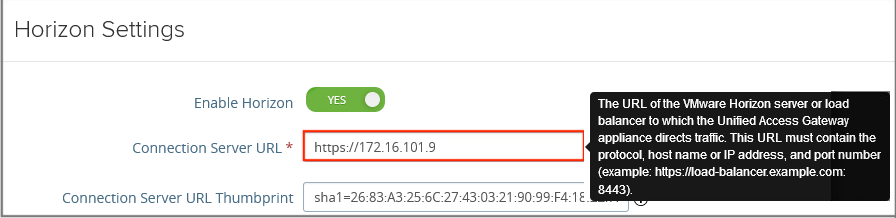
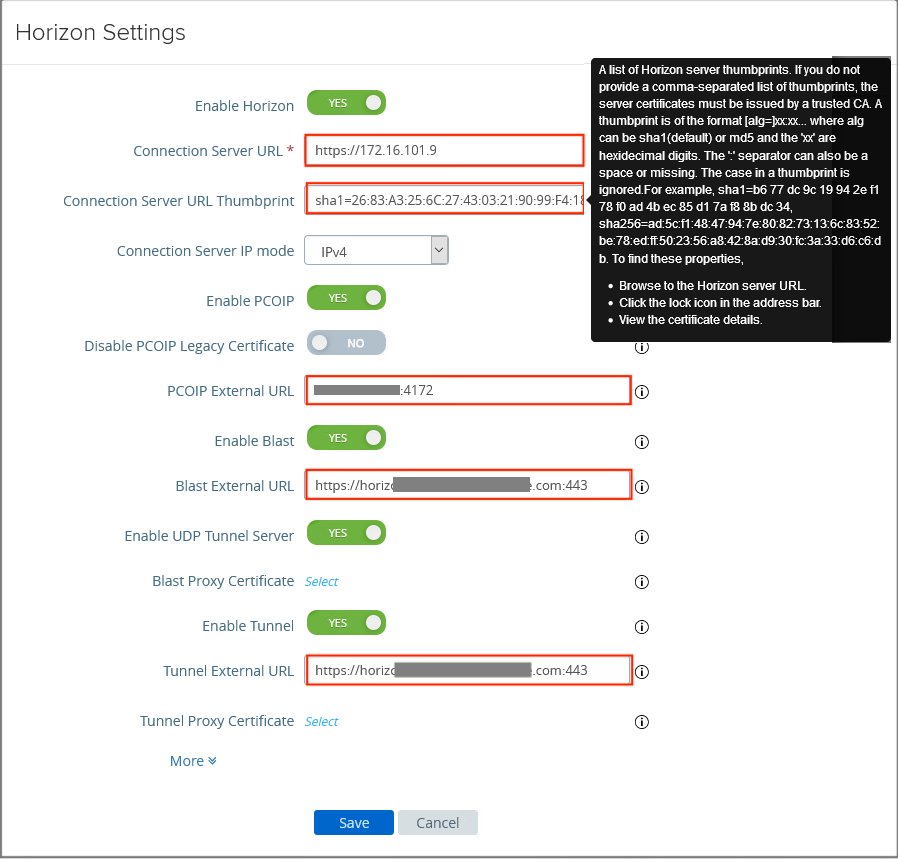
9. If you are deploying UAG 3.6 as part of new horizon installation, go to General Settings and configure the fields as per requirement and save the configuration.
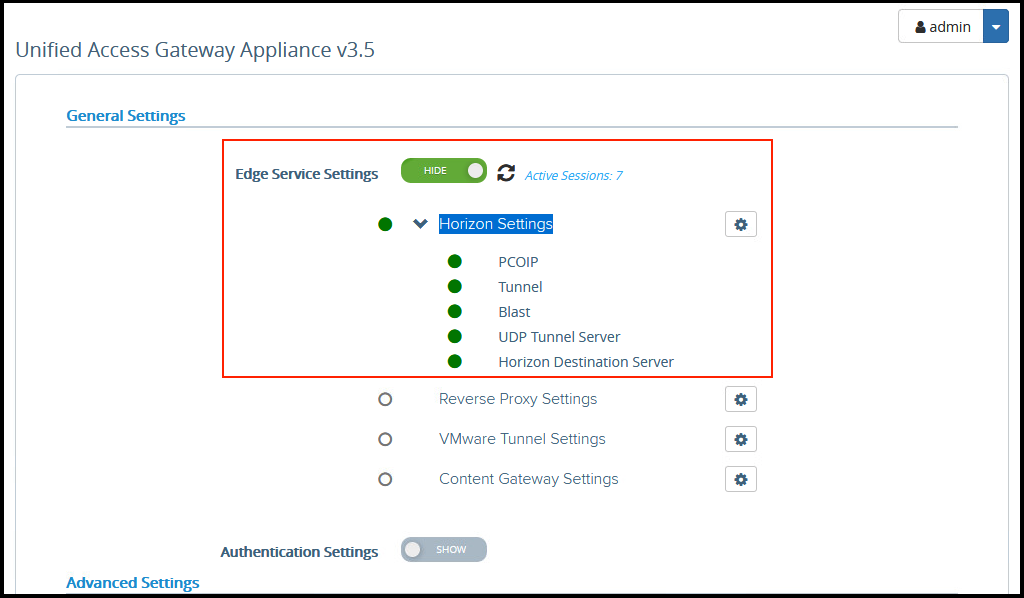
10. Confirm all the Edge Service Settings status are green.
Importing exiting UAG config
If you are updating UAGs as part of existing horizon environment, follow the below steps.
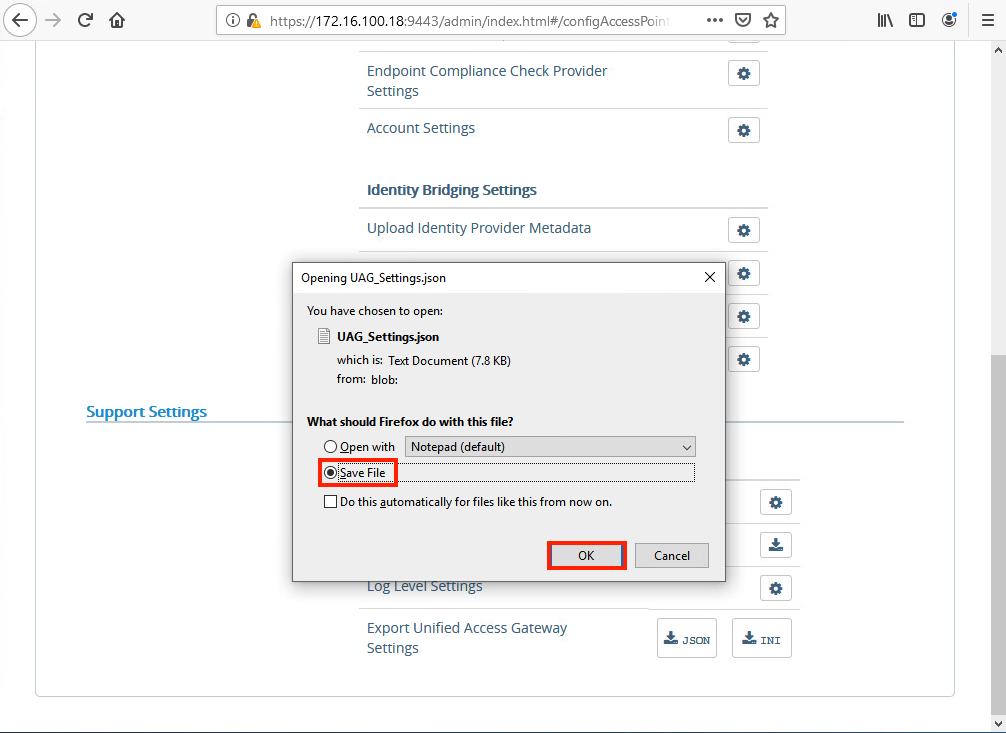
11. Log in to admin console of an existing UAG and export the configuration file to import to new UAG.
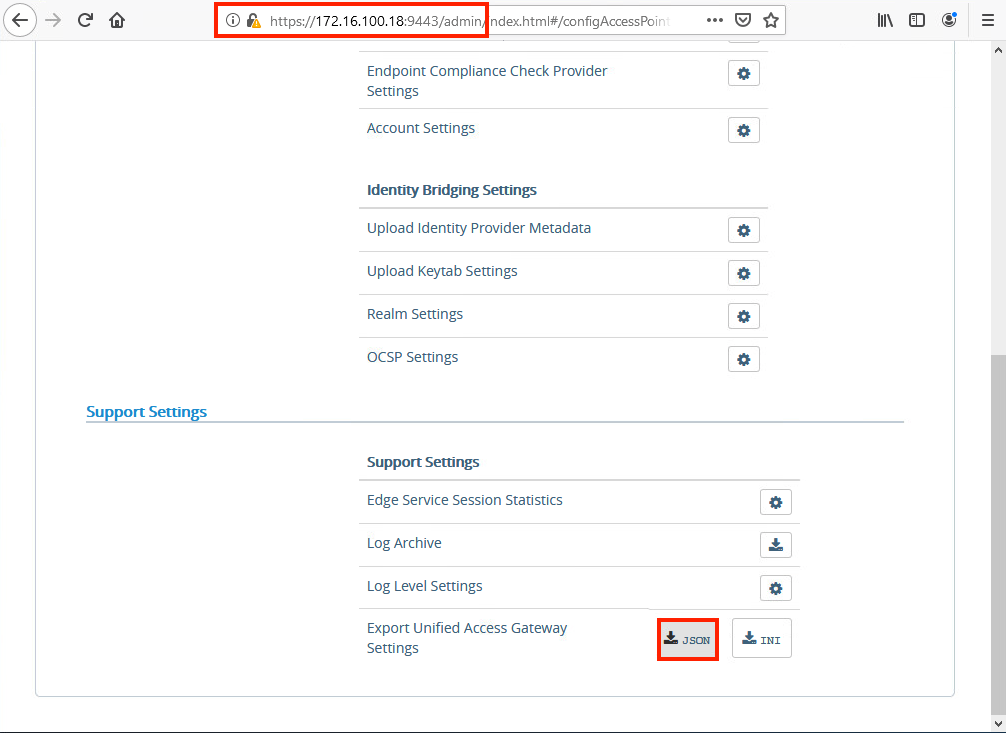
12. Save JSON config file in local machine.
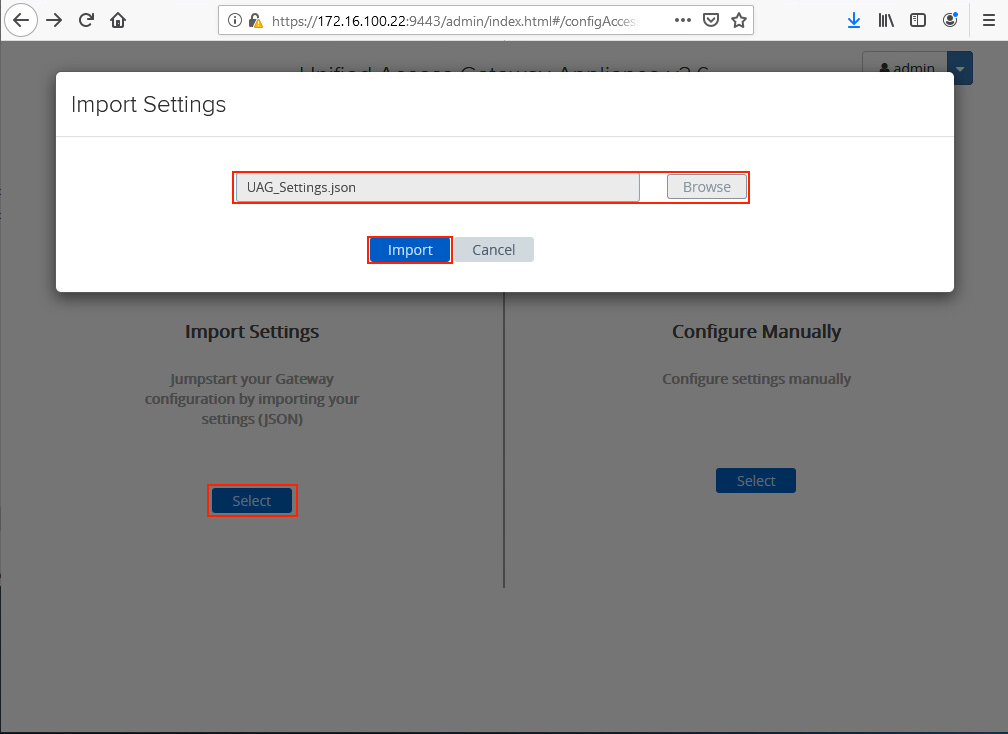
13. Return to newly deployed UAG admin console and select Import Settings > Browse > Select the Config file exported in step 10-11 and select import.
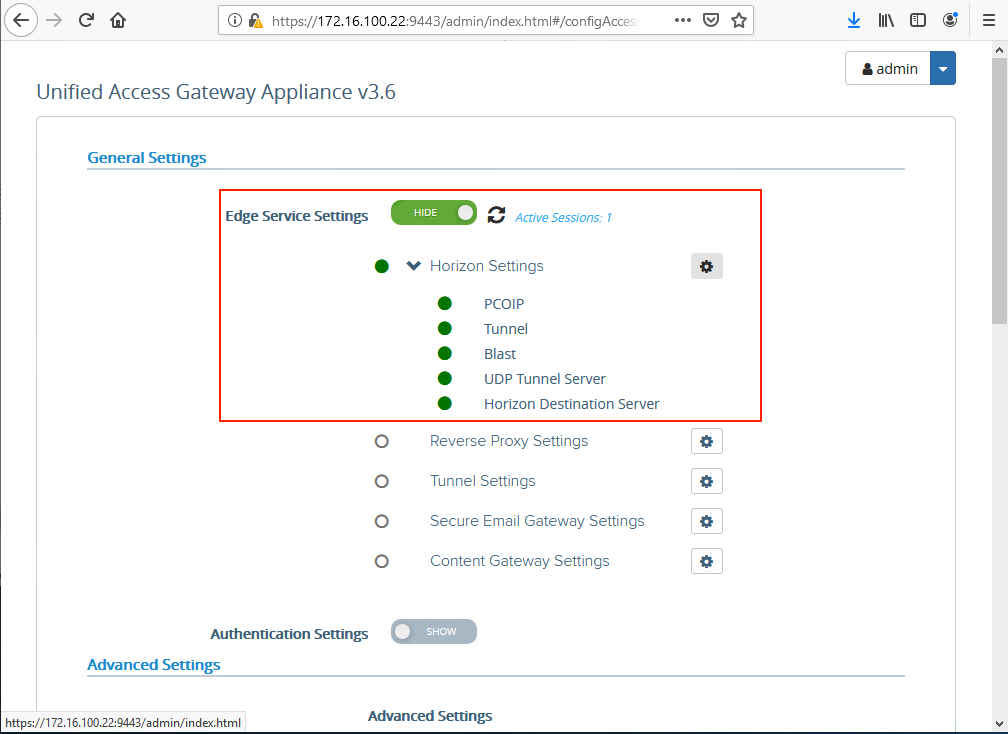
14. Once config import completed, select Configure Manually in the right > go to General Settings and confirm all the Edge Service Settings status are green.
Import Server Certificate for UAG
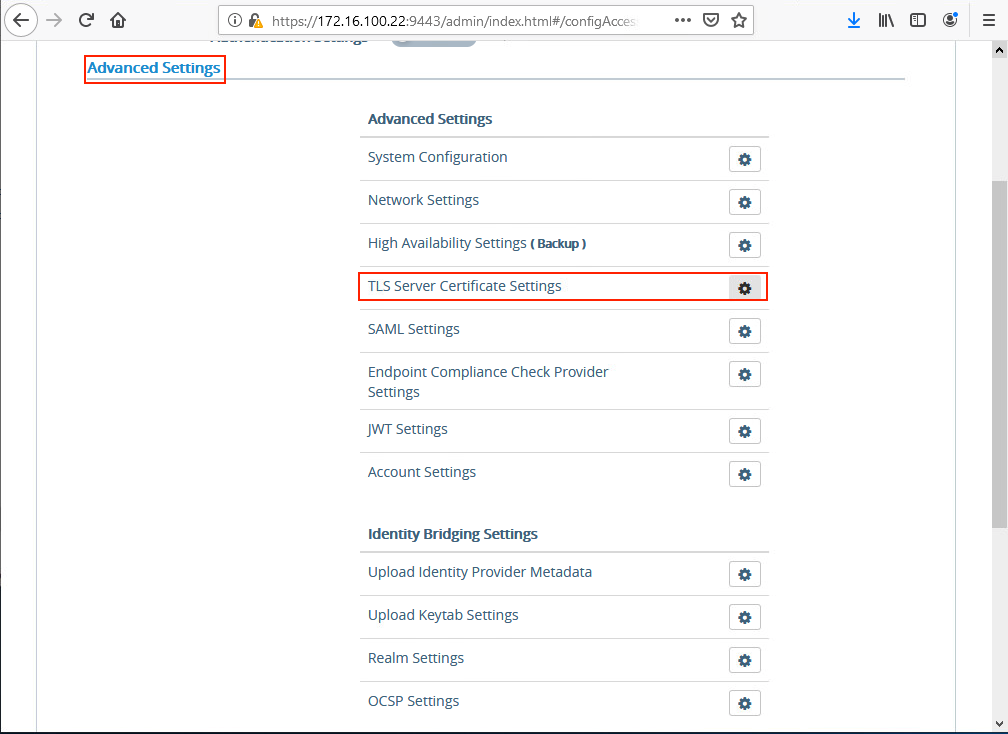
15. Under the Advanced Settings, click on gear button next to TLS Server Certificate Settings and import appropriate certificate and Save the configuration.

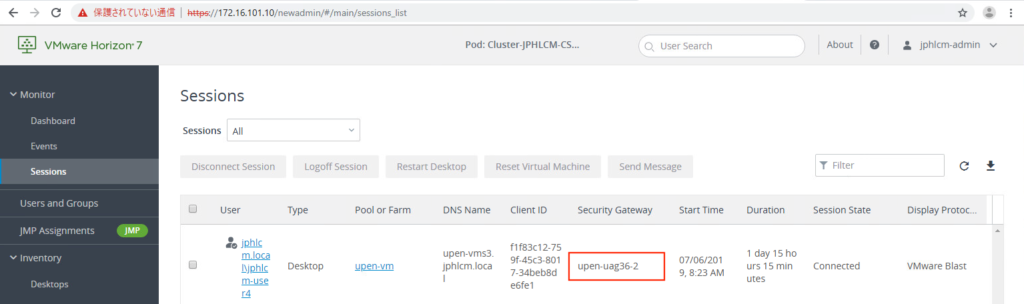
Connectivity Test
16. Access VDI within your environment and confirm if the Security Gateway session is on newly deployed UAG.
![]()