In my previous post, I had posted Cloud Connector deployment steps for VMware vSphere environment. In this post, I will provide step by step guidance for Cloud Connector deployment on Google Cloud Platform (GCP).
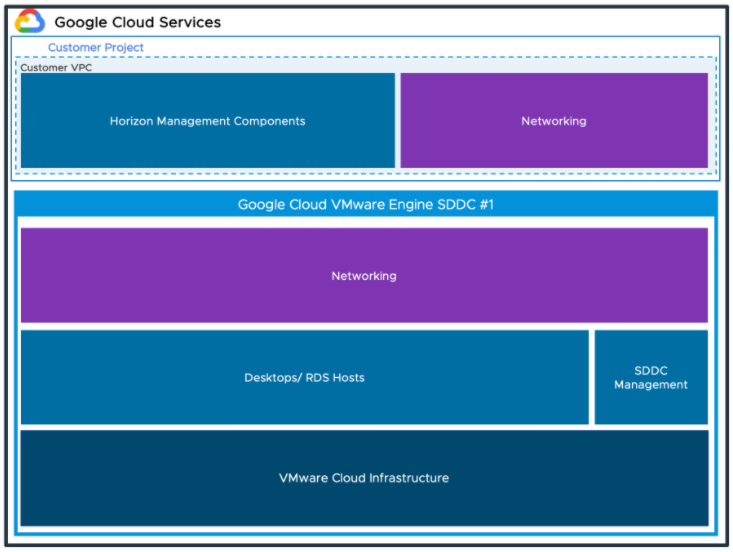
Basically, when a Horizon POD is deployed into a cloud environment using federated architecture, the Horizon Cloud Connector is deployed in the same place (infrastructure) where the set of Horizon management components are deployed. In this example, I am considering a federated POD deployed into Google Cloud VMware Engine (GCVE) where all the horizon management components (i.e. Horizon Connection Server, Unified Access Gateway, Appvolumes Manager, Dynamic Environment Manager etc.) resides in the native GCP infrastructure and VMs for desktops/RDSH/Application resides within the vSphere infrastructure of GCVE.
Federated Architecture of Horizon on GCVE
List of the tasks:
- Download the Horizon Cloud Connector TAR file.
- Create a Google Cloud Storage bucket and upload the appliance TAR to that bucket.
- Create a custom image from the uploaded TAR file.
- Create the Horizon Cloud Connector virtual machine (VM) instance from the custom image.
- Download the appropriate version of Horizon Cloud Connector file in tar format from myvmware.com. I am using Cloud Connector version 2.1 in this example.
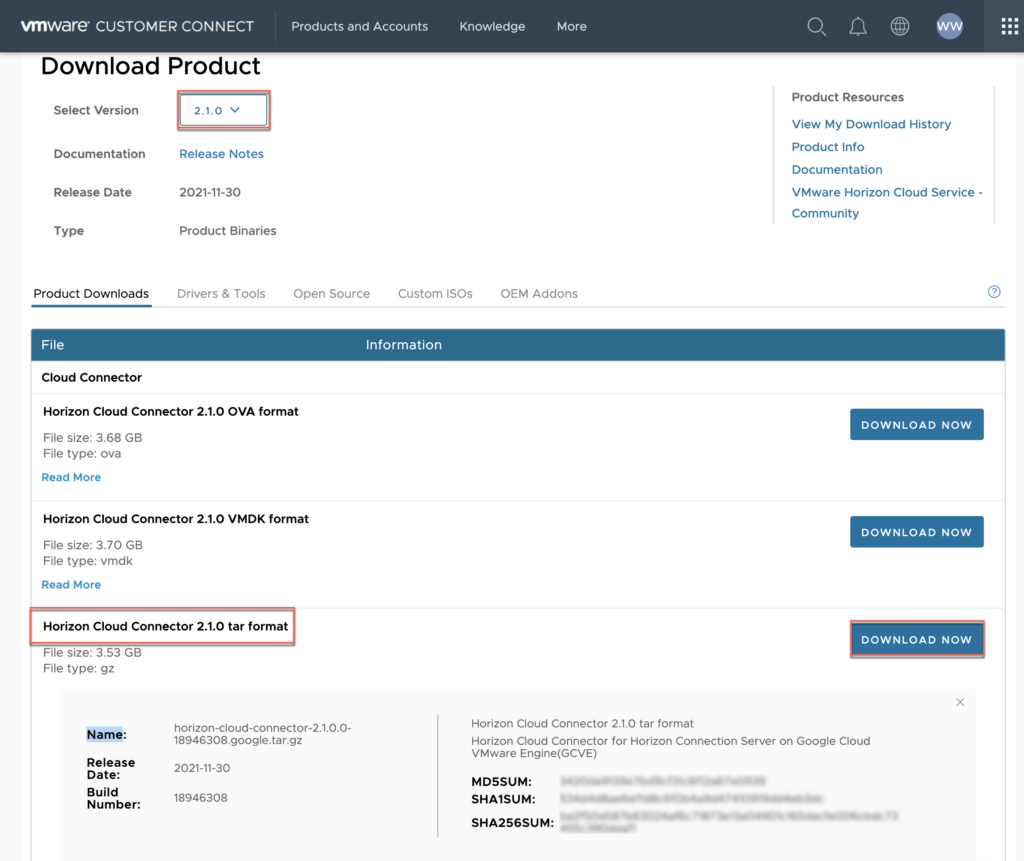
Note: Cloud connector version 1.10 or later are supported for Horizon on GCVE. However do not use Cloud Connector version 2.0 as VMware has identified some issue with it. For more detail, please refer to VMware KB article.
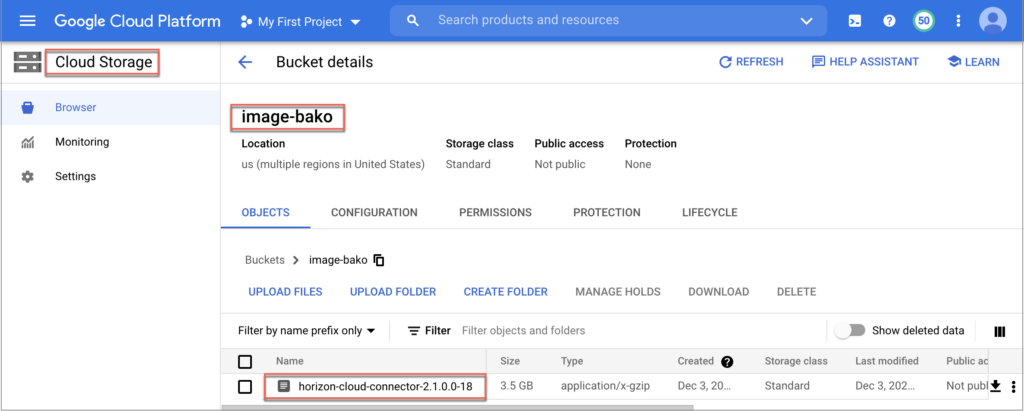
2. Log into your GCP console and navigate to the Cloud Storage bucket. I already have a bucket name “image-bako” in my account. If you don`t have one, you need to create. Upload the tar file (downloaded in step#1) to storage bucket.
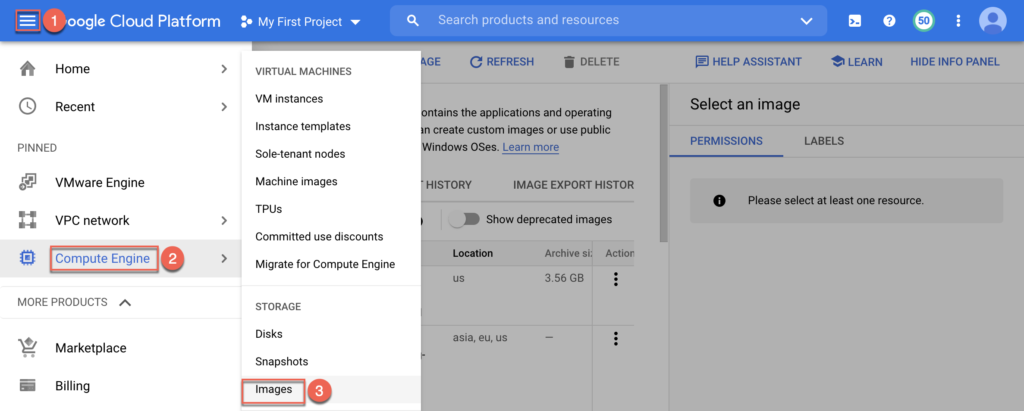
3. Select GCP main menu > [Compute Engine] > [Images] > [CREATE IMAGE].
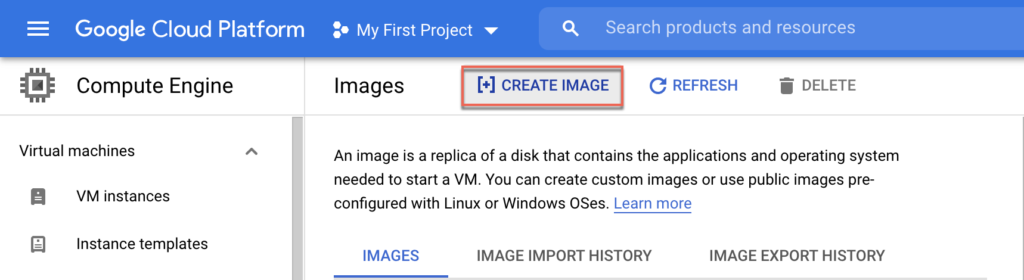
4. Give a name of your choice to your image, define the Source, Connector tar file, Location and select [Create].

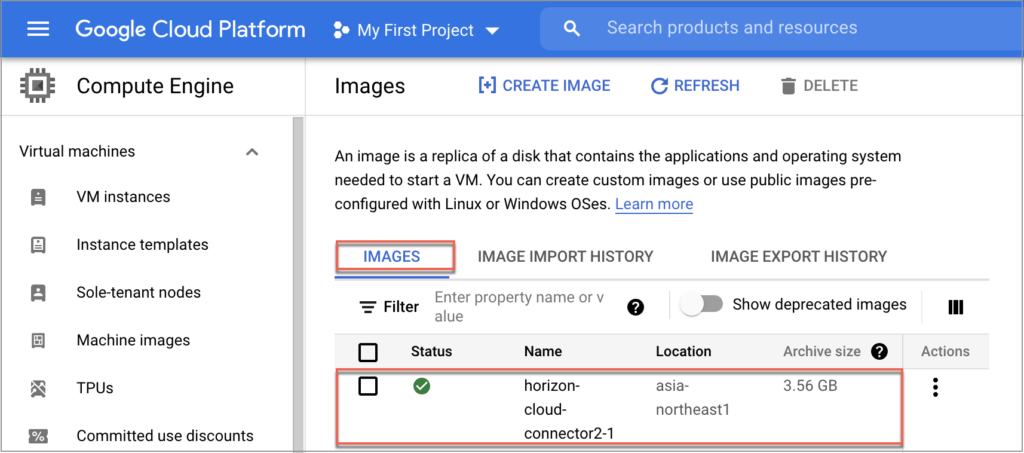
5. Verify your image in the list under [IMAGES].
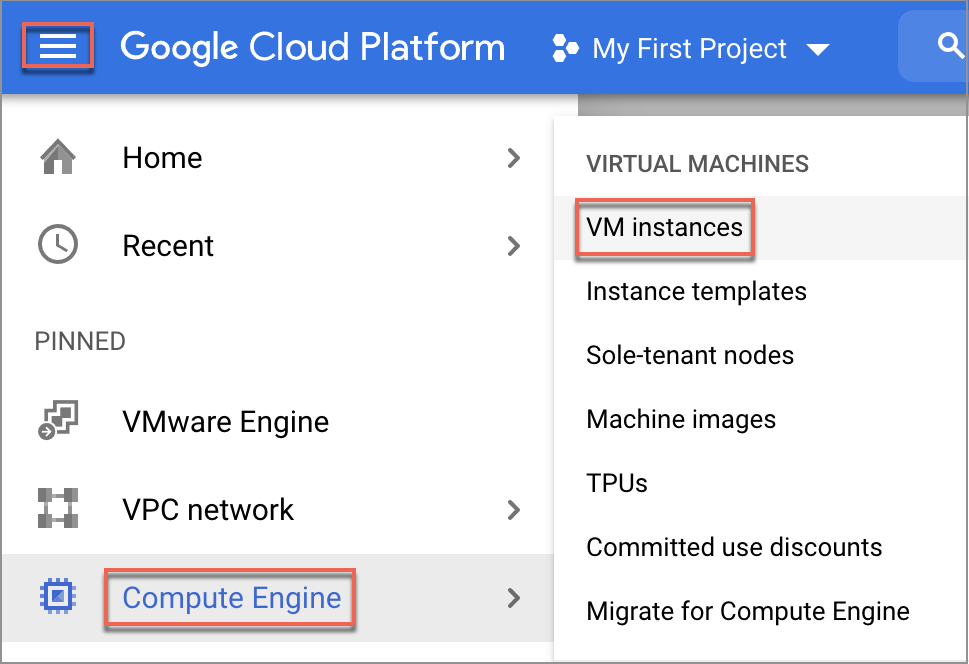
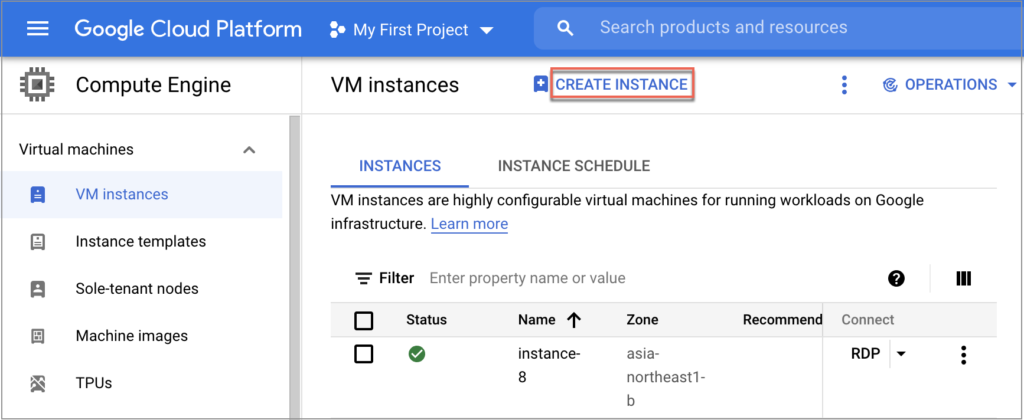
6. Select [Compute Engine] > [VM Instances] > [CREATE INSTANCE].
7. Give a name of your choice to VM Instance > define Region, Instance Series/type.
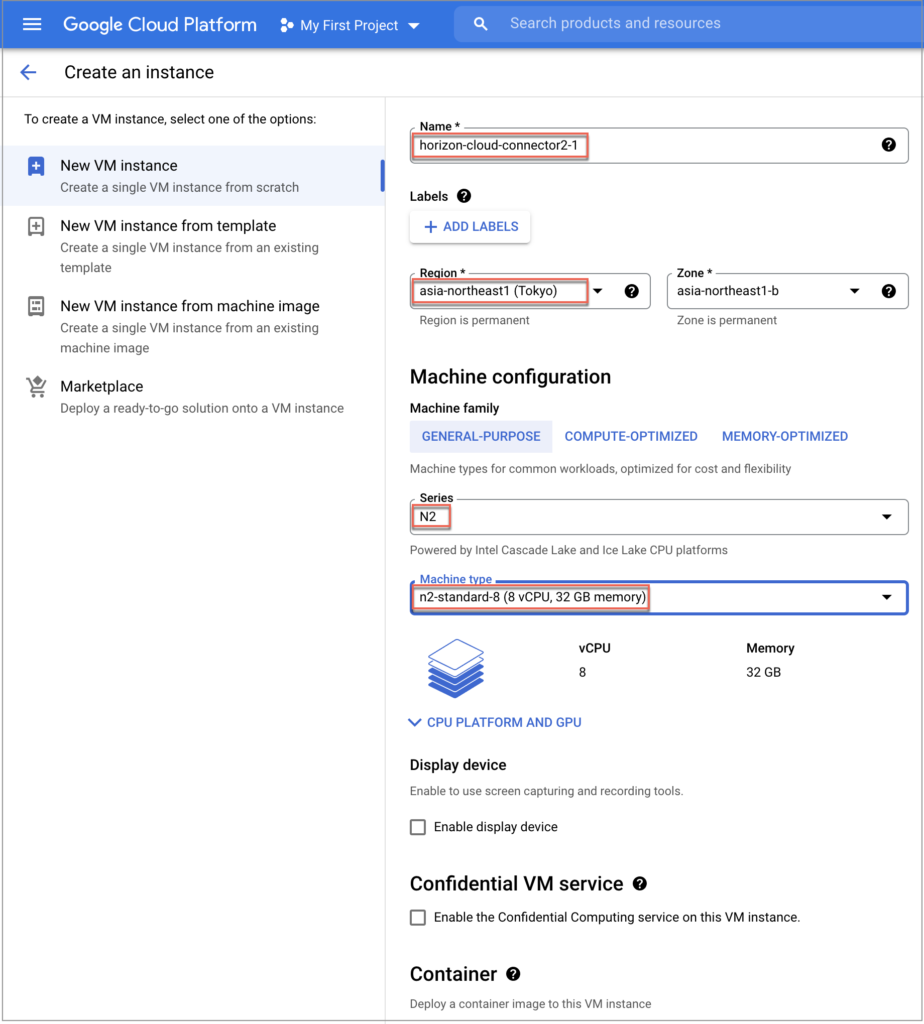
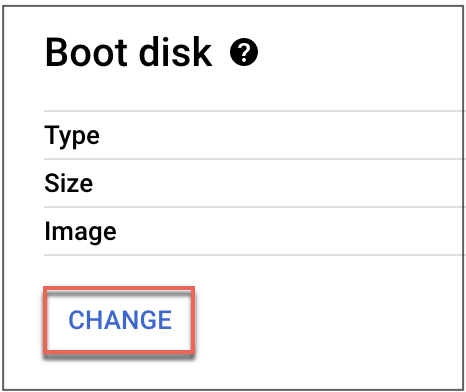
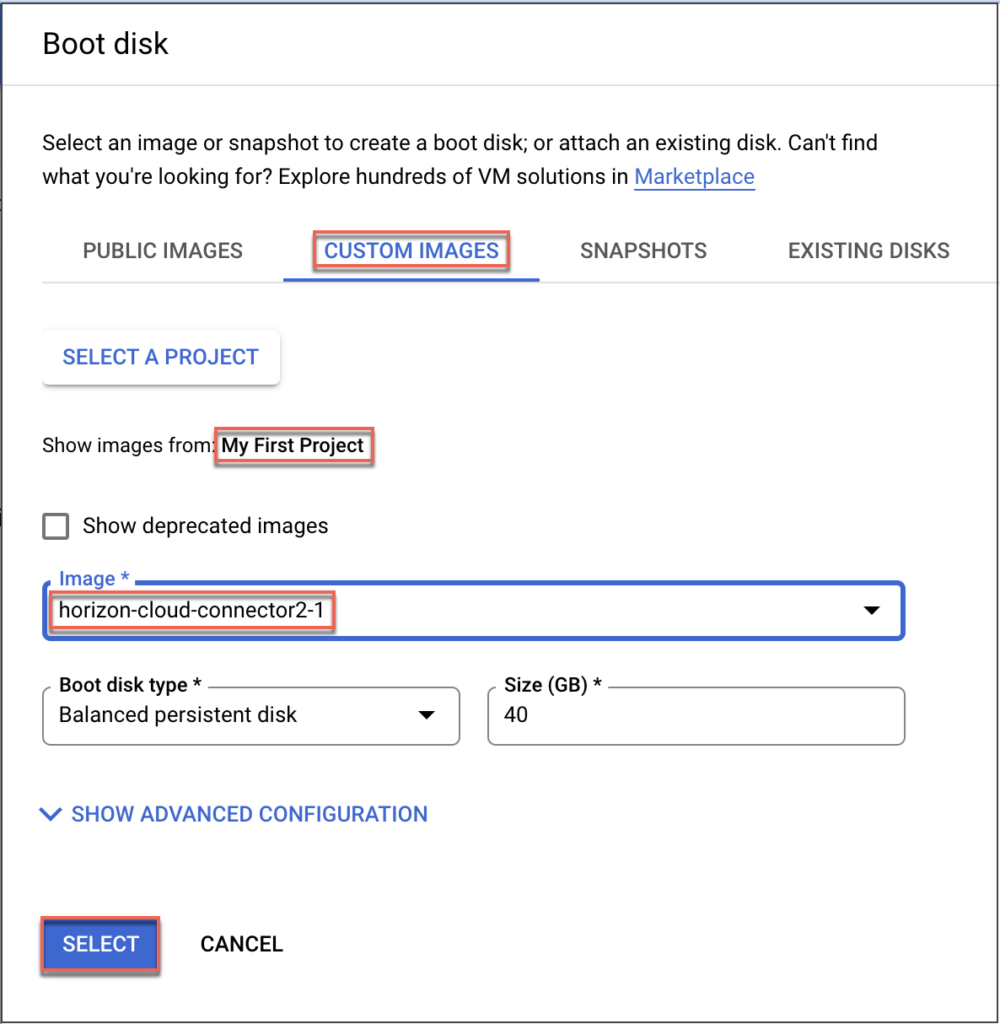
9. In [Boot Disk] section, click in [CHANGE] > navigate to [CUSTOM IMAGES] > select your Project, Image (created in step#5) and click in [SELECT].
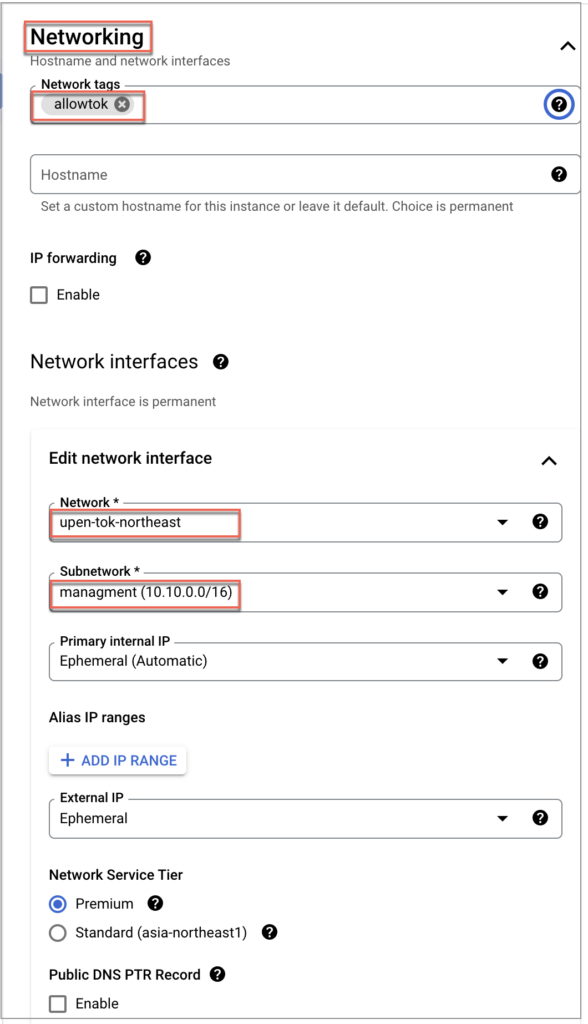
10. In Networking section, define Network tags if you need to allow Firewall to allow the SSH access to Connector VM. In my example, I am using tag “allowtok”. Define Network and Subnetwork.
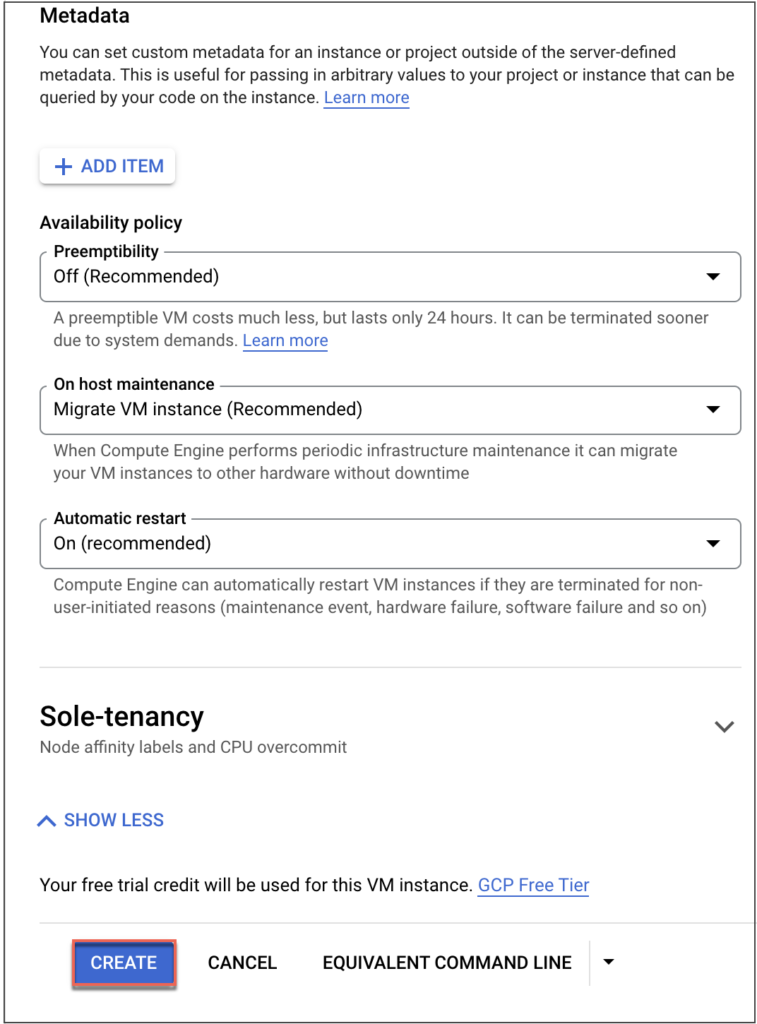
11. In management Section under the Automation, define Startup script to configure the Cloud Connector > click in [SELECT] to initiate the VM instance deployment.
Note: By default the root account of Cloud Connector is disabled for security. In the below example, account name “upen” is created and ssh enabled for debugging purpose however this step can be skipped if not required.
Startup script in my example
----------------------------
#! /bin/bash
/usr/bin/python3 /opt/vmware/bin/configure-adapter.py --sshEnable
sudo useradd upen
echo -e 'VMware-123\nVMware-123' | passwd upen
sudo usermod -aG ccadmingroup upen
sudo mkdir /home/upen
sudo chmod 755 /home/upen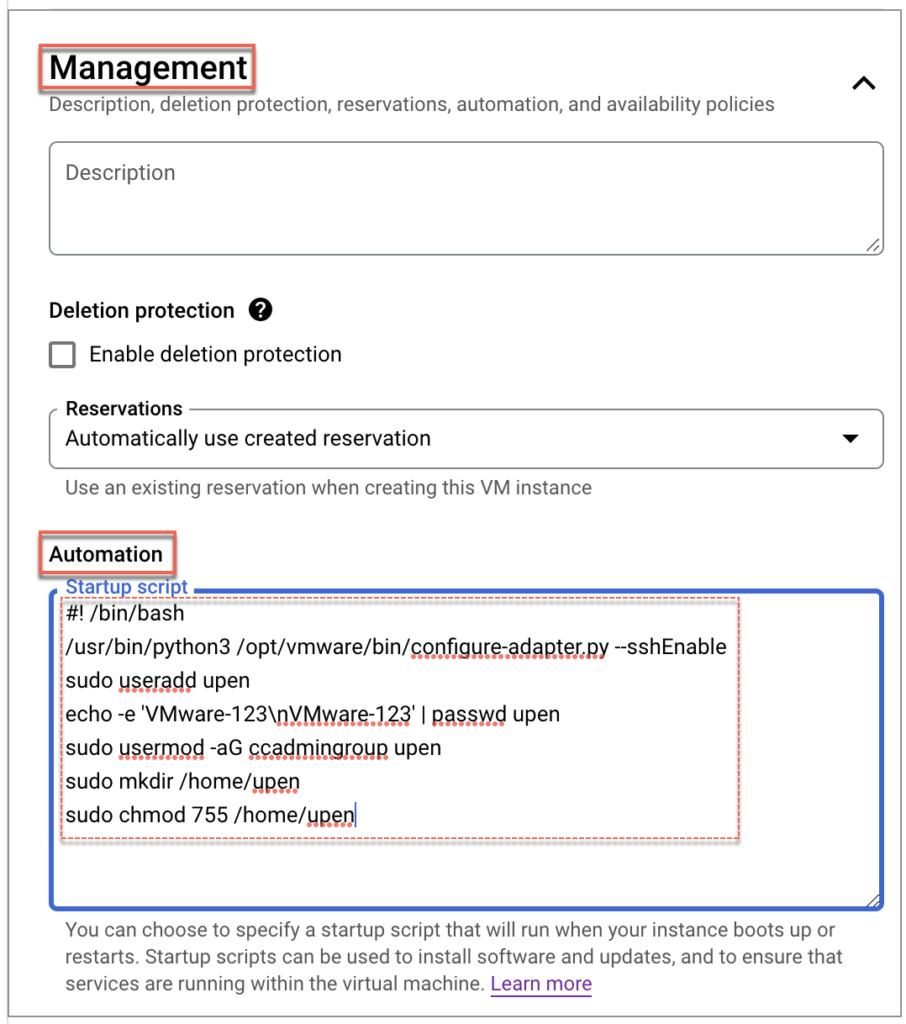
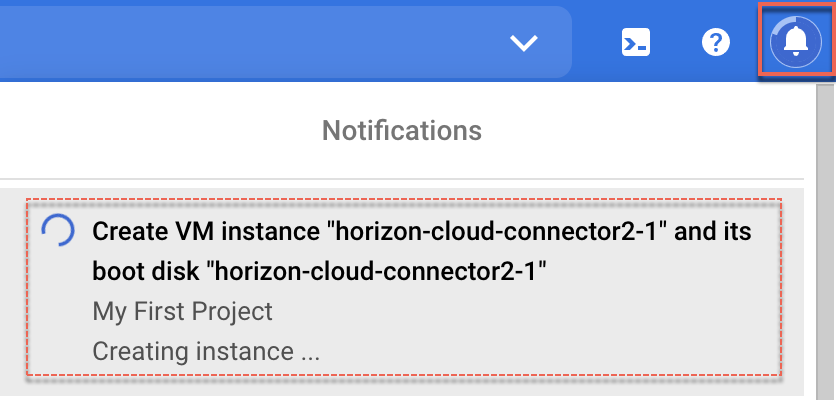
12. From the [Bell icon] in right top of the GCP console, you can verify the progress of VM instance creation. This task may take few minutes.
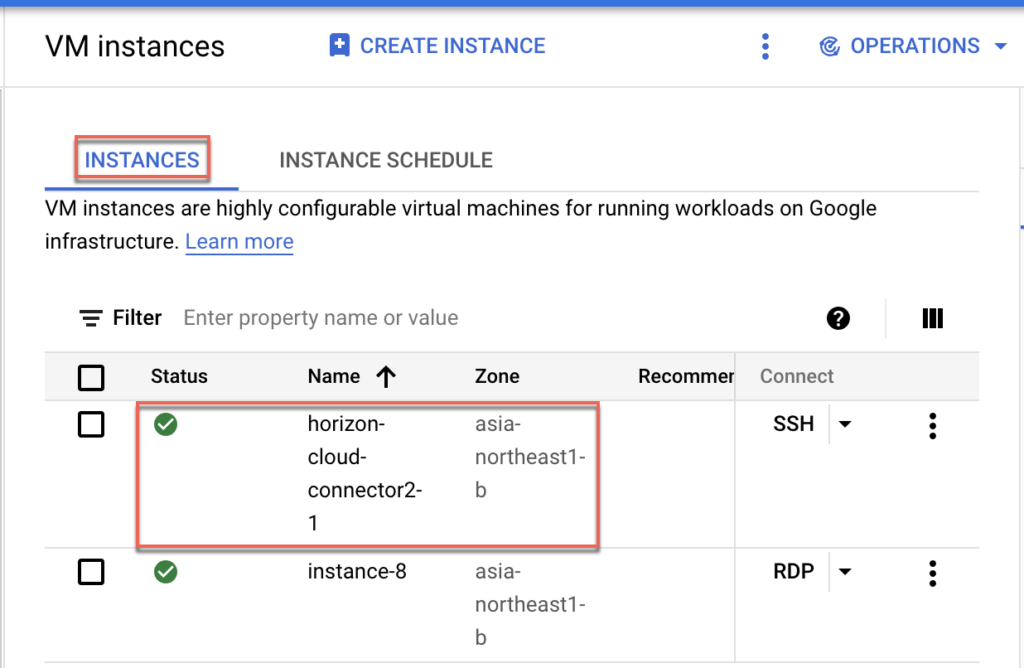
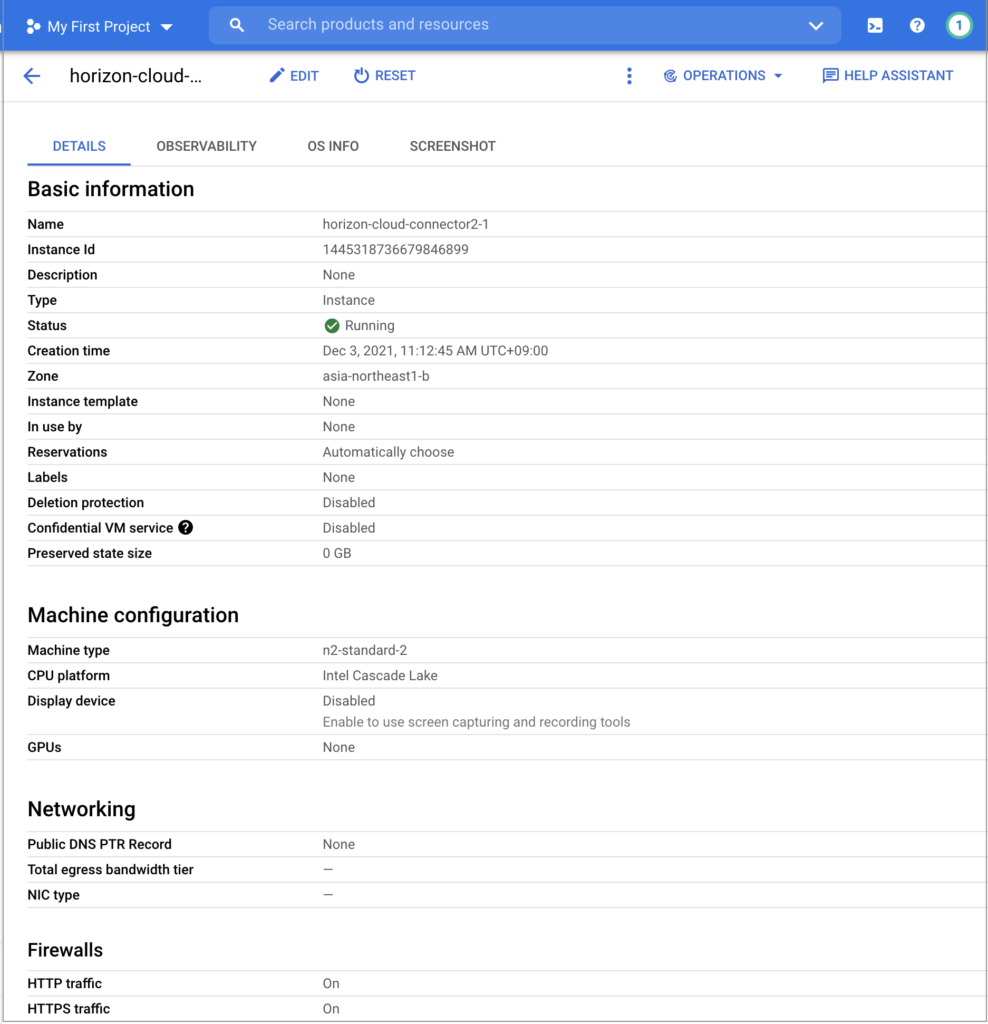
13. Confirm your Cloud Connector VM instance is ready and running.
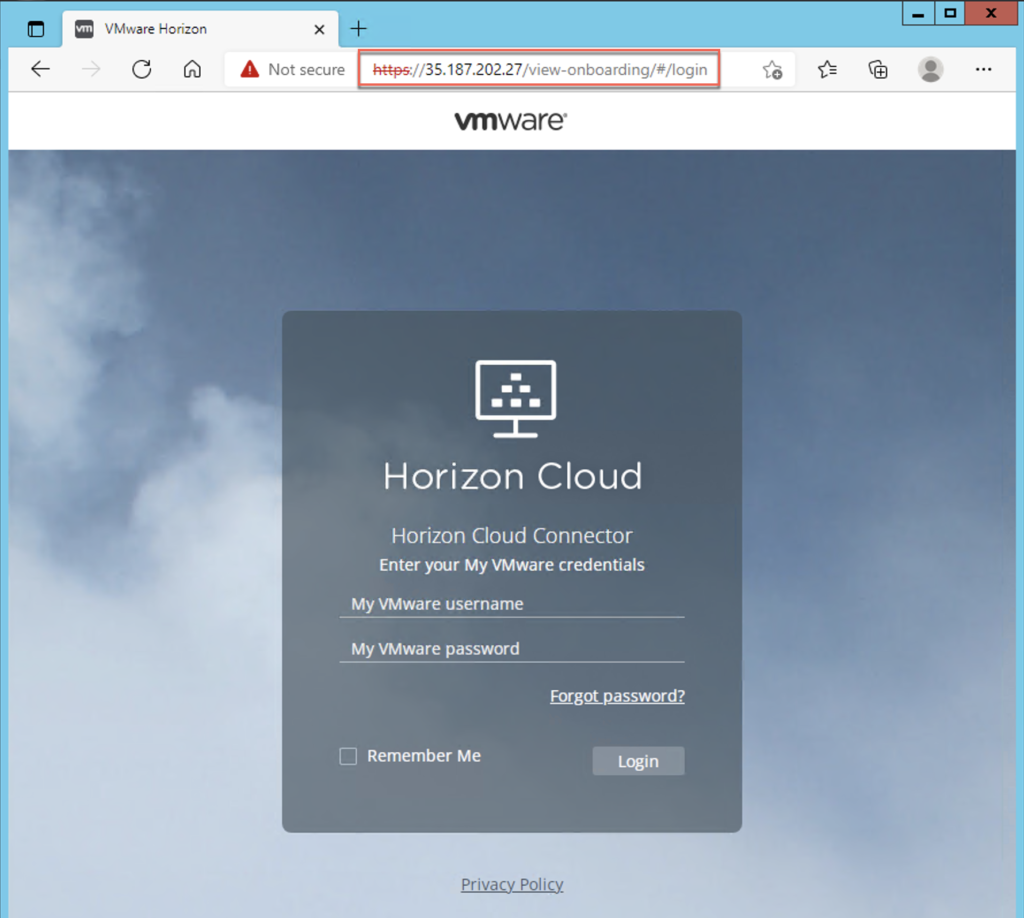
14. Access Cloud Connector onboarding console [https://connector ip/view-onboarding] whether with public IP or private IP as per your environment. I am accessing with public IP in this example.
If the deployment is succeeded, you should see the console like below.
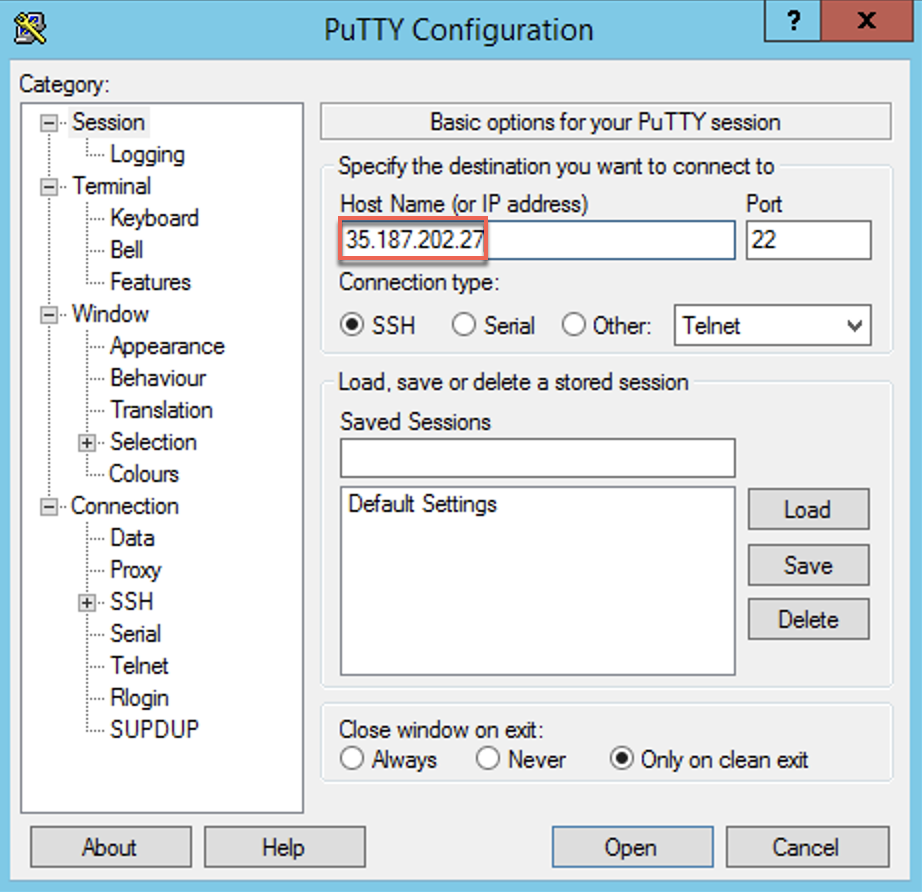
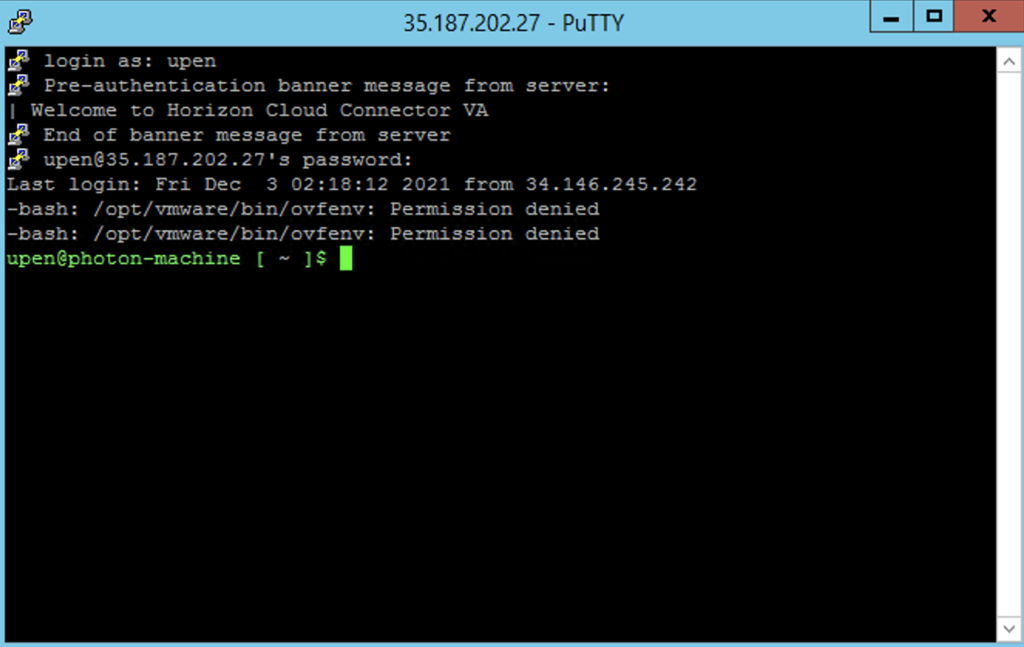
As I am allowing SSH for demo purpose, so I am able to SSH my cloud connector however this is optional.
Next step:
Please follow VMware official documents below for Cloud Connector onboarding.
Verify Horizon POD and Connector are ready to be paired. VMware Document
Workflow for Pairing Horizon POD and Cloud Connector. VMware Document
![]()