As per November 4, 2020 update, Horizon Cloud Universal Broker supports integration with Workspace ONE Hub Services and Workspace ONE Access Cloud. When integrated, the virtual desktop and remote app assignments that are brokered using Universal Broker can now be synched automatically to the Workspace ONE Intelligent Hub catalog and made available within the Hub catalog on web browser for your end users to view and launch. Unlike legacy Workspace ONE access integration with Horizon cloud, Virtual App Collection need not to be created while integrating with Intelligent Hub.
In this post, I will provide the step by step guidance on integration of Workspace ONE Hub Services with Horizon Cloud on Azure.
High-level architecture and communication flow of the components in a Horizon Cloud environment that is configured with Universal Broker and integrated with Workspace ONE Access and Intelligent Hub services.
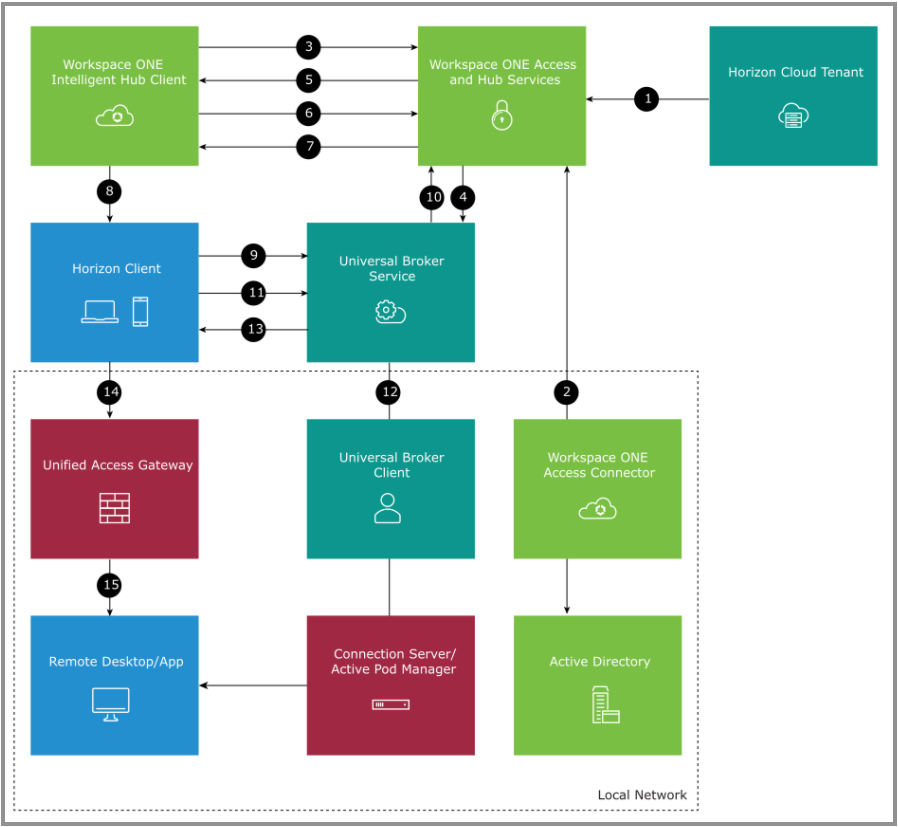
Detail explanation of the communication flows can be found here.
Prerequisites
-Universal Broker feature enabled Horizon Cloud on Azure tenant
-Workspace ONE Access Cloud tenant (optional). New cloud tenant can be created from Horizon Cloud Admin UI
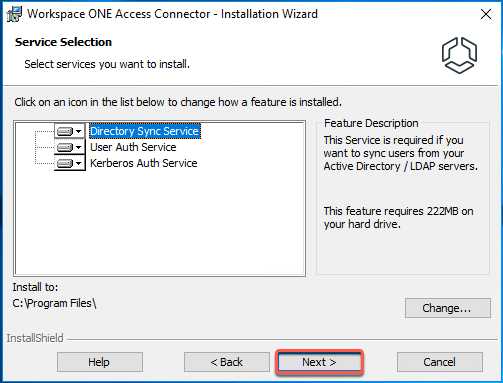
-A Windows Server machine for Workspace One Access Connector
-Workspace ONE Access Connector software version 19.03.0.1 or 20.10.
Note: Workspace ONE Access on-premises tenant is not supported with Universal Broker. [As of November 4, 2020 release]
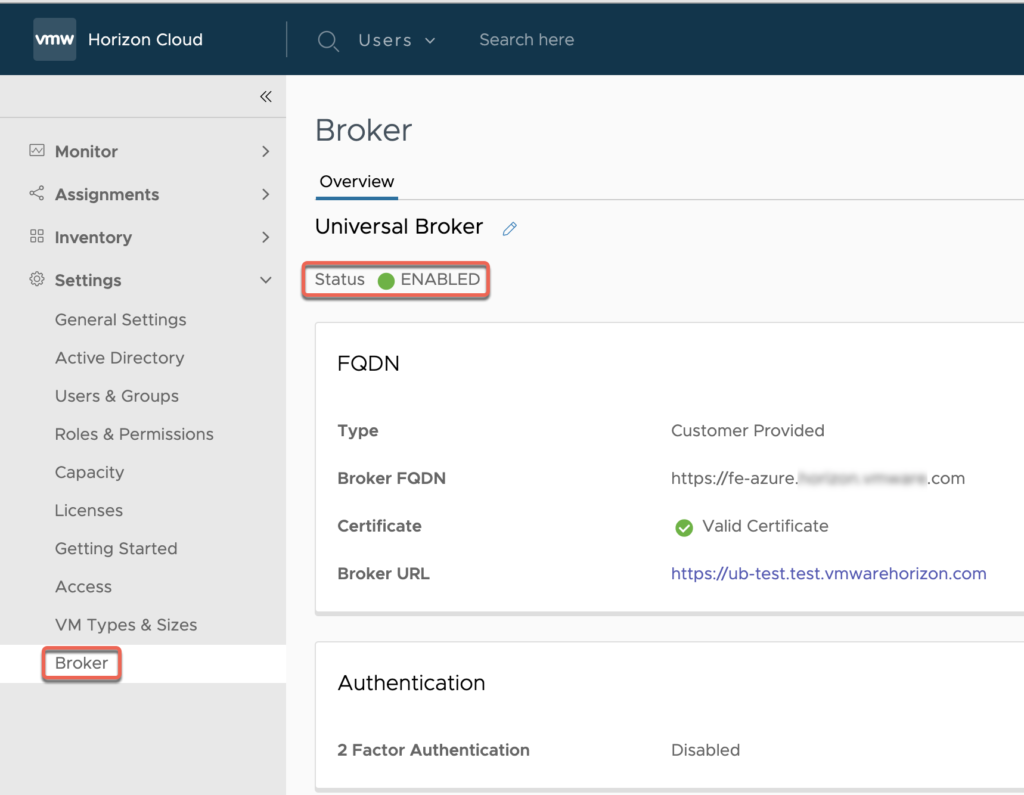
Enable Universal Brokering in Horizon Cloud administration console
1. Log into Horizon Cloud on Azure Admin UI > [Settings] > [Broker] and confirm the Universal Broker feature is enabled.
If the Universal Broker feature is not enabled in your Horizon Cloud environment follow this link.
Configure Workspace ONE Access cloud tenant in Horizon Cloud
2. In the Horizon Cloud Admin UI, navigate to [Settings] > [Access].
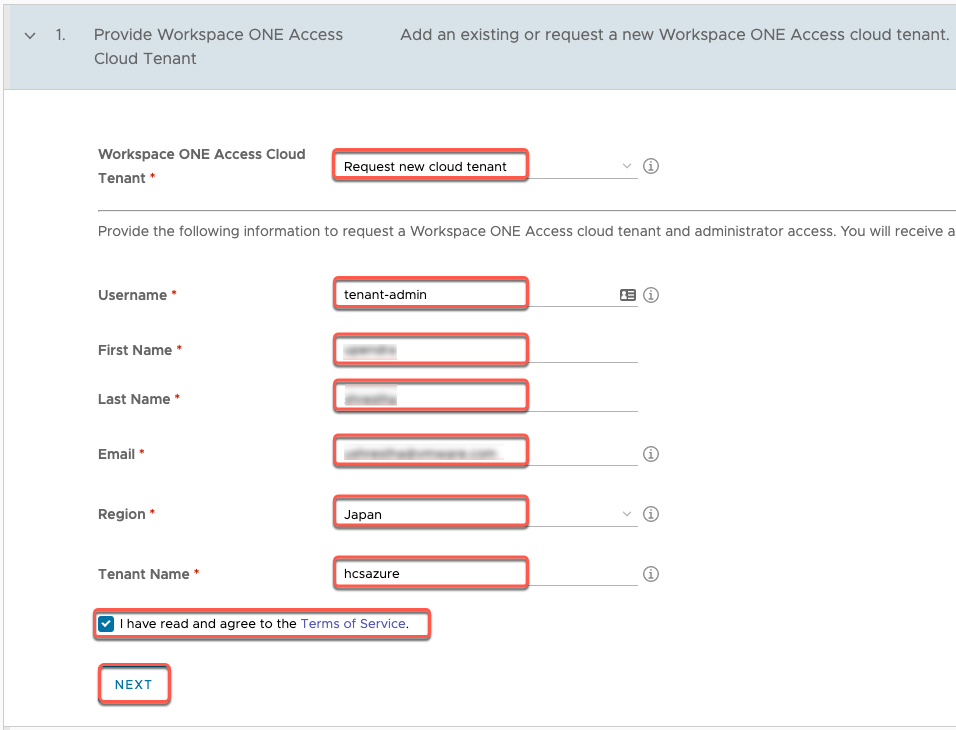
If you already have a Workspace ONE Access Cloud tenant please proceed from step#6. If you don`t have the one, select [Request new cloud tenant] from the dropdown in ” 1. Provide Workspace ONE Access Cloud Tenant” section and provide all the required information > [Next].
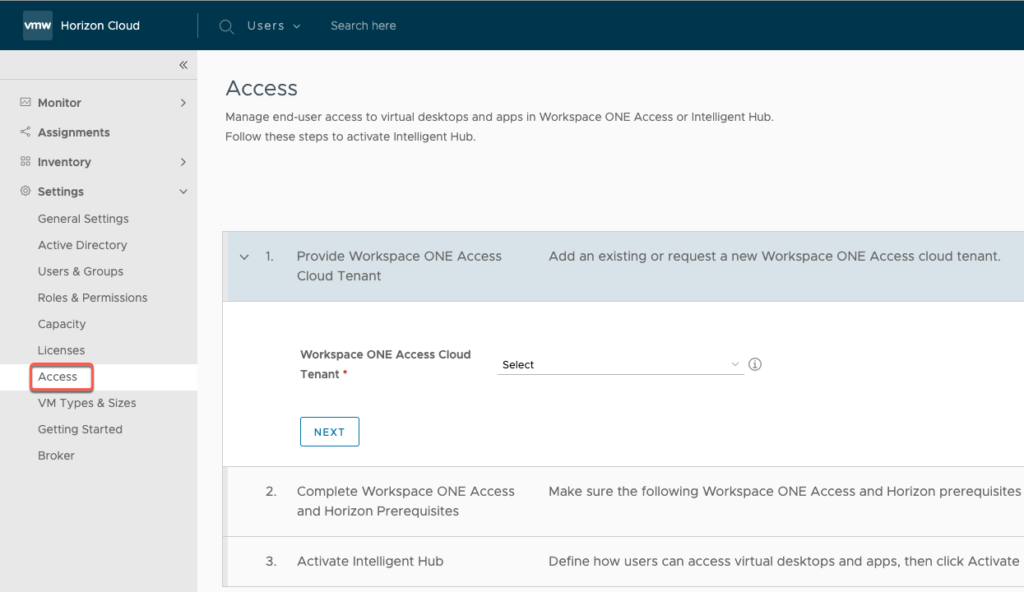
3. Select [Next] to proceed.
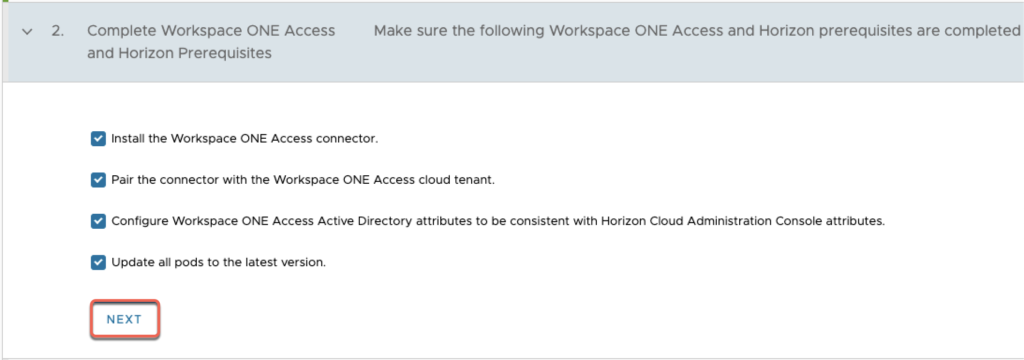
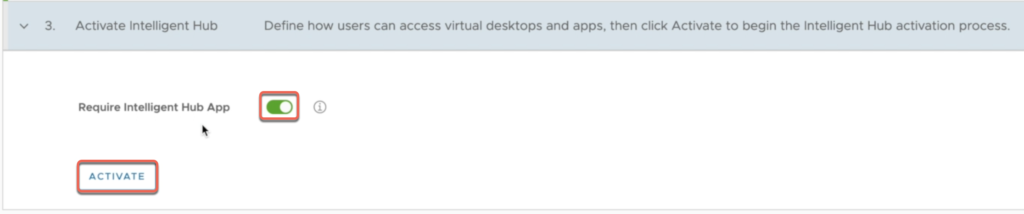
4. Turn on the toggle button next to the [Require Intelligent Hub App] (optional) and select [ACTIVATE].
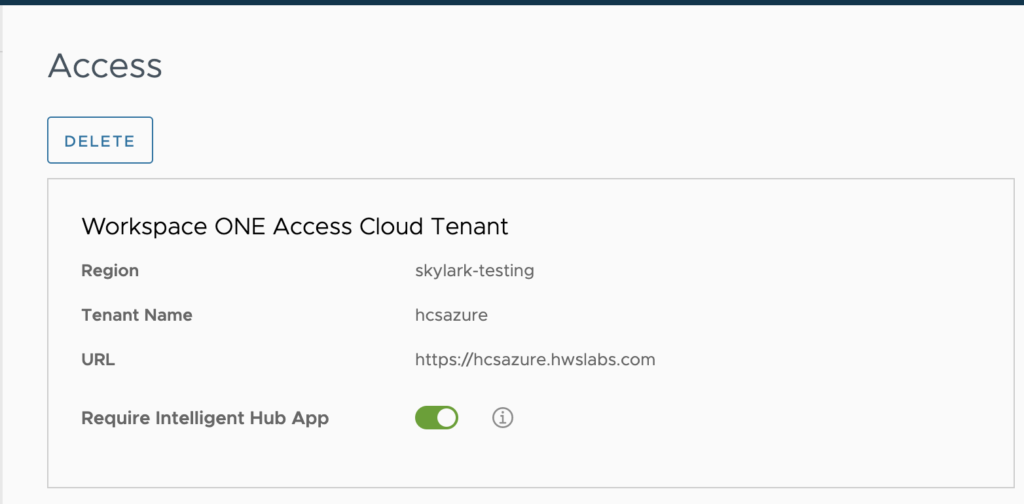
5. Confirm your Workspace ONE Access Cloud tenant has been successfully configured.
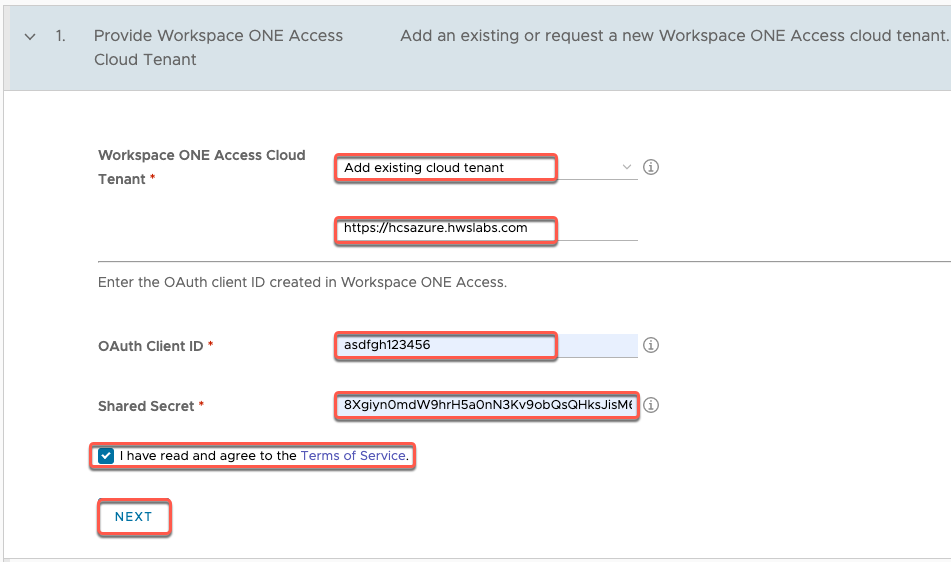
6. If in case of you already have a Workspace ONE Access Cloud tenant, navigate to [Settings] > [Access] and select [Add existing cloud tenant] from the dropdown in ” 1. Provide Workspace ONE Access Cloud Tenant” section > provide the required information and follow the on-screen instruction to proceed.

Note: The toggle next to the [Require Intelligent Hub App] is the switch to force the users to Workspace ONE Access. If you enable this toggle and launch Universal Broker FQDN, it will redirect to Workspace ONE Access Hub catalogue.
Configuration of Workspace ONE Access Intelligent Hub and Workspace ONE Access Connector 20.10.
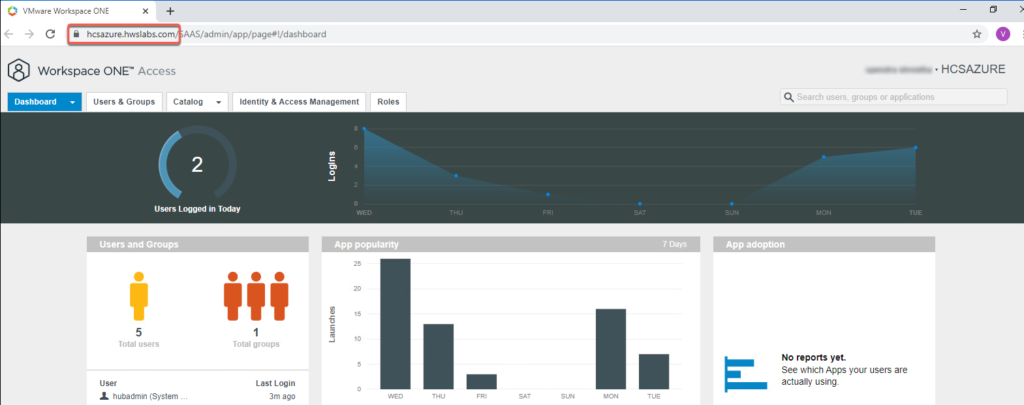
7. Log into Workspace ONE Access admin console which was created in step#5. In my case https://hcsazure.hwslabs.com/SAAS/login/0
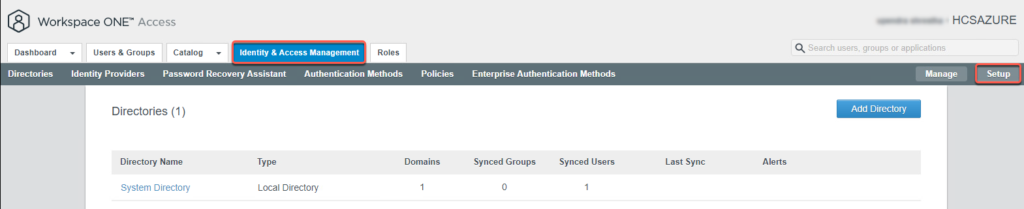
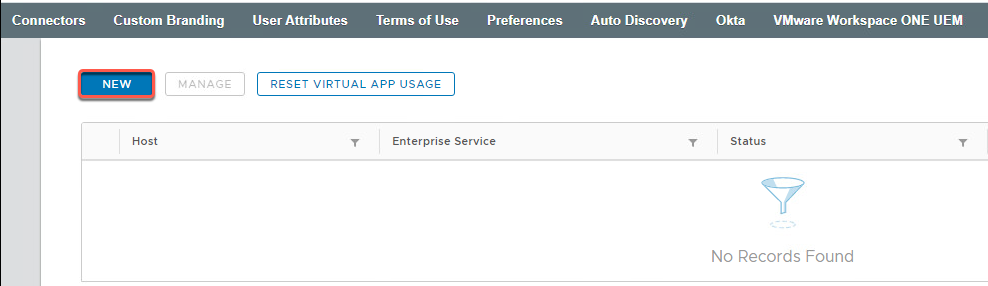
8. Navigate to [Identity & Access Management] > [Setup] > [NEW] > [Next]
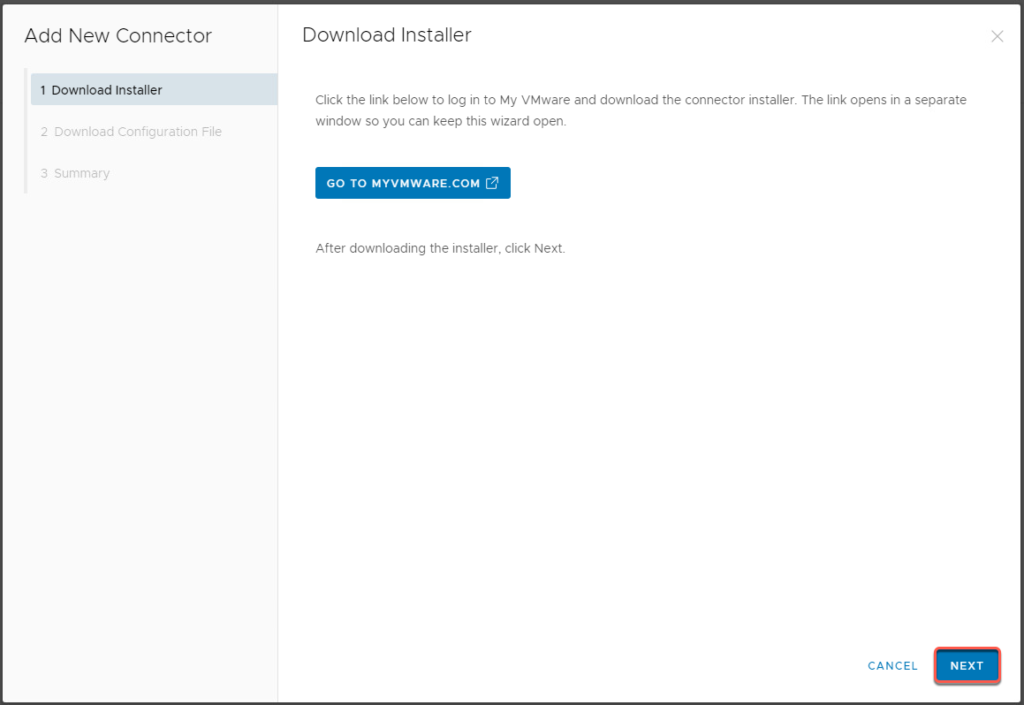
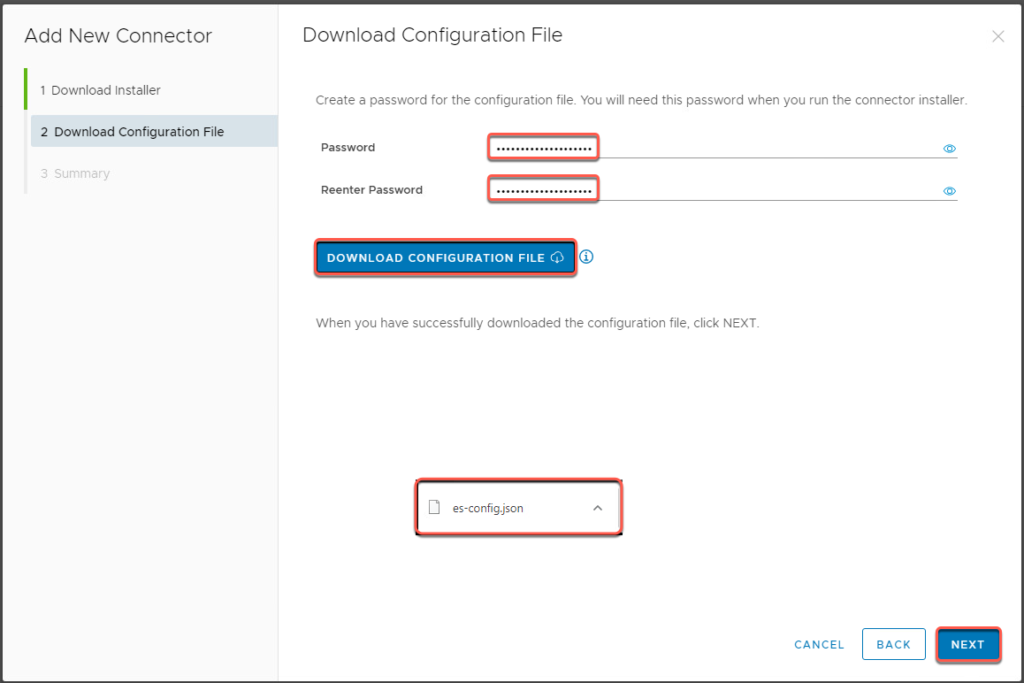
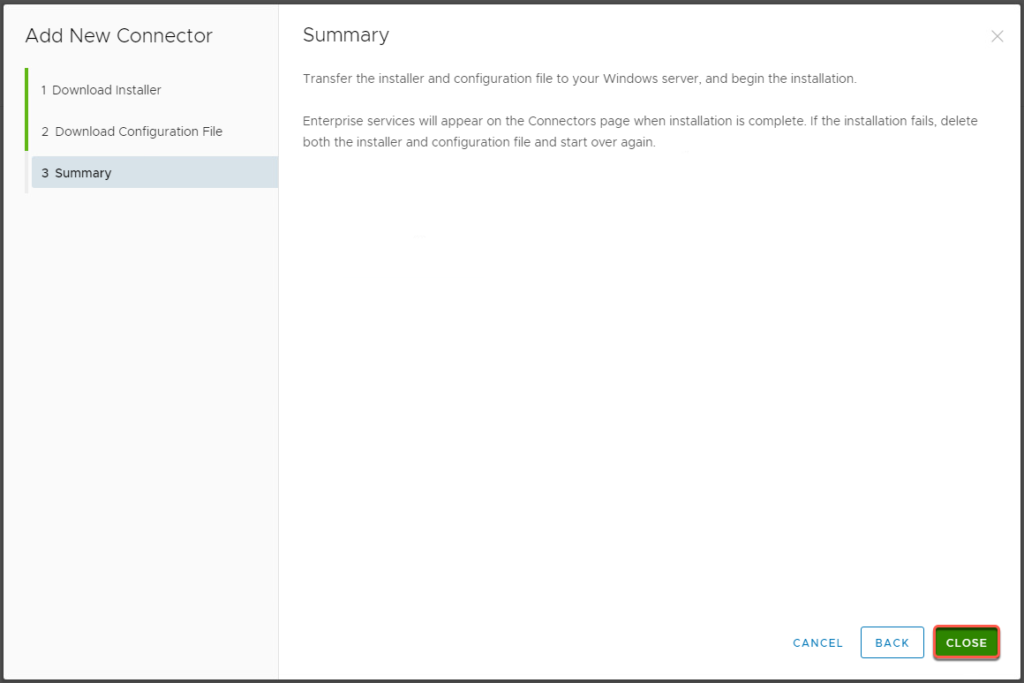
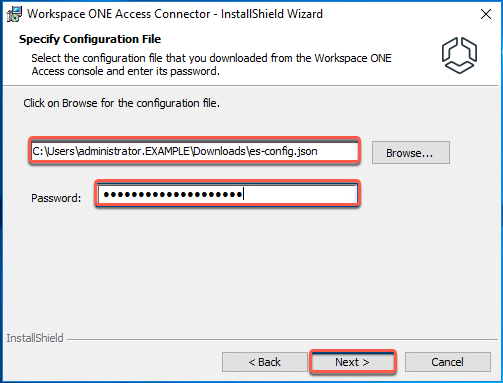
9. Create a password file to download the configuration file and select [DOWNLOAD CONFIGURATION FILE] > [Next] > [Close].
This configuration file will be used while installing Workspace ONE Access connector 20.10.x.

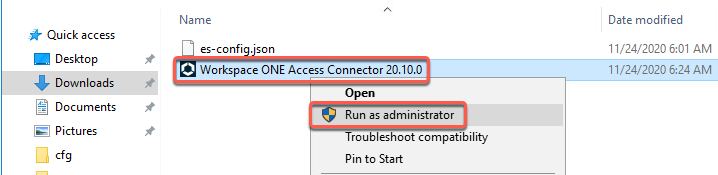
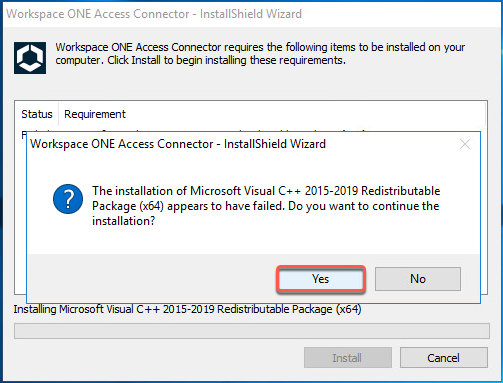
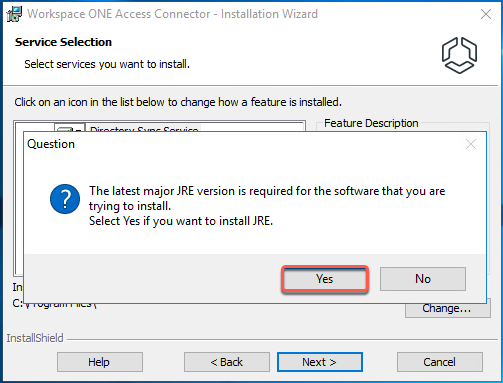
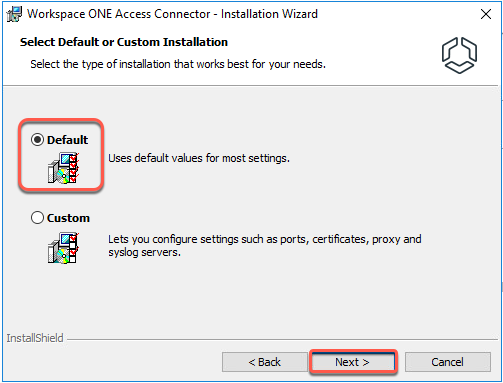
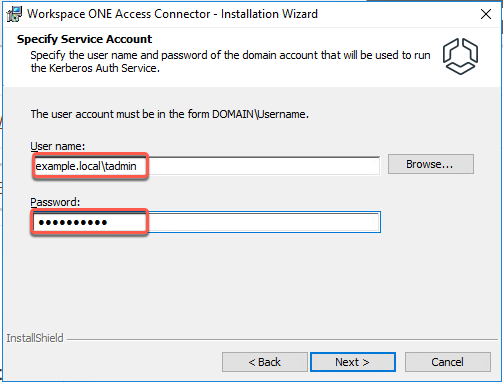
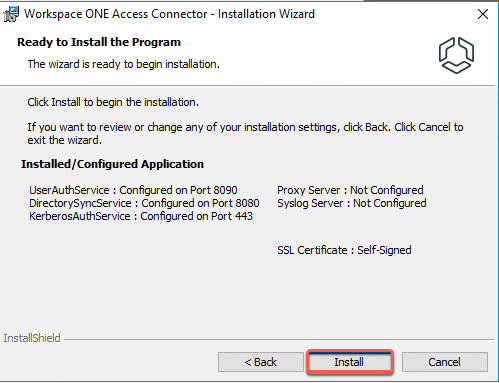
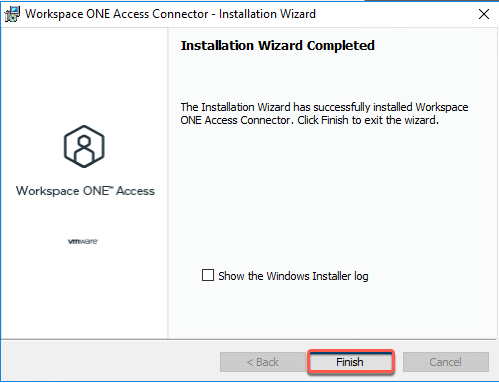
10. Confirm the Workspace ONE Access Connector installer version and install it on a Windows Server which you have prepared for connector machine.
Read the instruction for selecting the appropriate version of Workspace ONE Access connector.

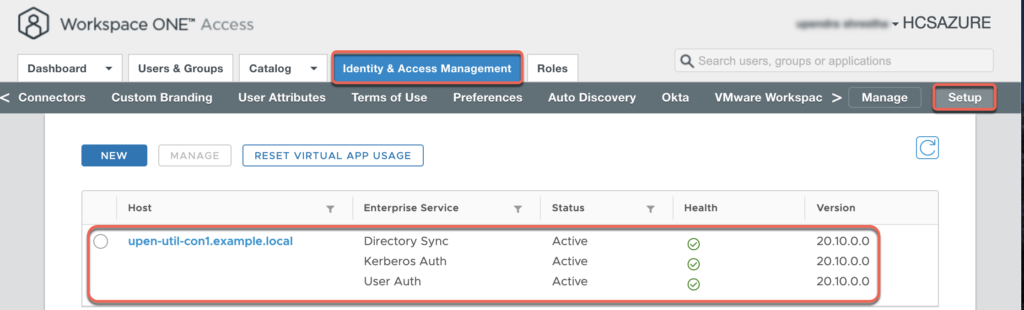
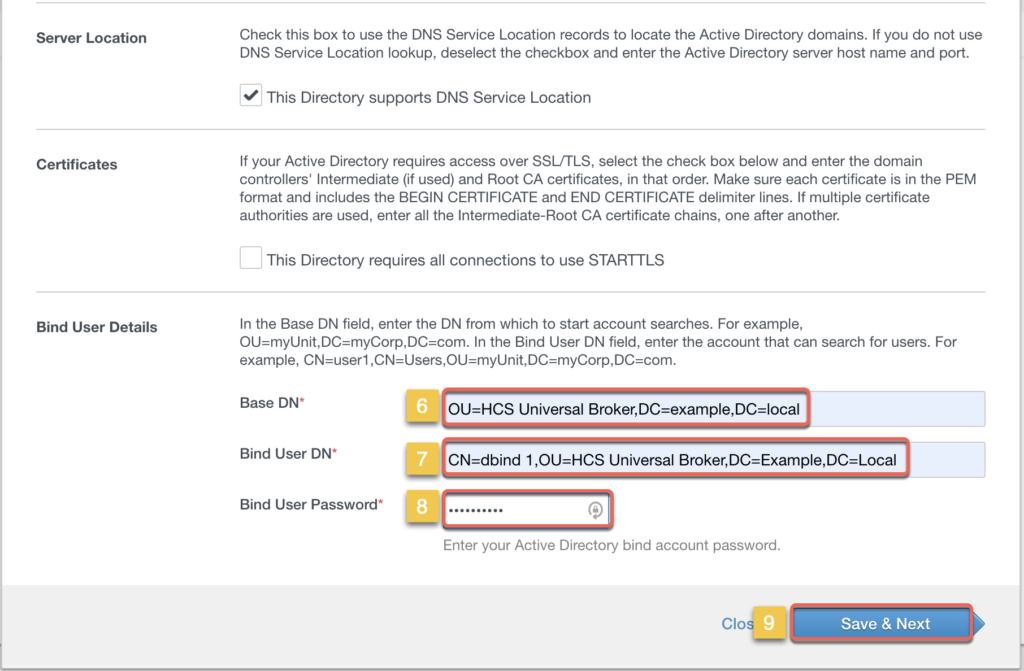
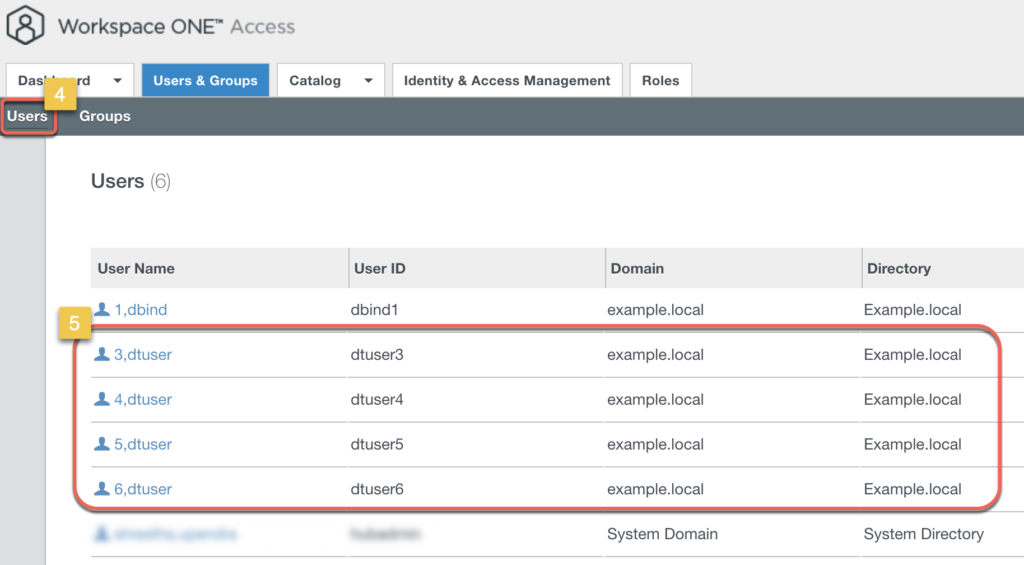
11. Configuration of the directory, groups and users.
Confirm the connector status before proceeding the directory configuration.
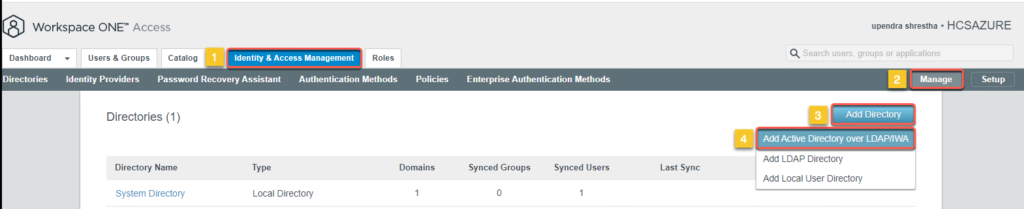
Navigate to [Identity & Access Management] > [manage] > [Add Directory] > [Add Active Directory Over LDAP/IWA].
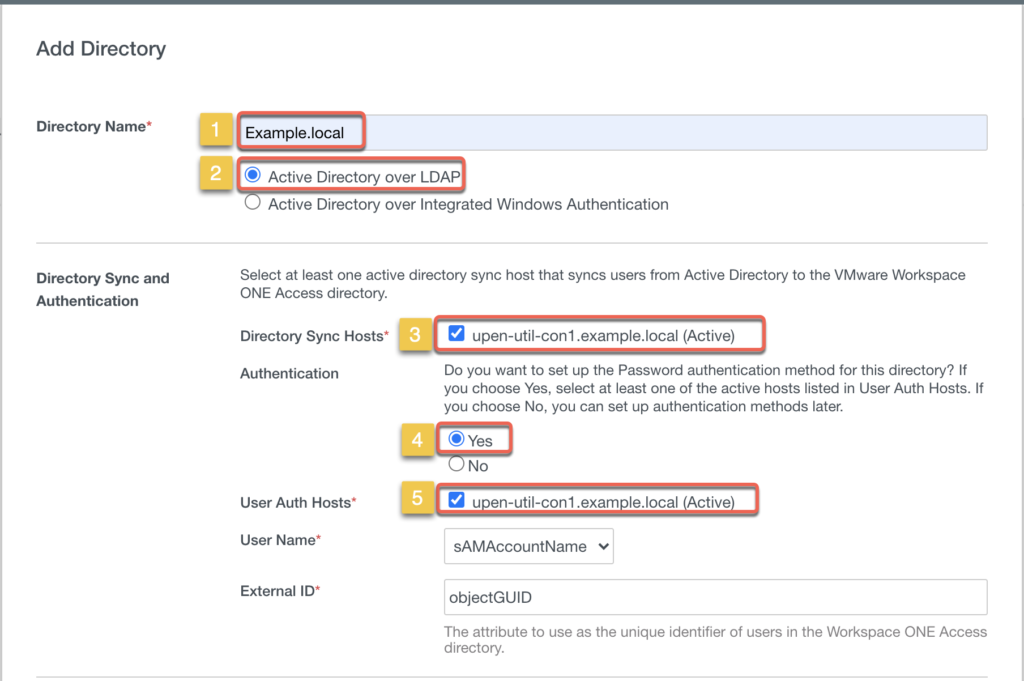
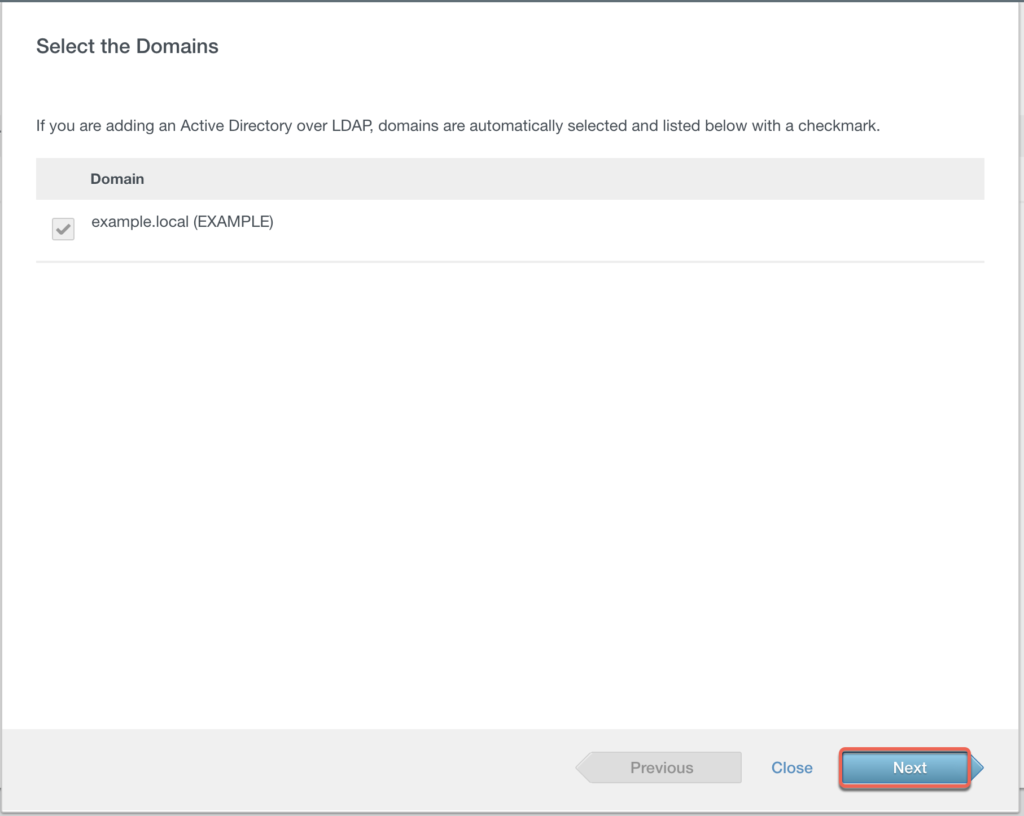
Provide the required information (1-9) > select [Save and Next] > [Next]
Define the Groups of users which need to have the access to Horizon Cloud Desktops/App resources > [Next].
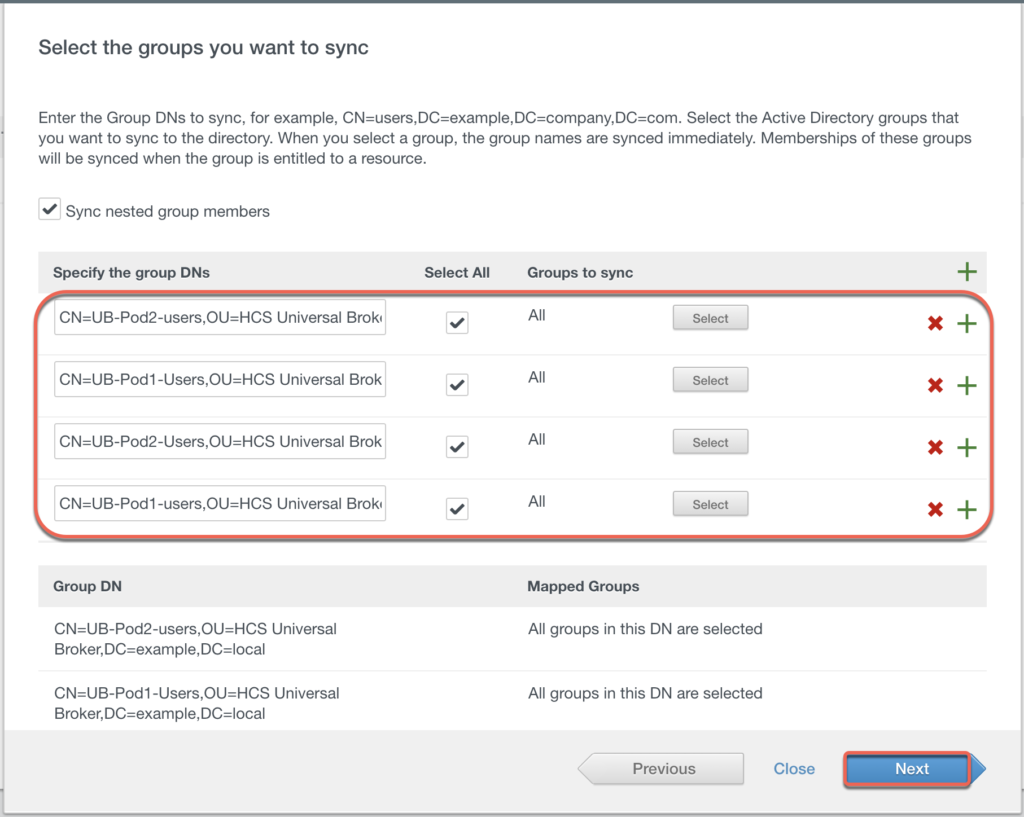
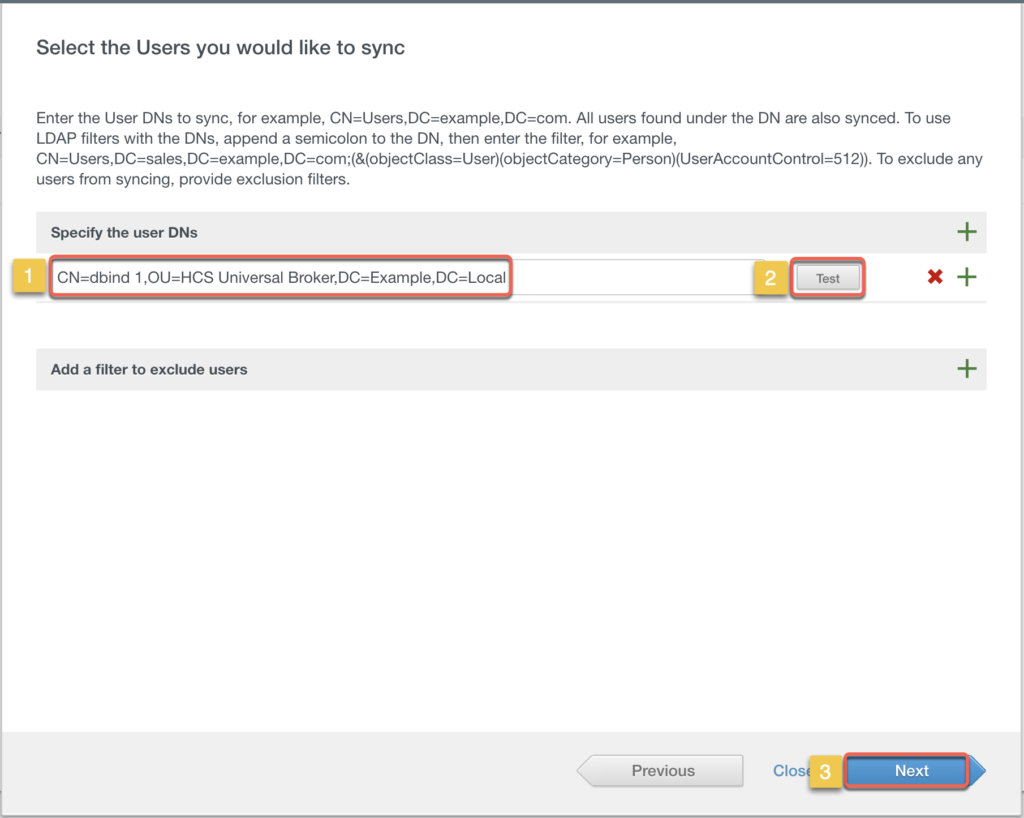
Specify the user DNs > [Test] > [Next].
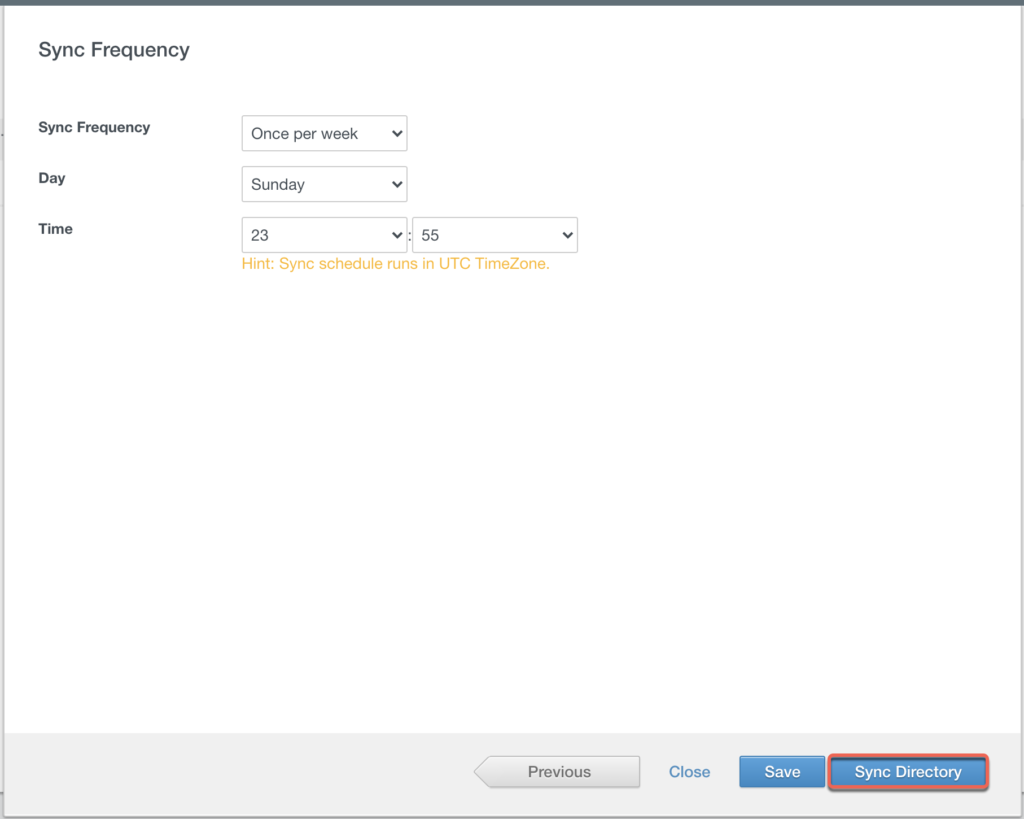
Select [Save] > [Sync Directory] and confirm sync log.
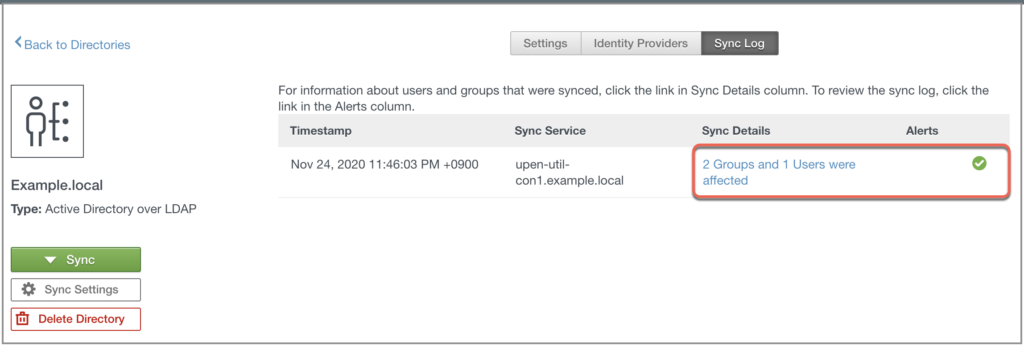
Verify the intended users and groups are sync correctly.
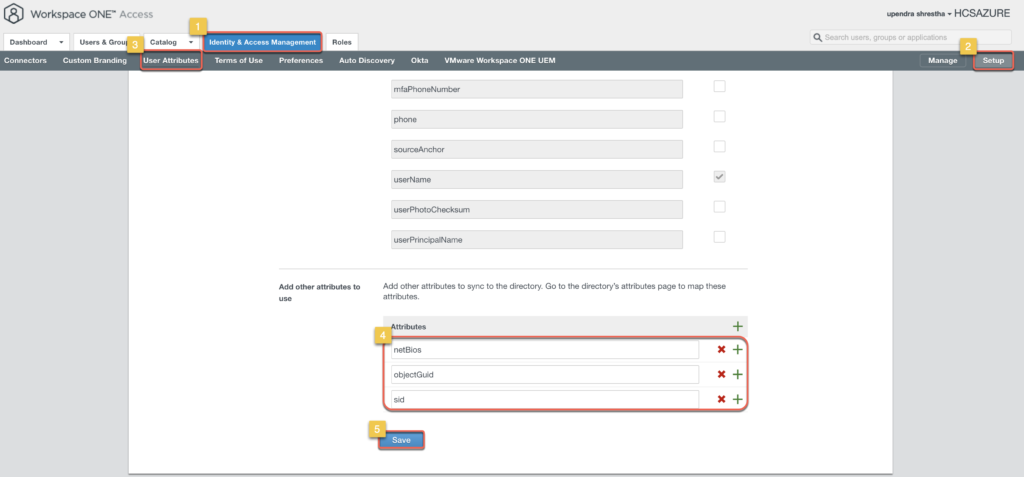
12. Configuration of User Attributes.
Navigate to [Identity and Access Management] > [Setup] > [User Attributes] and add netBios, objectGuid, sid (case sensitive) > Save.
Additional information can be found here.
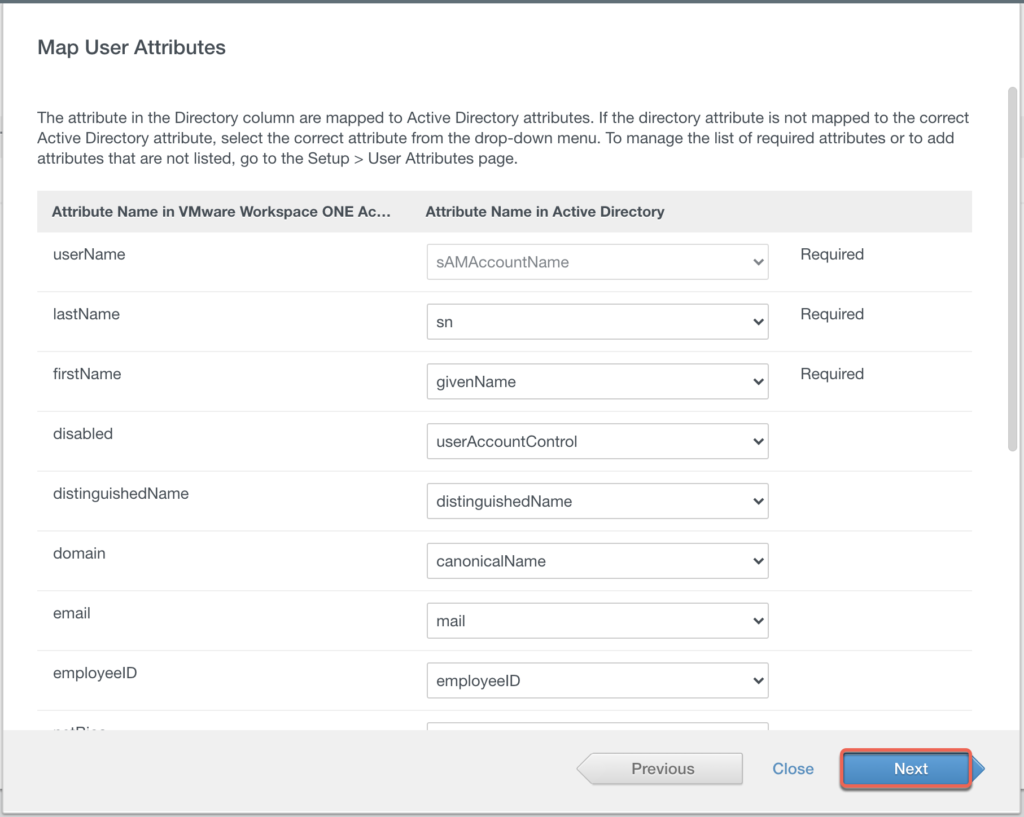
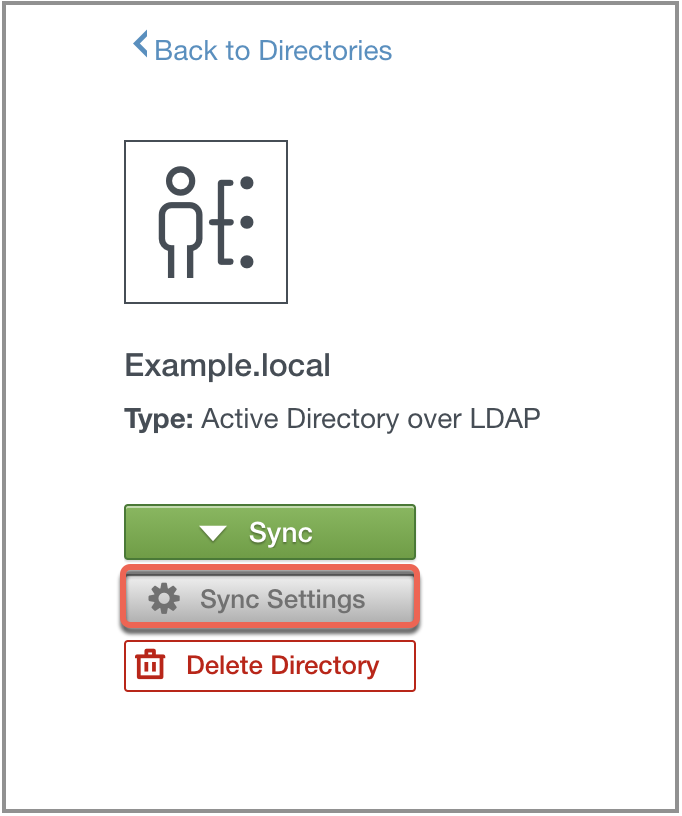
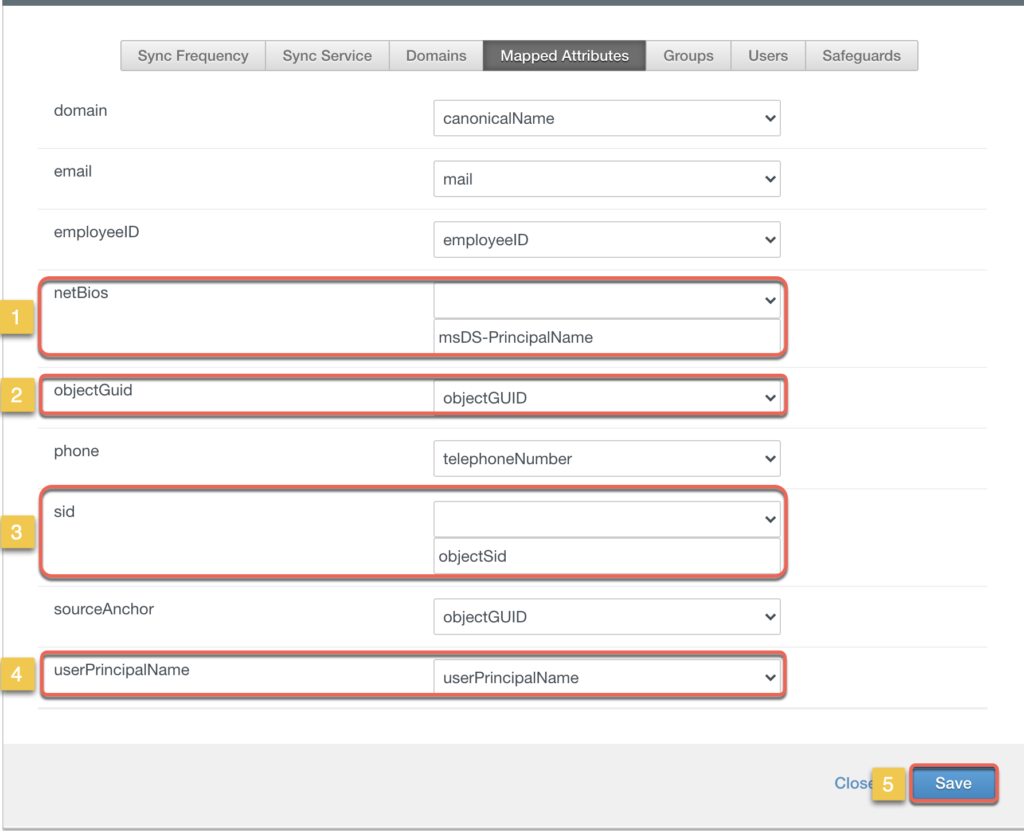
13. Configuration of Mapped Attributes.
Navigate to [Identity and Access Management] > [Manage] > Select your Directory from the list. “Example.local” in my case.

Select [Sync Settings] > [Mapped Attributes] and provide the required information (1-4) > [Save].
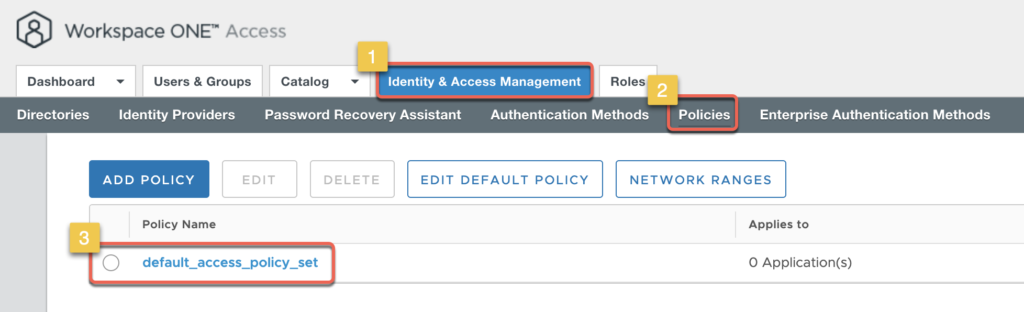
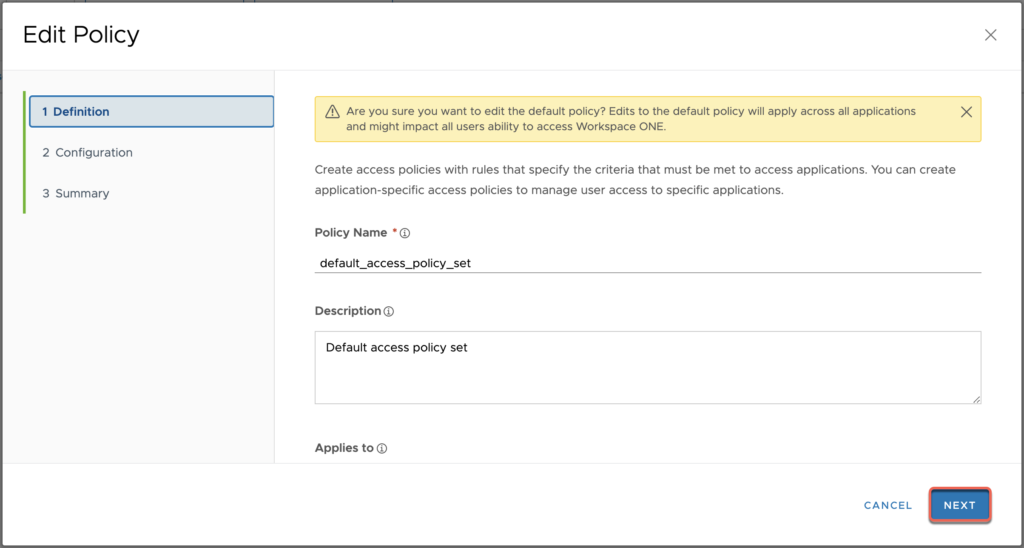
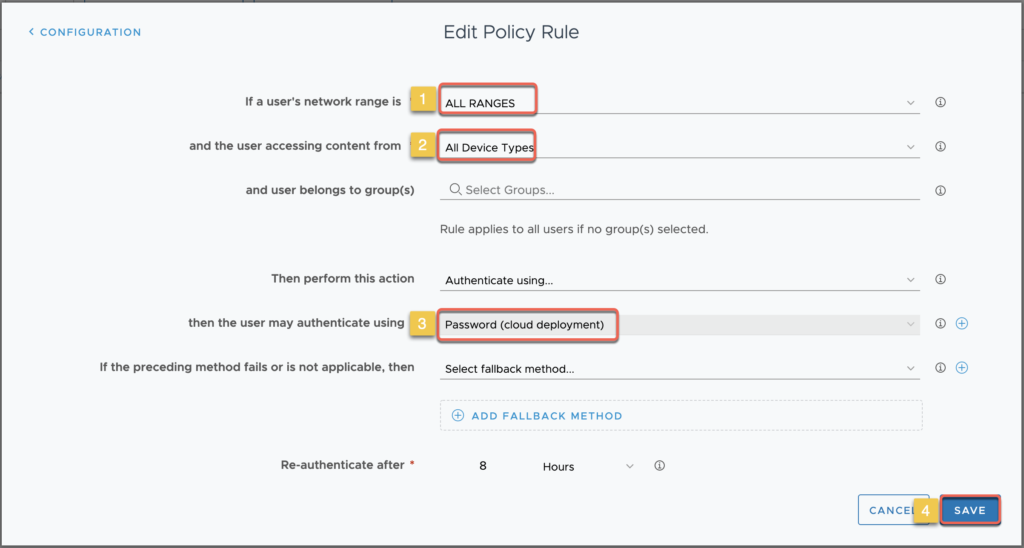
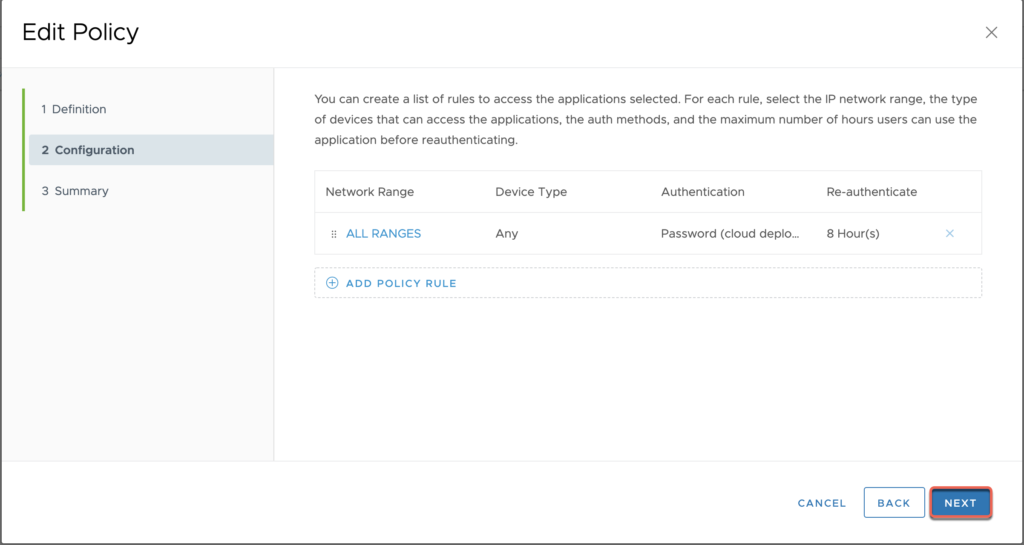
14. Configuration of Access Policy.
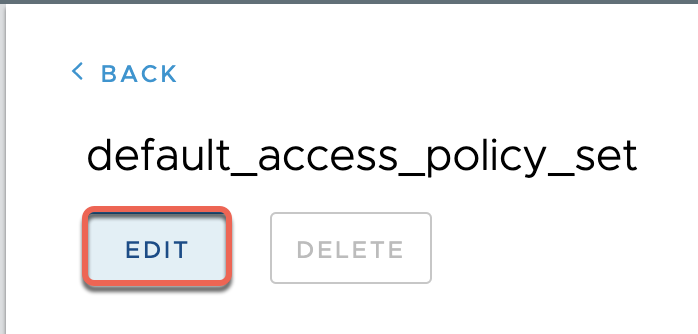
Navigate to [Identity and Access Management] > [Policies] > [default_access_policy_set] > [Edit]
Select [ALL RANGES] in section “2. Configuration”

Set the policy rules > [Save] > [Next] > Save.

Connectivity Test
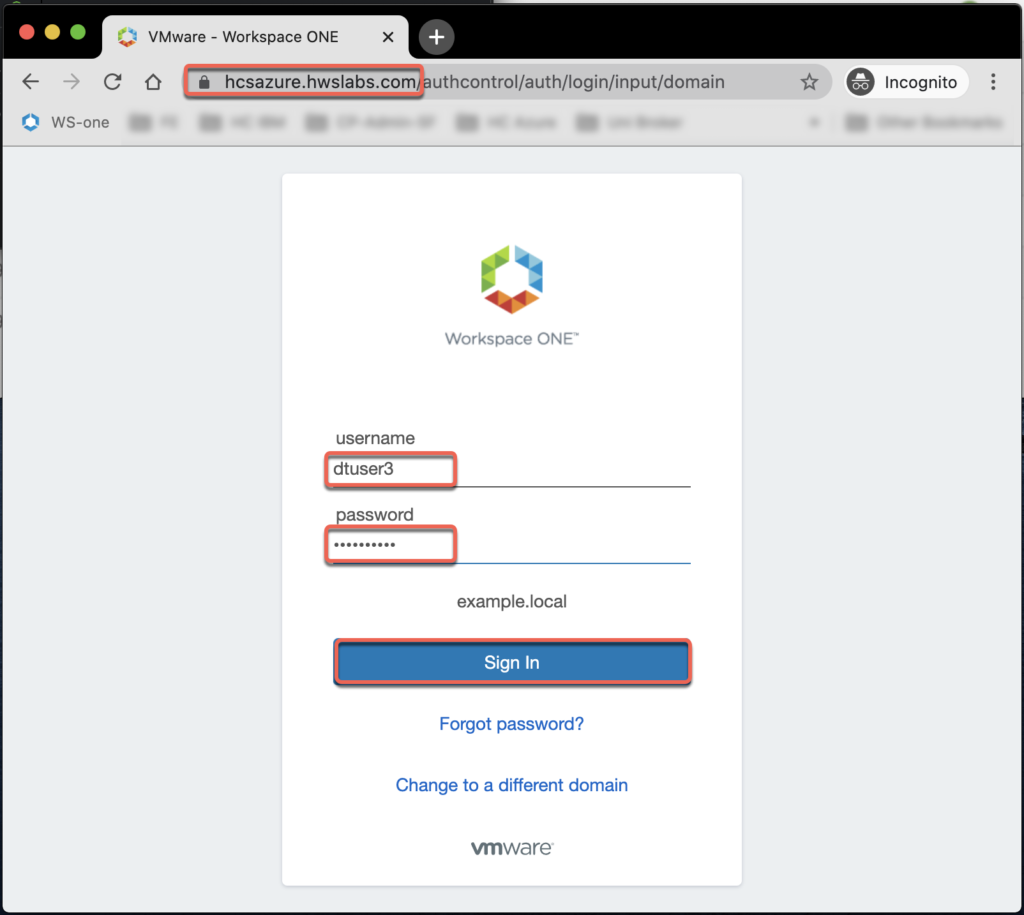
15. Access Workspace ONE Access user portal (“https://hcsazure.hwslabs.com” in my case) from browser of your choice and sign in with Active Directory username and password.
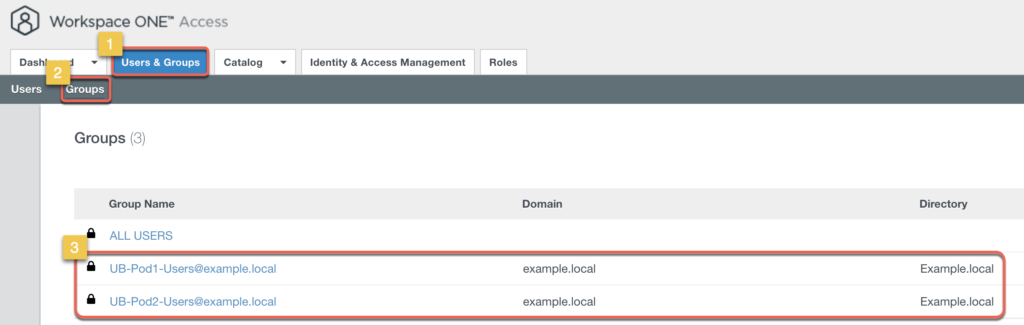
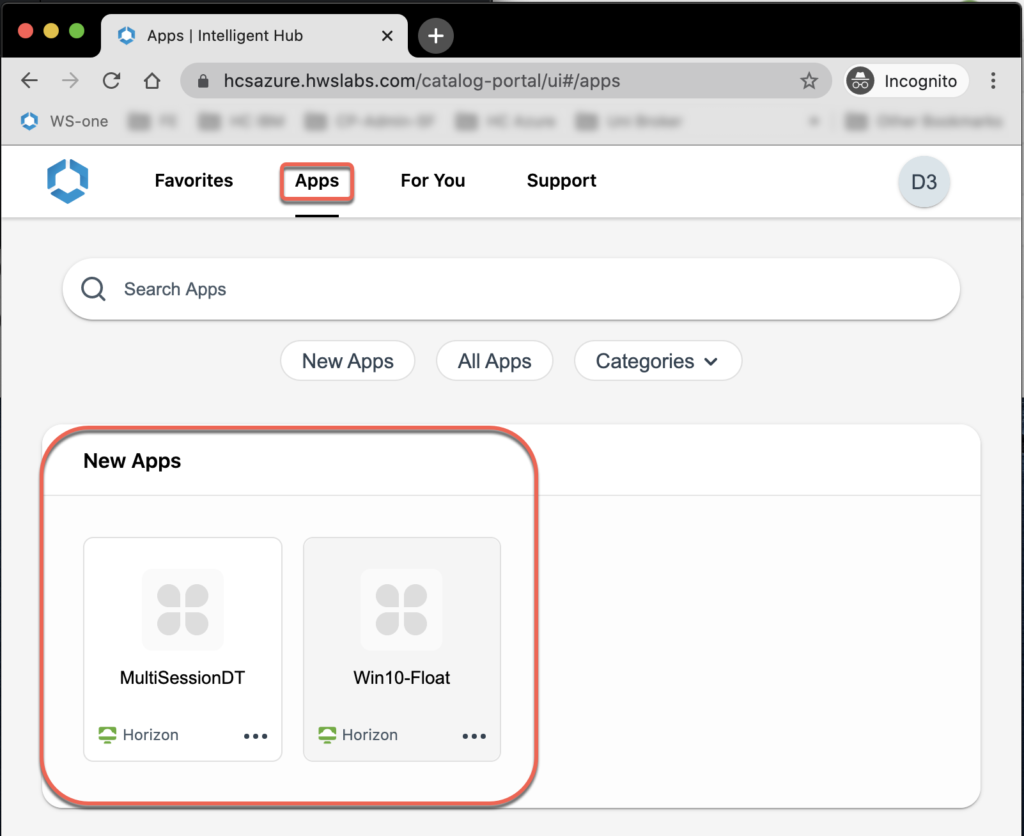
16. Navigate to [Apps] and confirm desktops and/or Apps in the list which are entitled to the user on Horizon Cloud POD. There are 2 desktops entitled to the user in my case.
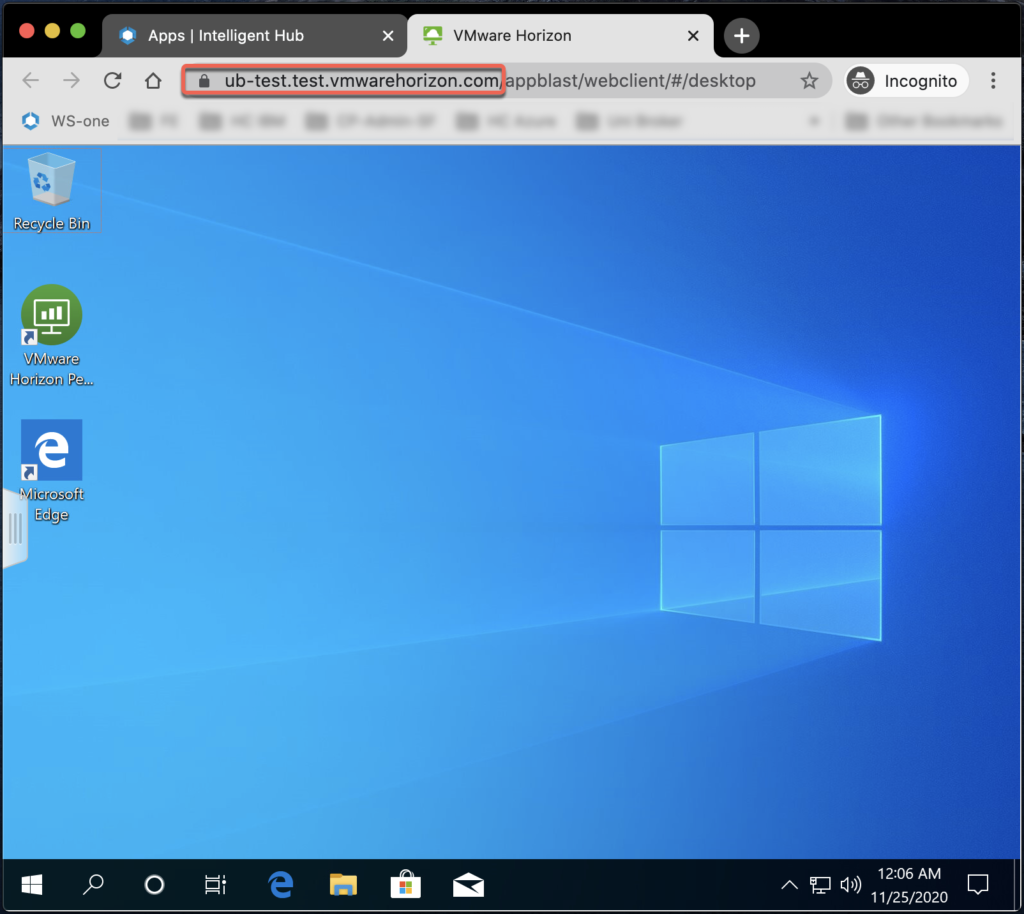
17. Launch the desktop from Browser or Horizon Client.
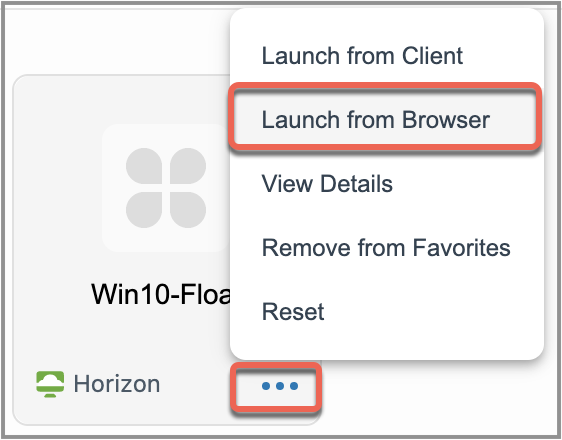
18. Confirm you are able to successfully launch the desktop. As seen in the address bar the user is redirected to Universal Broker FQDN.
Video clip- launching Horizon Cloud desktop from Workspace ONE Access Hub browser.
![]()