In this post, I will explain how to deploy VMware Unified Access Gateway (UAG) in AWS EC2 instance. I am deploying the UAG with 2 NICs and UAG software version 21.03 is used.
Planning
You will need to prepare below components to proceed the deployment.
- Unified Access Gateway Software
- Install AWSPowerShell and 7Zip application on your work PC
- AWS Account and console access with adequate privilege to deploy EC2 instance
- AWS AccessKey and SecretKey
- AWS VPC/IGW/RouteTables/Subnets for UAG/Security Group for UAG/Elastic IP for UAG (prepare as per your requirement)
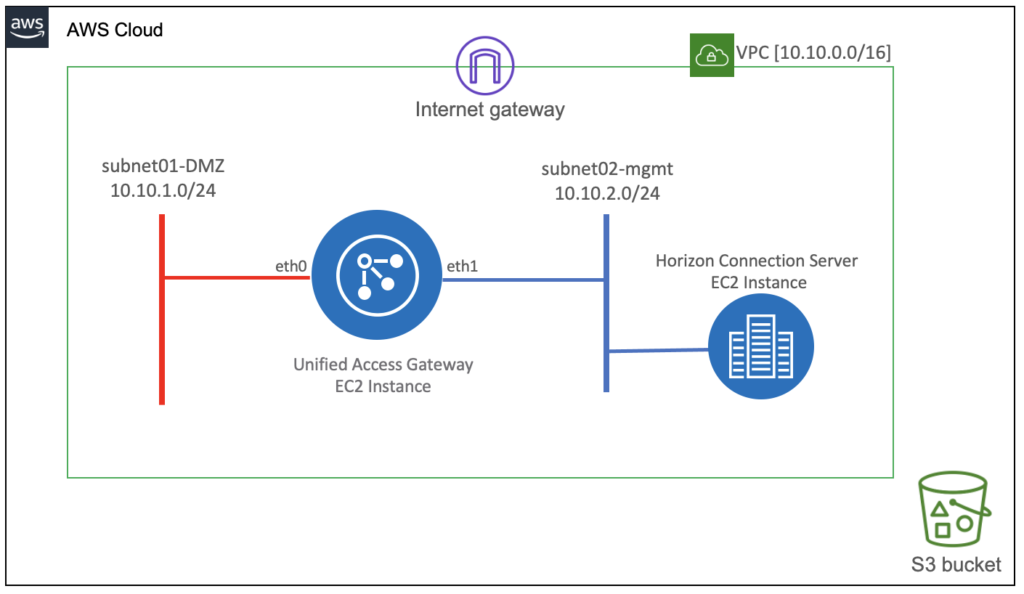
Logical Architecture: UAG with 2NICs
Preparation
1. Execute below command to install AWS PowerShell module and 7Zip on your work PC.
Install-Module -Name AWSPowerShell -Force
Install-Package 7Zip4PowerShell
2. Download the Unified Access Gateway software from myvmware.com download page.
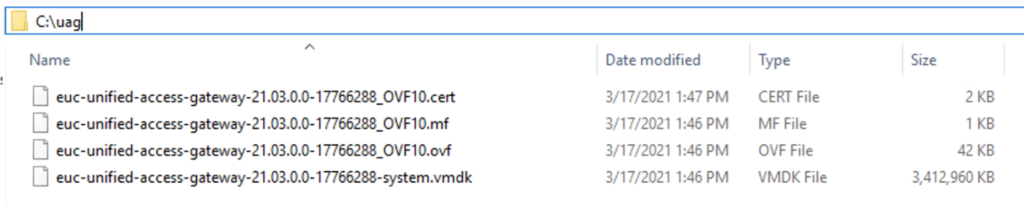
3. Extract the UAG ova file on your work PC with 7zip. In my case, I am extracting OVA under “c:\uag\” folder.
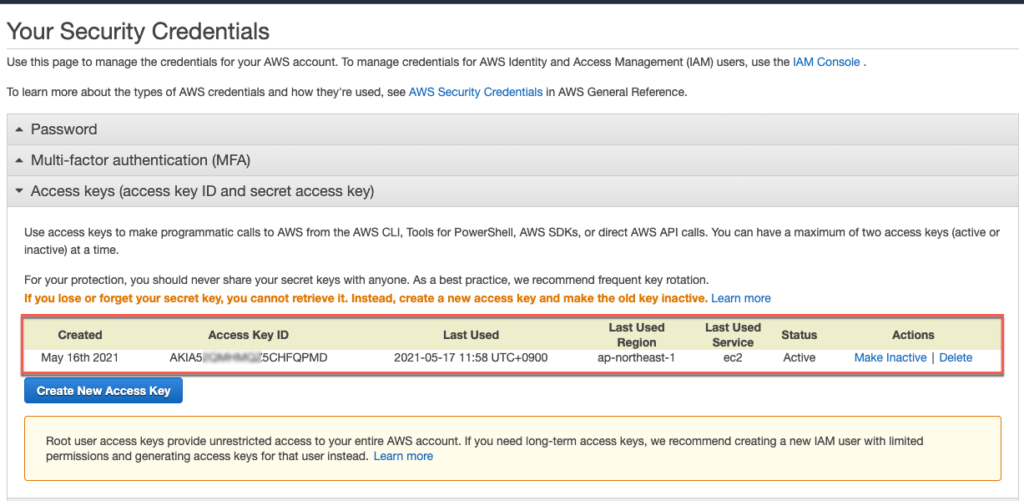
4. Login to your Amazon AWS account from web browser > Create an Access Key and obtain the Access Key ID and Secret Access Key.
5. Run Windows PowerShell on your work PC with Administrator privilege and set AWS credential in the default profile.
Set-AWSCredential -accesskey AKIA5XXXXXXX5CHFQPMD -secretkey bdug0imV2XXXXXXXXXXXXX9I9rnCtXc9hDrxfR0+ -Storeas default
6. Set your default AWS region.
Set-DefaultAWSRegion -Region ap-northeast-1

7. Create a bucket in Amazon S3 to store UAG vmdk image if one doesn’t already exist. In my case, I am creating bucket with name “vmw-uag2103”.
$bucket="vmw-uag2103"
New-S3Bucket -BucketName $bucket -Region ap-northeast-1
Creating Amazon Machine Image (AMI)
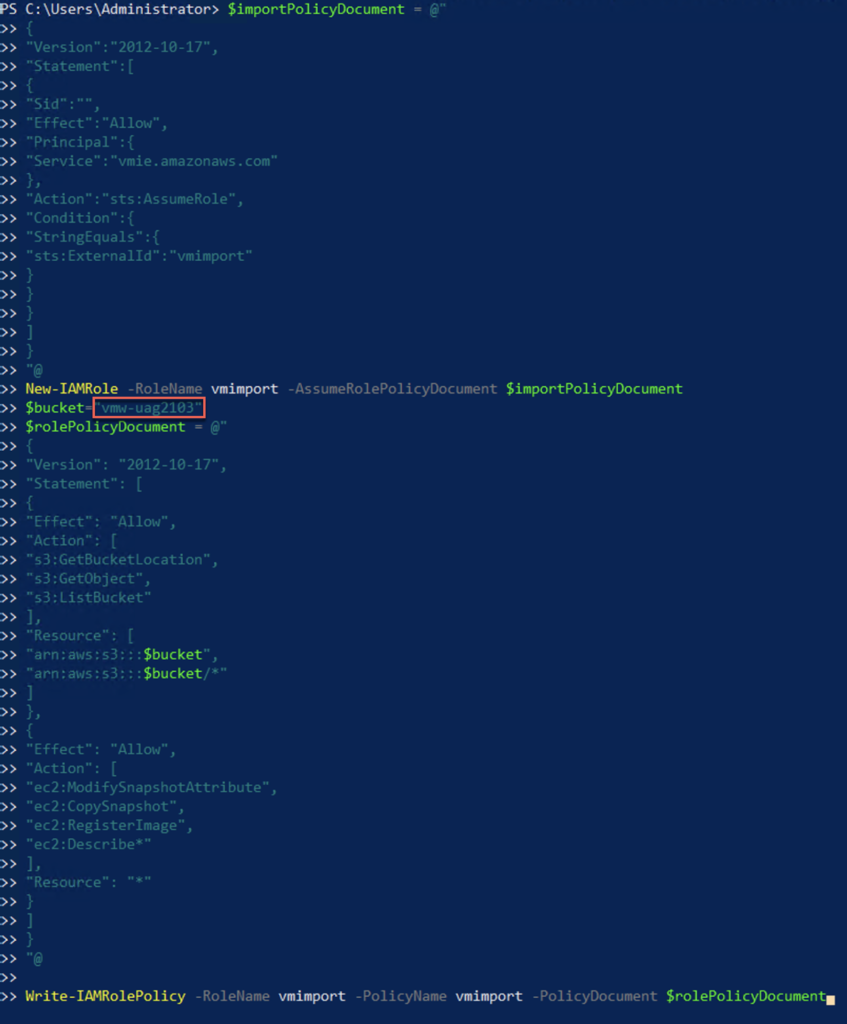
8. Create an IAM role in Amazon AWS called “vmimport” and apply a policy to the role.
$importPolicyDocument = @"
{
"Version":"2012-10-17",
"Statement":[
{
"Sid":"",
"Effect":"Allow",
"Principal":{
"Service":"vmie.amazonaws.com"
},
"Action":"sts:AssumeRole",
"Condition":{
"StringEquals":{
"sts:ExternalId":"vmimport"
}
}
}
]
}
"@
New-IAMRole -RoleName vmimport -AssumeRolePolicyDocument $importPolicyDocument
$bucket="vmw-uag2103"
$rolePolicyDocument = @"
{
"Version": "2012-10-17",
"Statement": [
{
"Effect": "Allow",
"Action": [
"s3:GetBucketLocation",
"s3:GetObject",
"s3:ListBucket"
],
"Resource": [
"arn:aws:s3:::$bucket",
"arn:aws:s3:::$bucket/*"
]
},
{
"Effect": "Allow",
"Action": [
"ec2:ModifySnapshotAttribute",
"ec2:CopySnapshot",
"ec2:RegisterImage",
"ec2:Describe*"
],
"Resource": "*"
}
]
}
"@

Write-IAMRolePolicy -RoleName vmimport -PolicyName vmimport -PolicyDocument $rolePolicyDocument
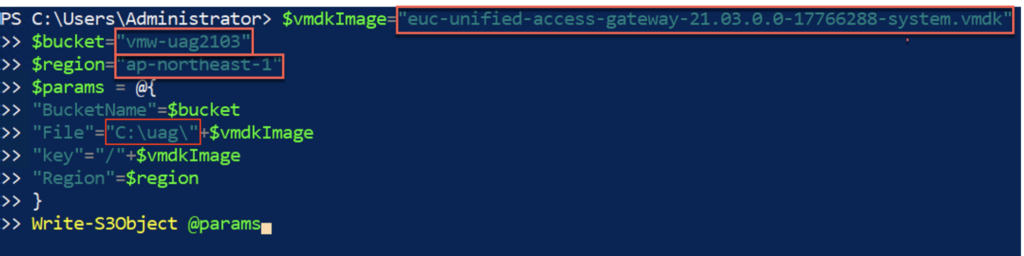
9. Upload *.vmdk image into the S3 bucket.
$vmdkImage="euc-unified-access-gateway-21.03.0.0-17766288-system.vmdk"
$bucket="vmw-uag2103"
$region="ap-northeast-1"
$params = @{
"BucketName"=$bucket
"File"="C:\uag\"+$vmdkImage
"key"="/"+$vmdkImage
"Region"=$region
}
Write-S3Object @params
10. Import EC2 Snapshot.
$params = @{
"DiskContainer_Format"="VMDK"
"DiskContainer_S3Bucket"=$bucket
"DiskContainer_S3Key"=$vmdkImage
"Region"=$region
}
$impId=Import-EC2Snapshot @params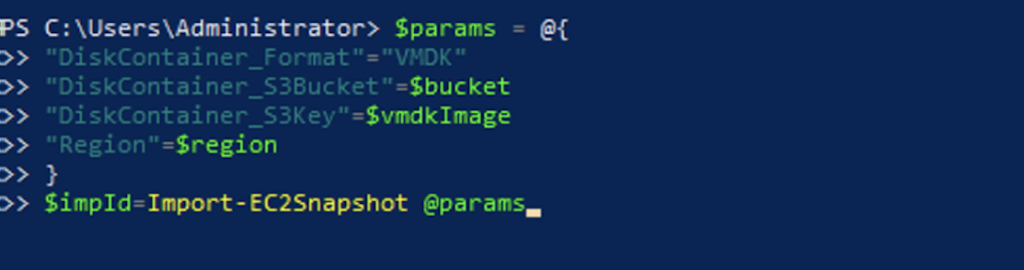
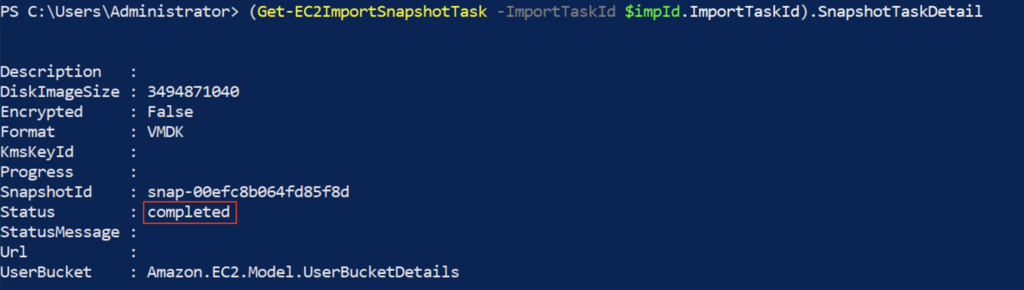
11. You can check the upload progress with below command.
Note: It may take sometime to create the snapshot. Wait until the status is showing as “completed“.
(Get-EC2ImportSnapshotTask -ImportTaskId $impId.ImportTaskId).SnapshotTaskDetail
12. You can confirm snapshotID with below command (optional).
(Get-EC2ImportSnapshotTask -ImportTaskId $impId.ImportTaskId).SnapshotTaskDetail.SnapshotId

13. Register the UAG image as an Amazon Machine Image (AMI).
$bdm=New-Object Amazon.EC2.Model.BlockDeviceMapping
$bd=New-Object Amazon.EC2.Model.EbsBlockDevice
$bd.SnapshotId=(Get-EC2ImportSnapshotTask -ImportTaskId $impId.ImportTaskId).SnapshotTaskDetail.SnapshotId
$bd.DeleteOnTermination=$true
$bdm.DeviceName="/dev/sda1"
$bdm.Ebs=$bd
$params = @{
"BlockDeviceMapping"=$bdm
"RootDeviceName"="/dev/sda1"
"Name"=$vmdkImage
"Architecture"="x86_64"
"VirtualizationType"="hvm"
"EnaSupport"=$true
}
Register-EC2Image @params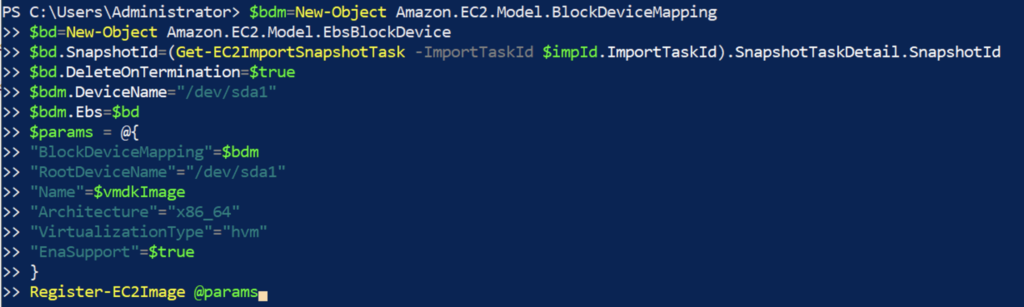
14. Go to your AWS console > AMIs and confirm your AMI exists in list.

Deploying UAG from AMI
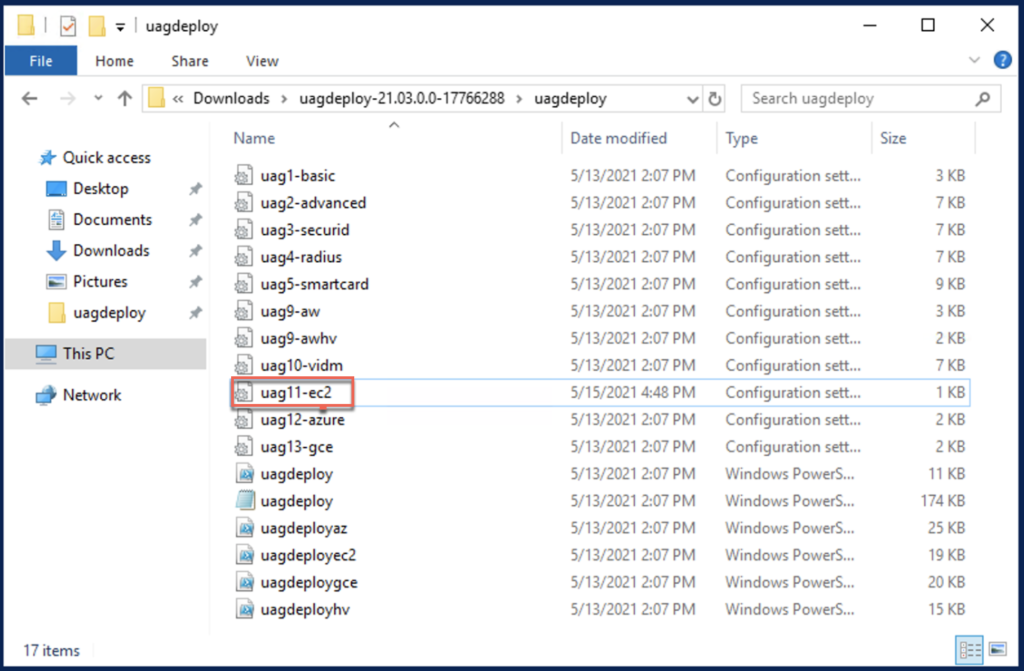
15. Download the uagdeploy PowerShell script zip file from myvmware.com download page and extract it. Zip file consists the scrip for VMware, AWS EC2 and azure deployment as well. You will see the files like below. You will need “uag11-ec2.ini”, “uagpeploy.psm1” and “uagdeployec2.ps1”.
16. Open uag11-ec2.ini file in text editor and modify it to match the UAG parameters with your AWS environment and requirement. Below is sample ini file content I am using to deploy UAG with 2 nics in my AWS environment.
Note: below configuration allows to access the UAG admin console from public internet. If you don`t want to expose UAG admin console to public internet, comment out (#) the lines “routes0=0.0.0.0/0 10.10.1.1” and “forwardrules=tcp/9443/127.0.0.1:9443”
[General]
name=UAG2103
deploymentOption=twonic
routes0=0.0.0.0/0 10.10.1.1
forwardrules=tcp/9443/127.0.0.1:9443
sshEnabled=true

[AmazonEC2]
# authentication
credentialProfileName=default

# type, region and image
instanceType=c4.large
region=ap-northeast-1

# UAG 21.03
amiId=ami-08c5d976ef679e70c

# eth0 settings
subnetId0=subnet-093a2c66725f37bc2
securityGroupId0=sg-0407737f7f0b4a6eb
publicIPId0=eipalloc-008f0d4904881242e

# eth1 settings
subnetId1=subnet-0b7532f83b1fa0ff3
securityGroupId1=sg-0407737f7f0b4a6eb
17. Once you get ready with your .ini file, run Windows PowerShell on your work PC with an Administrator privilege and set your AWS Credential in default profile if you have not done yet. (same as step: 5)
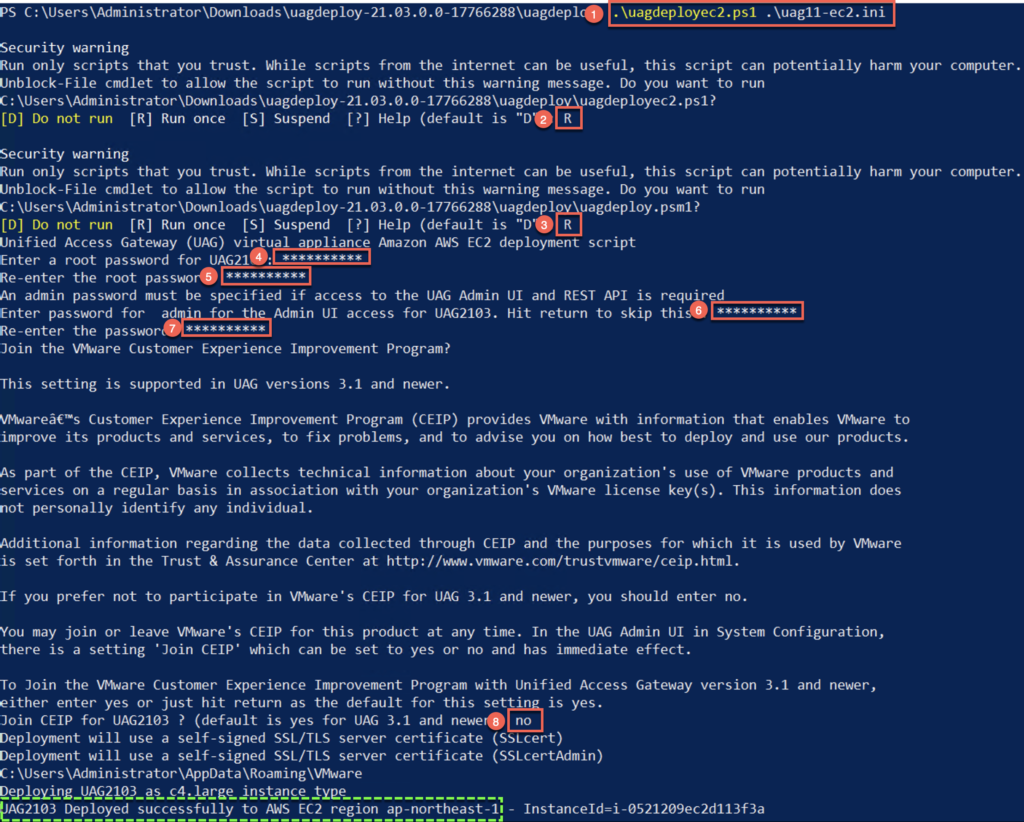
Set-AWSCredential -accesskey AKIA5XXXXXXX5CHFQPMD -secretkey bdug0imV2XXXXXXXXXXXXX9I9rnCtXc9hDrxfR0+ -Storeas default18. Execute “uagdeployec2.ps1″ PowerShell scrip by specify .ini file prepared in step# 16 and follow the on-screen instruction as highlighted below. At the end, you will see ” UAG deployed successfully to AWS EC2… ” if there is no issue with deployment.
Note: follow the steps highlighted in red.
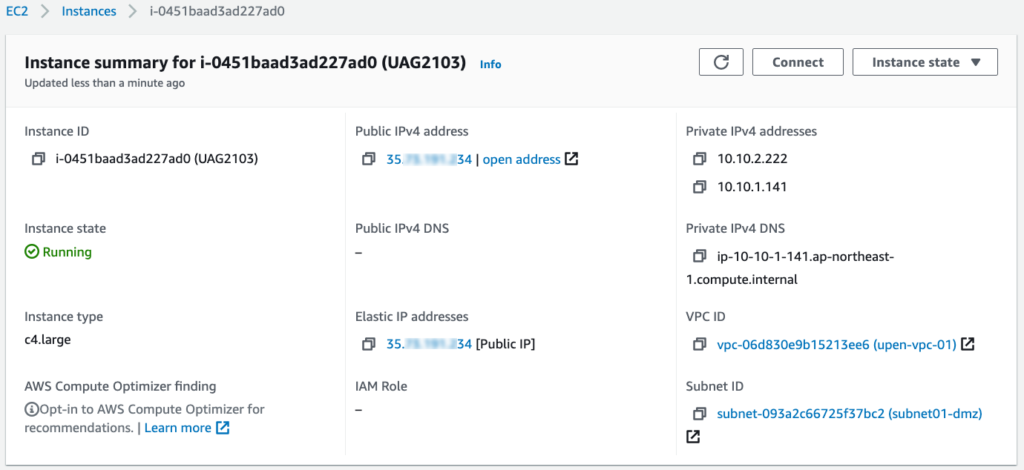
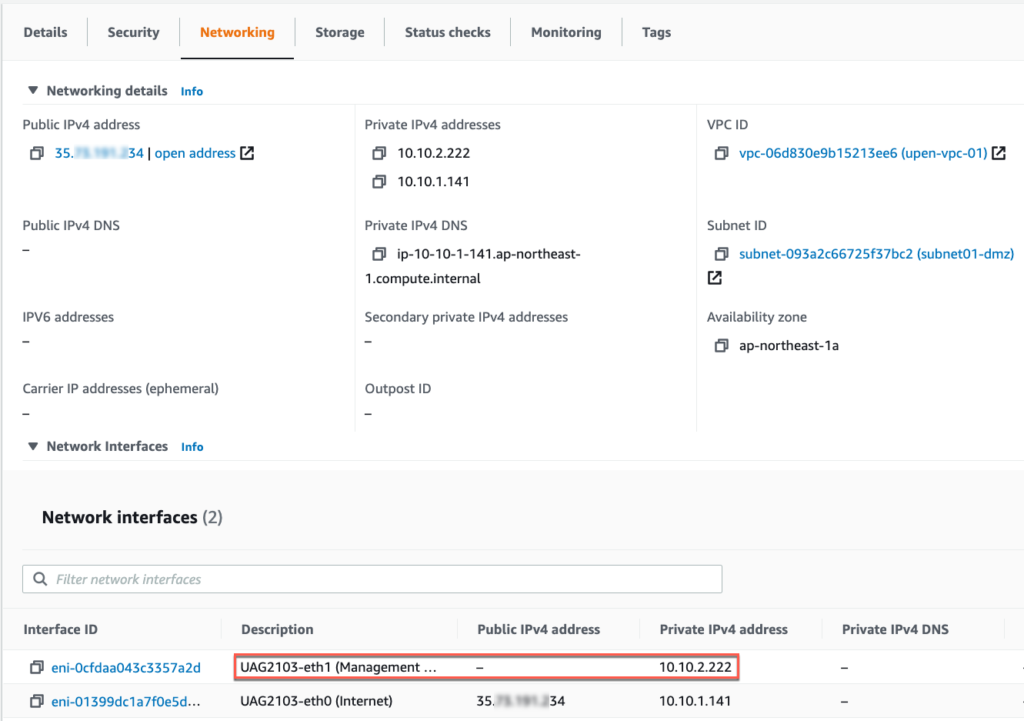
19. Login to AWS console and confirm “UAG2103” is deployed successfully. Also verify Instance State is showing as “Running”, # of vNIC , public/private IP address, security groups etc.

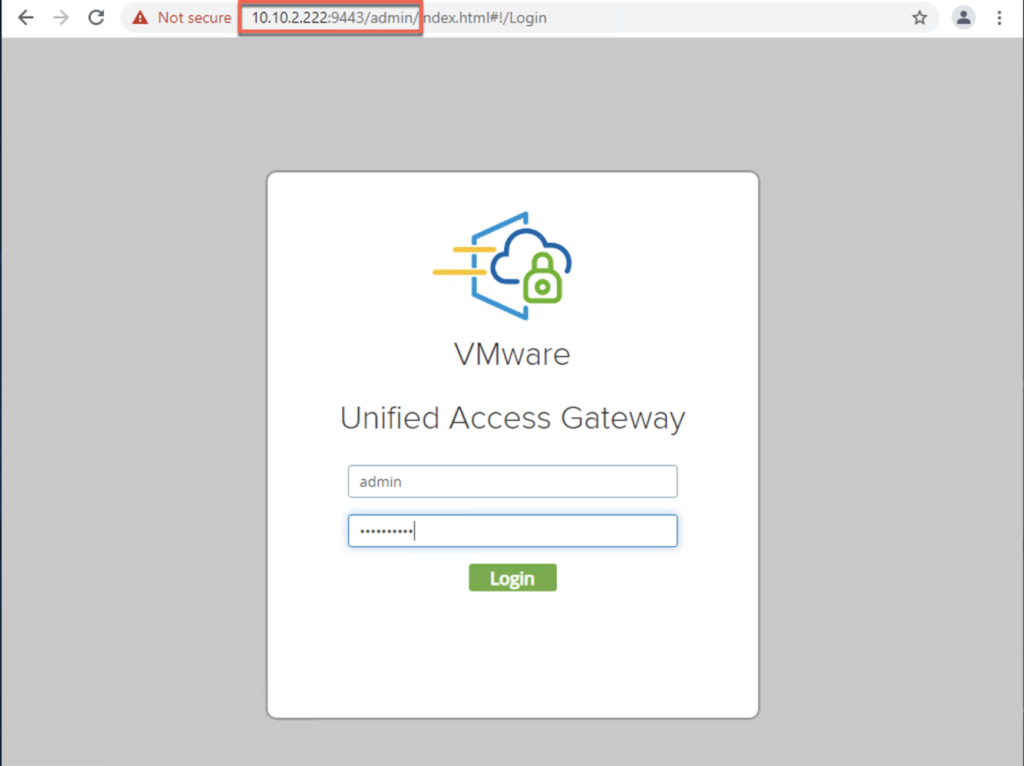
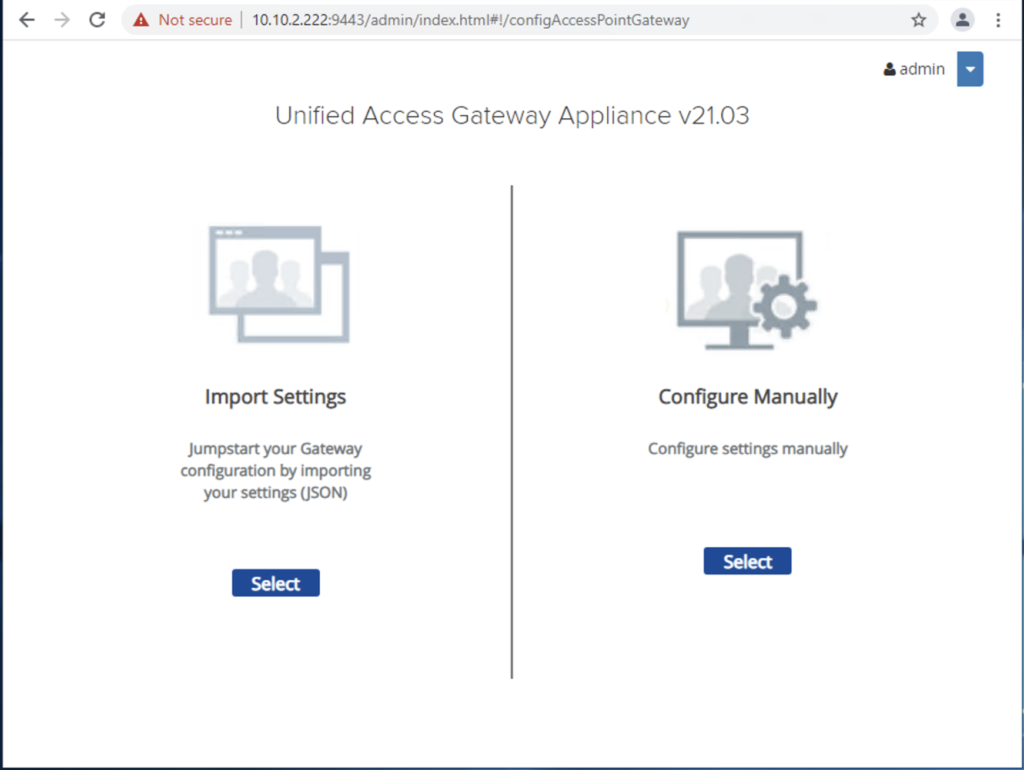
20. Access UAG admin console on web-browser with https://uag-ip or FQDN:9443/admin and proceed the configuration according to your requirement.
![]()