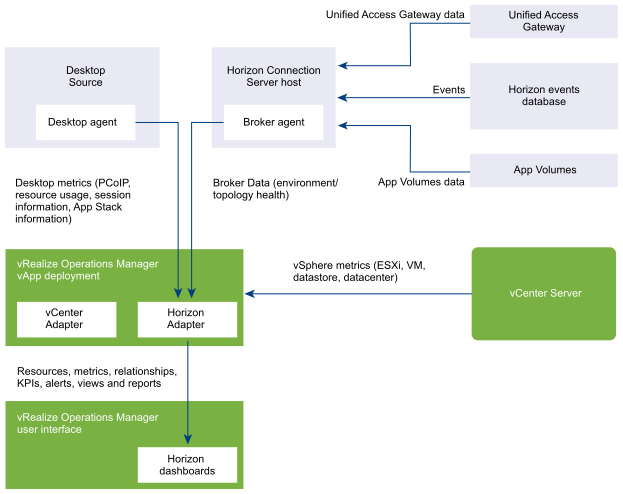
There are many moving components in Horizon deployment. Monitoring the health and performance of those moving components are always a challenging job for administrators. vROPs helps administrators provide metrics of health, performance and utilization of Horizon stack as well as underlying infrastructures in simplified visual format.
In this post I’ll provide the guidance on how to deploy and configure vROPs for Horizon. This post is based on Horizon on VMware Cloud on AWS (VMC) deployment however there is no significant different with Horizon on-premises deployment.
vRealize Operations (vROPs) Manager Architecture for Horizon
Release Notes Docs VMware
Reference Architecture Docs VMware
Compatibility Guide Docs VMware
Sizing Tool Docs VMware
vROPs for Horizon Sizing Methodology
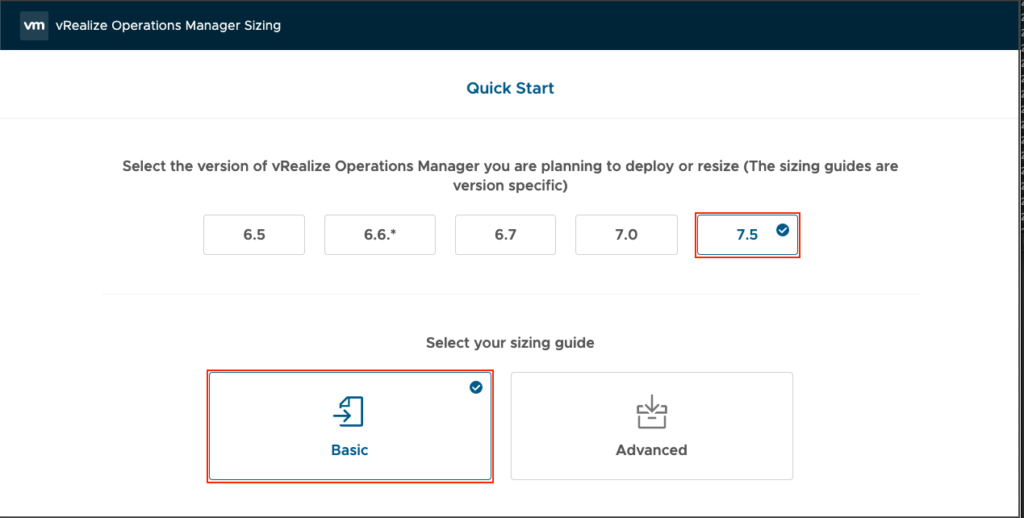
There are different deployment models available for vROPs. It is always import to find the right deployment model. You can find a link Here for a sizing tool published by VMware.
- Open web-based sizing tool and select the version and sizing guide option.
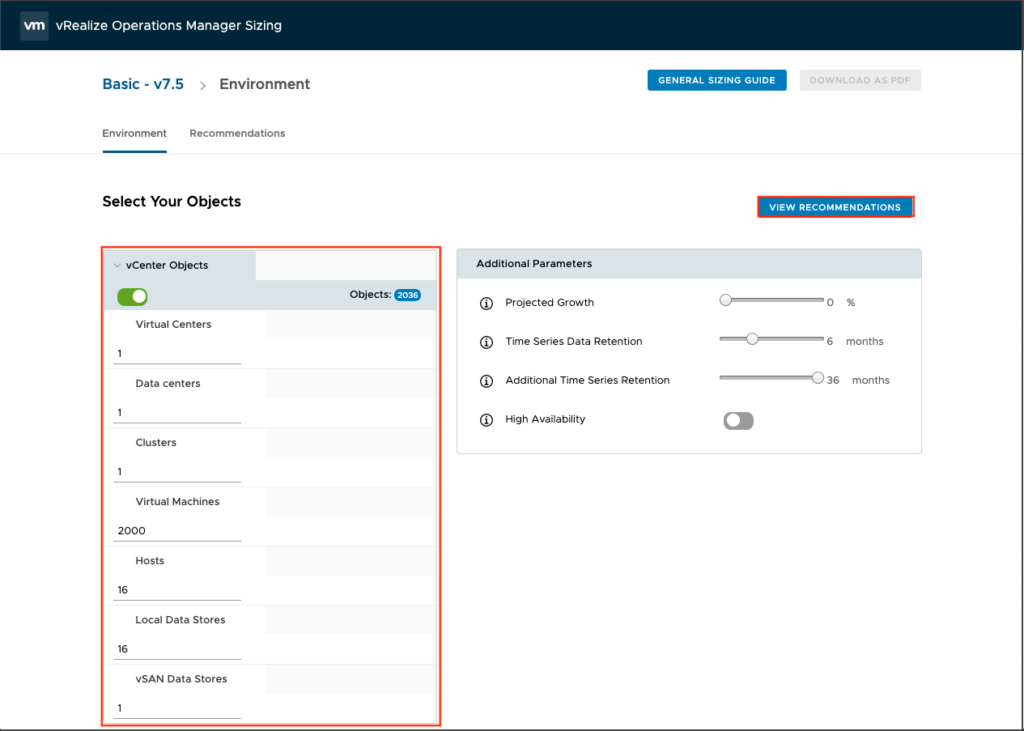
2. Fill up the details of objects and click in VIEW RECOMMENDATIONS at the right top of the page.
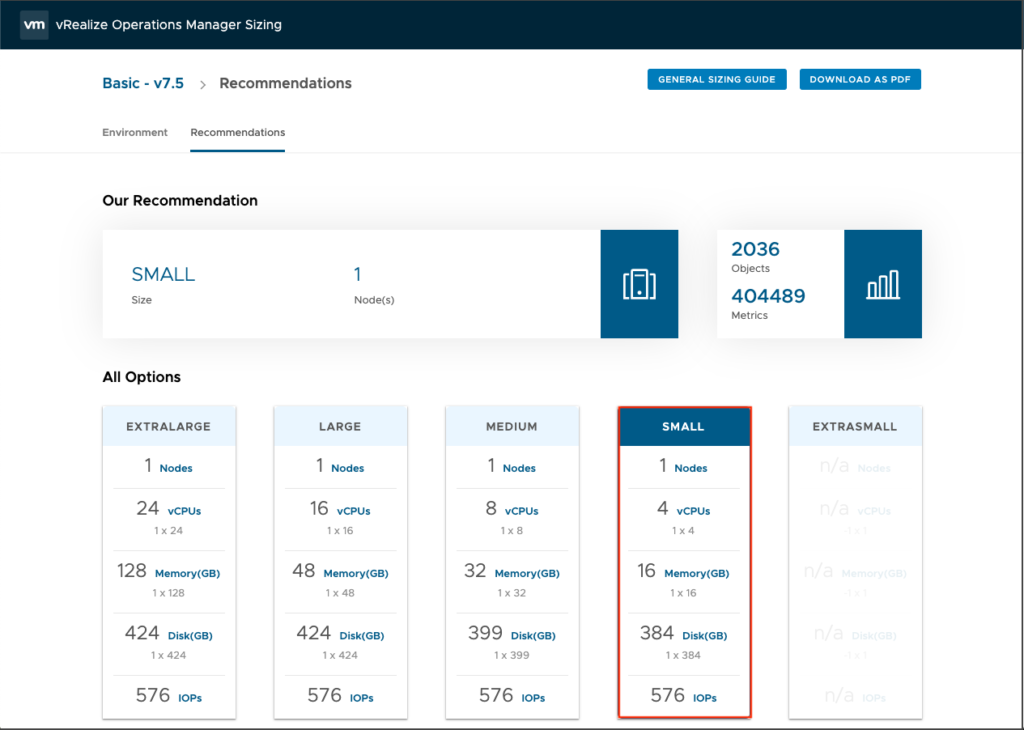
3. You will see the VMware’s recommendation as below as per detail you have entered in #2.
vRealize Operations Manager 7.5 Installation
Deployment of vROPs 7.5 Appliance
Before proceeding vROPs ovf deployment, download the vROPs ova from myvmware.com download page.

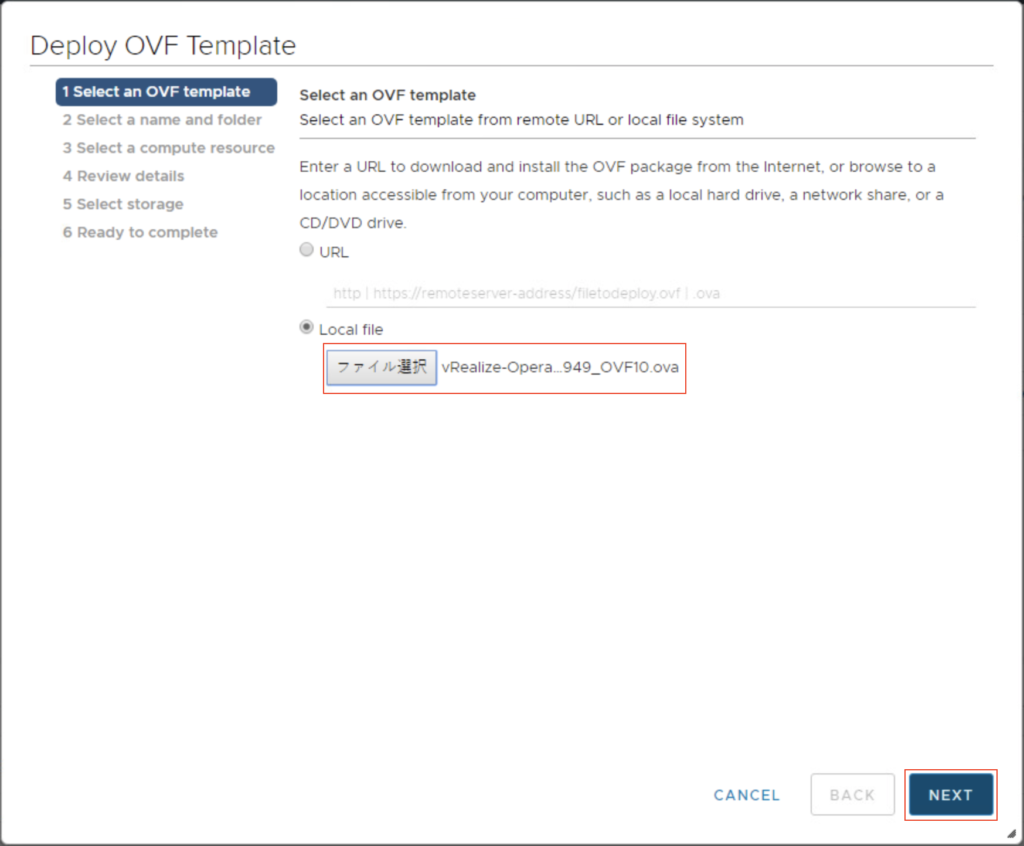
- Log into VMC vCenter web console. Open OVF deployment utility and locate the ova template you have downloaded. Select NEXT to continue.
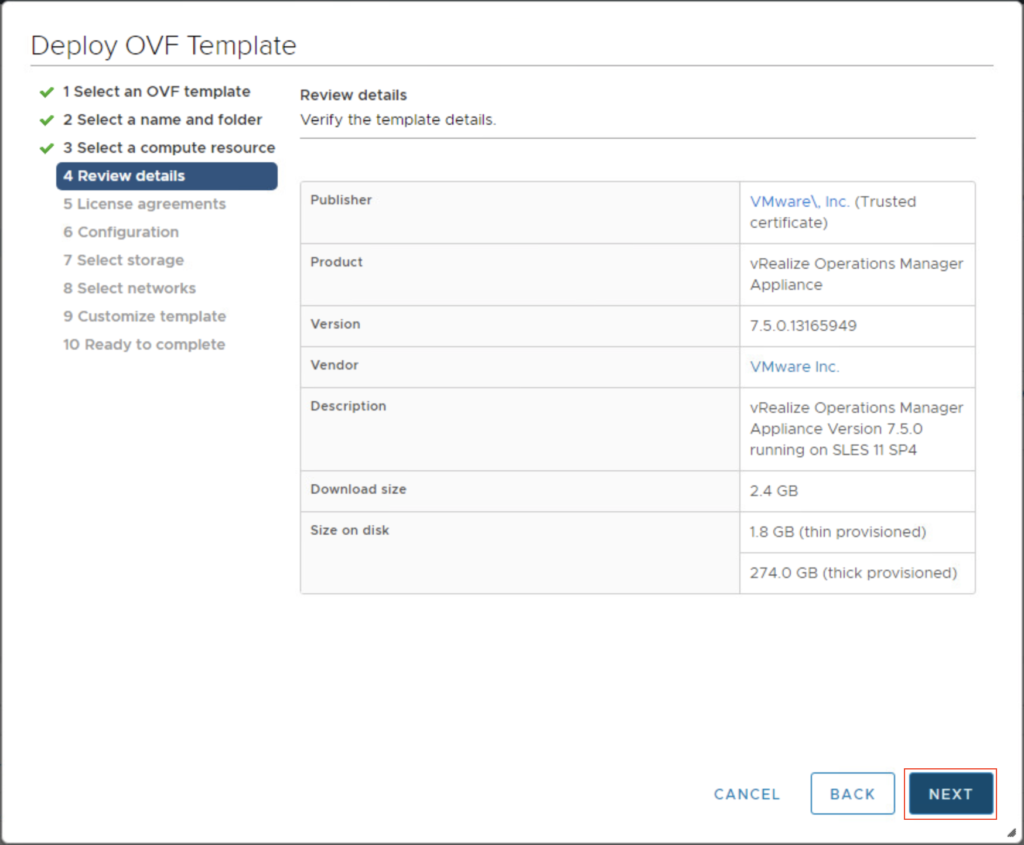
2. Confirm template detail and Select NEXT.
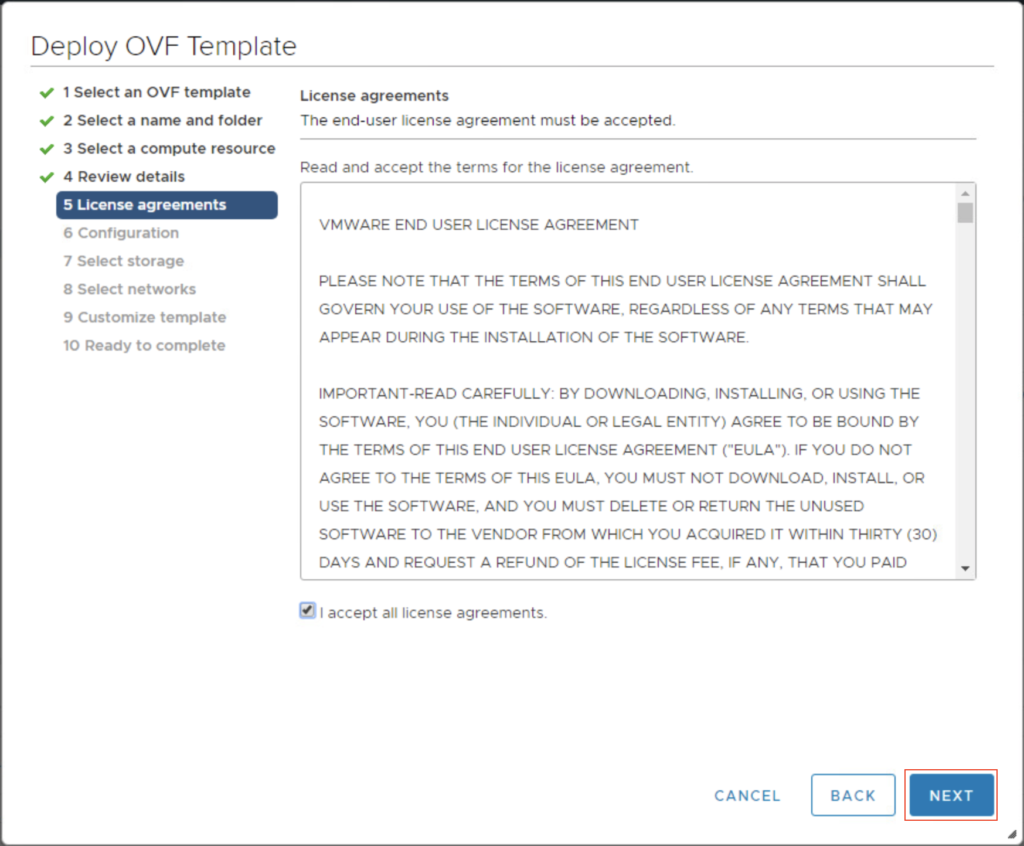
3. Accept all license agreements and select NEXT.
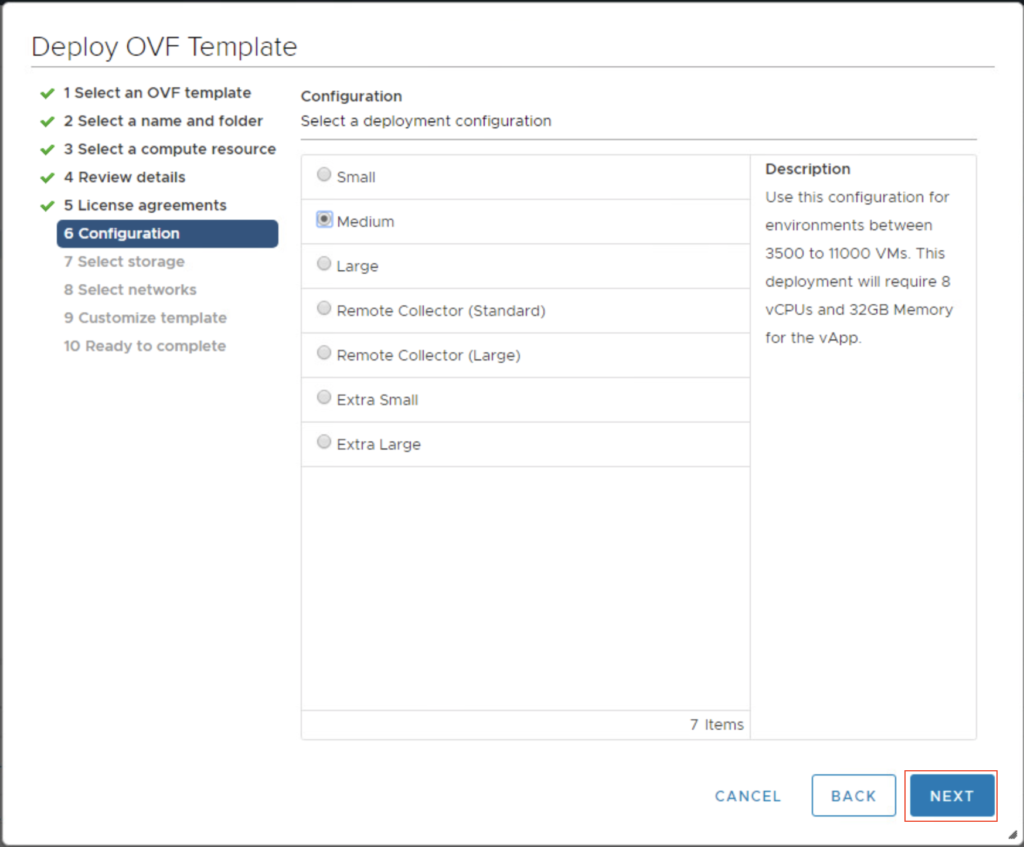
4. Select the size of deployment as per your requirement and select NEXT.
5. Select the Destination Network for vROPs appliance and select NEXT.

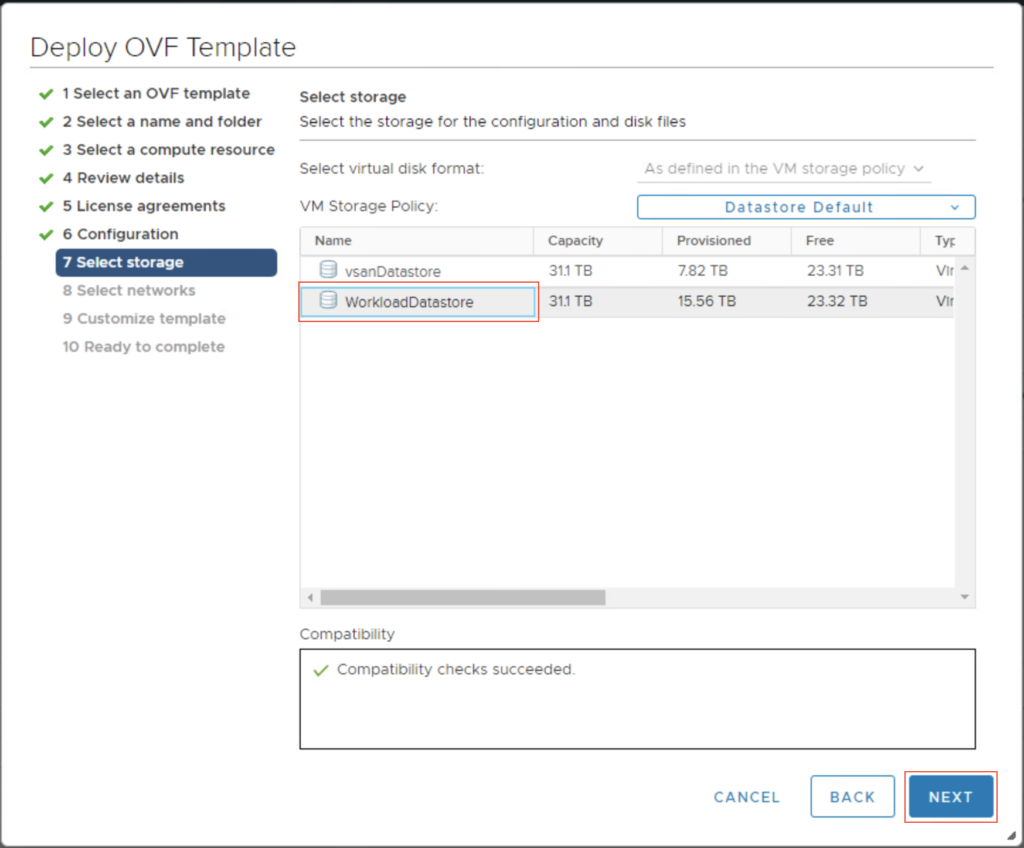
6. Select the target datastore and select NEXT.
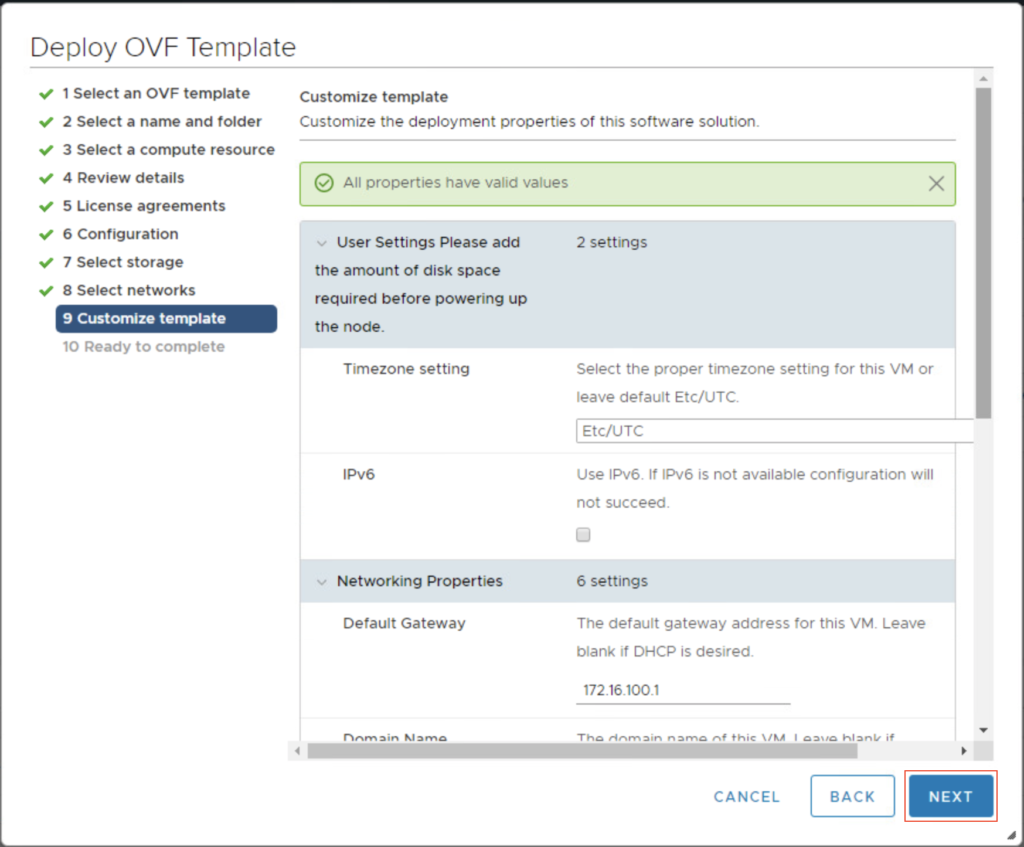
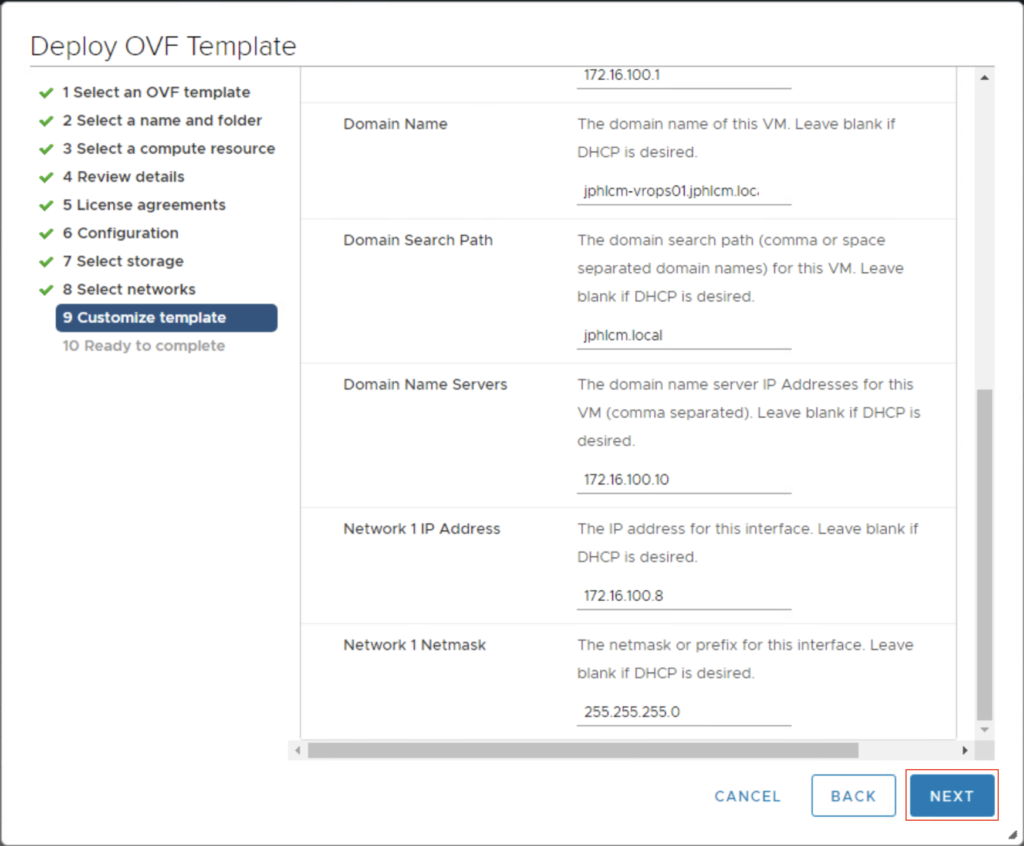
7. Enter all the necessary information to customize your deployment and select NEXT.
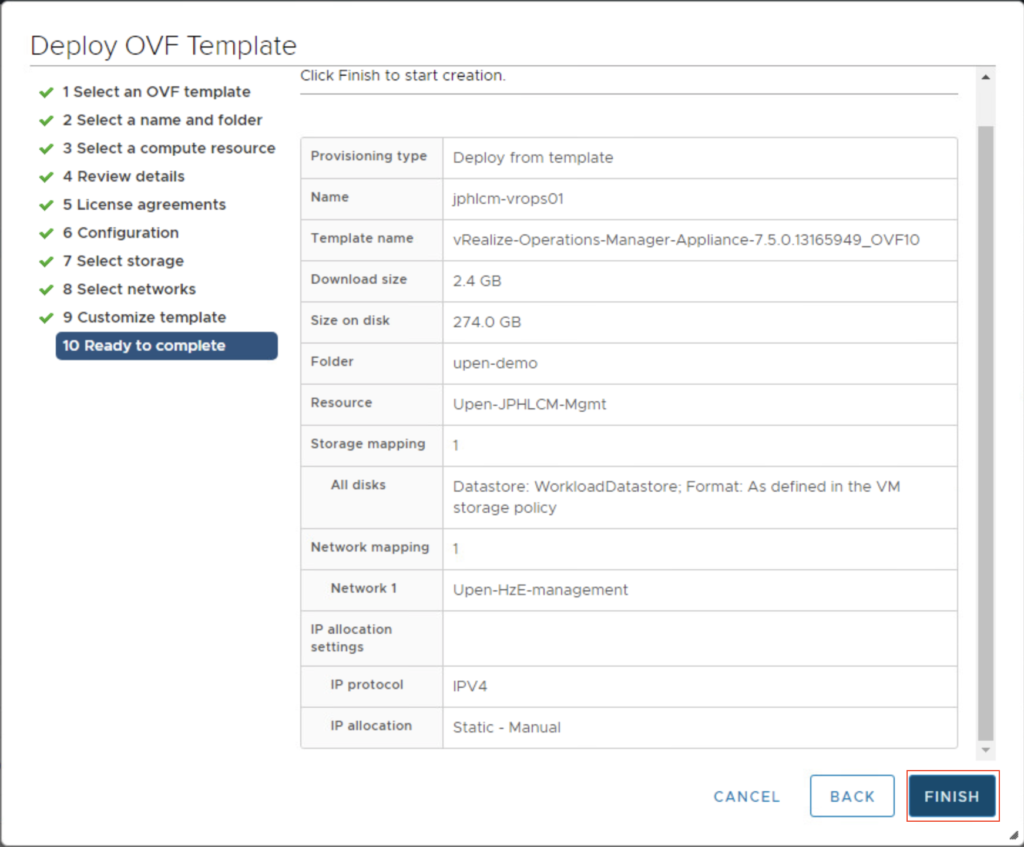
8. Verify the configuration and select FINISH to proceed the ova deployment.
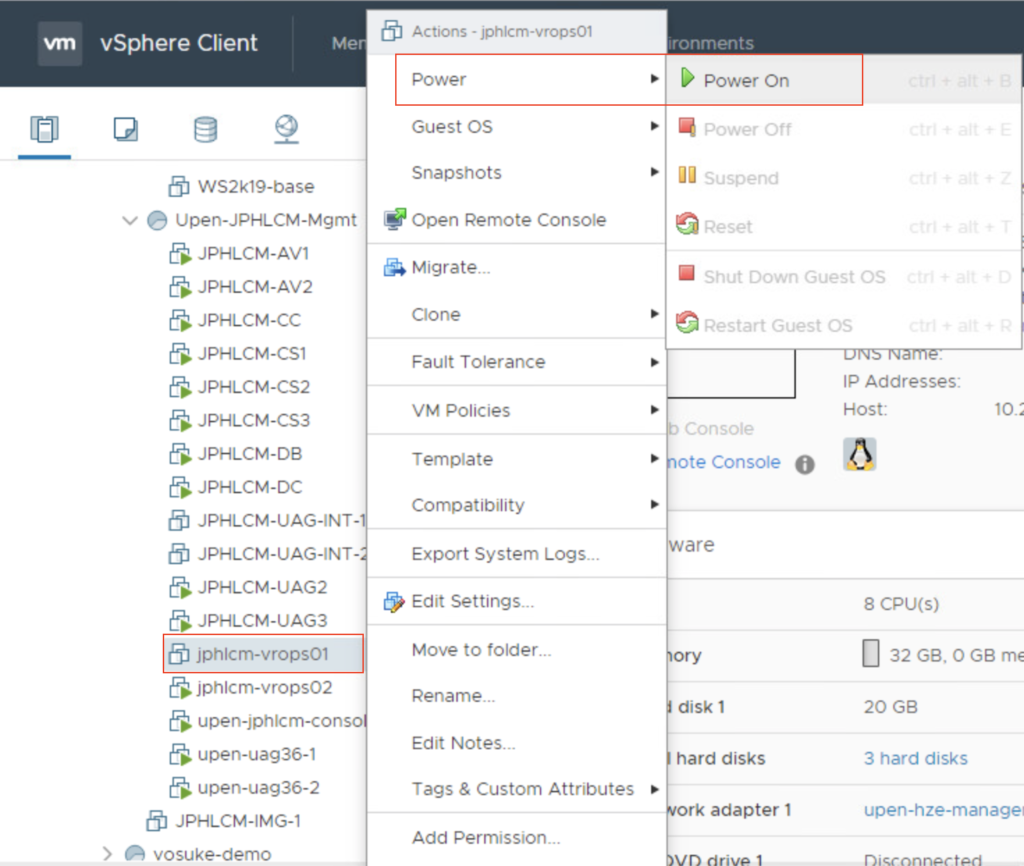
9. Once the ova deployment is completed, Power On the VM from vSphere Client.
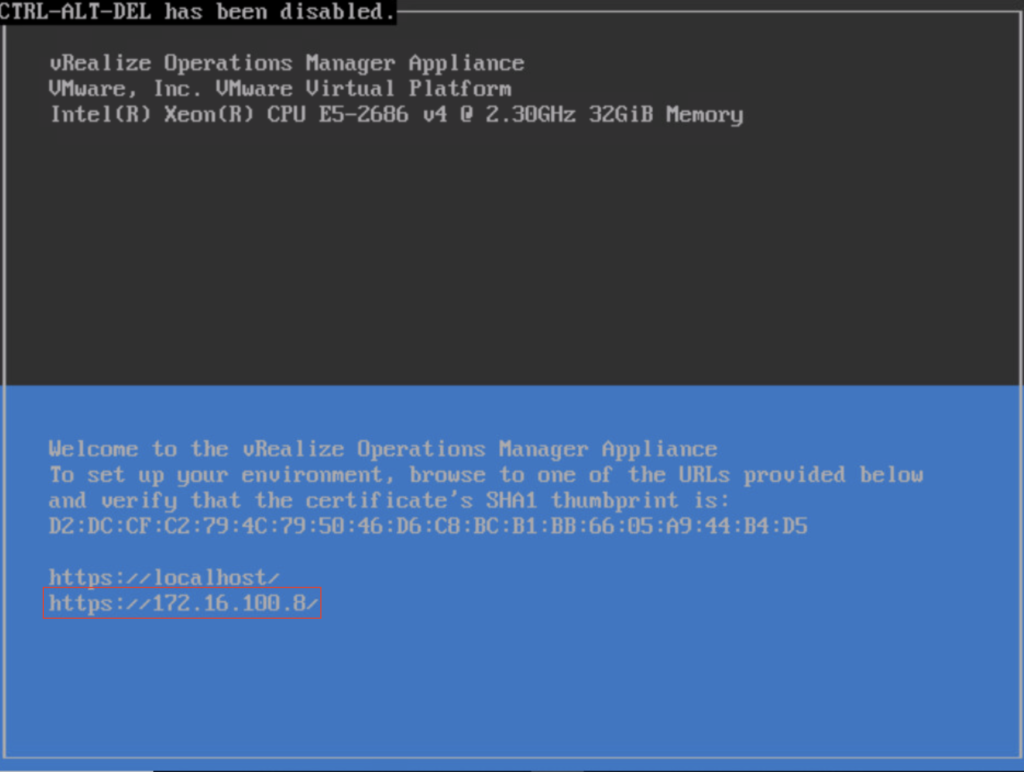
10. Open the web console and confirm VM is completely up and running. Verify if IP address of appliance is correct.
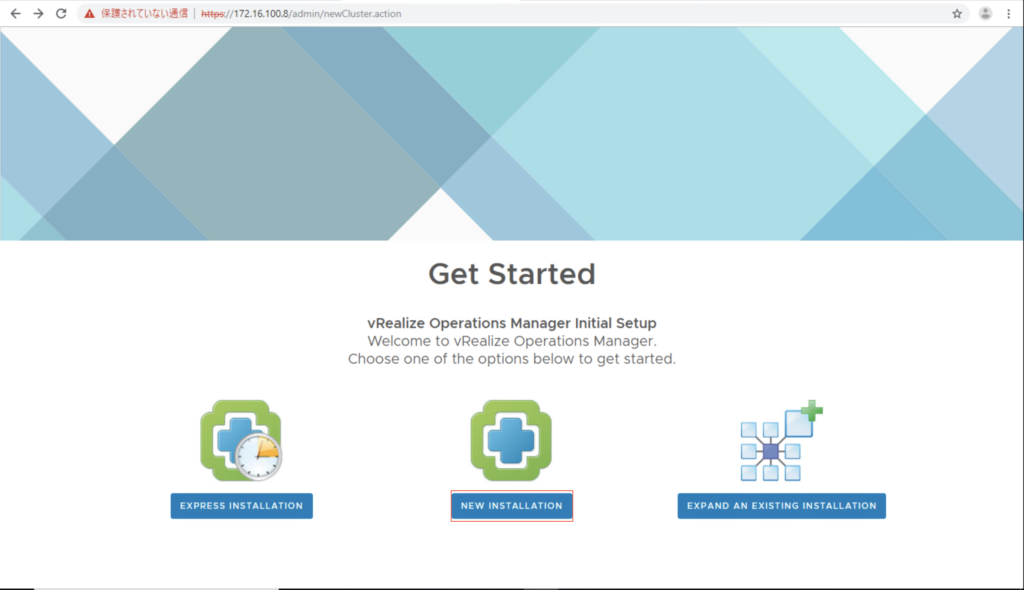
11. Open web browser and access vROPs admin console with https://ip address of recently deployed appliance. Select NEW INSTALLATION from Get Started page.
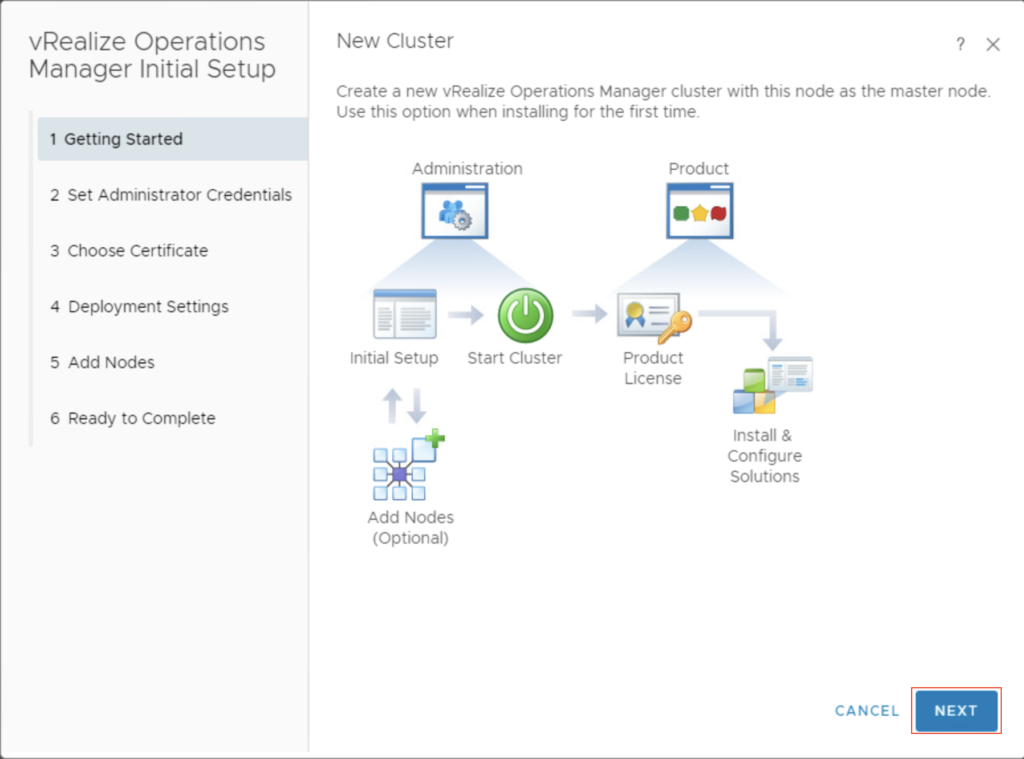
11. Select NEXT in New Cluster page.
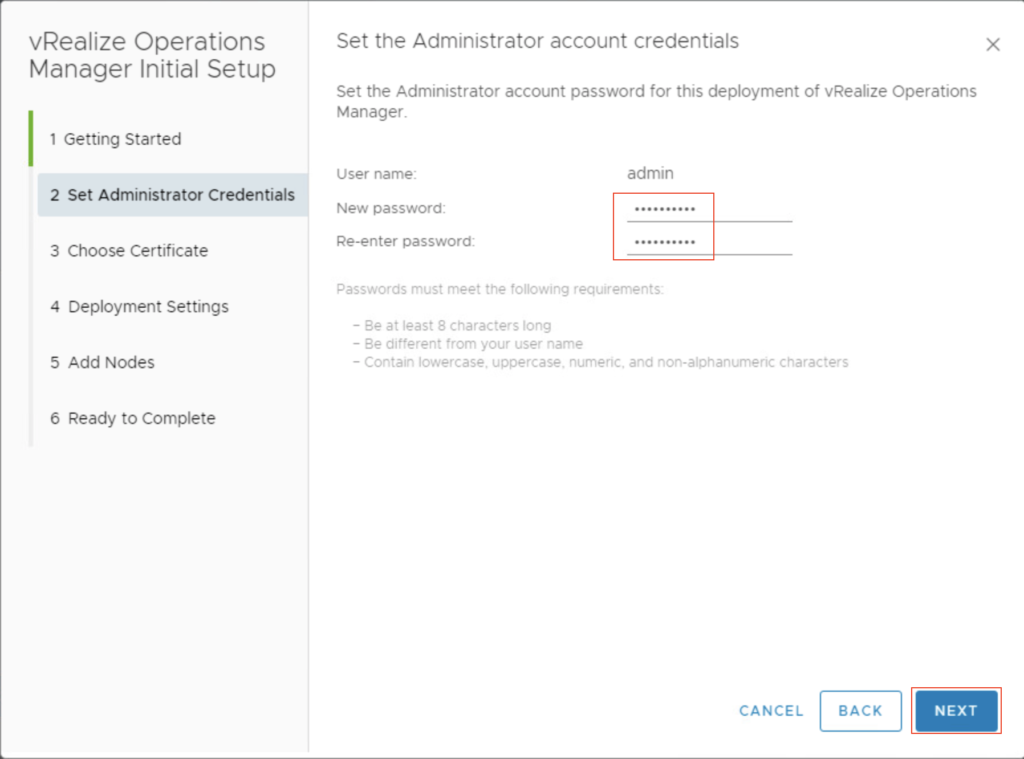
12. Set administrator account credential and select NEXT.
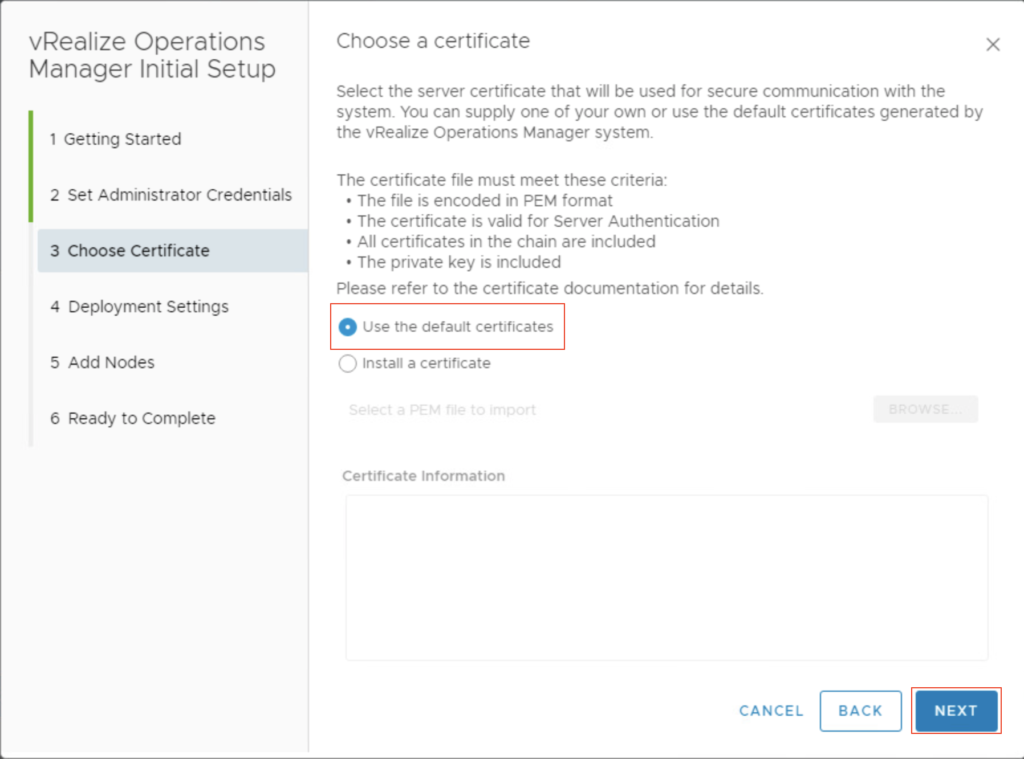
13. If you have your own certificate select ‘Install a certificate’. If you don’t have one, select ‘use the default certificate’ and select NEXT.
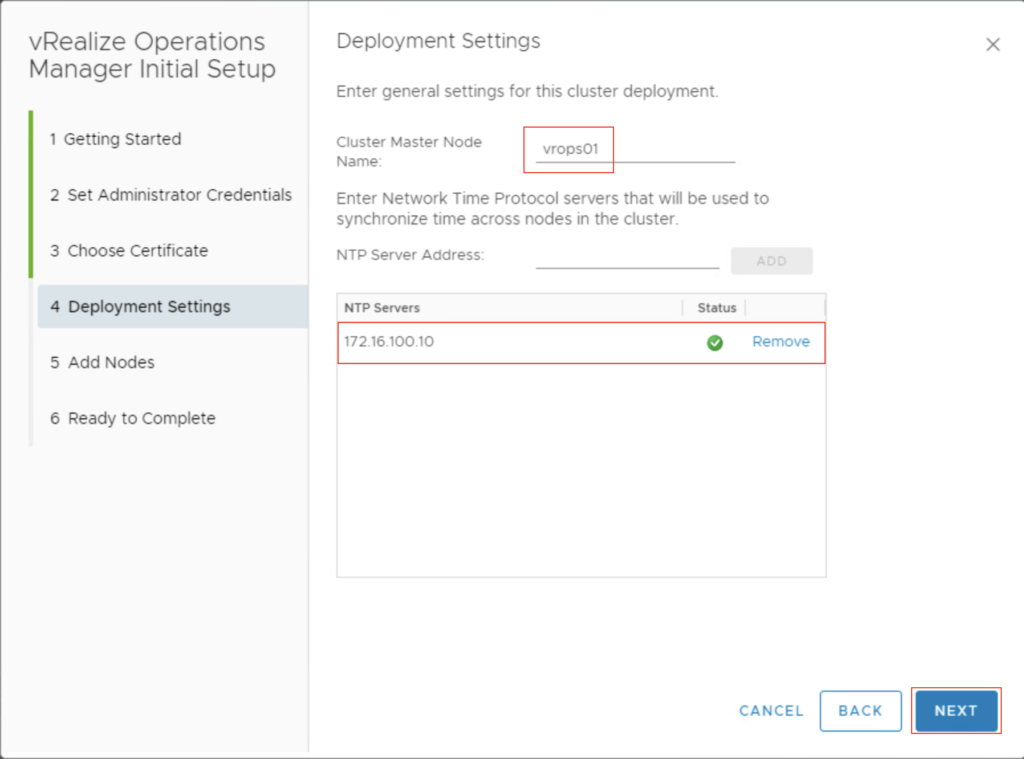
14. Define a user friendly name for vROPs cluster master node and add NTP server address and select NEXT.
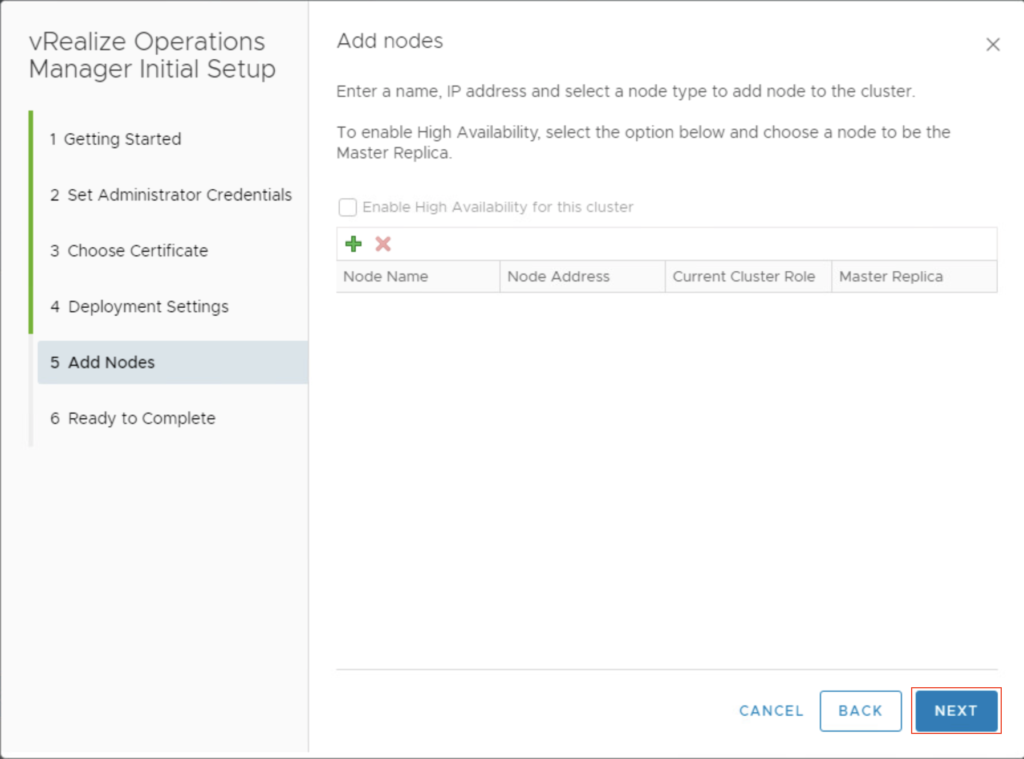
15. If you are deploying vROPS with HA, you can add your additional node/s here. If you don’t have additional appliance, select NEXT.
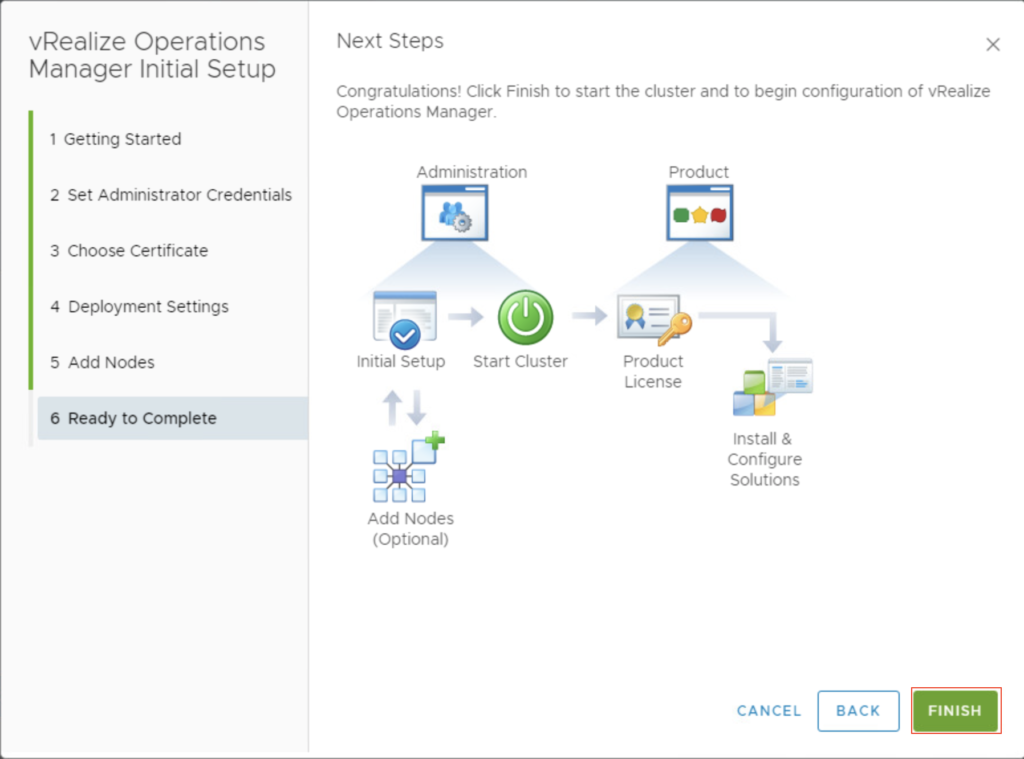
16. Select FINISH to proceed the configuration.
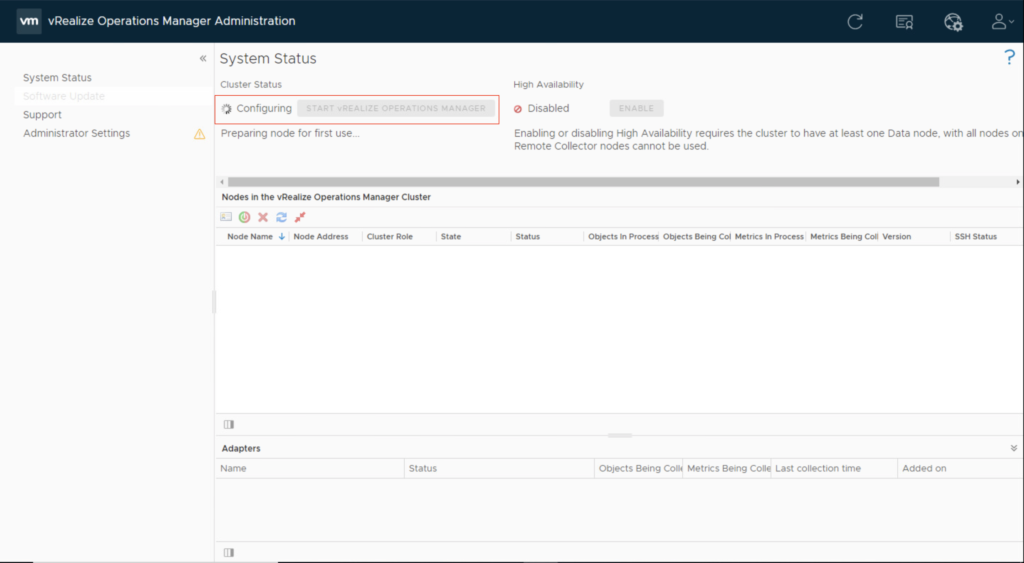
17. System will start configuring appliance according to the information you provided. This will take couple of minutes to complete.
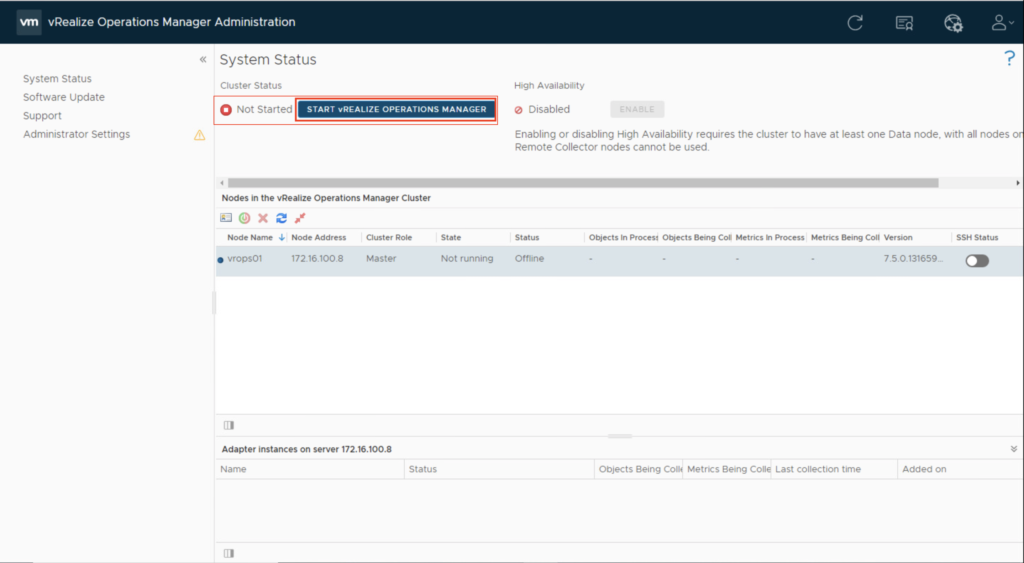
18. Once configuration is completed, ‘Start vRealize Operations Manager’ button will be activated. Click on it.
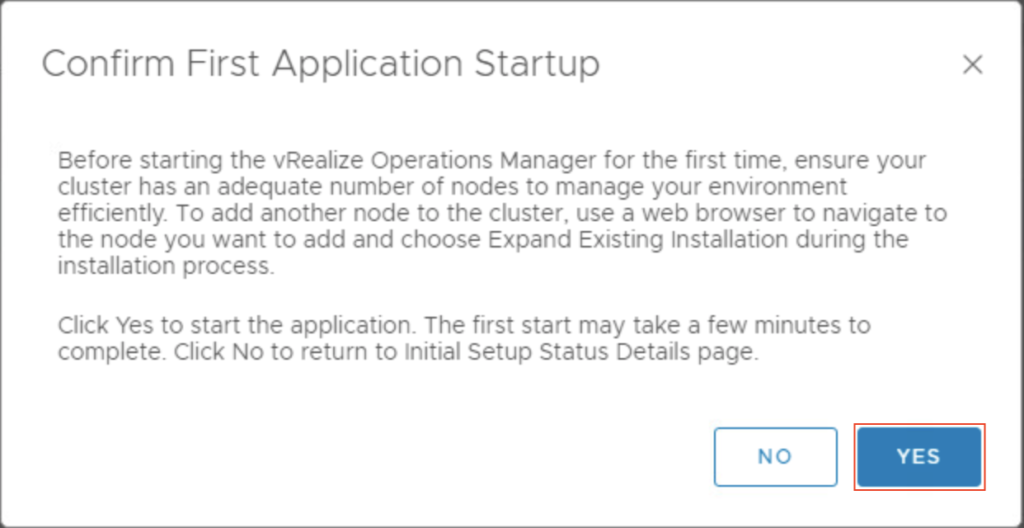
19. You will see below pop-up for confirmation if you are starting vROPS Manager for the first time. Select YES.
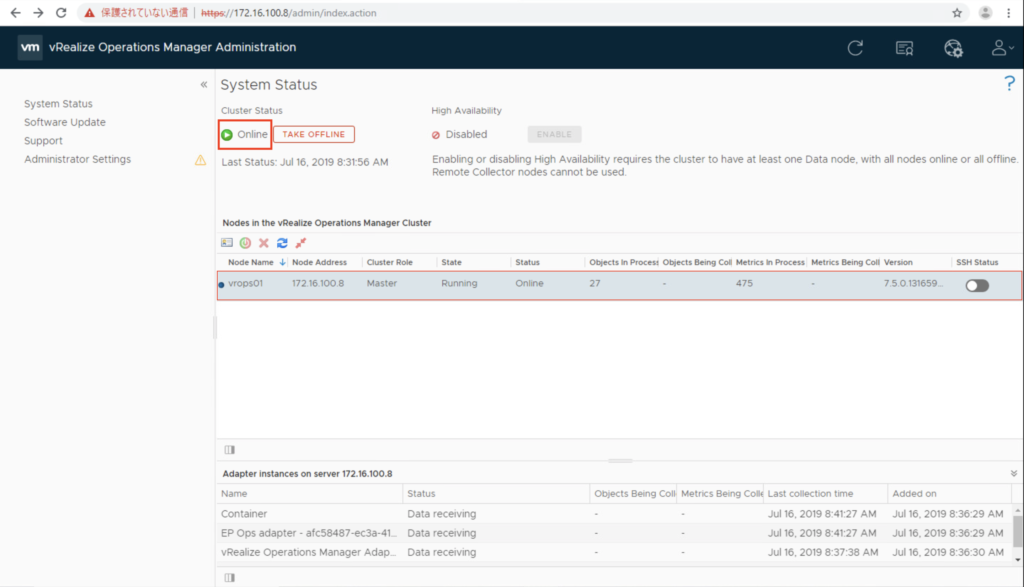
20. Confirm the vROPS managers status as ‘Online’. You have now successfully deployed vROPs Manager appliance.
21. Once the vROPs manager appliance deployment is completed, you will be able to access vROPs administration console with https://vrops-ip-address/ui. Log in with local users credential. Default user name is ‘Admin’ and password is the one you set as #12.

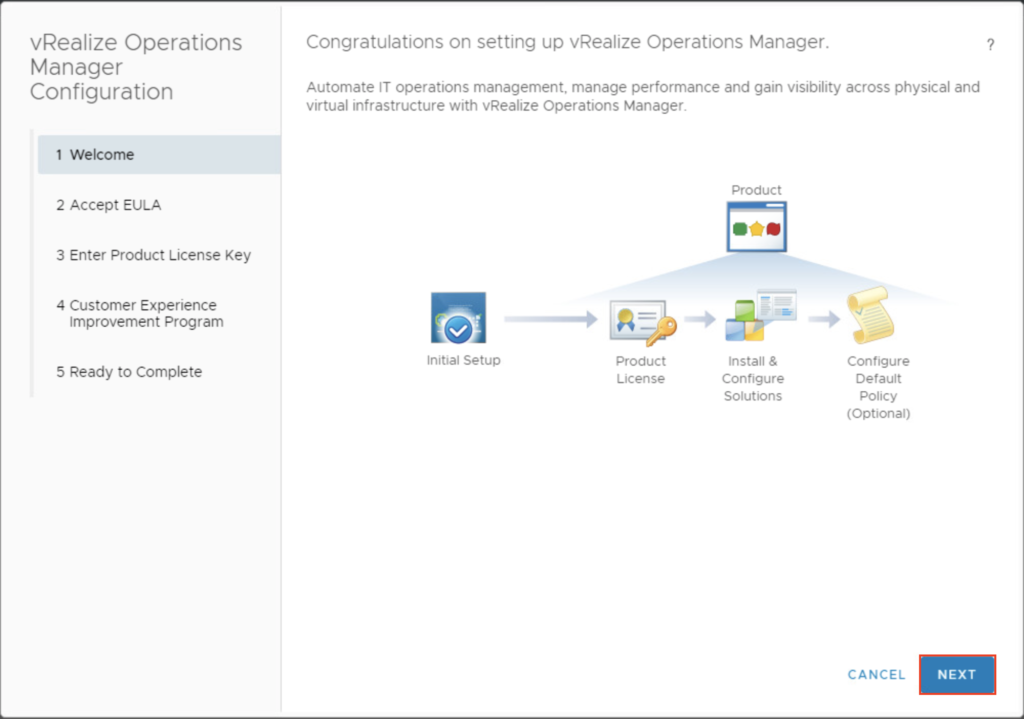
22. You will see below Welcome page, select NEXT.
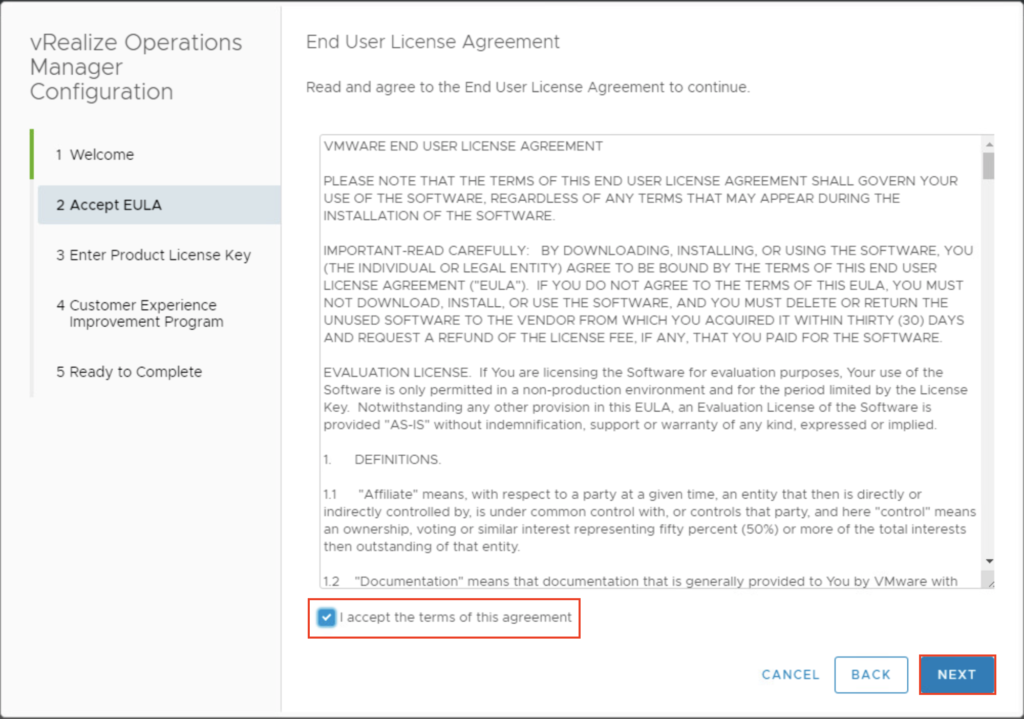
23. Accept the term of agreement and select NEXT.
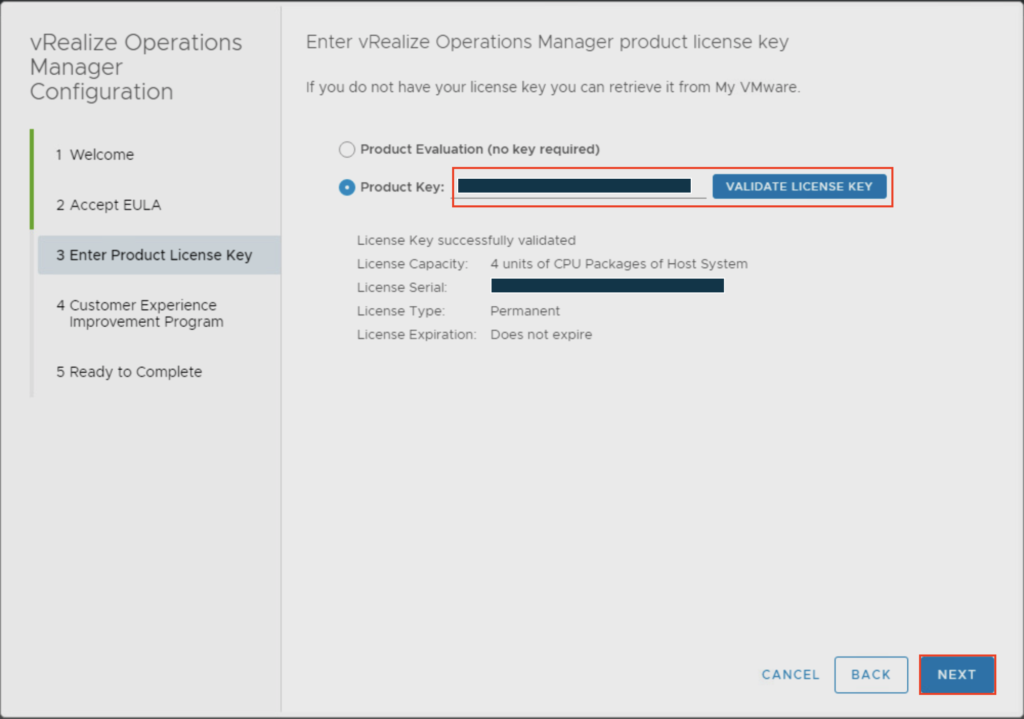
24. Enter the product key if you already have one and VALIDATE LICENSE KEY. If you don’t have product key, proceed as Evaluation. Evaluation period will be 60 days.
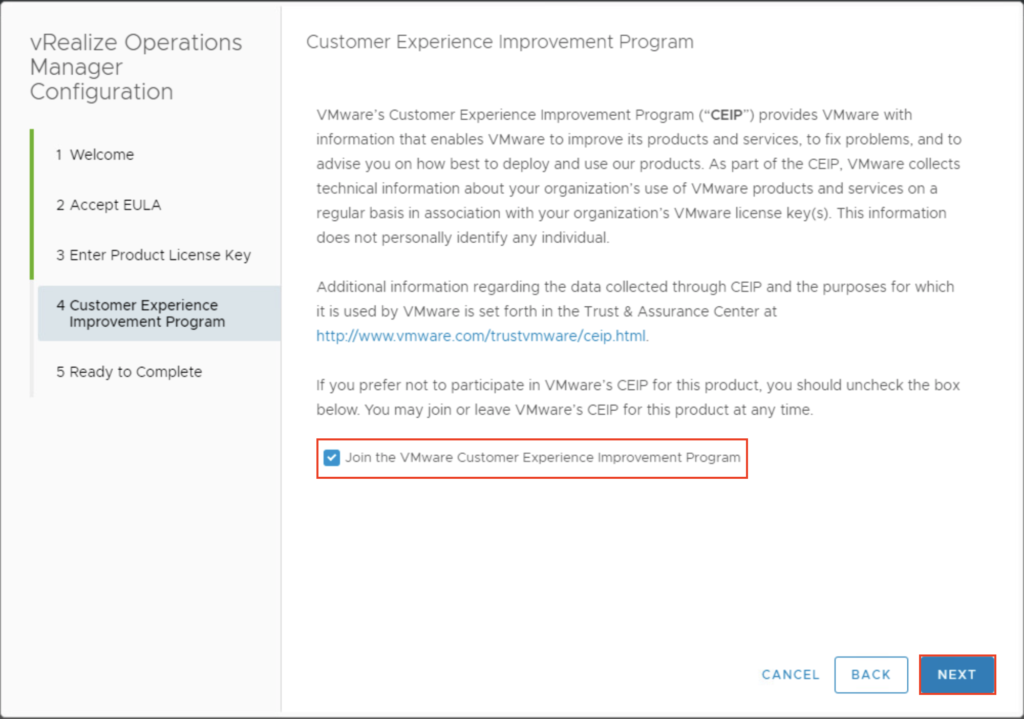
25. Select VMware Customer Experience Improvement Program and select NEXT.
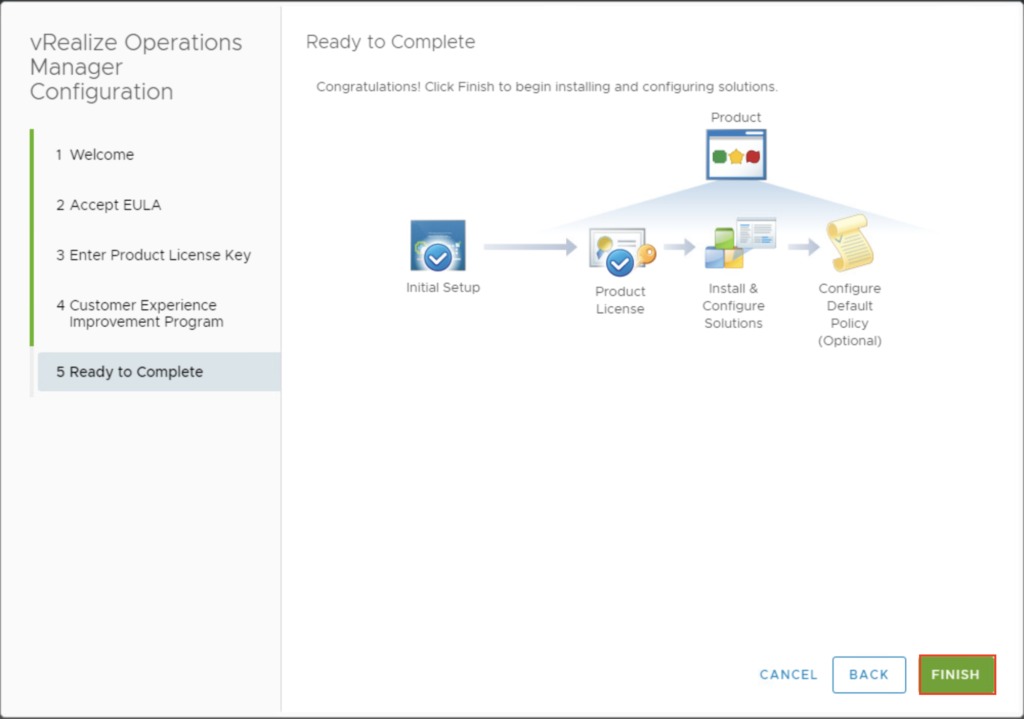
26. If everything looks good, select FINISH.
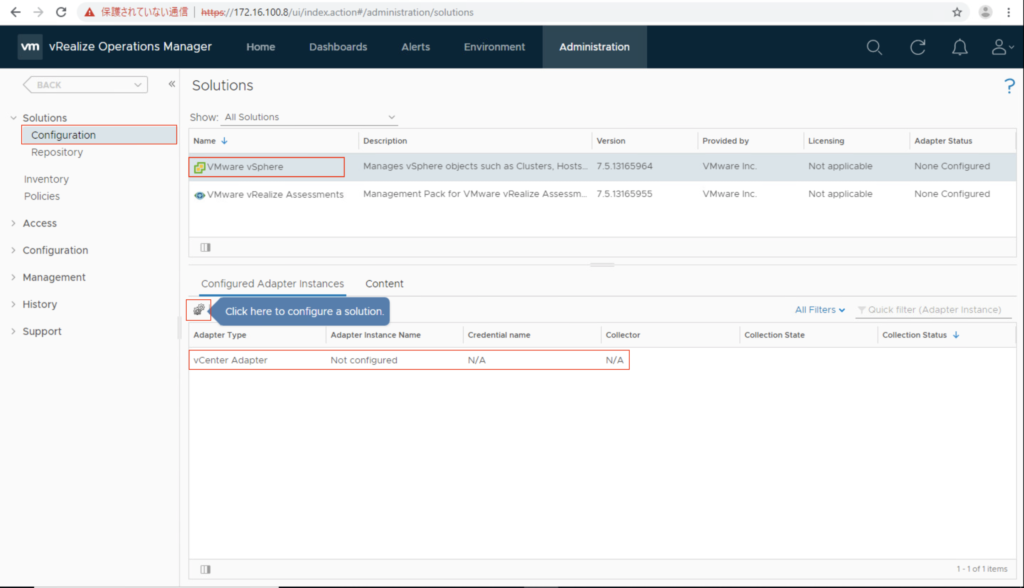
Configure virtual center for vROPs
- Go to Administration>Solution>Configuration. Select ‘VMware vSphere’ under Solutions and ‘vCenter Adapter’ under Configured Adapter Instances and click on gear button to proceed the configuration.
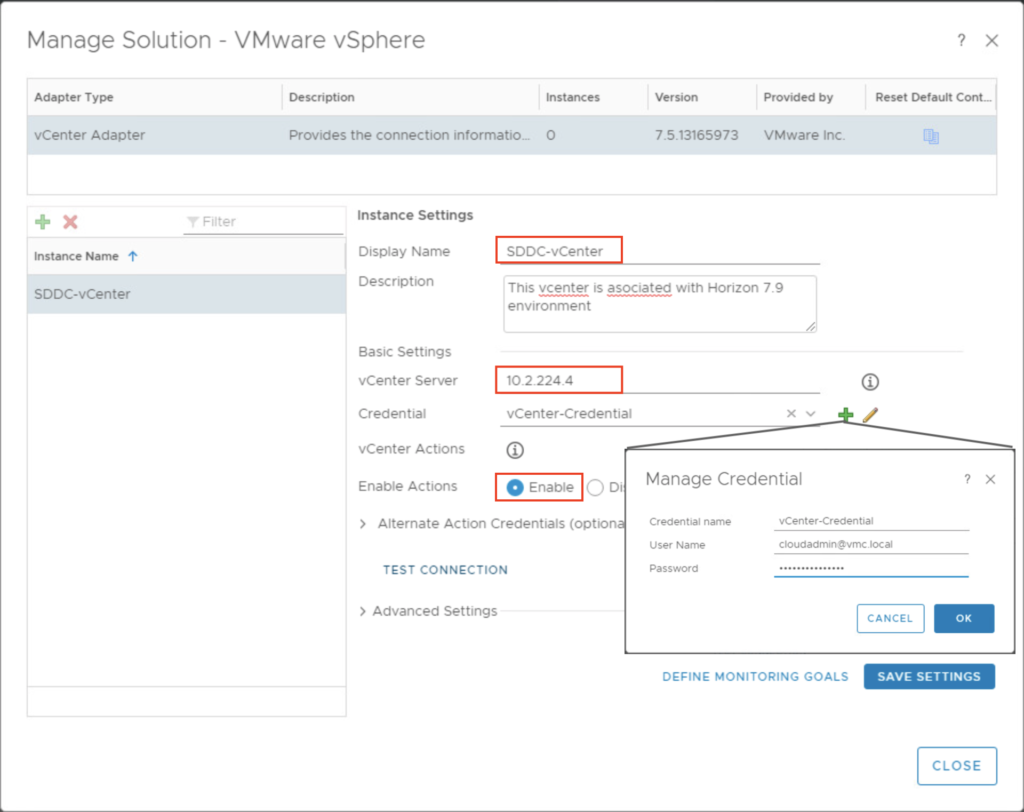
2. Define Display Name and vCenter IP/DNS name. Click on green plus sign at the right of ‘Credential’ and enter the friendly name in ‘Credential Name’ and user-name/password for vCenter login and select OK.
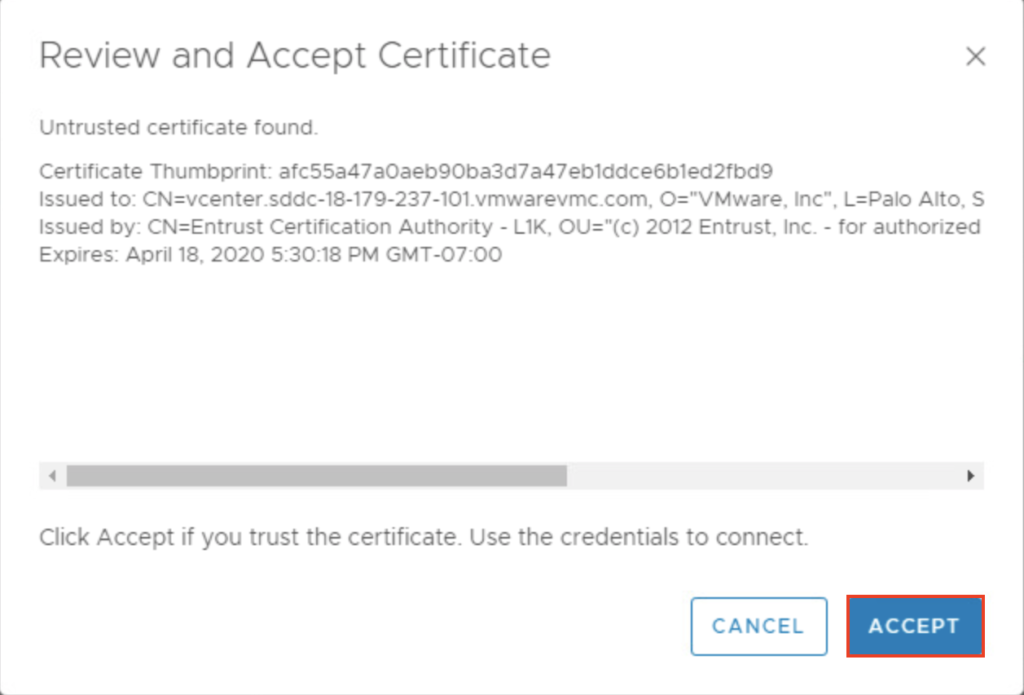
3. Select Accept
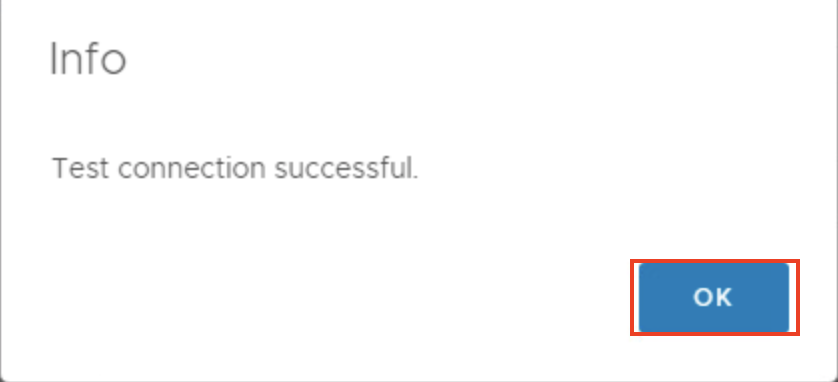
4. Click on TEST CONNECTION to test the vCenter connectivity. You will see the ‘Test Connection Successful’ info. Select OK.
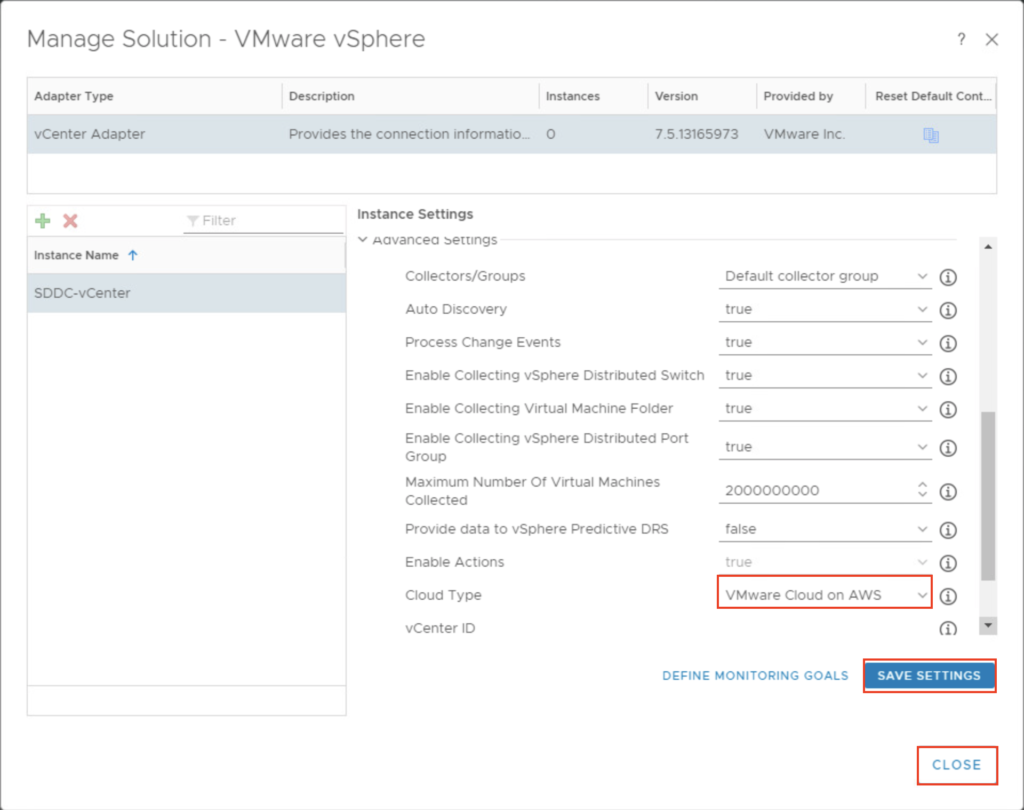
5. Expand Advance Settings and select appropriate parameters and select SAVE SETTINGS to save the vCenter configuration.
Configure Active Directory group for vROPS administration
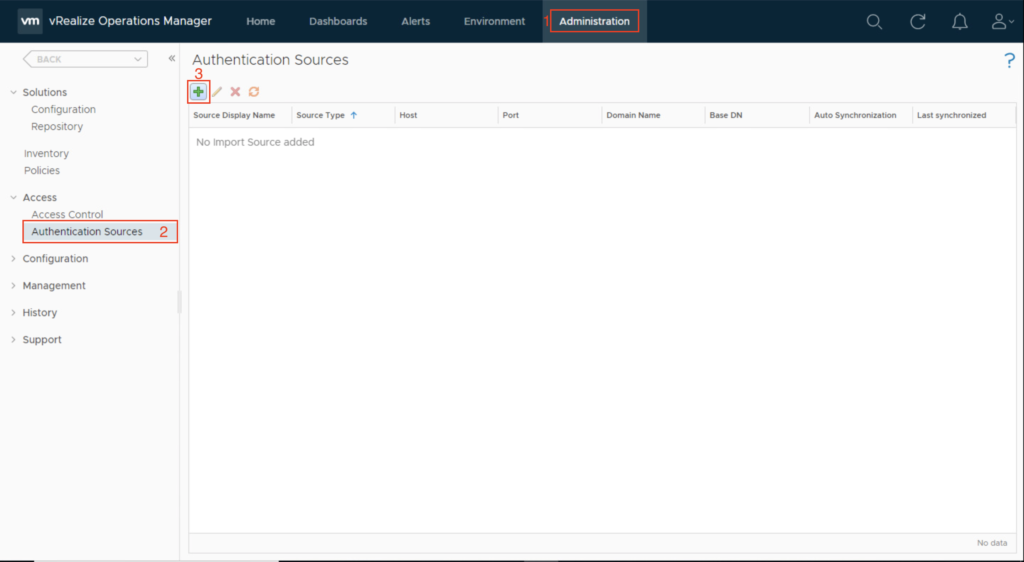
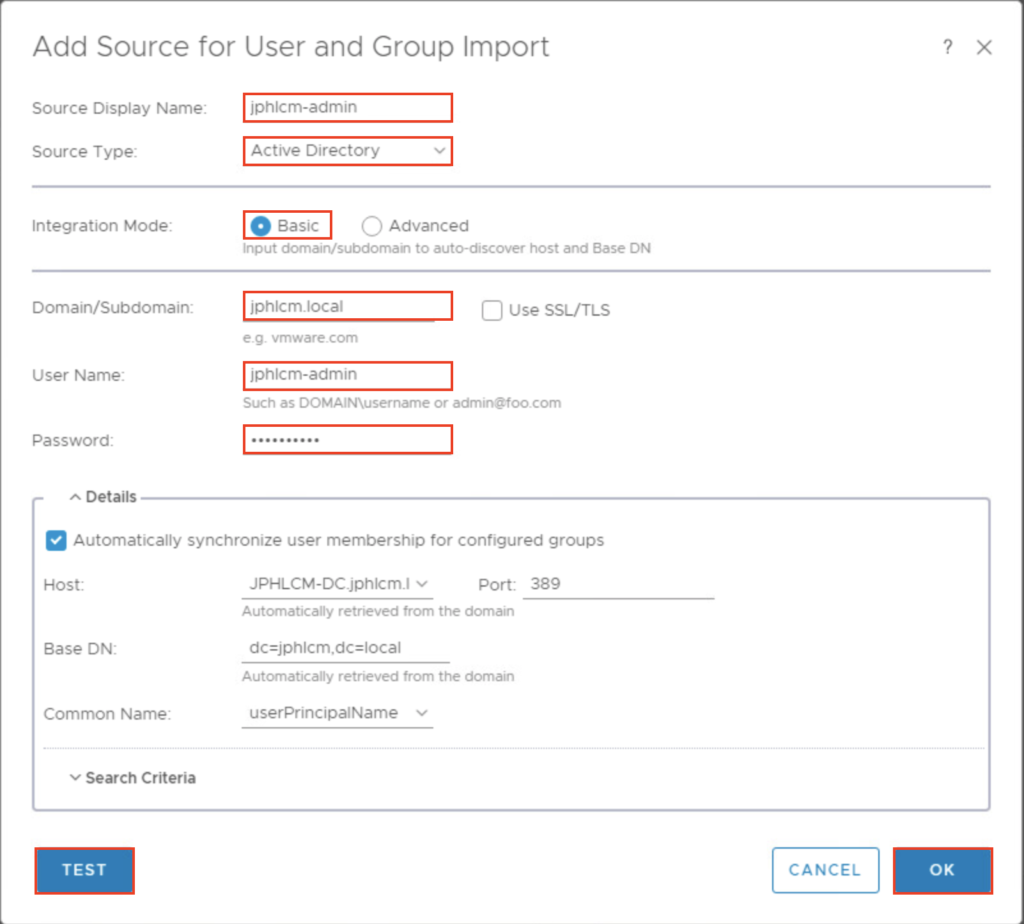
- Go to Administration> Access> Authentication Sources and click in green plus sign.
2. Give user friendly Display Name, select Active Directory as Source Type and enter domain information and click on TEST at the left button to test the Active Directory connectivity.
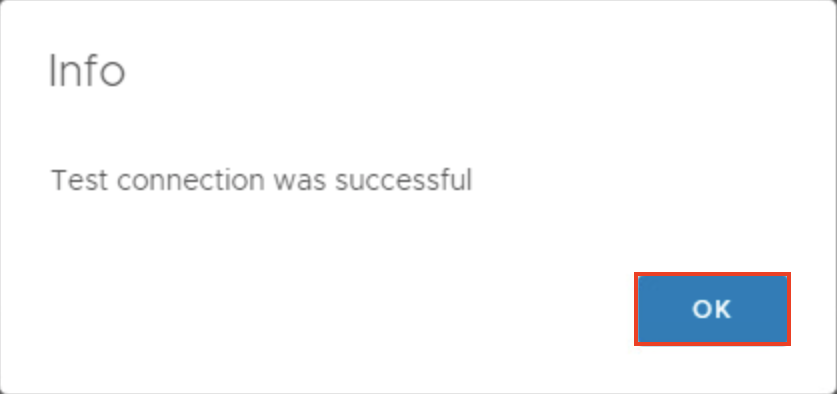
3. If Active Directory connectivity is success you will see below message. Select OK.
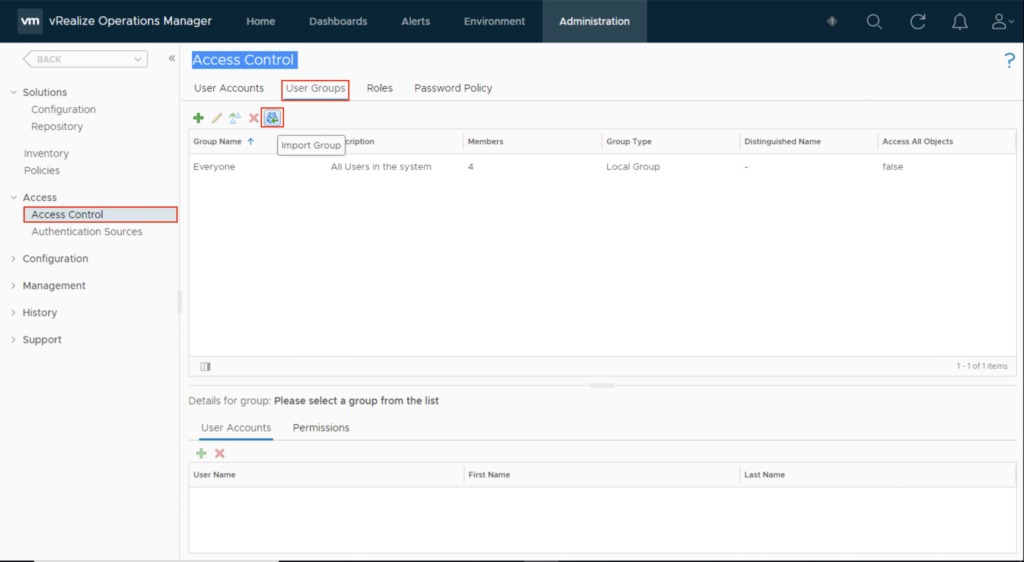
4. Got to Access Control>User Groups and click in Users’ Group sign.
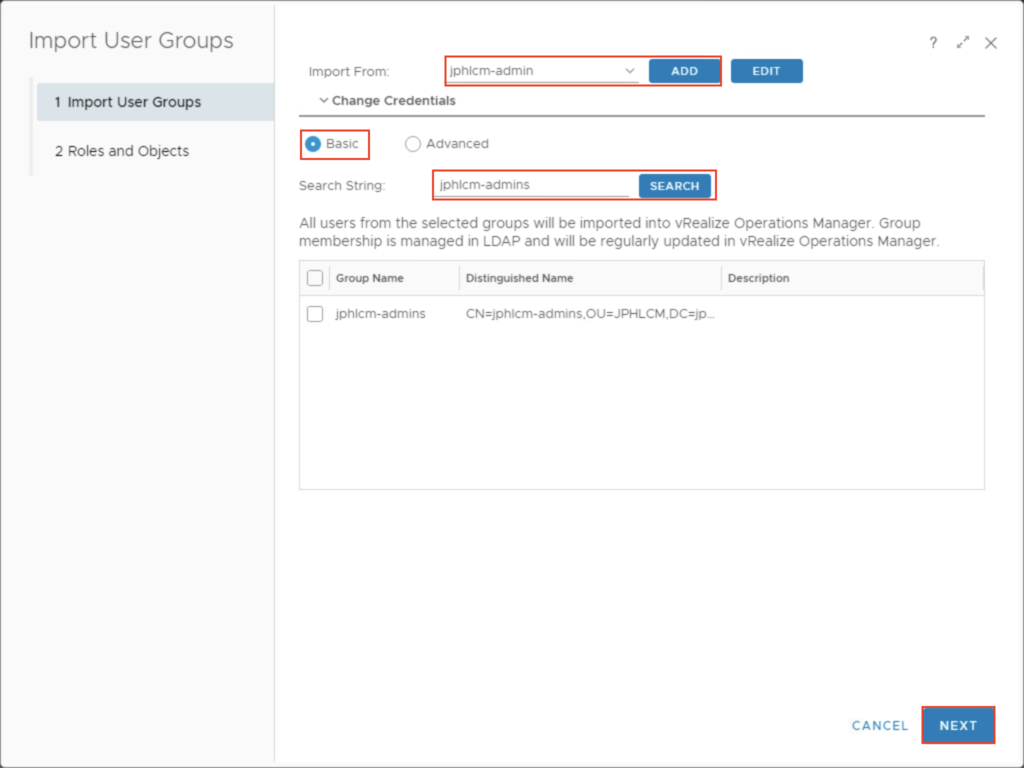
5. Select the group name configured in #2 and click ADD. Select other options as per your requirement and select NEXT.
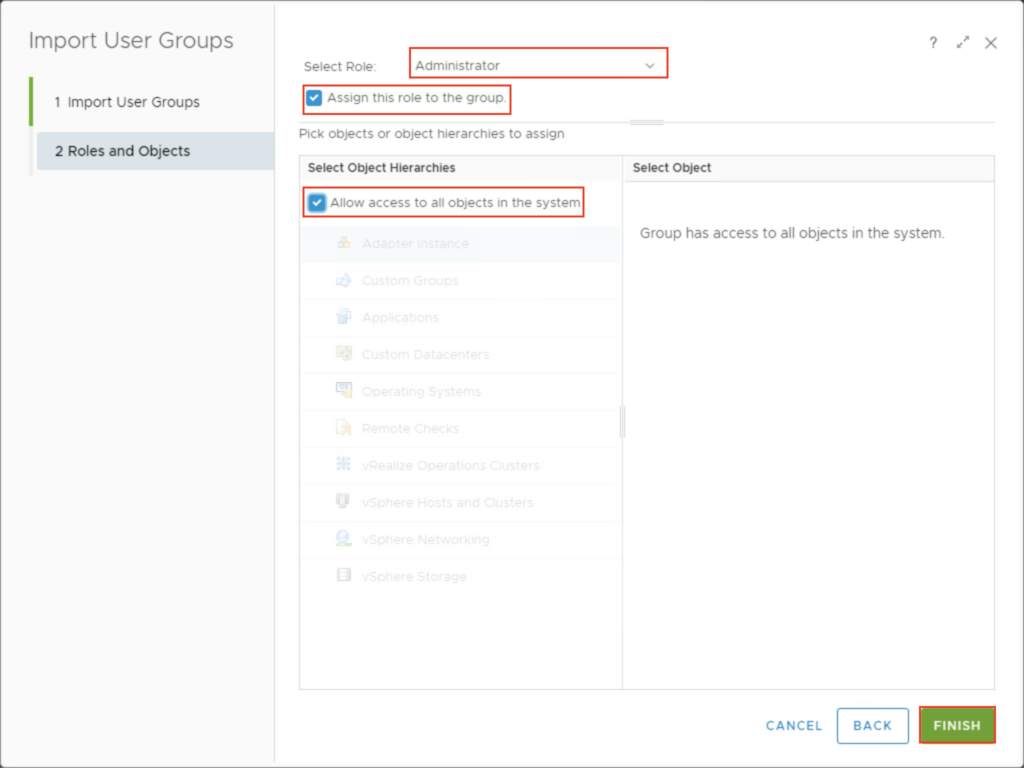
6. Select the role as Administrator from dropdown, put the check in ‘Assign this role to the group’ and ‘Allow access to all objects in the system’ and FINISH.
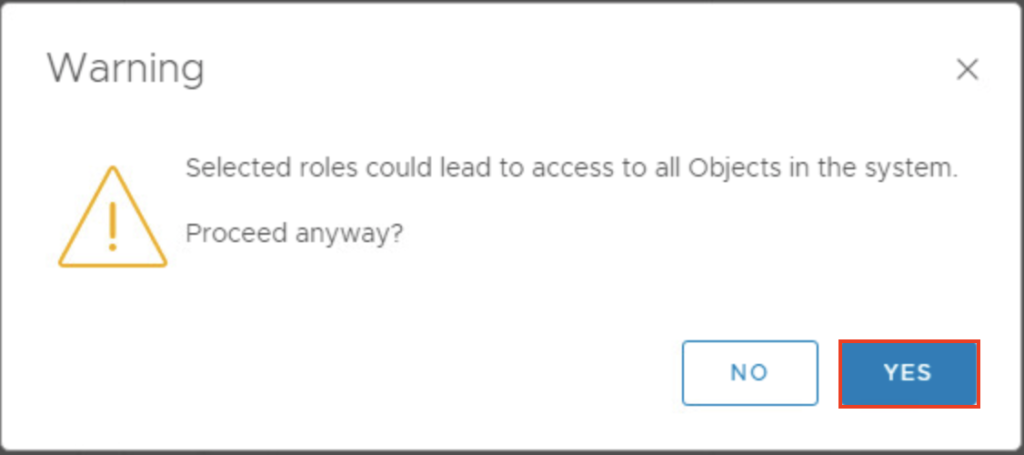
7. You will see a warning as below, select YES.
8. If you configured the Active Directory correctly, you should be able to login vROPs admin console with AD users. Open vROPs admin console with https://vrops-ip-address/ui. Select your AD group from dropdown and log in with AD username/password.
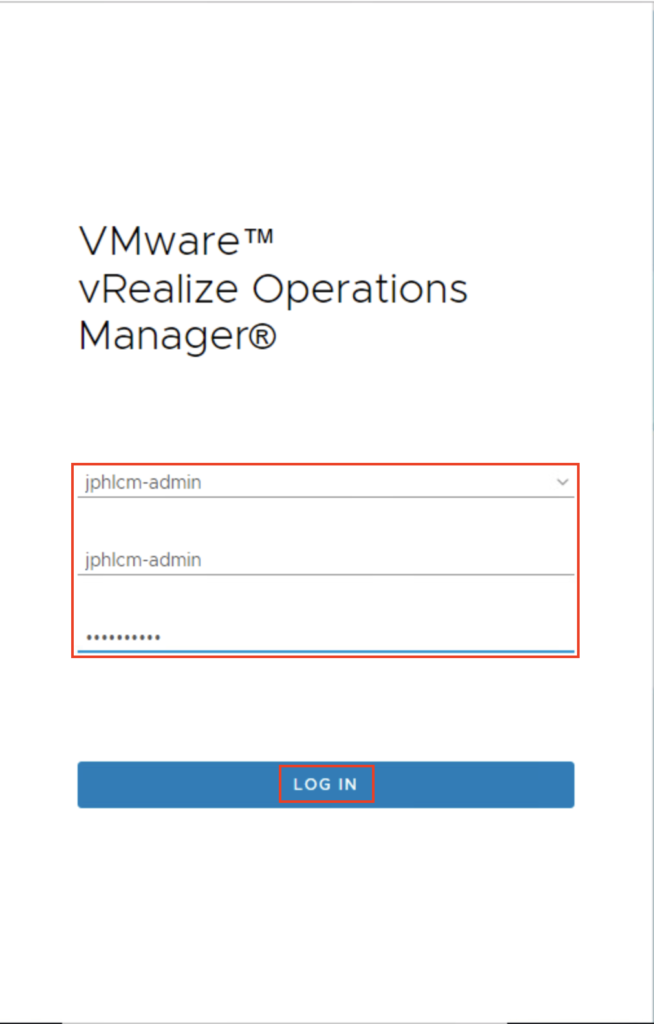
9. Confirm you are able to log in to admin console with AD credentials.

![]()