Introduction
VMware “App Volumes” manages the entire life cycle of application including packing, updating and the retiring an application. Initially, App Volumes feature was only supported in Horizon Enterprise 0n-premises deployment but as per Horizon Cloud Service (HCS) 25th March 2021 release, this feature is officially support on HCS on Azure Windows 10 enterprise single session and multi session desktops as well.
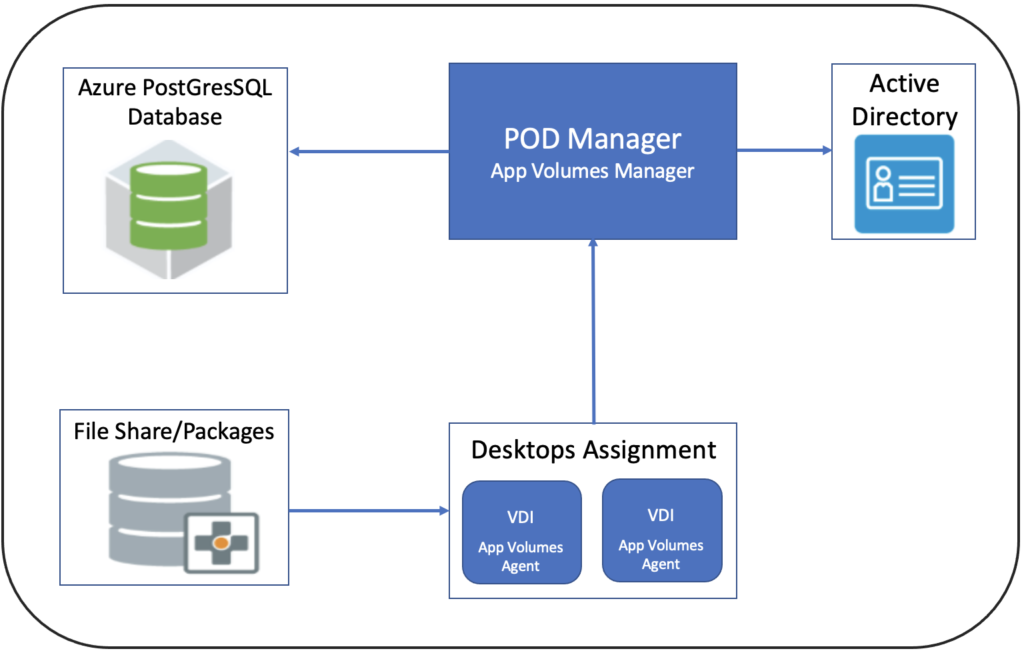
Unlike in Horizon Enterprise, the App Volumes infrastructure components is built within the HCS POD manager, there is no need of manual deployment of App Volumes infrastructure such as App Volumes Managers, App Volumes databases and storage. App Volumes leverages Microsoft Azure PostgreSQL managed service for database needs. Also, the App volumes file share to store and deliver apps is automatically provisioned during the HCS POD deployment.
App Volumes console is seamlessly integrated into the HCS Universal Console. We can manage desktops and apps in the same console. App Volumes Agent installation is also integrated into the Horizon Cloud image creation workflows.
There are two ways for packaging the apps in Horizon Universal Console, whether create new application package or import an existing application package. In this post, I will provide the step-by-step guidance on creating the new application package from Horizon Universal Console.
Logical Architecture of App Volumes in HCS on Azure
Prerequisites for App Volumes
Confirm your POD meets the below requirements before you starting the app creation. Detail can be found here.
- Horizon Cloud POD version is 3.1 (manifest version 2298.0) or newer version.
- Broker (Single POD broker or Universal Broker) has been configured.
- Unified Access gateway has been configured.
- Active Directory Domain Registration has been completed.
- Firewall port requires for App Volumes are allowed.
- Confirm the Fileshare field under the Setting > Capacity> POD> Detail in Horizon Universal Console.
- Confirm you have image with App Volumes agent installed in your POD.
Known Limitations for App Volumes in Horizon Cloud
There are some limitations with App Volumes in current HCS on Azure release. Detail can be found here.
Creating Application and Package and AV app assignment
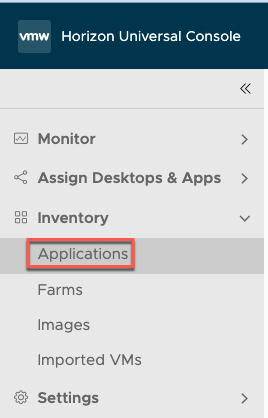
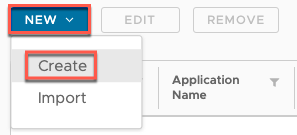
- Log into Horizon Cloud Universal Console > [Inventories] > [Application] > [New] > select [Create] from drop down.
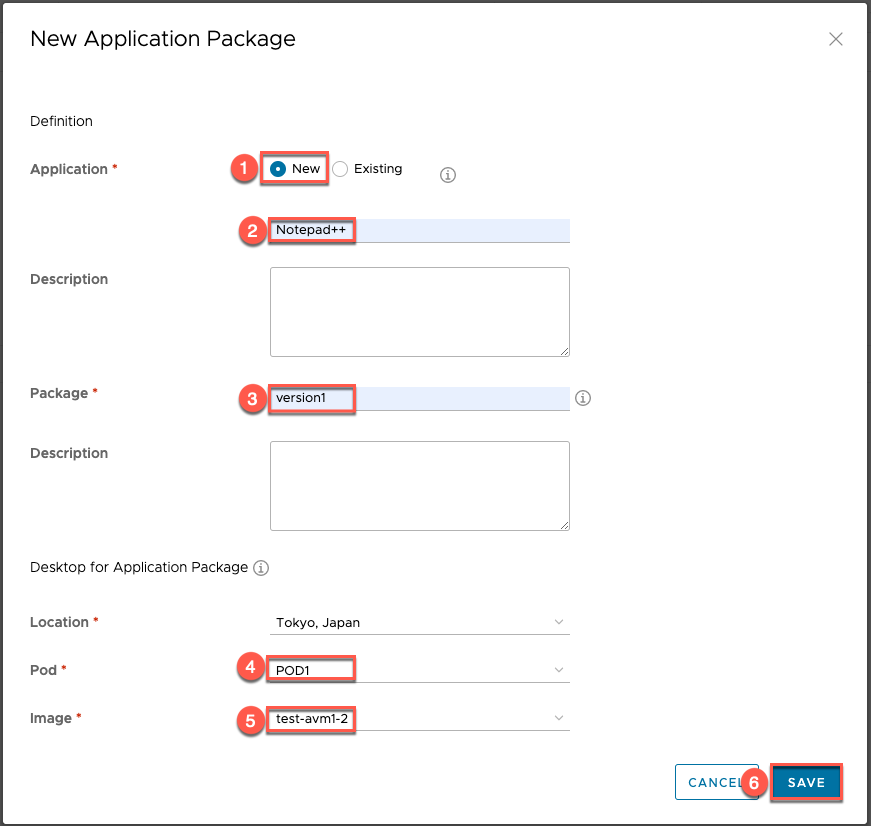
2. Select [New] and give the name of application and package. Choose the POD Name, Image and [Save].
Note: The image selected here is used to create the app capture VM.
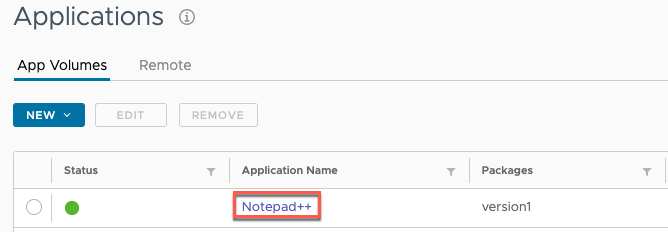
3. Confirm the Application name and status. Click on the application name.

4. Point the mouse pointer on top of Status icon and confirm the stats as “Desktop creating in progress”. This process creates the app capture machines (step#5).

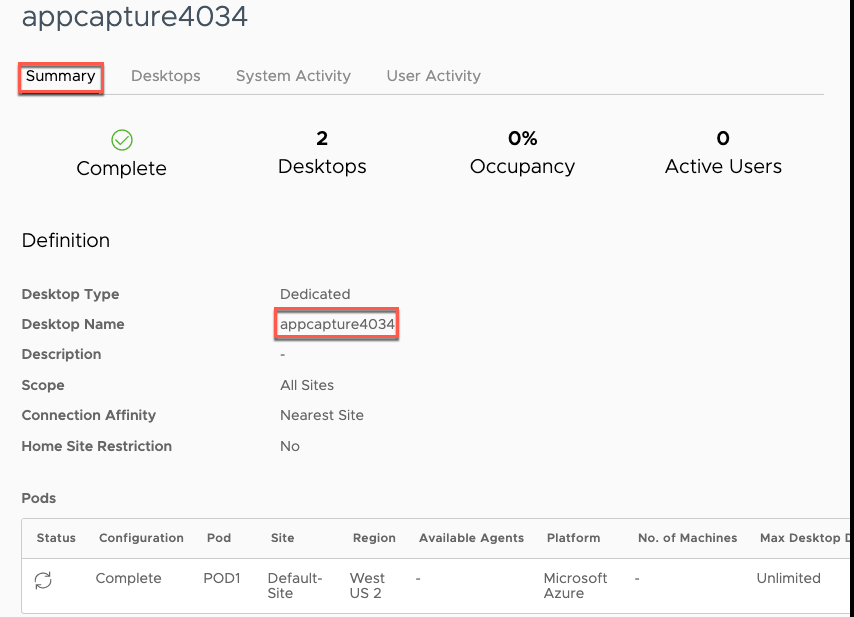
5. Navigate to [Assignments] > [VDI Desktops & Apps] and confirm an assignment name with appcapturexxxx is in progress. Click on top of assignment name and confirm the summary of the assignment.
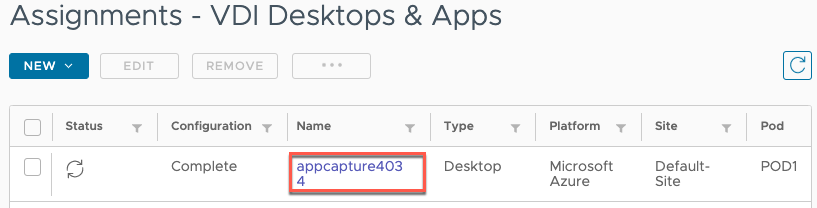
Note: Locations of assignments vary, as described below.
- If you have selected Single-Pod Broker in Settings > Broker, these assignments appear in Assignments > Desktops & Apps.
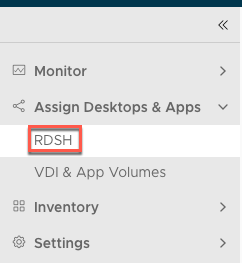
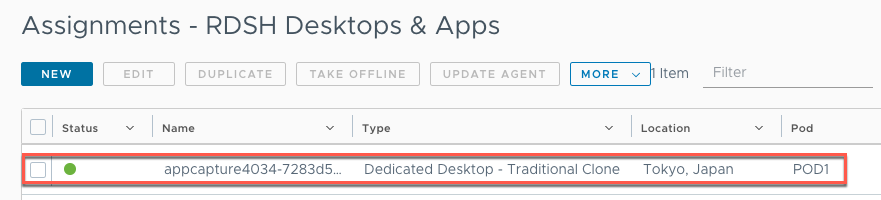
- If you have selected Universal Broker in Settings > Broker and the assignments are based on a non-multi-cloud assignment, they appear in Assignments > RDSH Desktops & Apps.
- If you have selected Universal Broker in Settings > Broker and the assignments are based on a multi-cloud assignment, they appear in two locations: Assignments > VDI Desktops & Apps and Assignments > RDSH Desktops & Apps.
- When an assignment appears in both locations, the name is slightly different. The name of the assignment in Assignments > RDSH Desktops & Apps has an additional alphanumeric string appended to it. For example, an assignment that has a name like
appcapture1234in Assignments > VDI Desktops & Apps would have a name likeappcapture1234-5ab6c789in Assignments > RDSH Desktops & Apps.
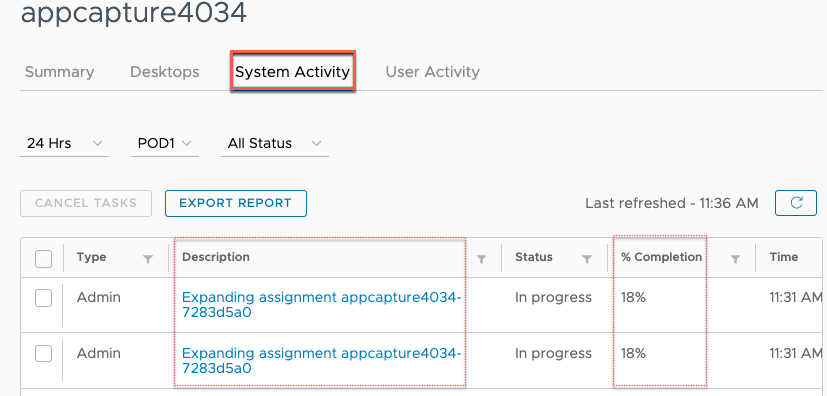
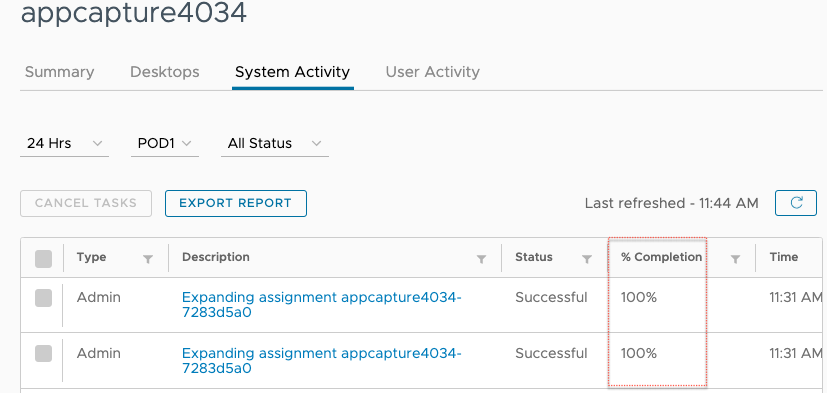
6. Navigate to [System Activity] tab and confirm the app capture machines are under deployment. This takes upto 20 minutes to get ready for app capture.
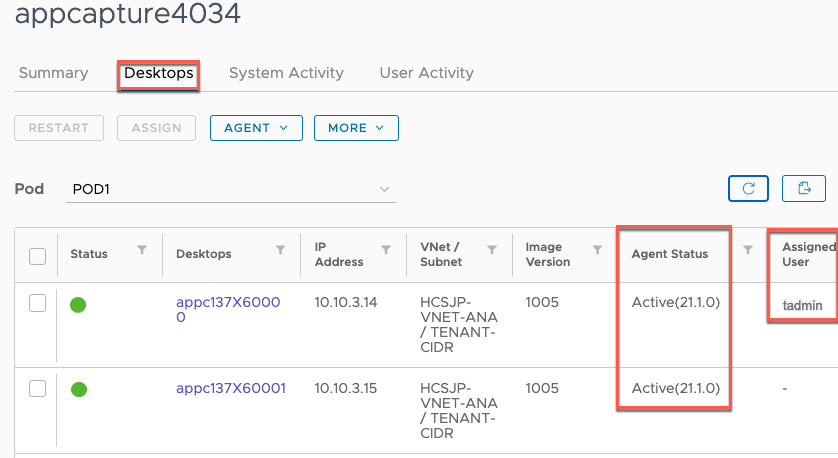
7. Navigate to [Desktop] tab and confirm the status of machine as green and Agent as active. Also confirm an user is assigned to one of the machine within appcapture assignment. This user is the same which you use to login to HCS Universal Console. User name “tadmin” in this case.
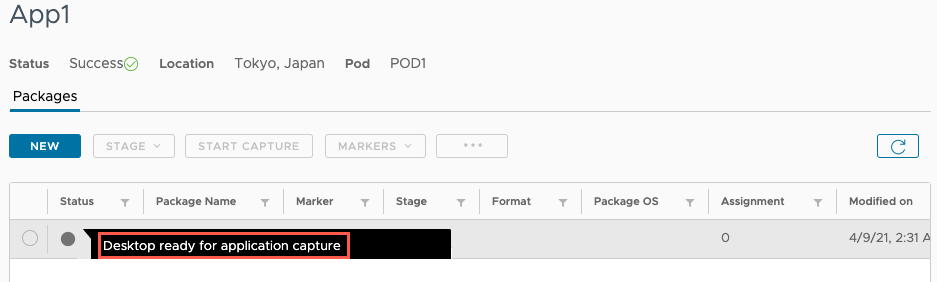
8. Navigate to [Inventory] > [Application] > click on the name of application you created in step#2&3.
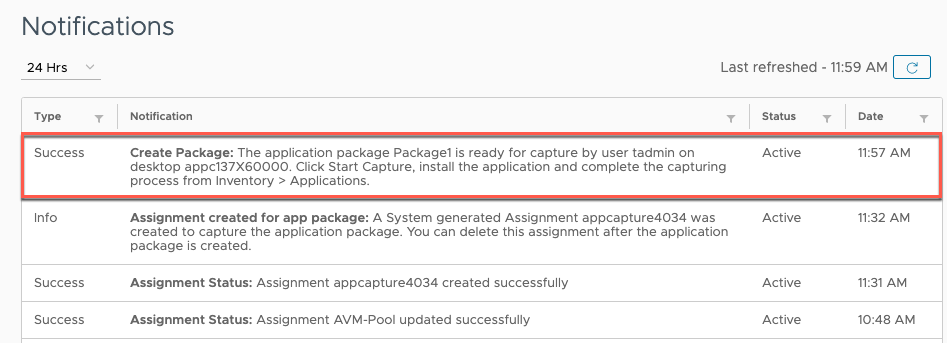
9. Point the mouse pointer on top of package status and confirm “Desktop ready for application capture”.
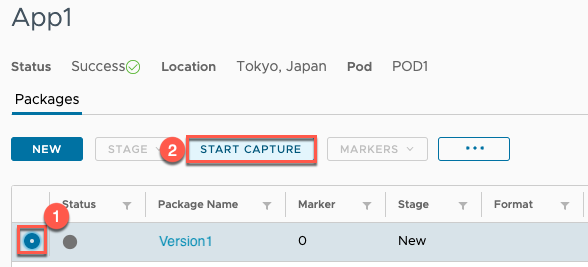
10. Select package and click on [START CAPTURE].
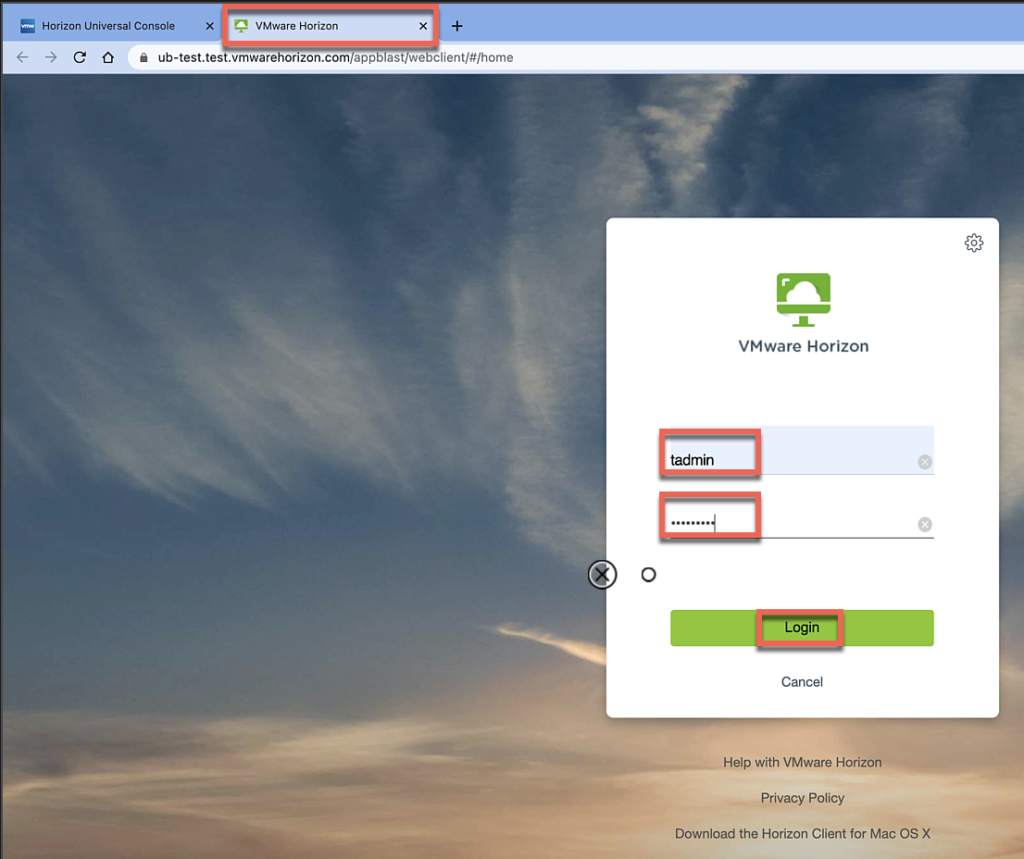
11. You will get redirected to new browser tab showing login windows (a.k.a. app blast portal). Login with user name and password and launch the capture machine.
Note: From here you are going to access the app capturing machine where you need to login with the user name and password which was used to log into HCS Universal Console. Username you confirmed on step#7.
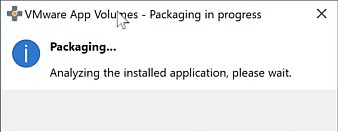
12. You will see an App Volumes capture pop-up message. DO NOT close this message until you complete the application installation.
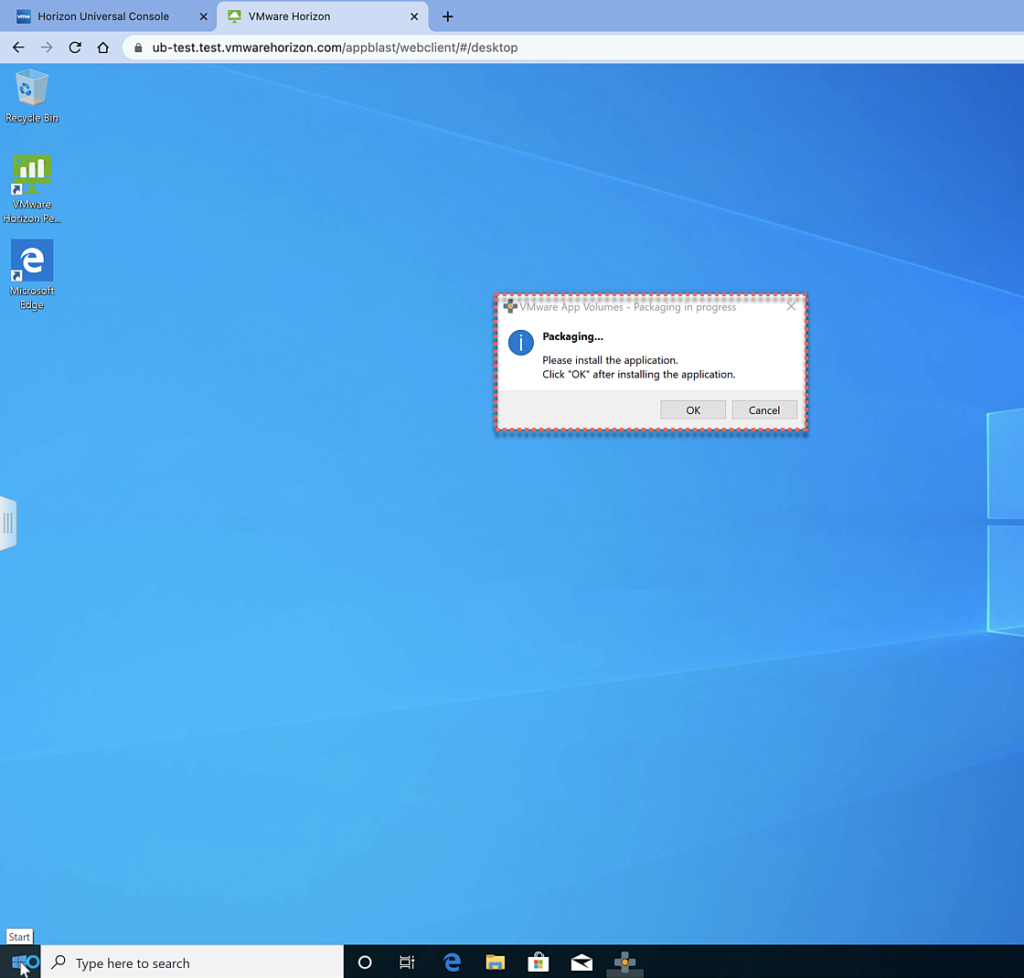
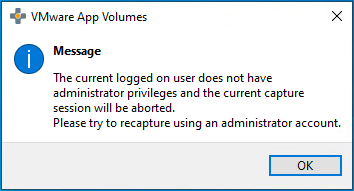
Note: You will see below message if the logged on user does not have administrative privilege. Either the user should have local admin or domain admin privilege to be able to install the application.
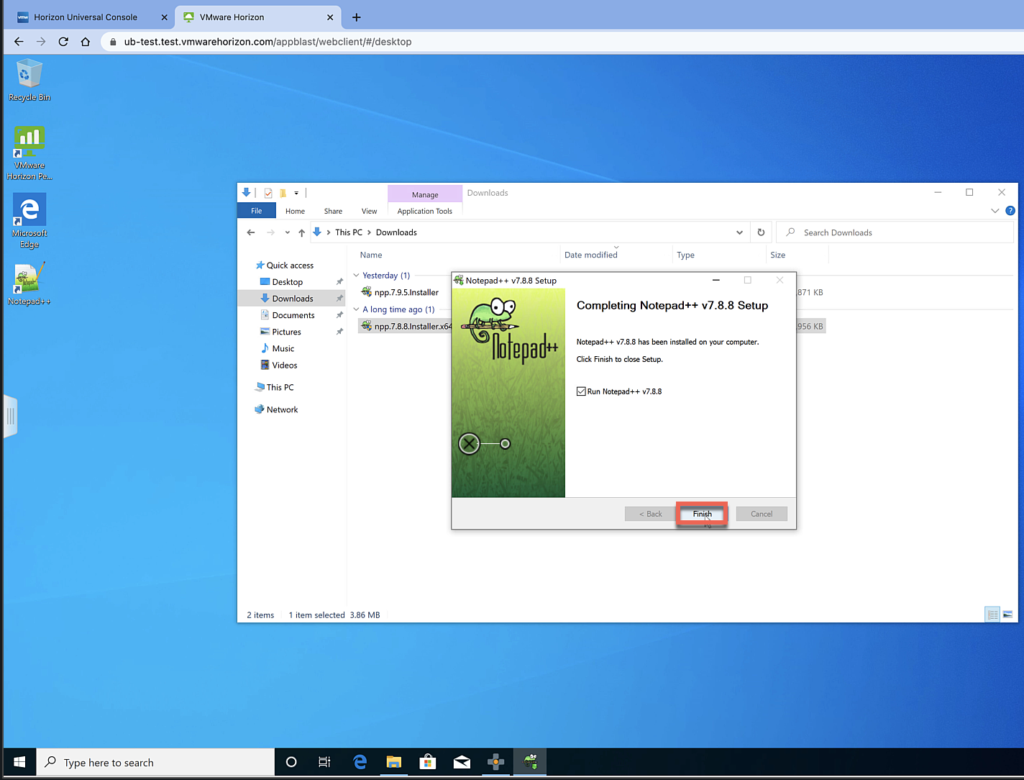
13. Complete the application installation.
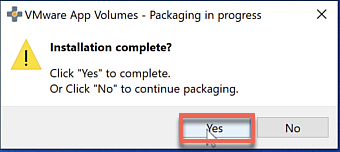
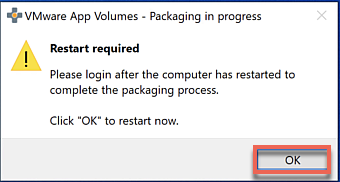
14. Click on [Yes] on the pop-up message once the application installation is completed.
15. App capture machine get rebooted once you click on [OK]. The desktop session on browser get disconnected
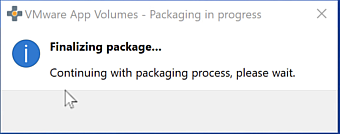
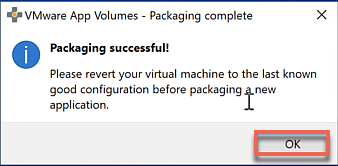
16. Wait for 1-2 minutes until capture machine get rebooted and re-launch the capture machine from the app blast portal. Click on [OK] on packaging successful messages pops up window.
17. Navigate back to HCS Universal Console > [Inventory] > [Application] > select application name you created earlier in step#2&3 > package name in step#4 and confirm the stage as “Packaged”.
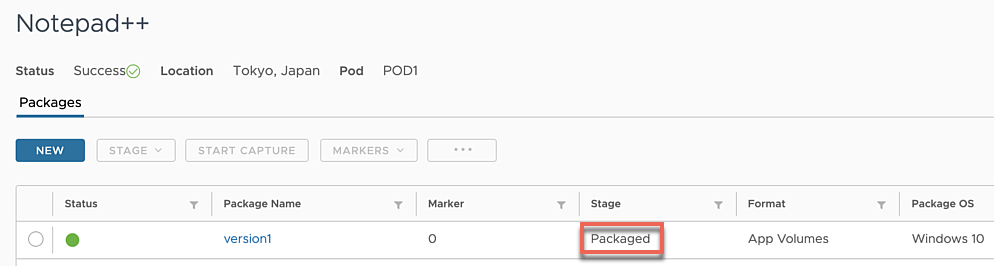
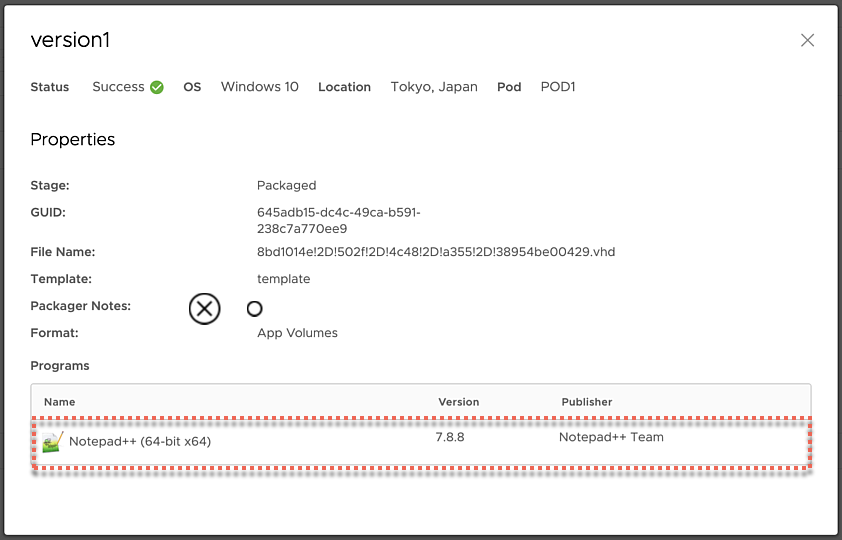
Click on package name to confirm the detail of application package i.e. name, version, publisher etc.
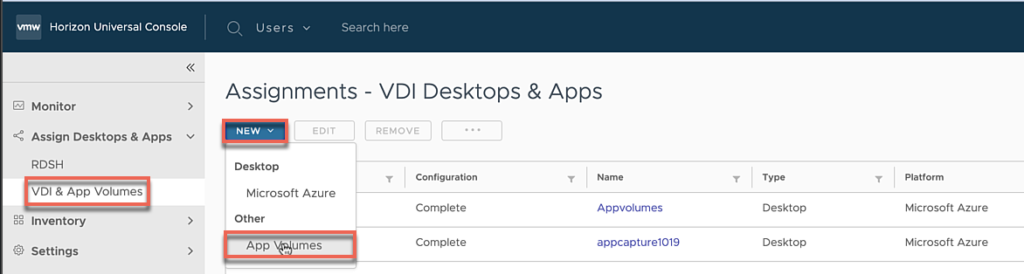
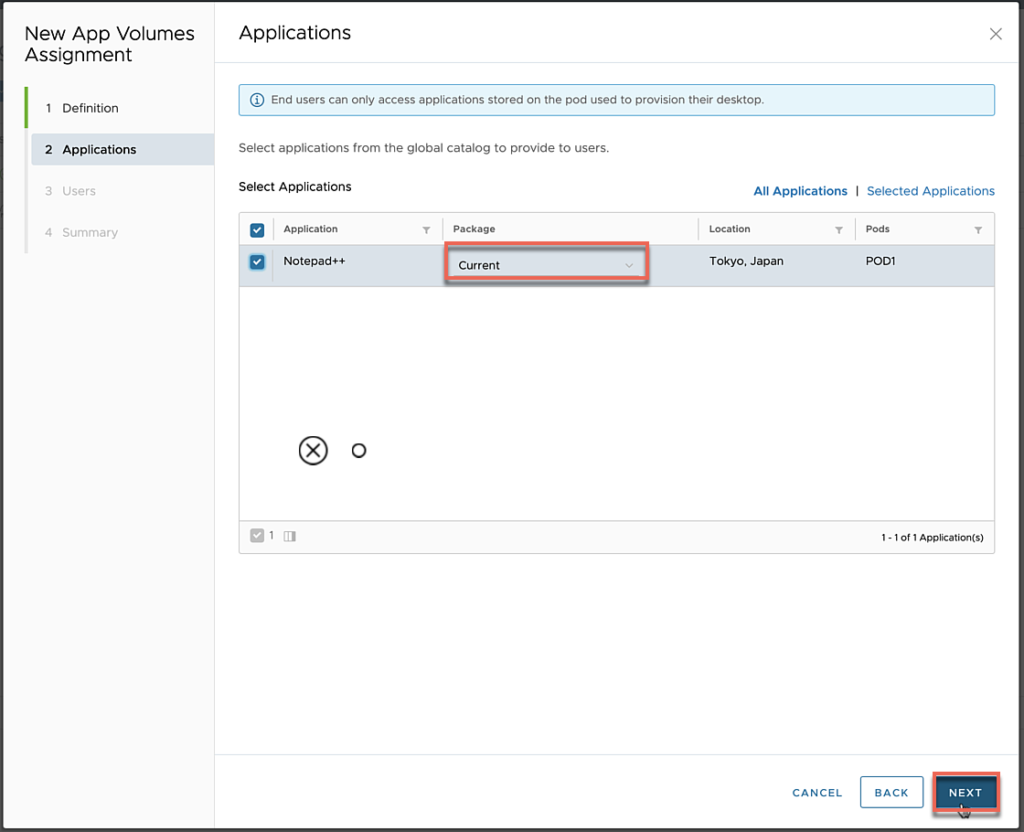
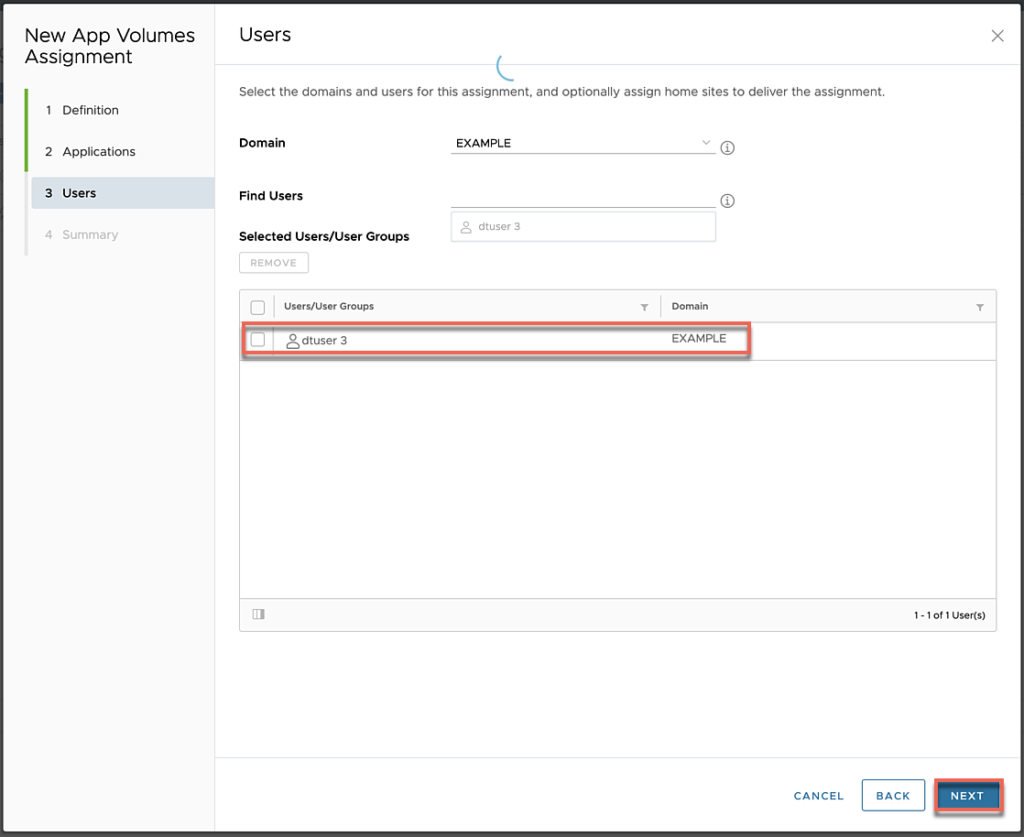
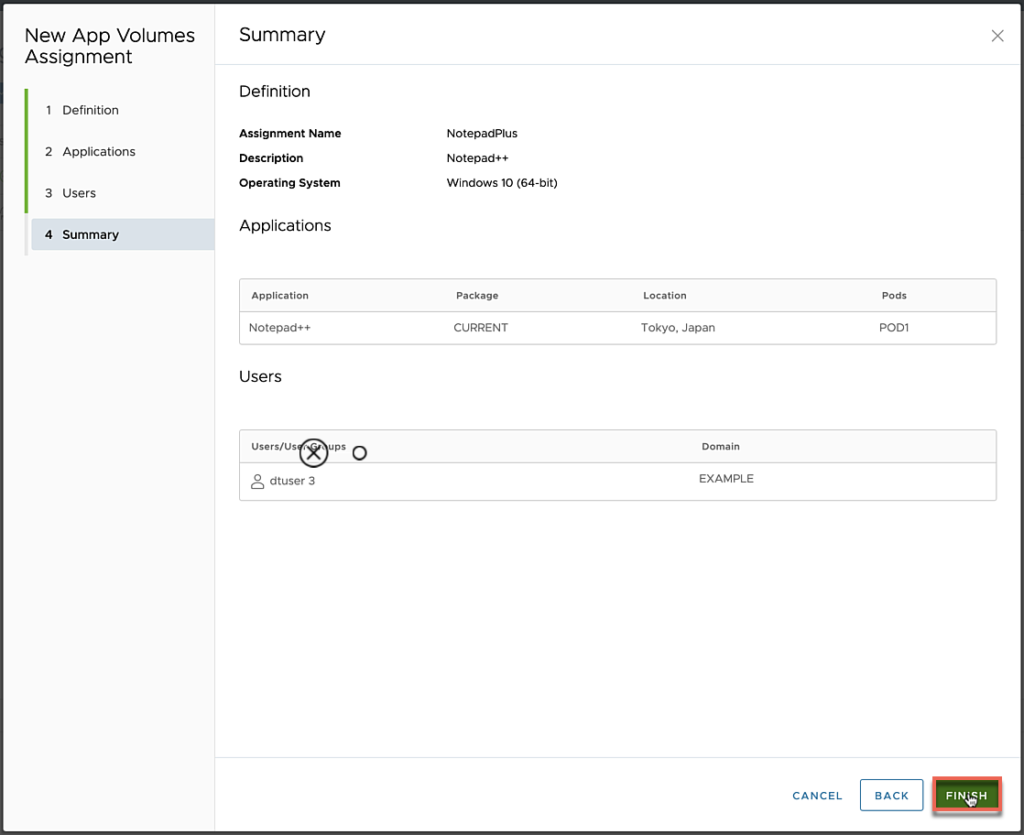
18. Create an application assignment.
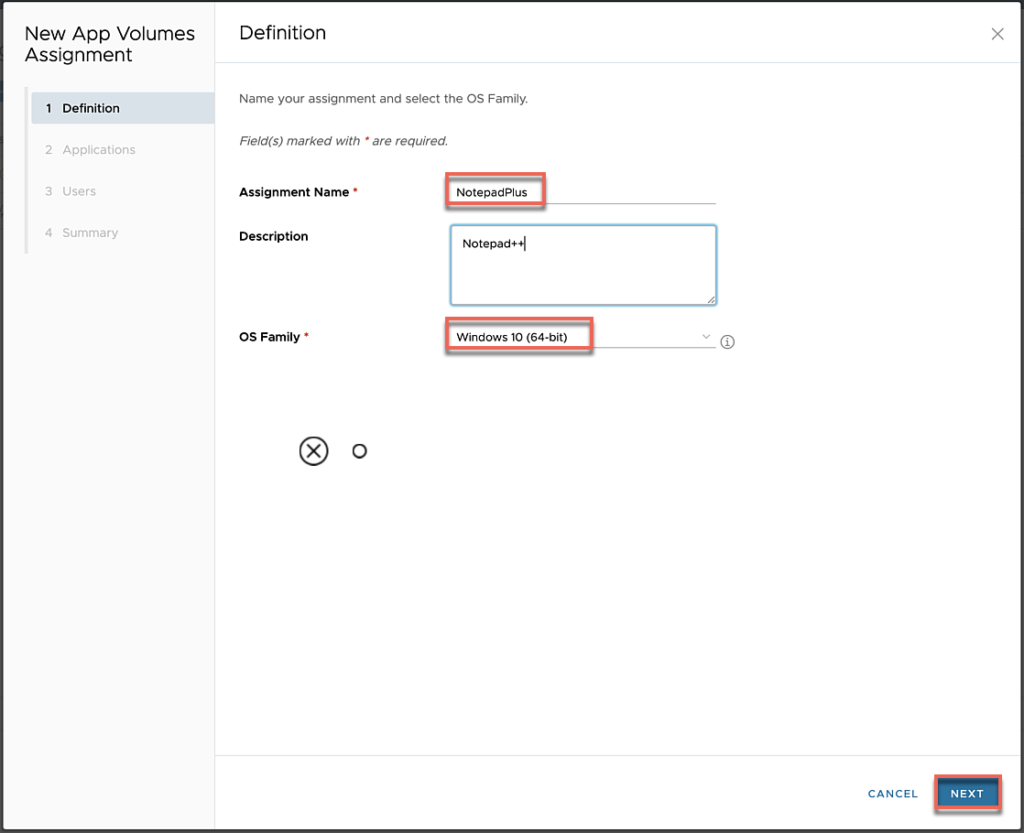
Navigate to [Assign Desktop & Apps] > [VDI & App Volumes] > click on drop-down button next to the [NEW] > select [App Volumes] and follow the on-screen instructions.

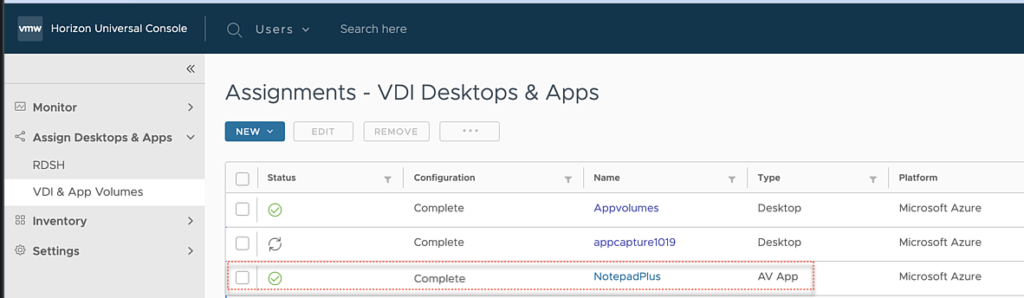
19. Confirm the newly create AppVolumes App exists in list, status as “green ticked” and configuration as “Complete”.
Video clip – Application packaging and verification of application delivery.
![]()