
Dynamic Environment Manager (DEM) Configuration Steps for Horizon Cloud Service (HCS)
Omnissa Dynamic Environment Manager (DEM) provides centralized management of user personalization and application settings, ensuring a consistent user experience across virtual desktop sessions.
This blog provides a step-by-step guide to configuring DEM in Horizon Cloud Service (HCS) Next-Gen using the NoAD method. It covers file share preparation, DEM configuration in Horizon Cloud Universal Console, DEM Management Console setup, and validation of user profile data.
1. Create and Configure the File Share
1.1 Create a file share accessible from the Horizon Cloud desktop machines.
1.2 Create two folders within the file share:
- General – Used to store DEM configuration files.
- Profiles – Used to store user-specific DEM profile data.

1.3 Configure the required SMB share and NTFS permissions for both folders to allow DEM to read configuration files and store user profile data. Refer to the omnissa product document.
2. Configure the NoAD.xml File
2.1 Inside the General folder, create the following directory structure:
Y:\General\FlexRepository\NoAD

2.2 Copy the provided sample NoAD.xml file into the NoAD folder.
<?xml version="1.0" encoding="utf-8"?>

<userEnvironmentSettings>

<setting type="noAD"

ProfileArchivePath="\\DC-NEXT01\hcs-dem-noad\Profiles\%username%\Archives"

ProfileArchiveBackupPath="\\DC-NEXT01\hcs-dem-noad\Profiles\%username%\Backups"

LogFileName="\\DC-NEXT01\hcs-dem-noad\Profiles\%username%\Logs\FlexEngine.log"

LogLevel="1"

ConfigPathMissingAction="0"

ArchivePathMissingAction="1"

AppBlockingEventLog="1"

EventLog="1"

EventLogAsync="1"

EventLogDirectFlexRefresh="1"

EventLogUEMRefresh="1"

/>

</userEnvironmentSettings>
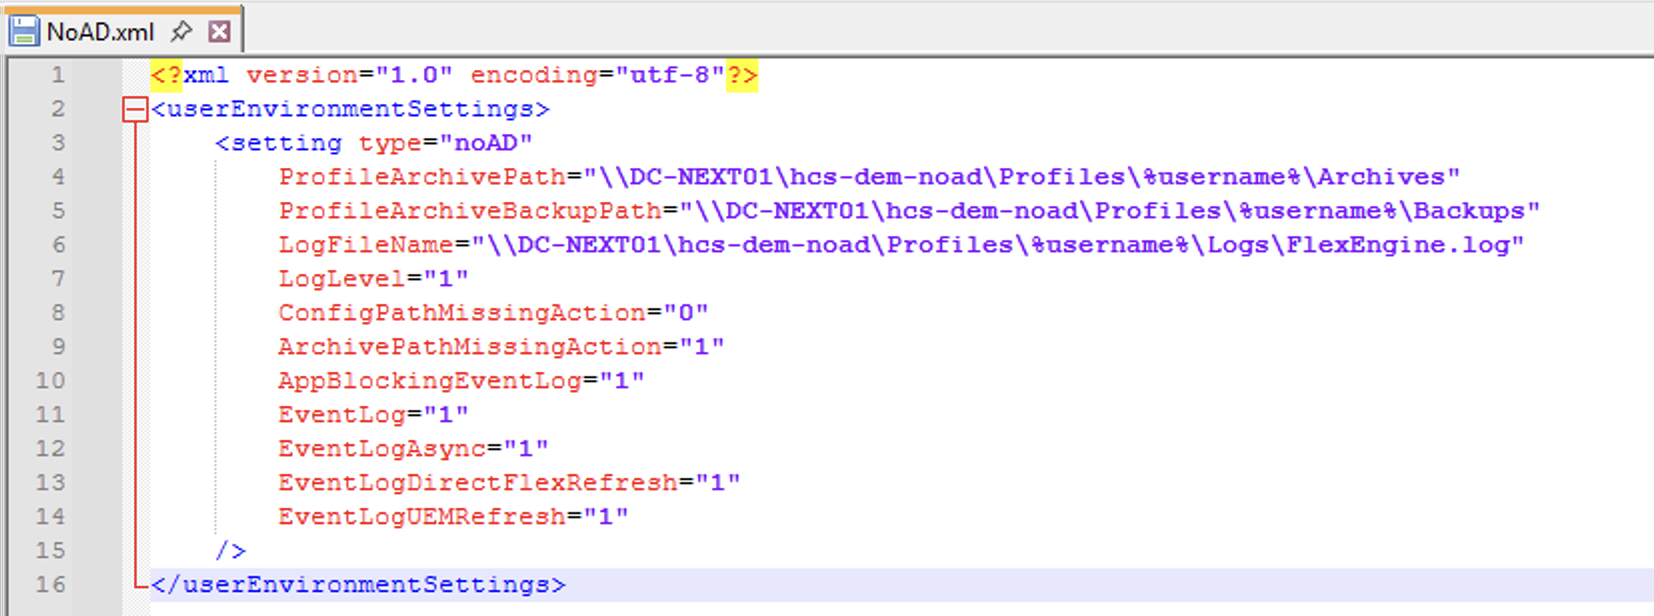
2.3 Update the paths and settings in NoAD.xml to match your file share and folder structure.
3. Configure DEM in Horizon Cloud Universal Console
3.1 Log in to the Horizon Cloud Universal Console.
3.2 Navigate to the Dynamic Environment Manager under the Settings
3.3 Configure DEM using the appropriate file share paths and settings.
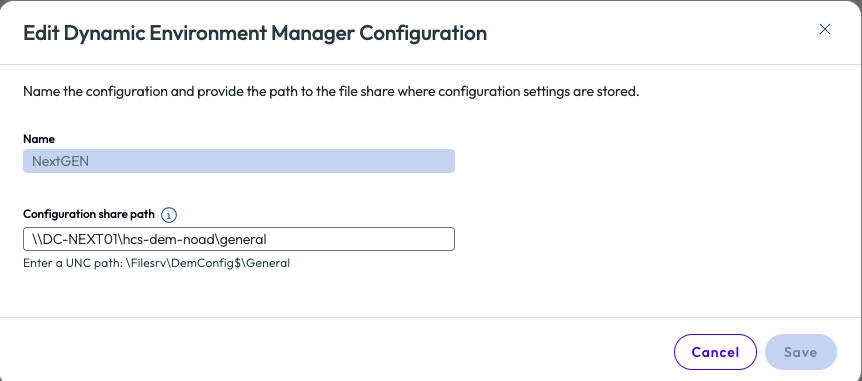
4. Install Horizon Agent Installer (HAI) with DEM
4.1 Install the Horizon Agent Installer (HAI) with the DEM component enabled in the golden image.
4.2 Ensure the DEM component is installed and available on the desktop pool machines.
5. Enable DEM in the Desktop Pool
5.1 Navigate to the desktop pool configuration in the Horizon Cloud Universal Console.
5.2 Enable DEM for the target desktop pool.
5.3 Save and apply the configuration.
6. Install and Configure the DEM Management Console
6.1 Install the DEM Management Console on a machine that has network access to the DEM configuration file share.
6.2 Launch the DEM Management Console.
6.3 Complete the initial configuration by specifying the DEM configuration share and required settings.
6.4 Verify that the console can access and manage the DEM configuration files.
7. Validate the DEM Configuration
7.1 Log in to a Horizon Cloud Service (HCS) desktop using a test user account.
7.2 Confirm that DEM initializes successfully during the user login process.
7.3 Navigate to the Profiles folder in the file share.
7.4 Verify that the user-specific DEM profile folder and data are created as expected.

7.5 Log out and log back in to confirm that DEM captures and restores the user’s environment settings correctly.