Omnissa recently announced the general availability of new feature called “Horizon Cloud Server on Amazon Workspace Core”, where admin can now register amazon Workspaces Core as a capacity provider and deploy Horizon Edge directly on AWS native infrastructure. Unlike in Horizon 8 on Amazon Workspace Core, Horizon Cloud service on Amazon Workspaces core does not require the Horizon8 Connection Server software. Connection Server functionality like user`s authentication, session management and brokering happens from Horizon Cloud Service Control Plane which is fully managed by Omnissa Inc.
In this post we will go through the prerequisites and end to end deployment steps including edge deployment, image import and desktops pool deployment.
Prerequisites
Below are the prerequisites need to be in place before you to be able to start deploying the Horizon Edge on Amazon Workspace Core. Please check the check-list in docs.omnissa for further detail.
- Horizon Cloud Service Account
- Valid Amazon Web Services account in a supported AWS region
- Amazon availability Zones for WorkSpaces Personal Configured
- Amazon Workspaces BYOL for Windows11 and 10 desktops
- Either of a supported identity provider for user identity. Microsoft Entra ID, Omnissa Access SaaS/On-prem, Omnissa identity service(new)
- Domain Service and Active Directory for Machine Identity
- SSL Certificate for UAG deployment
- Networks
- Ports
Deployment Workflow
During the Horizon Cloud Edge deployment, we need to perform the multiple tasks back and forth in AWS as well as Horizon Cloud console. Below are the list of the tasks at high level.
The list tasks need to be performed in AWS/Workspaces console
- Create an Amazon VPC
- Create Subnets and Route tables in AWS
- Create NAT Gateway (for mgmt/desktops ) and Internet GW (UAG external access)
- Create a DHCP option Set and attach it to the VPC
- Create IAM role and Policy
- Enable BYOL in Amazon Workspaces (this is required for Windows 11/ 10 desktop)
- Create a directory and AD Connector (ADC)
- Import windows image and create image
The list of tasks need to be performed in Horizon Cloud Universal Console
- Sing up and login to Horizon Cloud Service Universal Console
- Register Active Directory and user iDP
- Register “Amazon Workspace Core” as provider
- Edge deployment
- Import image from Amazon Workspaces Core or EC2
- Desktops Pool / Pool Group Creation and users entitlement
- Access the desktops
Note: If you have already performed the AWS related tasks, you can refer to step-8 onwards for Horizon Edge on Amazon Workspaces Core deployment.
Creating AWS VPC, Subnets, Directories, BYOL
- Login to your AWS console and create a VPC in the region where you would like to deploy your Horizon Cloud Edge.

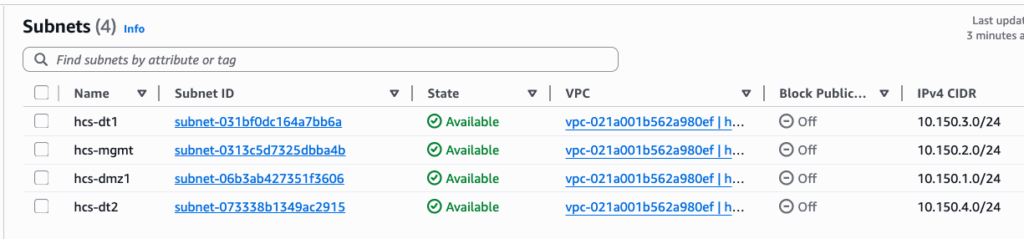
2. Create 4 subnets. Out of 4 subnets, one of the subnet need to be in different availability zone. Because, while creating a Directory in Amazon Workspaces, we need to define 2 subnets from the different availability zone. In my case, I have 3 subnets in apne1-az1 and 1 subnet in apne1-az4.

3. Create a Internet Gateway and NAT gateway.


4. Create 2 route tables for public and private.
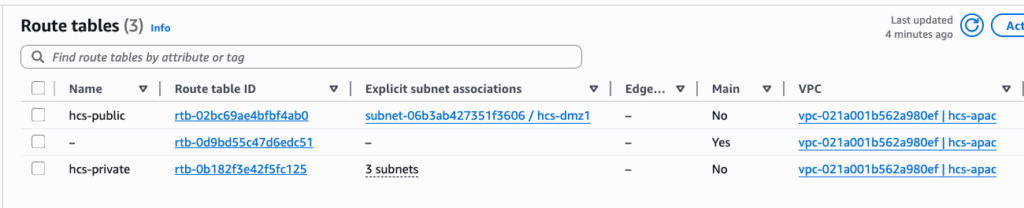
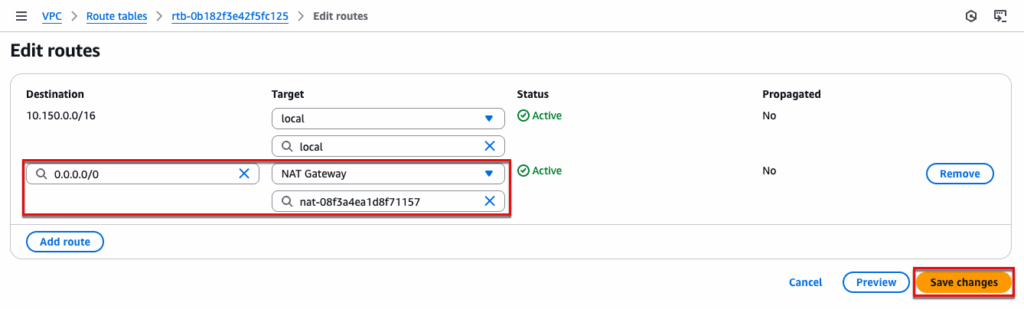
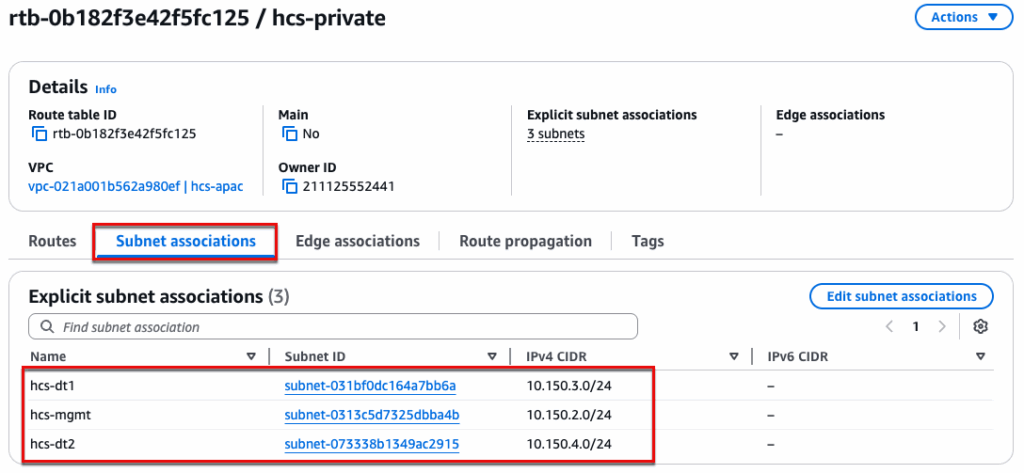
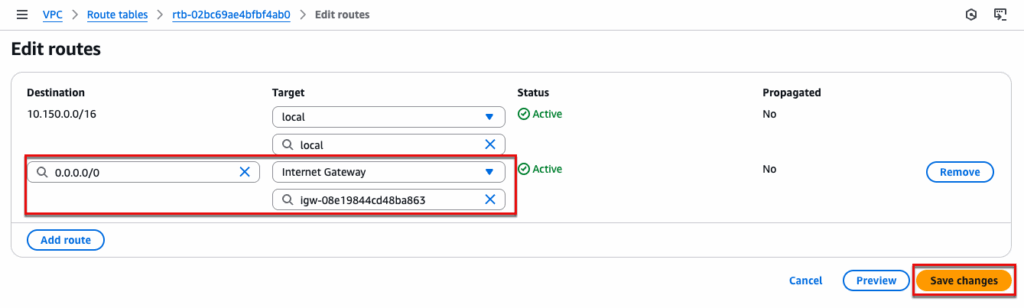
For private: Edit the routes and point 0.0.0.0/0 to NAT Gateway. Navigate to [Subnet Associations] and select the subnets which are used for management and desktops.
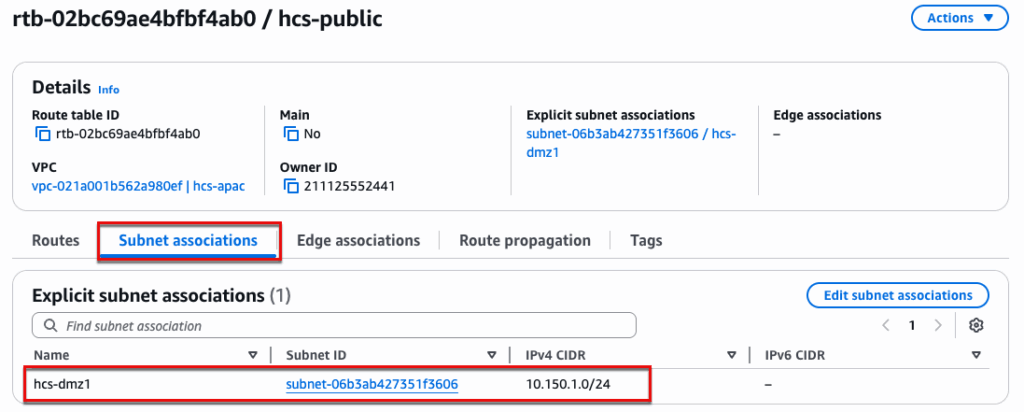
For Public: Edit the routes and point 0.0.0.0/0 to Internet Gateway. Navigate to [Subnet Associations] and select the DMZ subnet which is used for UAG External Access.
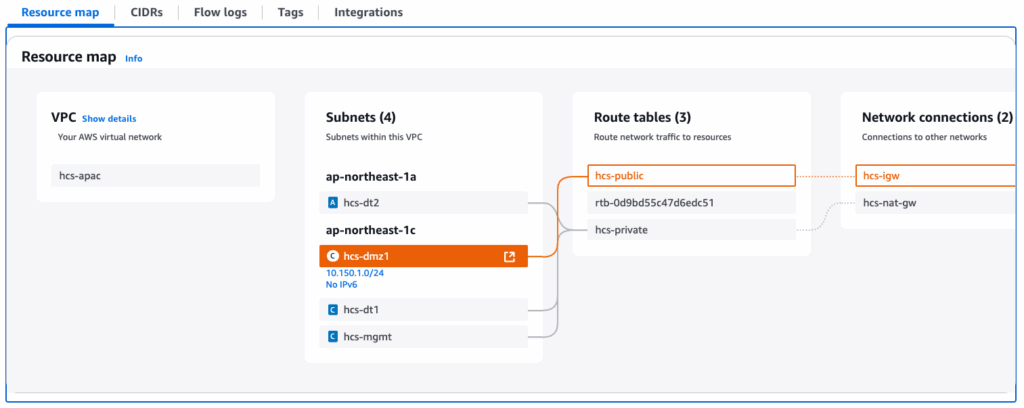
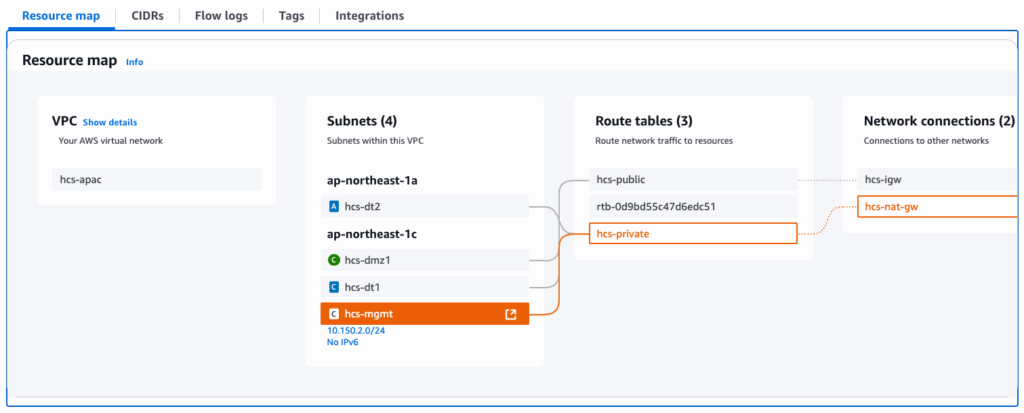
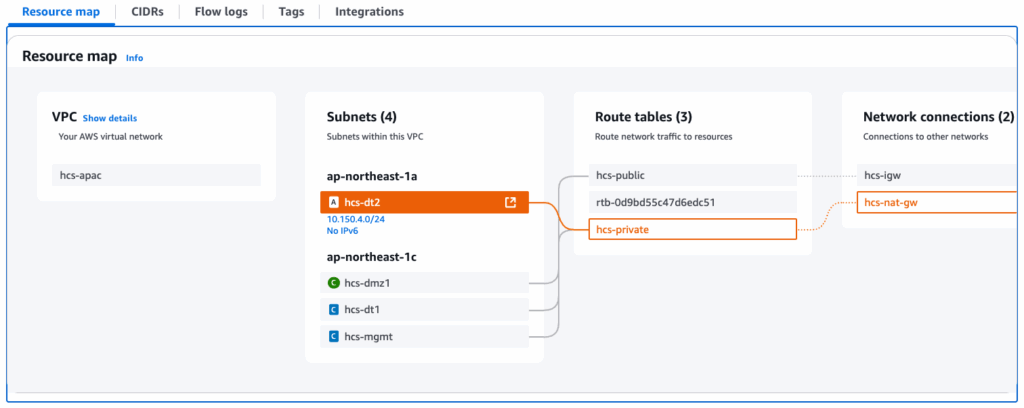
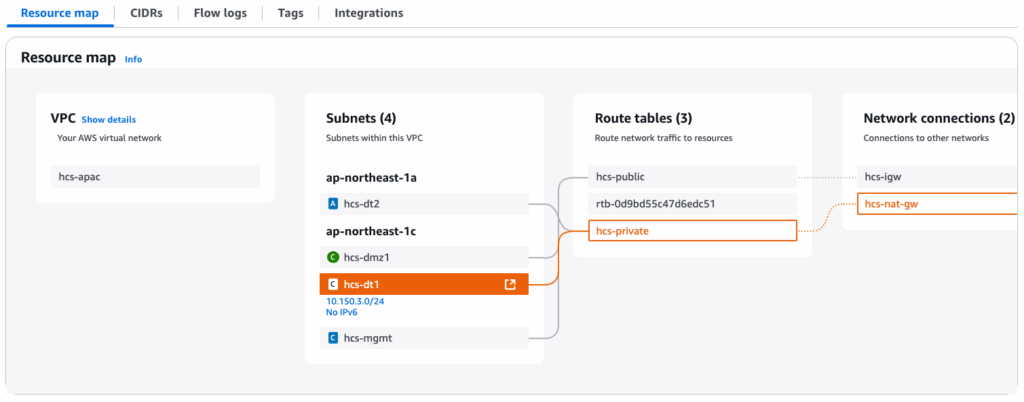
Once you performed step-4, navigate to VPC > [Resource map] and confirm if the routes are configured correctly. Click in the subnet name name to see the route map.
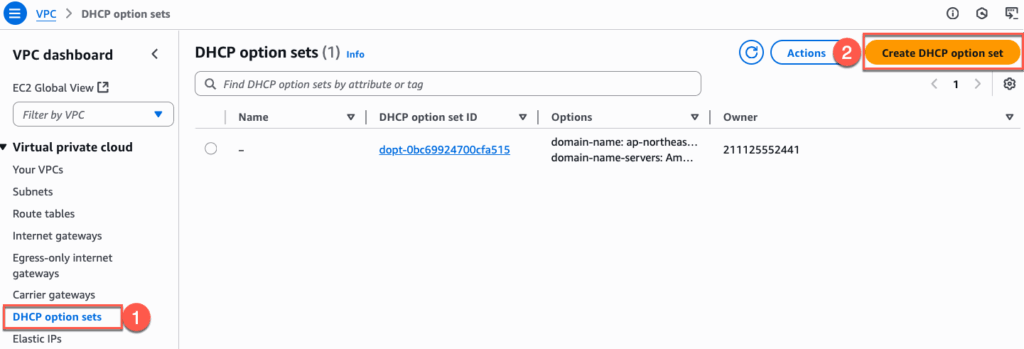
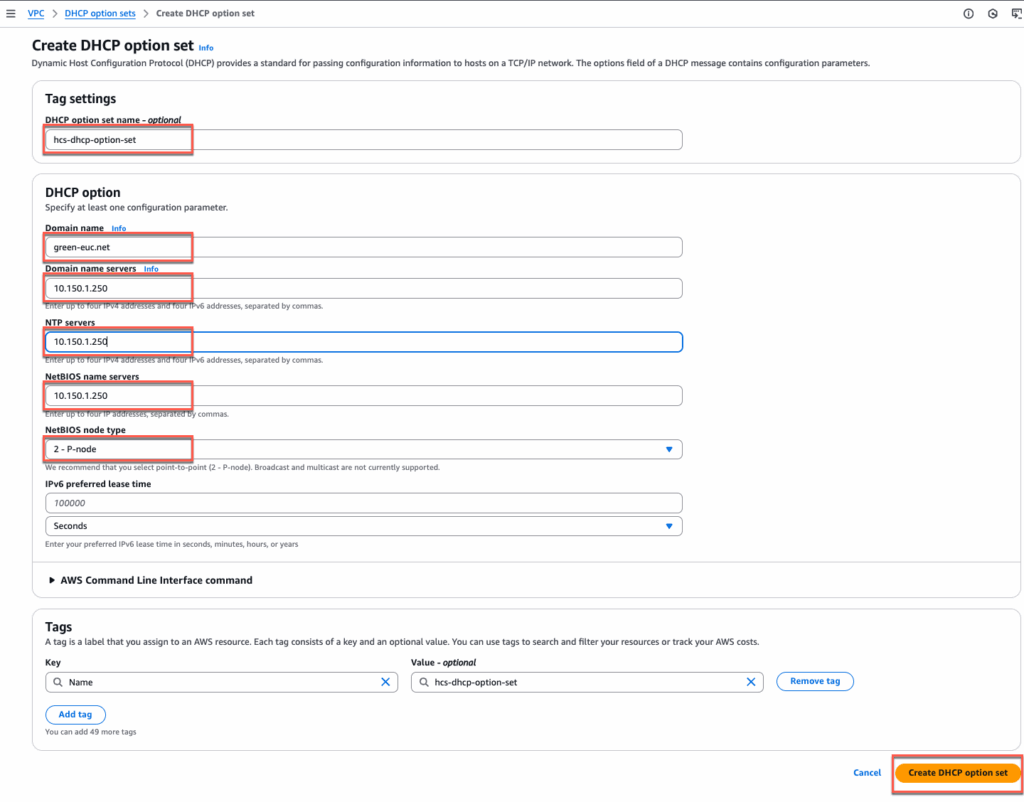
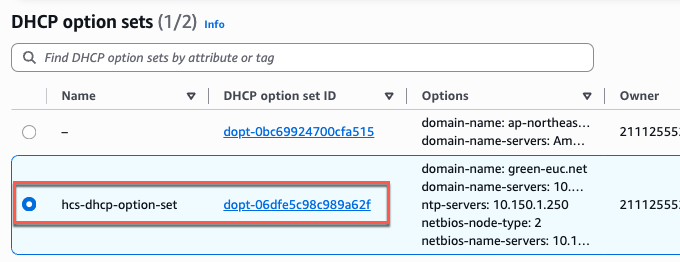
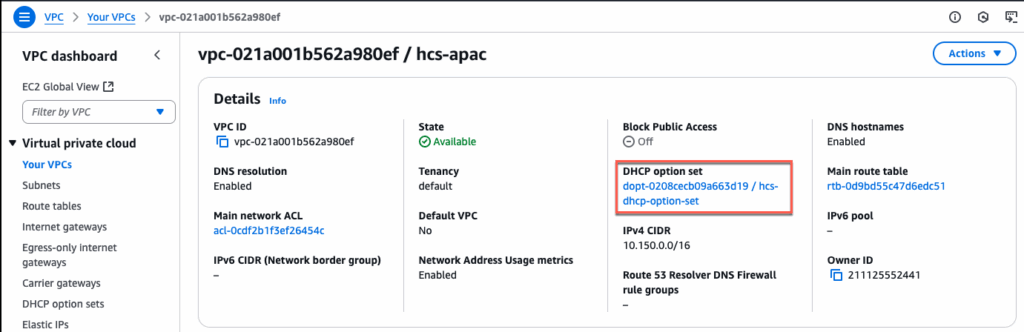
5. Create a DHCP option Set and attach it to the VPC.
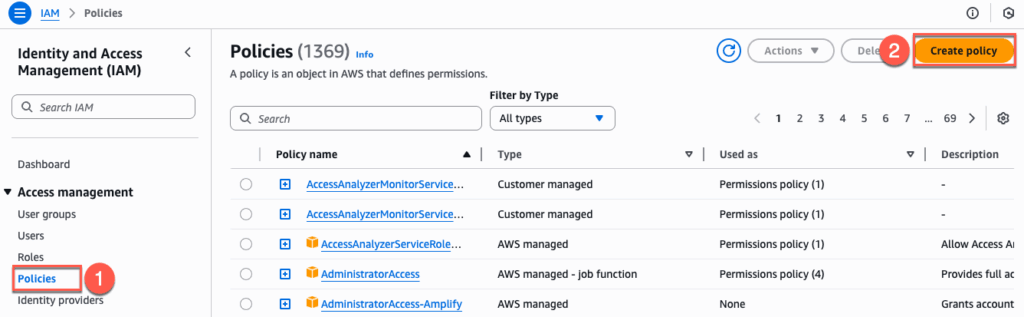
6. Create IAM role and Policy
Create a policy:
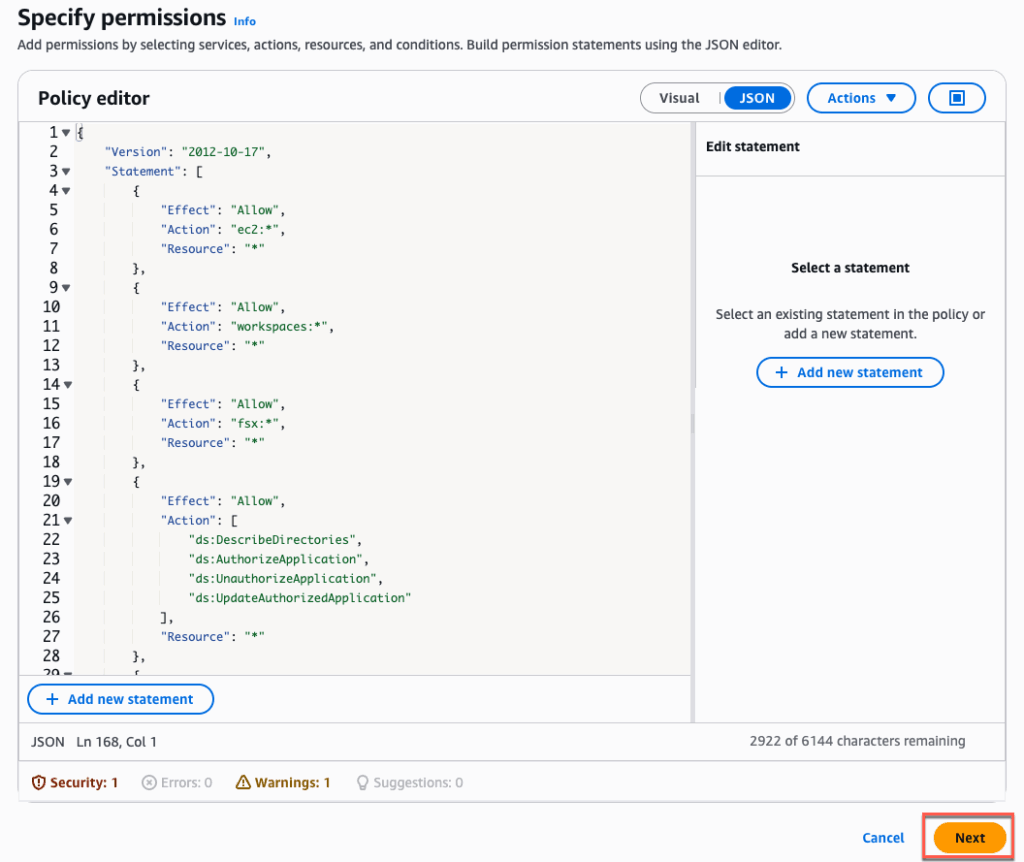
Navigate to IAM > [Policies] > [Create Policy] > [JSON]
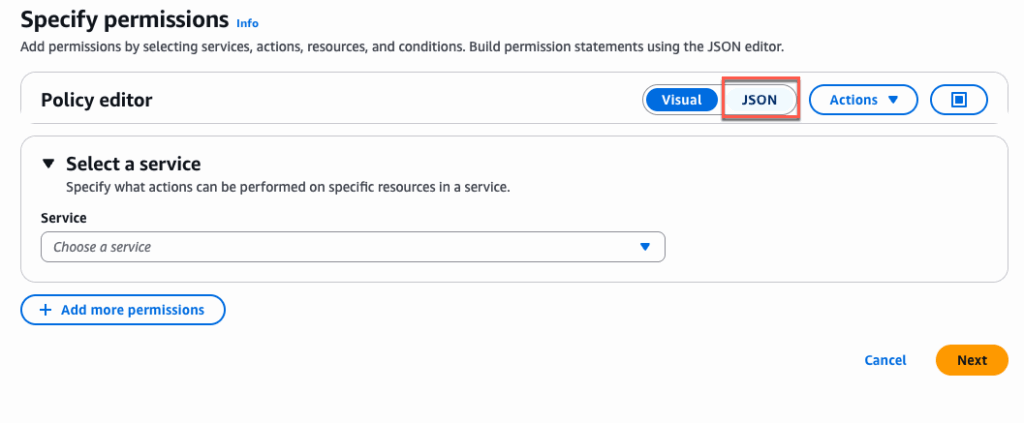
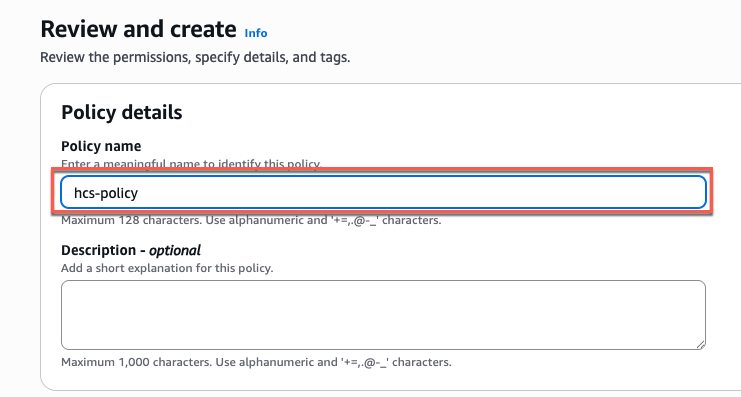
Copy below JSON and paste in [Policy Editor] > [Next] > define the [Policy Name] > [Create Policy]. JSON details can be found in doc.omnissa.com.
{
    "Version": "2012-10-17",
    "Statement": [
        {
            "Effect": "Allow",
            "Action": "ec2:*",
            "Resource": "*"
        },
        {
            "Effect": "Allow",
            "Action": "workspaces:*",
            "Resource": "*"
        },
        {
            "Effect": "Allow",
            "Action": "fsx:*",
            "Resource": "*"
        },
        {
            "Effect": "Allow",
            "Action": [
                "ds:DescribeDirectories",
                "ds:AuthorizeApplication",
                "ds:UnauthorizeApplication",
                "ds:UpdateAuthorizedApplication"
            ],
            "Resource": "*"
        },
        {
            "Effect": "Allow",
            "Action": [
                "cloudformation:CreateStack",
                "cloudformation:UpdateStack",
                "cloudformation:DeleteStack",
                "cloudformation:DescribeStacks",
                "cloudformation:TagResource",
                "cloudformation:UntagResource",
                "cloudformation:DescribeStackEvents",
                "cloudformation:ListStackResources",
                "cloudformation:GetTemplate"
            ],
            "Resource": "*"
        },
        {
            "Effect": "Allow",
            "Action": [
                "resource-groups:GetGroup",
                "resource-groups:CreateGroup",
                "resource-groups:DeleteGroup",
                "resource-groups:UpdateGroup",
                "resource-groups:Tag",
                "resource-groups:Untag",
                "resource-groups:GetTags",
                "resource-groups:ListGroups",
                "resource-groups:ListGroupResources",
                "resource-groups:ListResourceTypes",
                "resource-groups:AssociateResource",
                "resource-groups:DisassociateResource"
            ],
            "Resource": "*"
        },
        {
            "Effect": "Allow",
            "Action": [
                "elasticloadbalancing:AddTags",
                "elasticloadbalancing:RemoveTags",
                "elasticloadbalancing:RegisterTargets",
                "elasticloadbalancing:DeregisterTargets",
                "elasticloadbalancing:DescribeTargetHealth",
                "elasticloadbalancing:CreateListener",
                "elasticloadbalancing:DeleteListener",
                "elasticloadbalancing:DescribeListeners",
                "elasticloadbalancing:CreateTargetGroup",
                "elasticloadbalancing:DeleteTargetGroup",
                "elasticloadbalancing:ModifyTargetGroup",
                "elasticloadbalancing:DescribeTargetGroups",
                "elasticloadbalancing:CreateLoadBalancer",
                "elasticloadbalancing:DeleteLoadBalancer",
                "elasticloadbalancing:DescribeLoadBalancers",
                "elasticloadbalancing:ModifyLoadBalancerAttributes",
                "elasticloadbalancing:ModifyTargetGroupAttributes"
            ],
            "Resource": "*"
        },
        {
            "Effect": "Allow",
            "Action": [
                "s3:GetObject",
                "s3:PutObject",
                "s3:ListBucket",
                "s3:ListAllMyBuckets",
                "s3:CreateBucket",
                "s3:DeleteObject",
                "s3:DeleteBucket",
                "s3:PutBucketPolicy",
                "s3:GetBucketPolicy",
                "s3:DeleteBucketPolicy",
                "s3:PutBucketTagging",
                "s3:GetBucketLocation",
                "s3:PutLifecycleConfiguration",
                "s3:PutBucketPublicAccessBlock",
                "s3:PutEncryptionConfiguration"
            ],
            "Resource": "*"
        },
        {
            "Effect": "Allow",
            "Action": [
                "iam:GetRole",
                "iam:PassRole",
                "iam:CreateRole",
                "iam:GetPolicy",
                "iam:PutRolePolicy",
                "iam:GetPolicyVersion",
                "iam:ListAttachedUserPolicies",
                "iam:GetInstanceProfile",
                "iam:CreateInstanceProfile",
                "iam:DeleteInstanceProfile",
                "iam:CreateServiceLinkedRole",
                "iam:AddRoleToInstanceProfile",
                "iam:RemoveRoleFromInstanceProfile",
                "iam:SimulatePrincipalPolicy",
                "iam:DeleteRole",
                "iam:AttachRolePolicy",
                "iam:DetachRolePolicy",
                "iam:ListAttachedRolePolicies",
                "iam:ListInstanceProfilesForRole"

            ],
            "Resource": "*"
        },
        {
            "Effect": "Allow",
            "Action": [
                "tag:GetResources",
                "tag:TagResources",
                "tag:UntagResources"
            ],
            "Resource": "*"
        },
        {
            "Effect": "Allow",
            "Action": [
                "kms:Encrypt",
                "kms:Decrypt",
                "kms:ReEncrypt*",
                "kms:GenerateDataKey*",
                "kms:DescribeKey",
                "kms:ListKeys",
                "kms:ListAliases"
            ],
            "Resource": "*"
        },
        {
            "Effect": "Allow",
            "Action": [
                "ssm:SendCommand",
                "ssm:StartSession",
                "ssm:CreateAssociation",
                "ssm:DescribeAssociation",
                "ssm:GetCommandInvocation",
                "ssm:ListCommandInvocations",
                "ssm:DescribeInstanceInformation"
            ],
            "Resource": "*"
        }
    ]
}
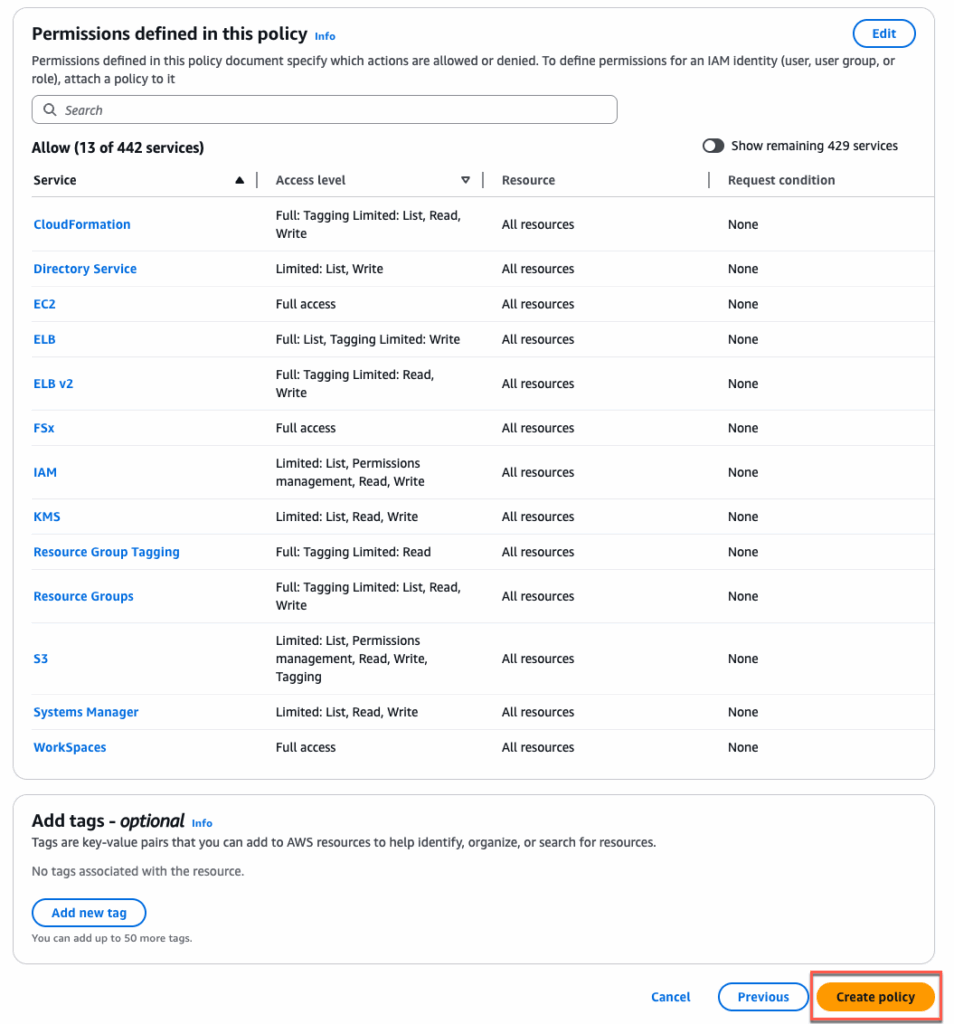
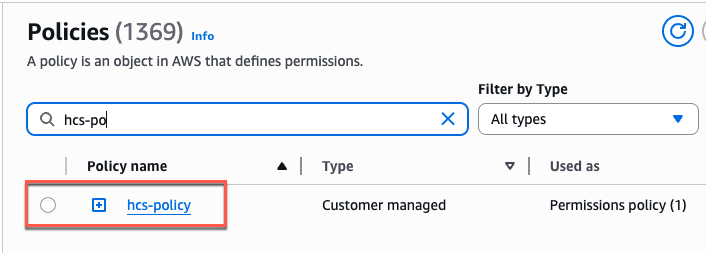
Confirm you have created a policy.
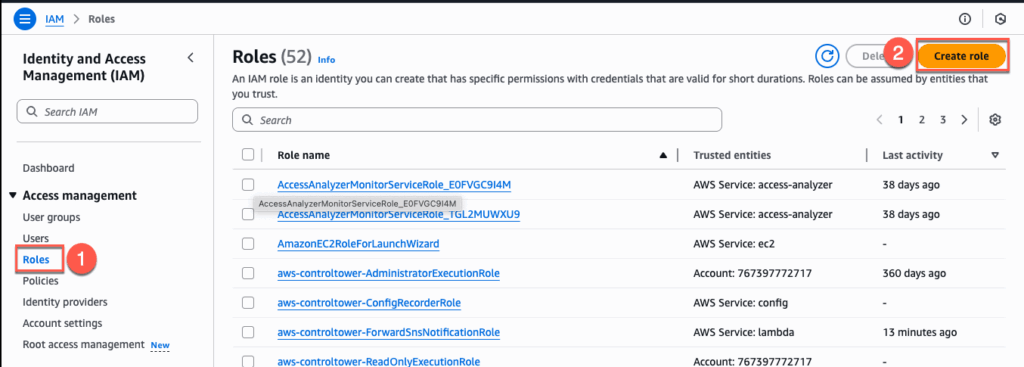
Creating a role:
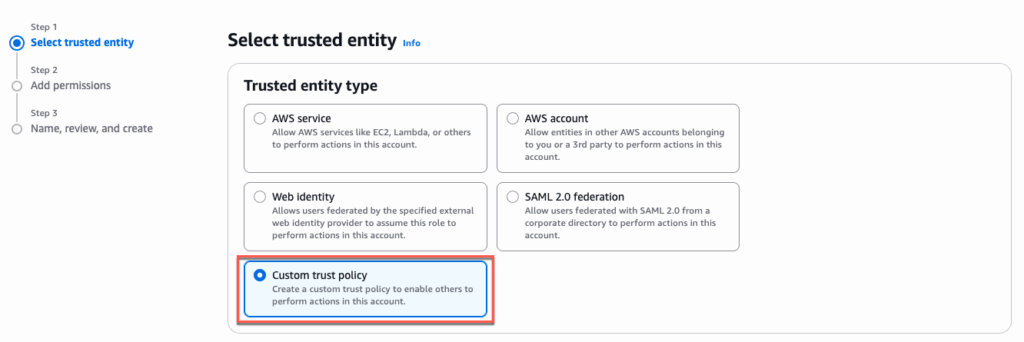
In AIM console > select [Role] > [Create Role] > [Custom trust policy]
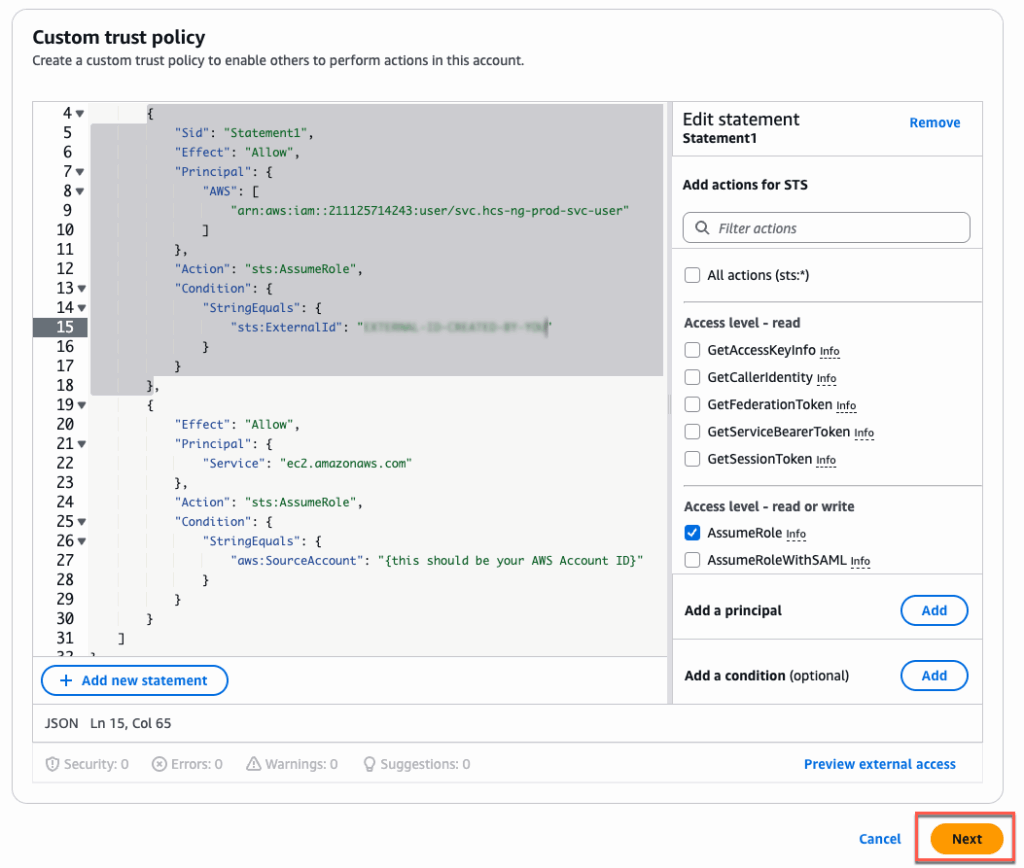
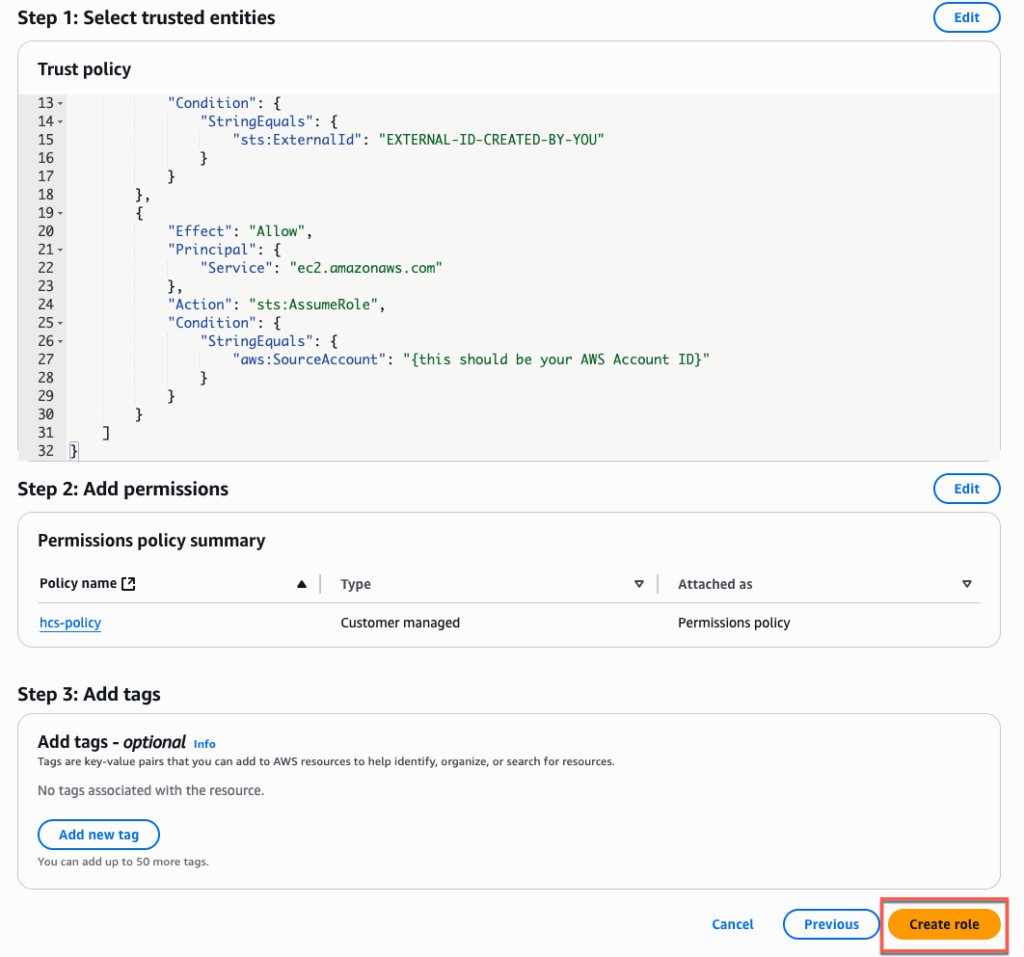
Copy below JSON and paste in Policy Editor > [Next] > define the [Policy Name] > [Create Policy]. JSON details can be found in “Create IAM Roles” section of doc.omnissa.com. However, you MUST modify below 2 lines matching your AWS account.
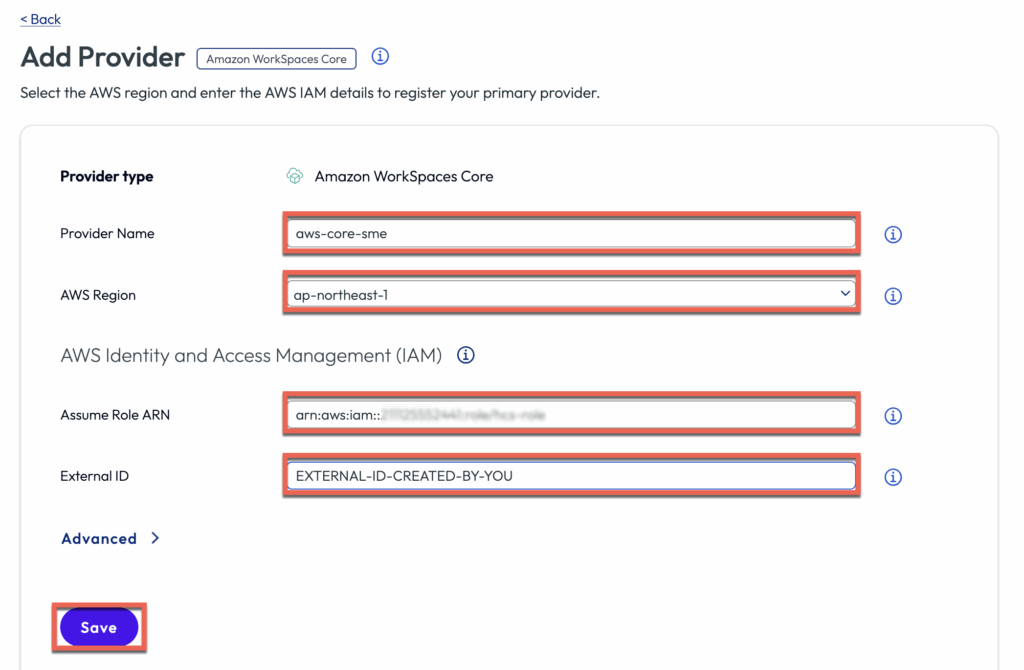
"sts:ExternalId": "{create a custom ExternalId}" Give any External ID of your choice.
"aws:SourceAccount": "{this should be your AWS Account ID}" Define your AWS Account ID
    {
    "Version": "2012-10-17",
    "Statement": [
        {
            "Sid": "Statement1",
            "Effect": "Allow",
            "Principal": {
                "AWS": [
                    "arn:aws:iam::211125714243:user/svc.hcs-ng-prod-svc-user"
                ]
            },
            "Action": "sts:AssumeRole",
            "Condition": {
                "StringEquals": {
                    "sts:ExternalId": "{create a custom ExternalId}"
                }
            }
        },
        {
            "Effect": "Allow",
            "Principal": {
                "Service": "ec2.amazonaws.com"
            },
            "Action": "sts:AssumeRole",
            "Condition": {
                "StringEquals": {
                    "aws:SourceAccount": "{this should be your AWS Account ID}"
                }
            }
        }
    ]
}
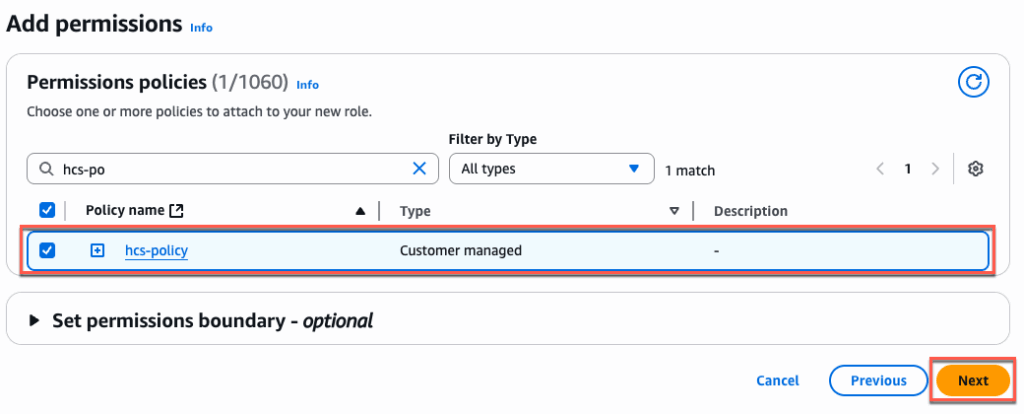
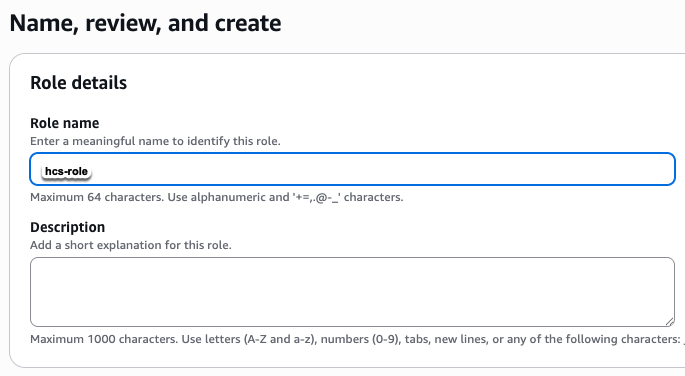
In add permissions section, select the policy which you have created in previous step. In my case policy name is “hcs-policy” > [Next] > give a name to role you are creating > [Create Role].
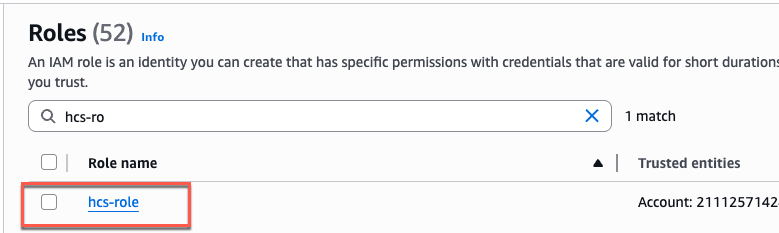
Confirm that the role has been created successfully.
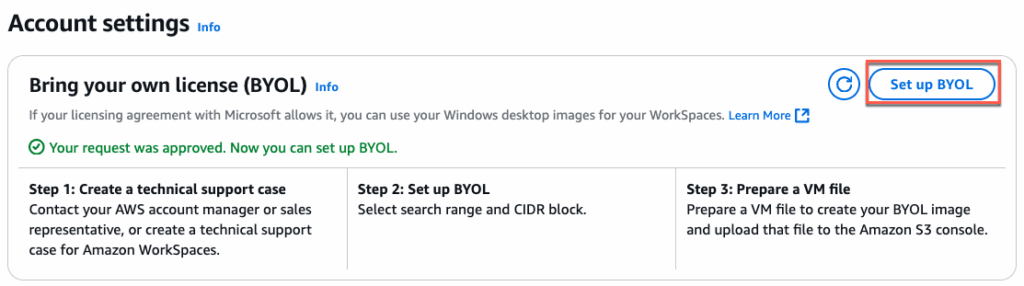
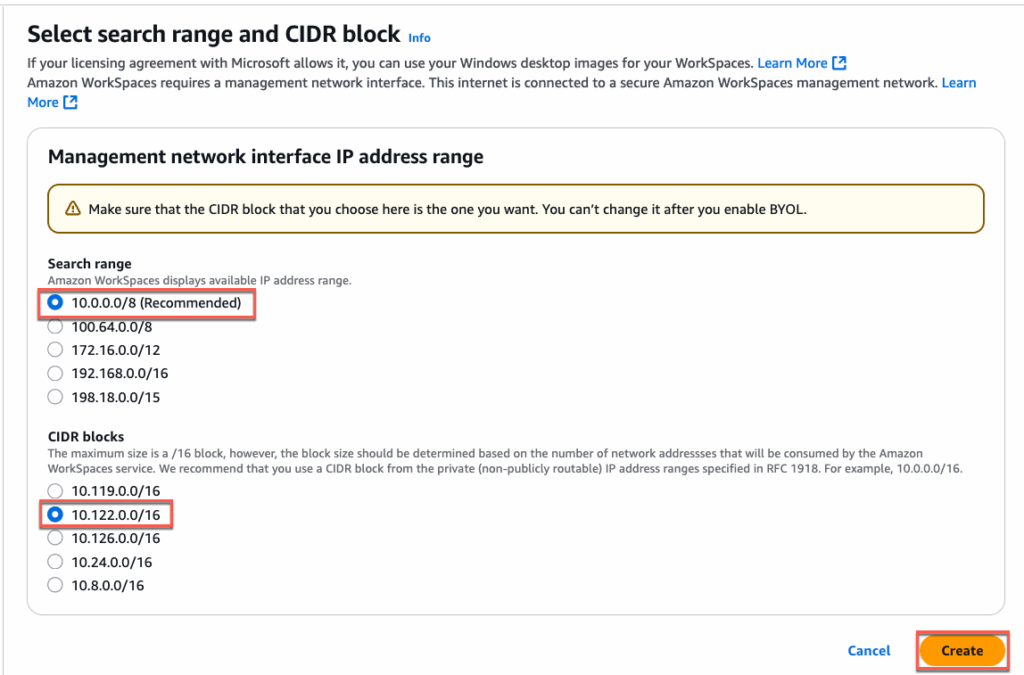
6. Configuring BYOL in Workspace core.
Note: Before you to be able to configure the BYOL, you need to request to AWS support to enable the BYOL feature in your account and AWS region. BYOL need to be enabled by region base, can not be enabled to global regions at once.
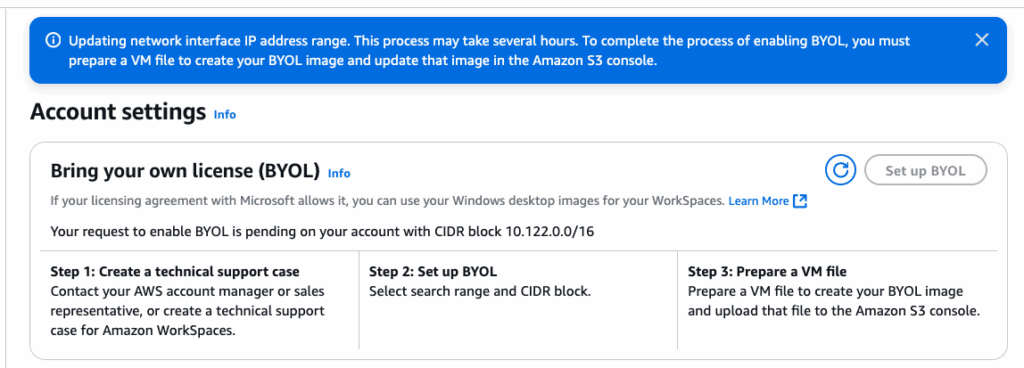
If the BYOL is enabled in your account and AWS region, you will see the [Set UP BYOL] is activated > click in [Set Up BYOL] > select the CIDR Range as needed > [Create]. It may take sometime to complete the BYOL configuration.
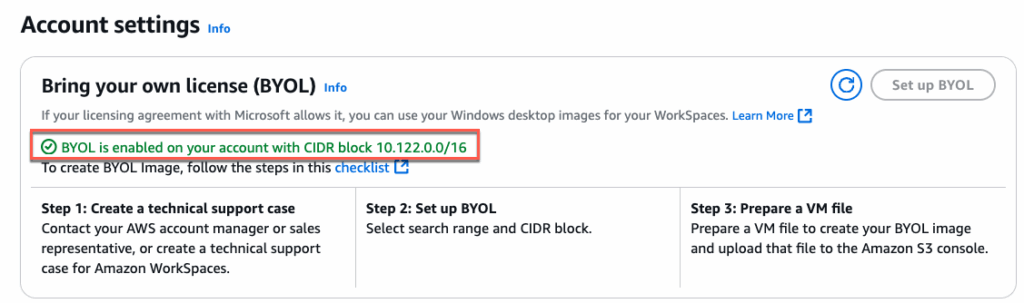
Confirm that the BYOL is enabled in your account and AWS region.
7. Creating AWS directory service and AD connector
Before creating AWS Directories, you need to configure the Microsoft Active directory domain service. In my case, I have configured Microsoft Windows ADDS in AWS EC2 machine.

In this step, first we will create a directory and register it to AWS Directory Service.
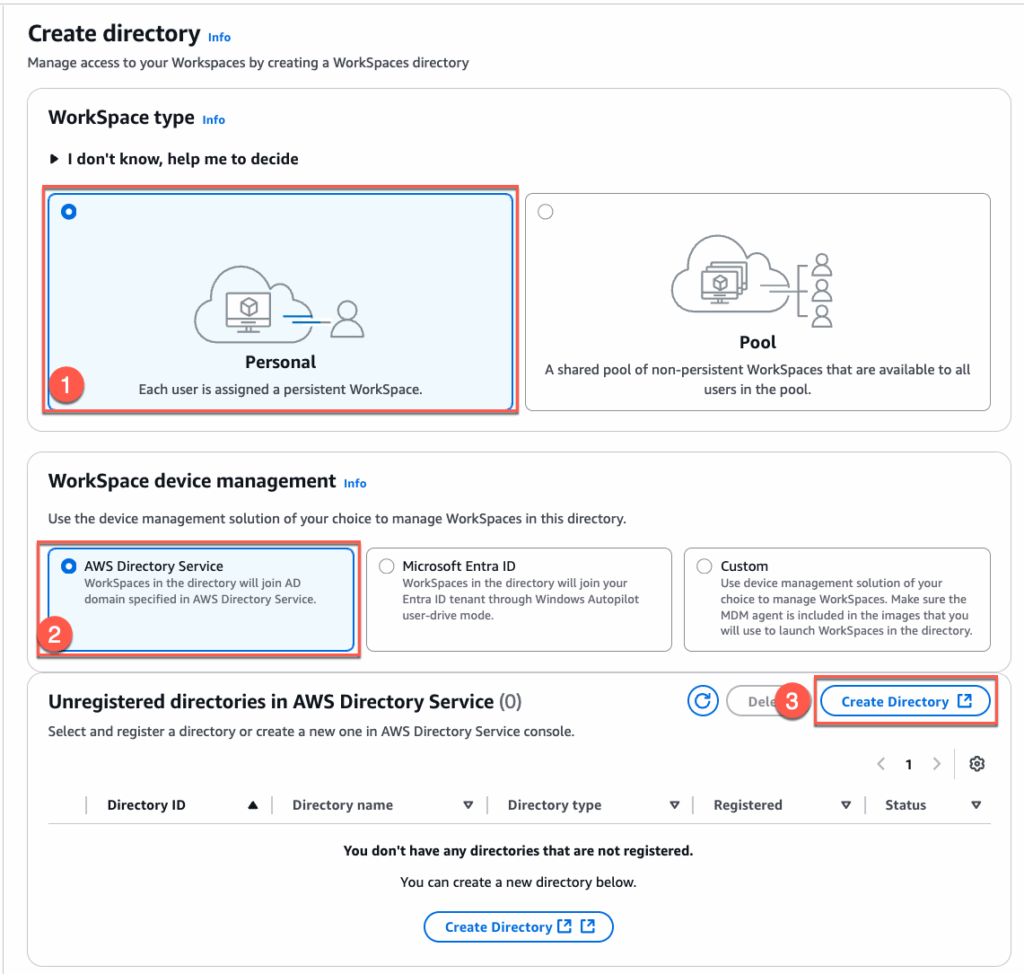
Creating Amazon Workspace Directories:
Navigate to Amazon Workspaces > [Directories] > [Create Directories] > [Personal] > [AWS Directory Service] > [Create directory]

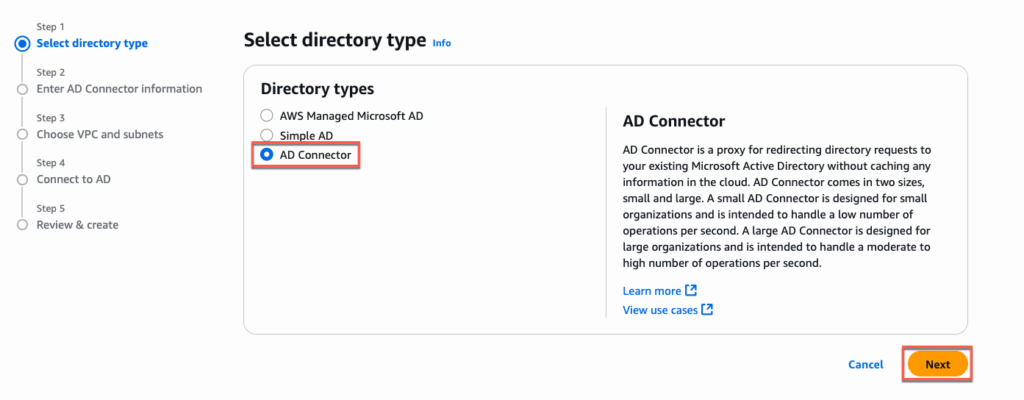
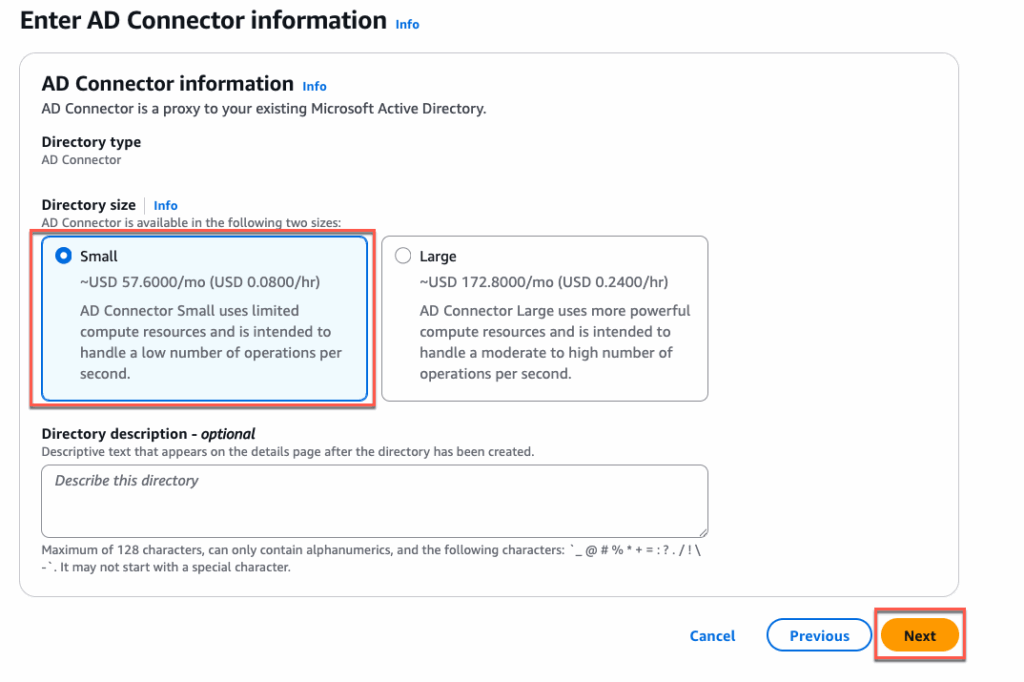
Select [AD Connector] > [Next] > [Small] > [Next]
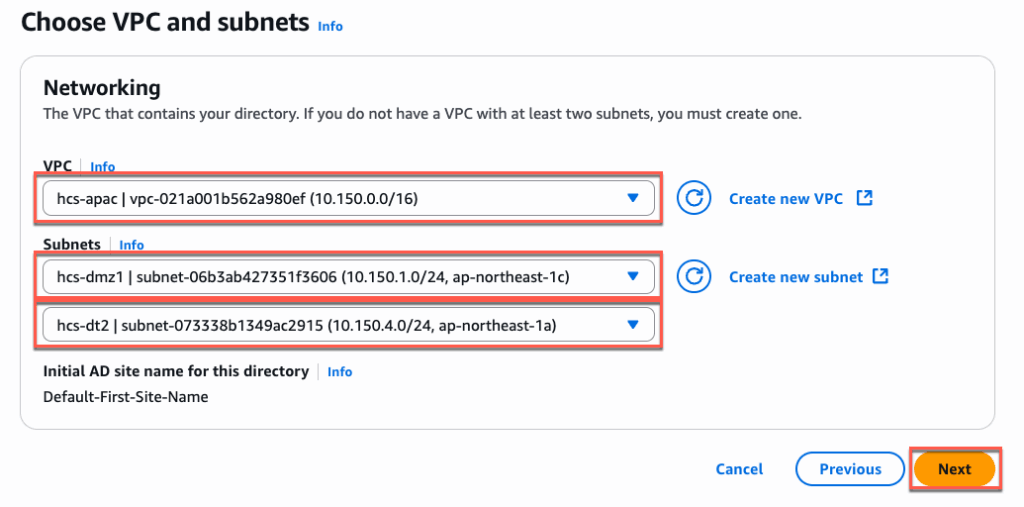
Select your [VPC] and Subnets from the drop down. Subnets must be from 2 different availability zone > [Next].
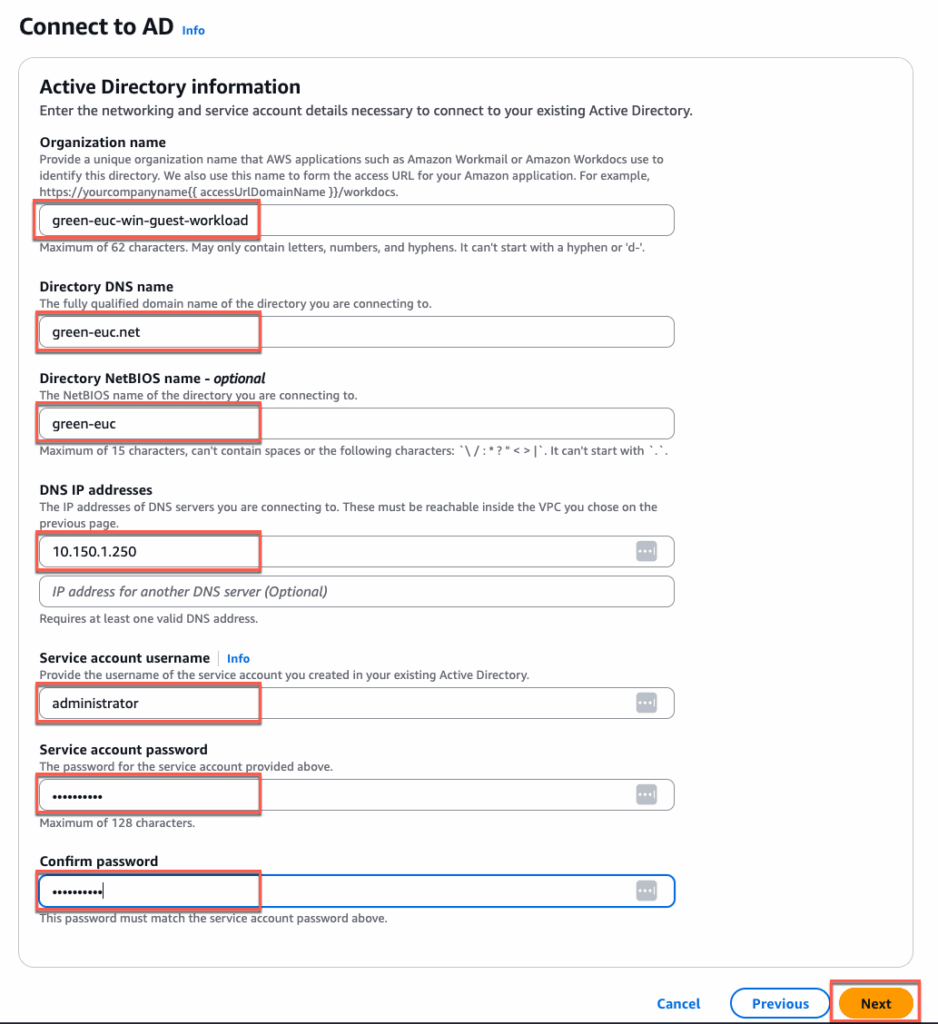
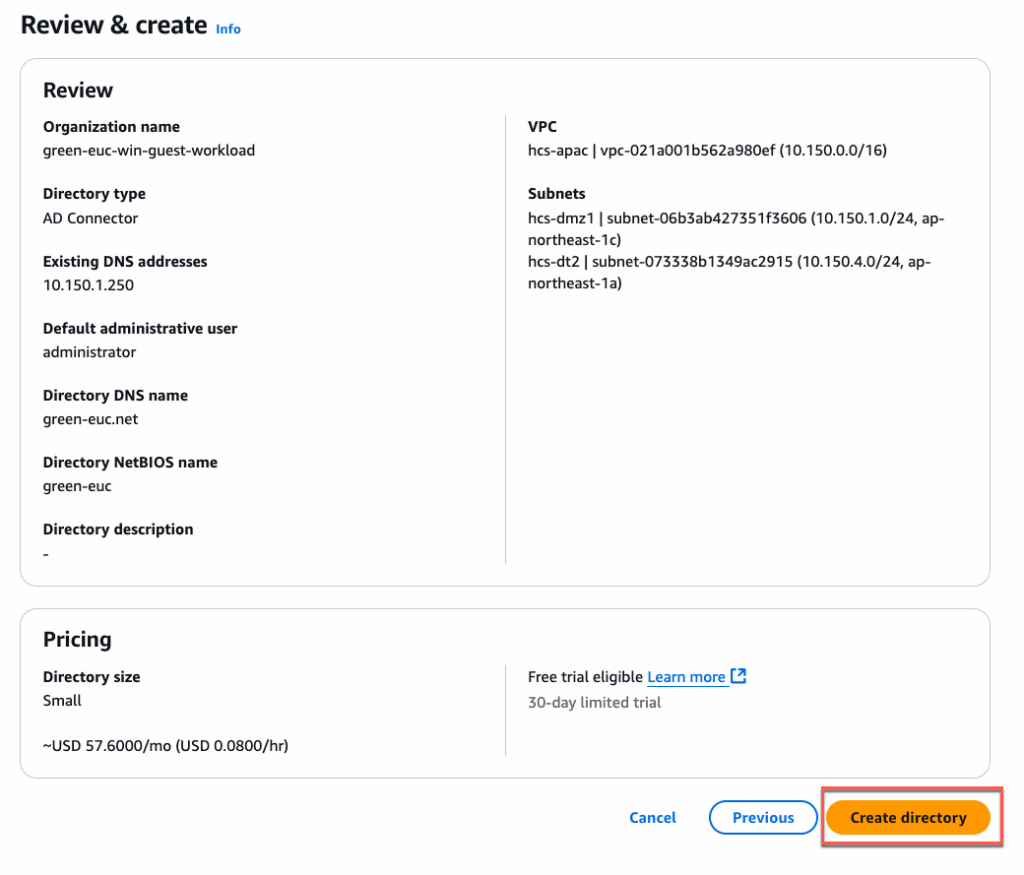
In [Connect to AD] section, give the [Organization name] of your choice but this need to be unique. This directory name will be appeared in Horizon Universal Console while creating the pool > [Next] > [Create Directory].
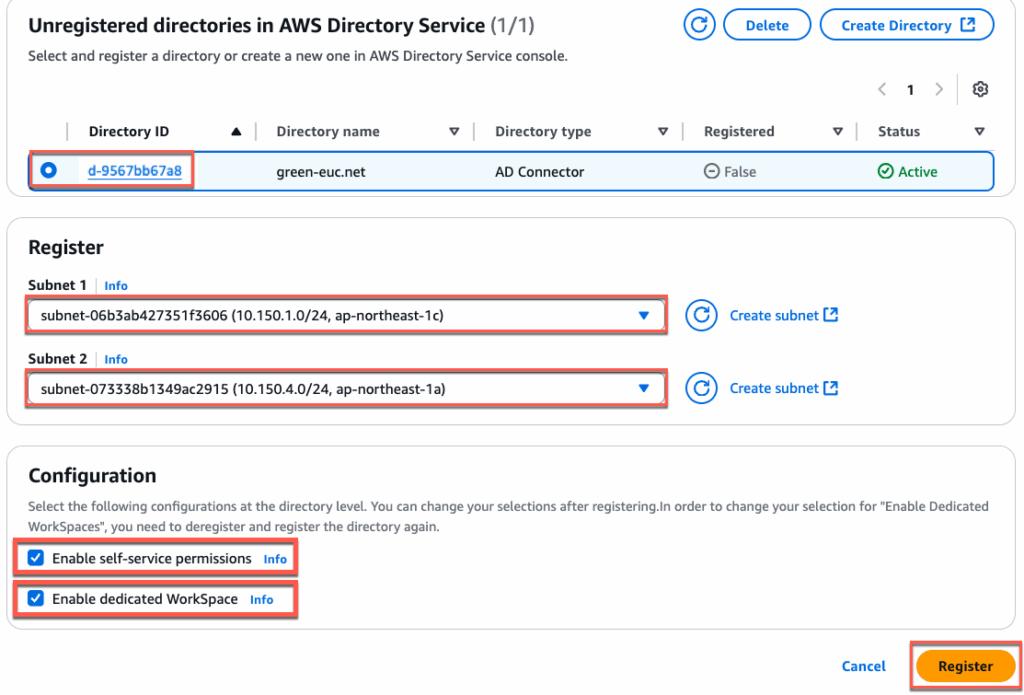
Under the [Unregistered directory… ] section, confirm that the directory is created successfully and status is [Active].

Select the [Directory] > select the subnets from 2 different AWS availability zone > [Register]
Note: the subnets defined here will be used to create the Workspaces VM (pool VMs). So you need to select the subnets where you wish to place the pool/image VMs.
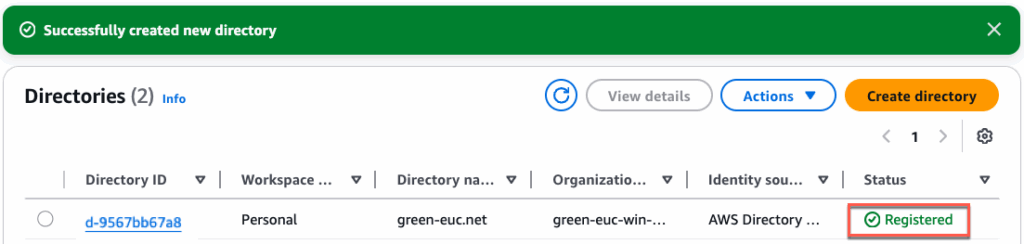
Confirm that the directory is registered successfully and status is showing as [Registered].
Deployment of Edge from Horizon Universal Console
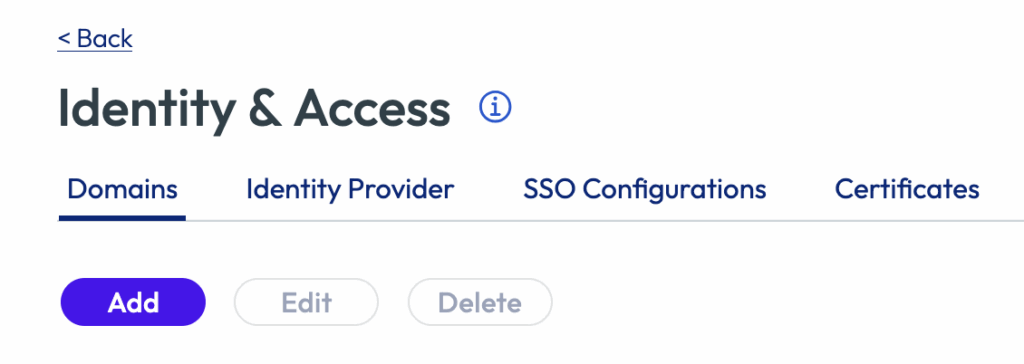
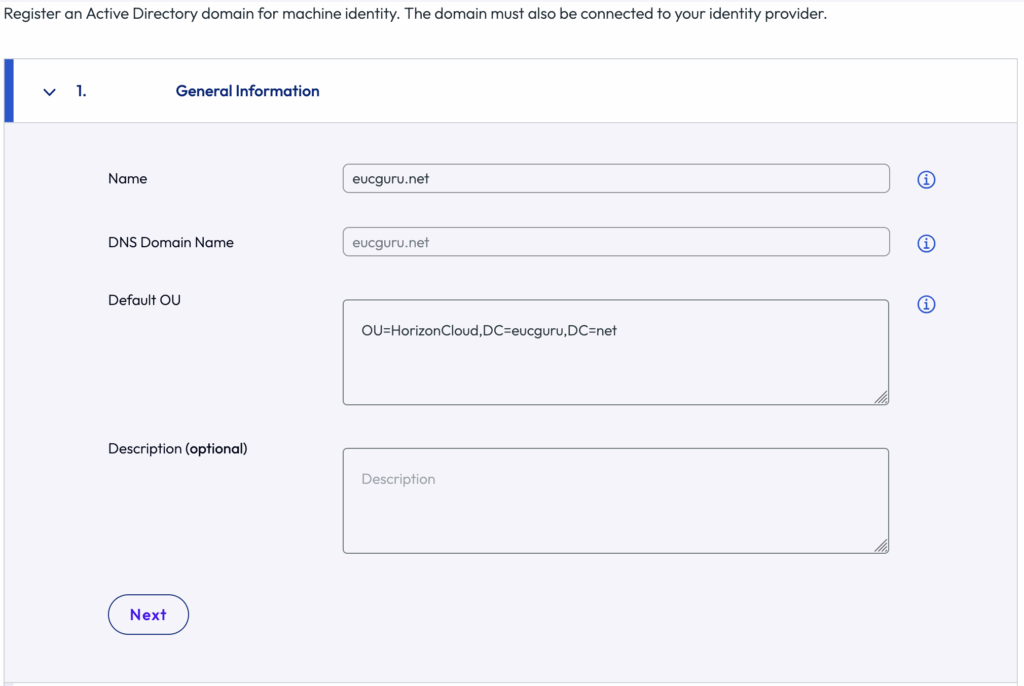
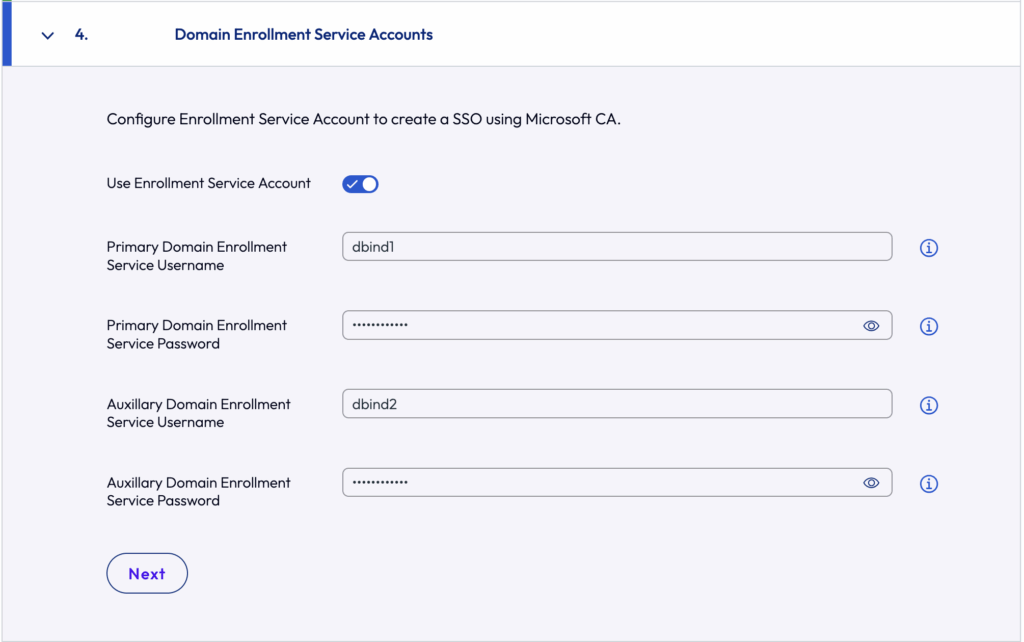
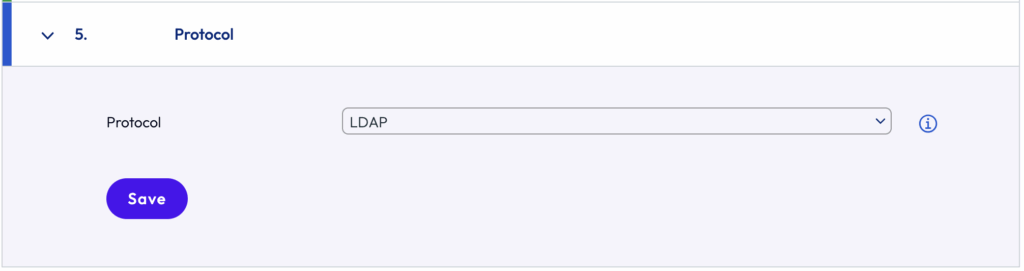
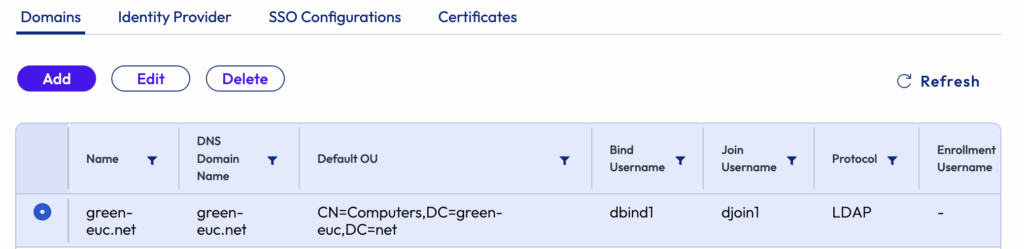
8. Registering domain for Machine Identity.
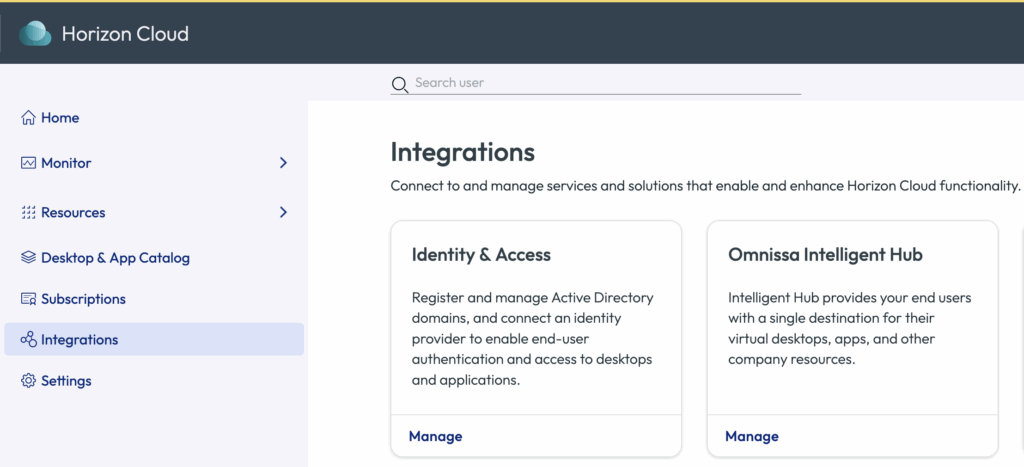
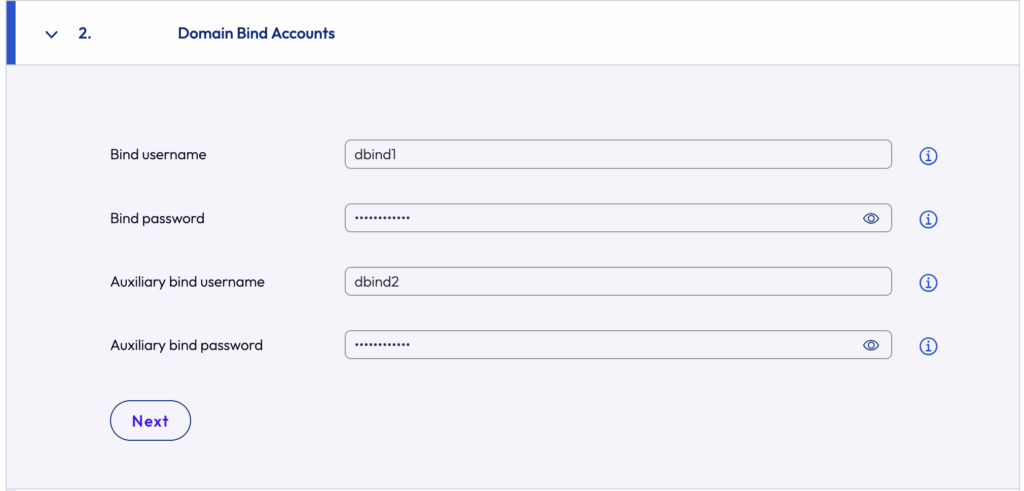
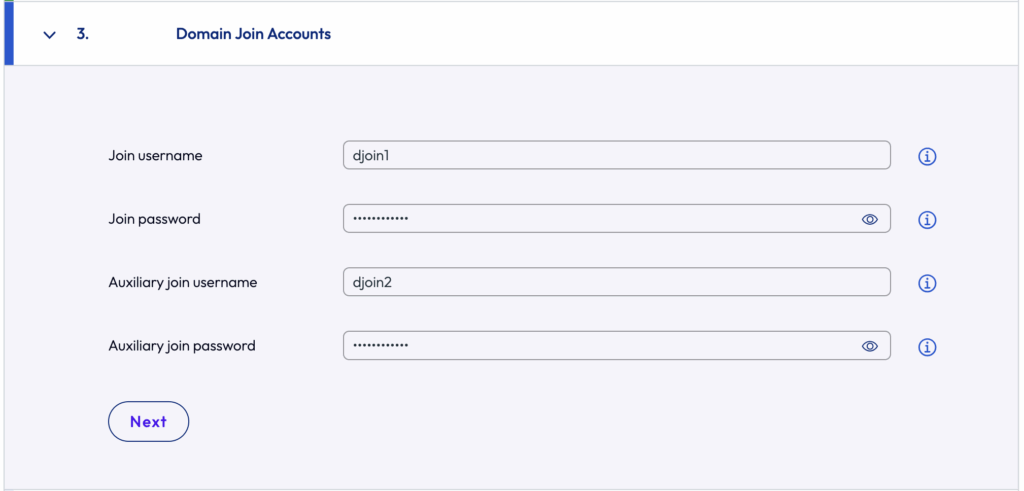
Login to Horizon Cloud Universal Console from https://connect.omnissa.com > Horizon Cloud > [Integration] > [Domains] > [Add] > define [domain name], [Domain bind] and [Domain join] accounts > [Save].
Note: For domain bind and join accounts, there are some specific permission requirements. Requirement details can be found in doc.omnissa.com.
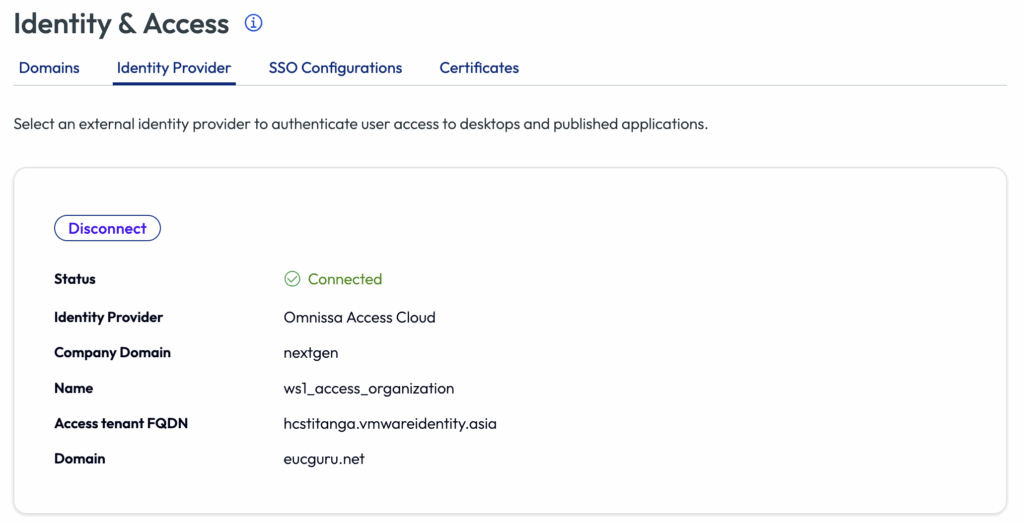
9. Registering identity provider for users identity.
Either of Azure Entra ID or Omnissa Access SaaS/On-prem or Omnissa Identity Service can be used as users identity. In my case, I am using Omnissa Access.
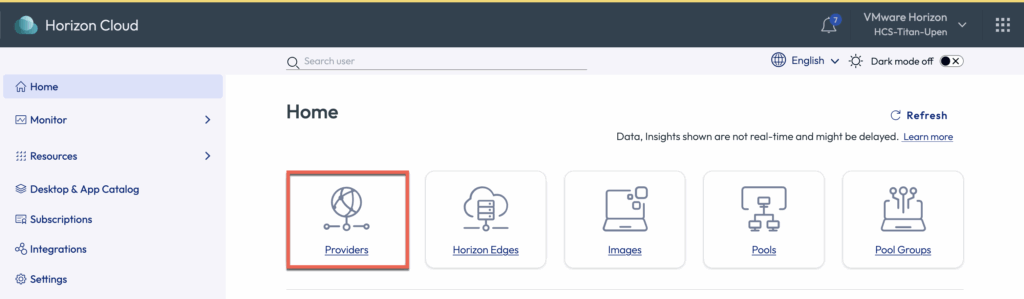
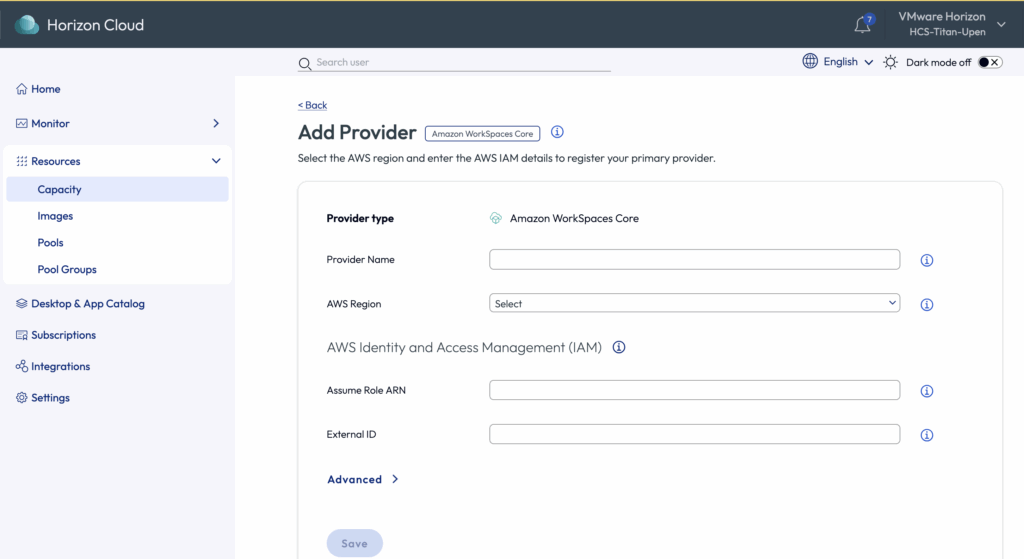
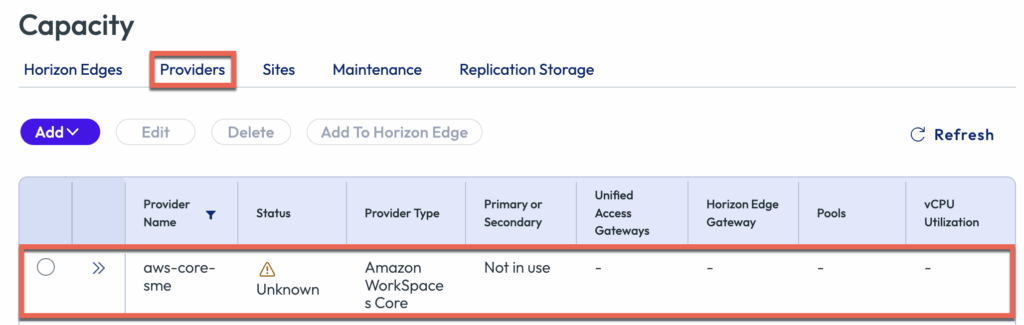
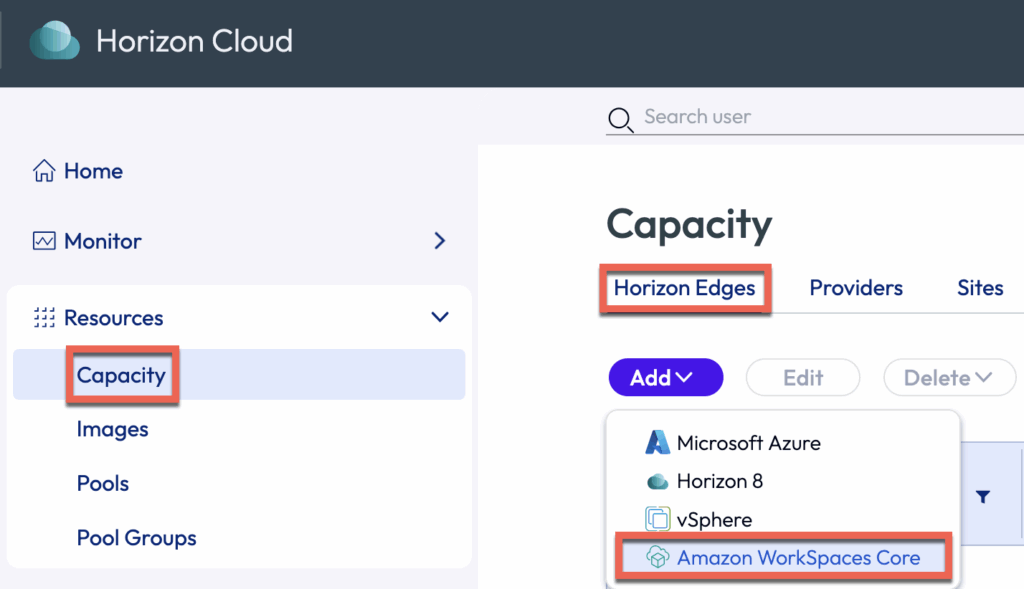
10. Registering Amazon Workspace Core as Capacity Provider
11. Deploying Horizon Edge on Amazon Workspaces Core
Navigate to the left pane of Horizon Universal Console > Capacity > [Horizon Edges] > [Amazon Workspaces Core]
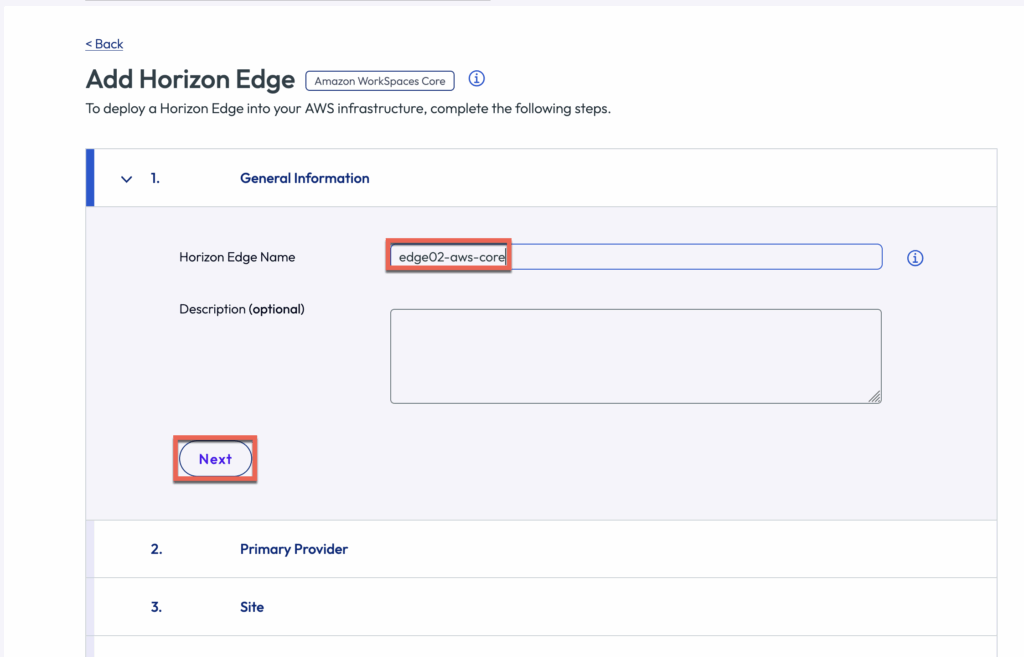
Give the name to Horizon Edge > [Next]
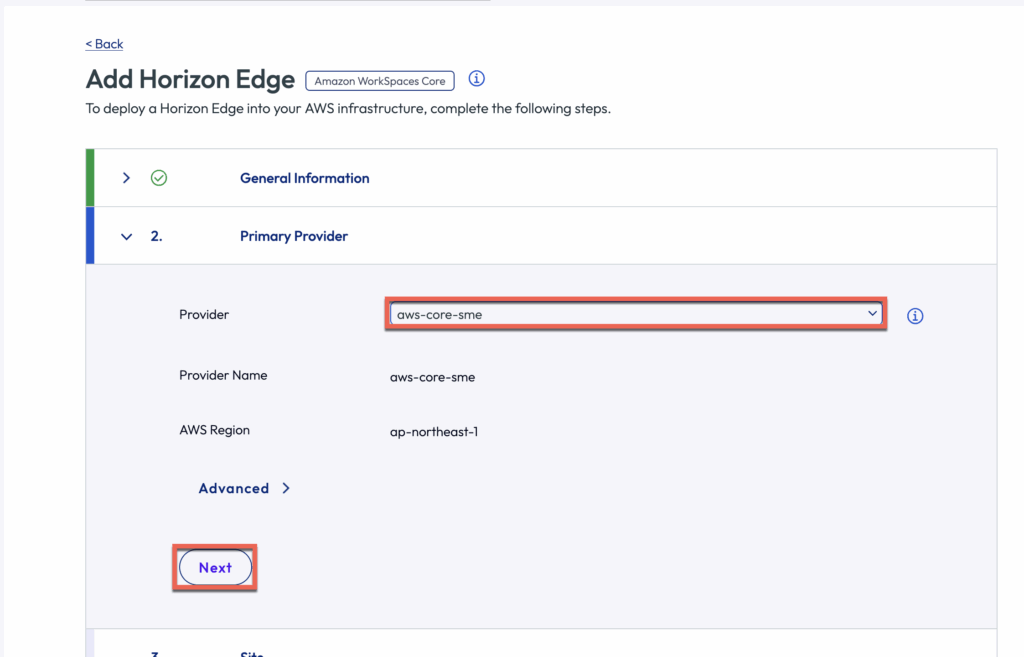
Select the provider from drop down menu which you have registered in previous step > [Next]
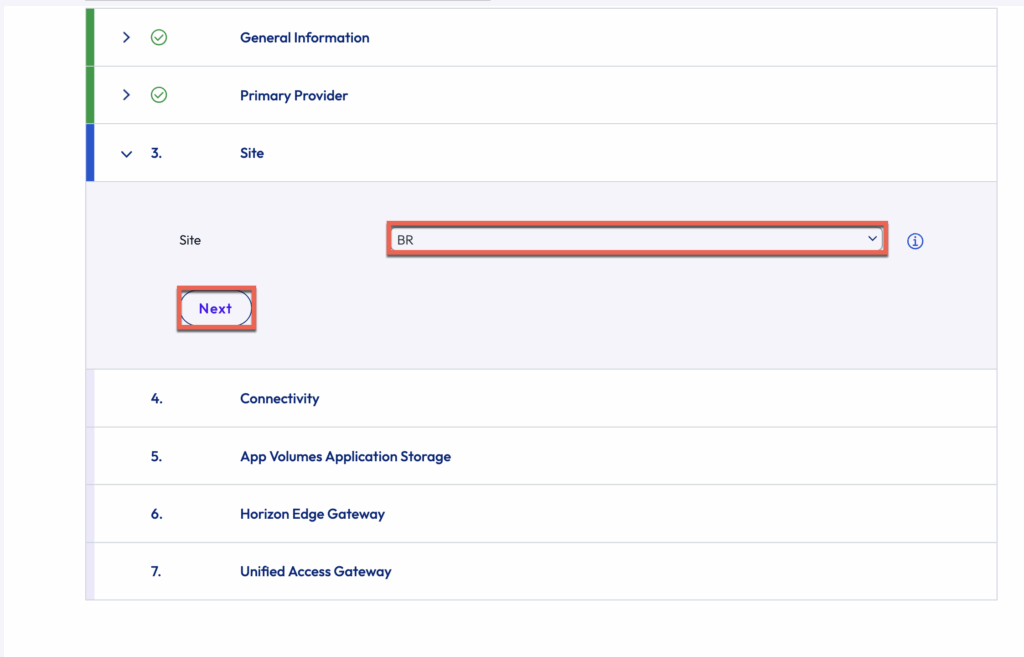
Select or create a [Site] name > [Next]
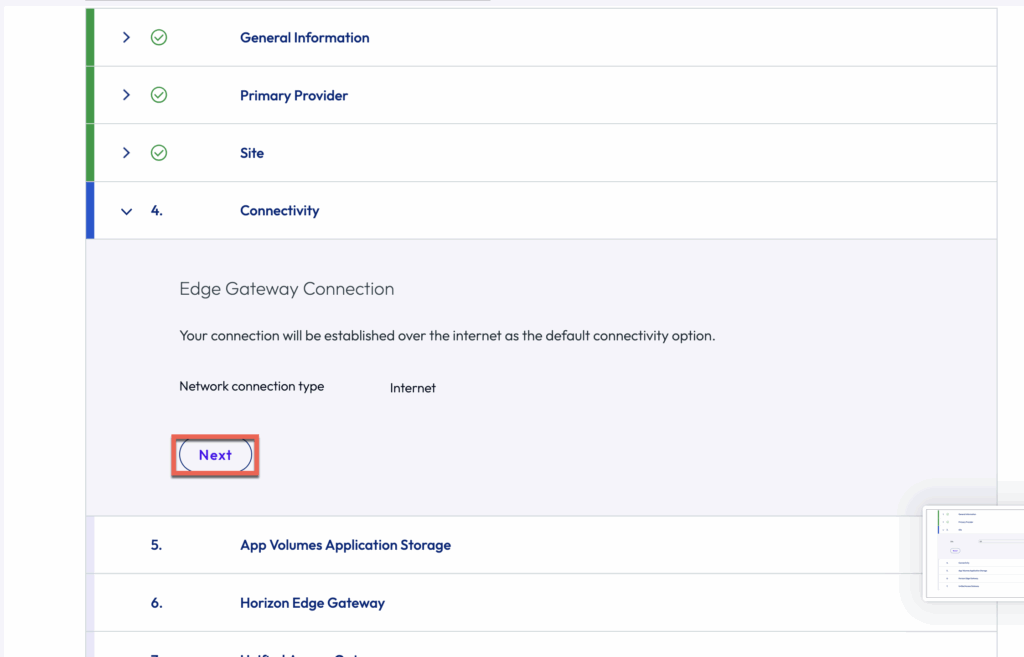
[Next]
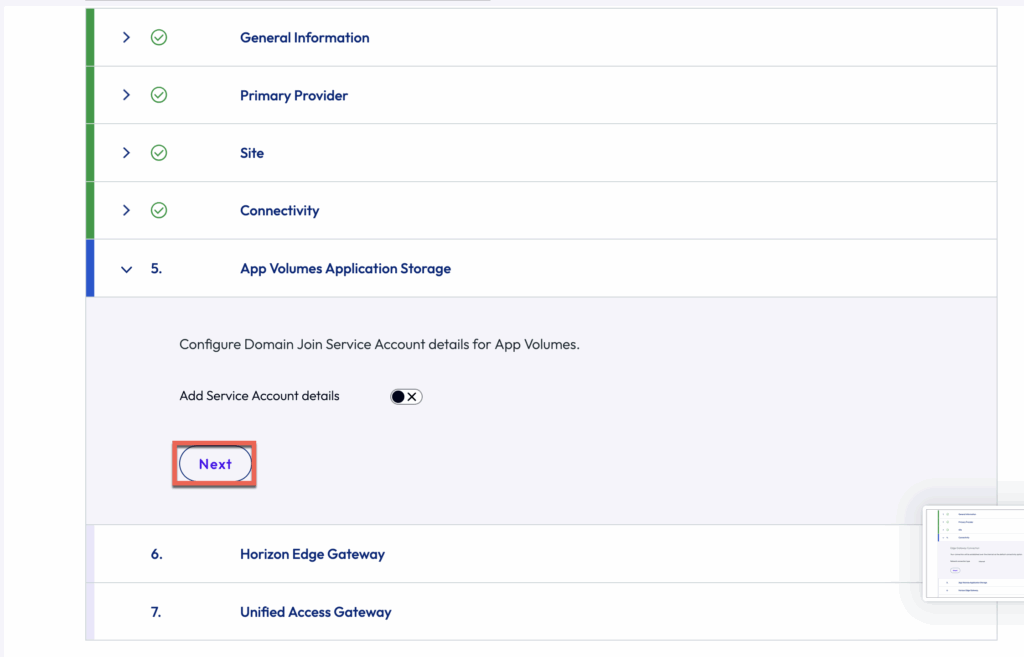
For now, we are not configure the the App Volumes. Just do [Next]
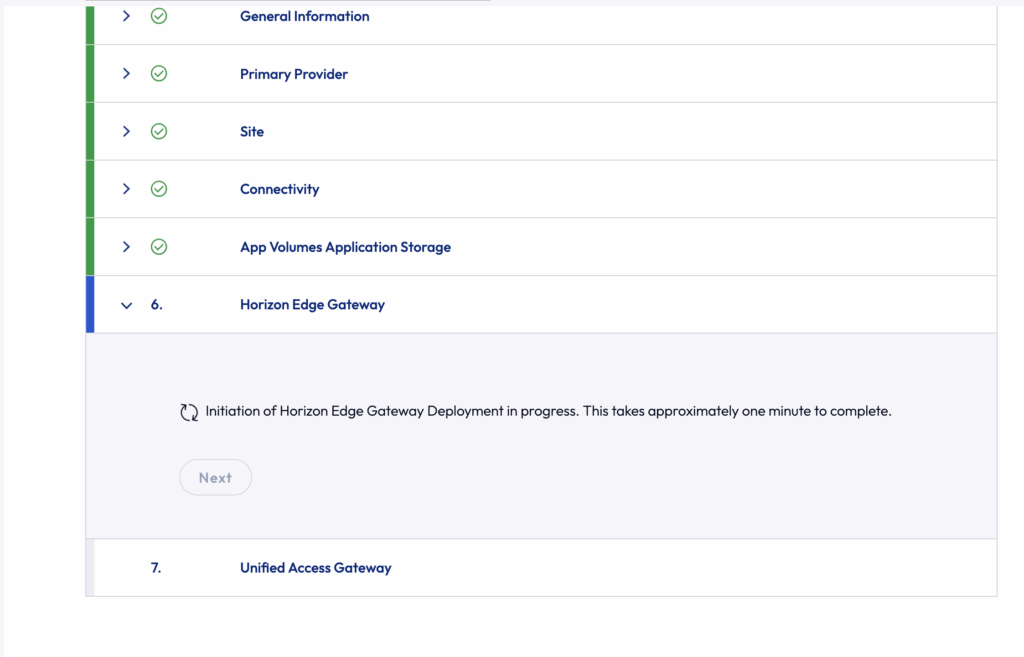
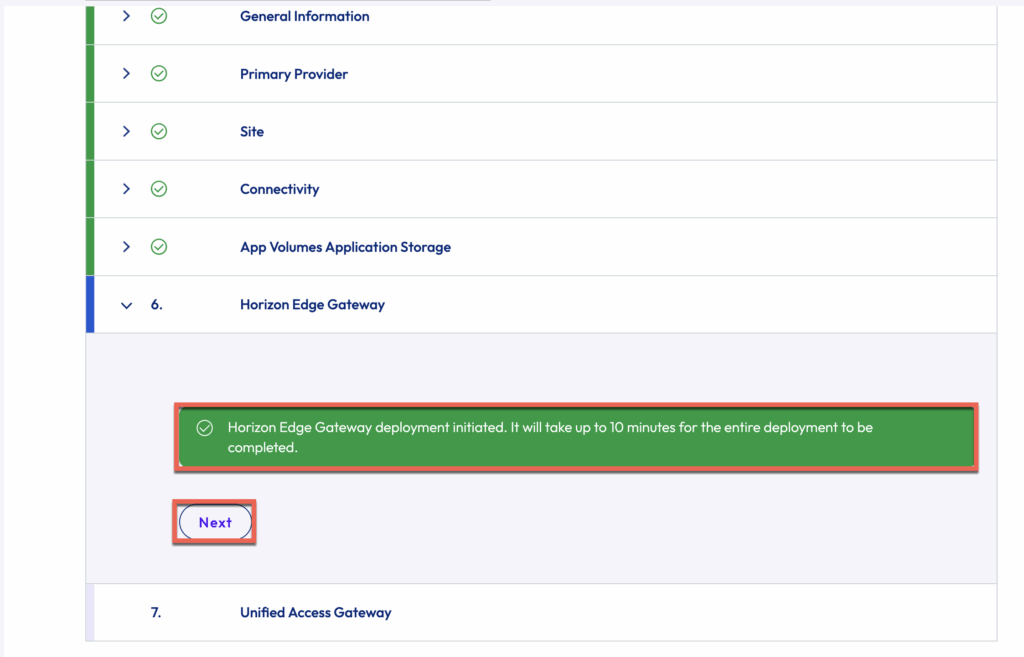
You can see the Edge creation has been initiated. It may take some time before you to be able to go to UAG configuration section > [Next]
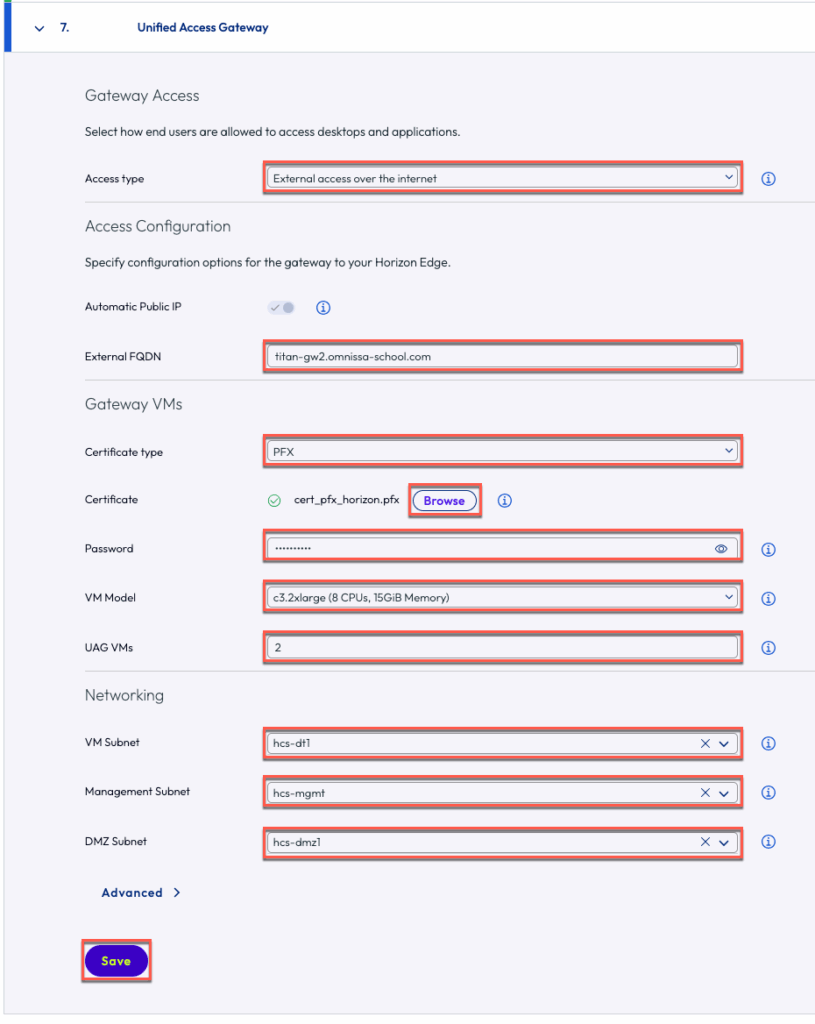
In [Unified Access Gateway] section, define the [Access type]> [FQDN] that you would want to use > [Certificate] > [VM Model] > [Networking] e.t.c. and [Save].
You may see the below pop about the deployment > click [Ok]
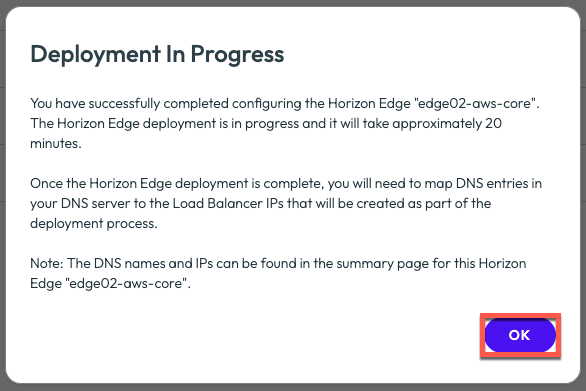
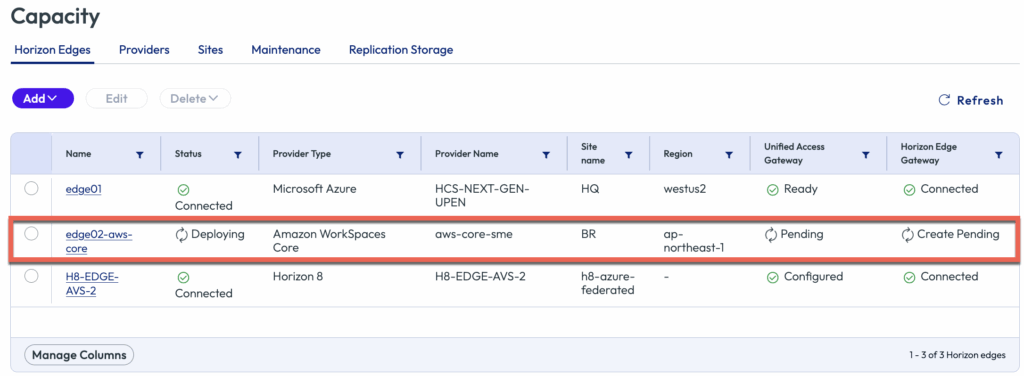
Confirm your edge deployment has been started. This may take upto 20-25 minutes to complete.
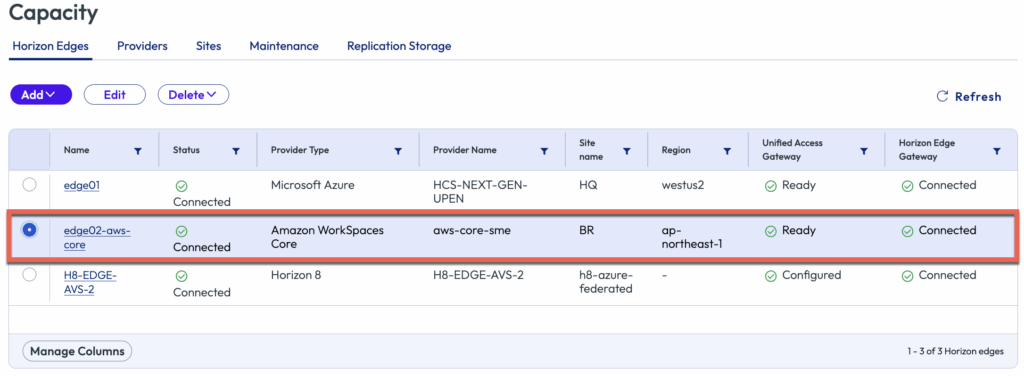
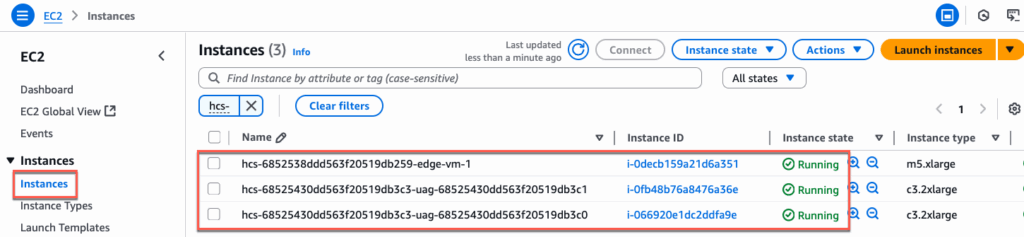
Confirm that your Horizon Edge on Amazon Workspace Core has been deployed Successfully.
You can also confirm the Horizon Edge and UAG VMs under EC2 Instances in AWS console.
Please follow the below link if you need to configure TrueSSO for Amazon Workspaces Core Edge:
Please follow the below link for provisioning Windows Desktop Images in Horizon Cloud Edge on Amazon Workspaces Core:
![]()