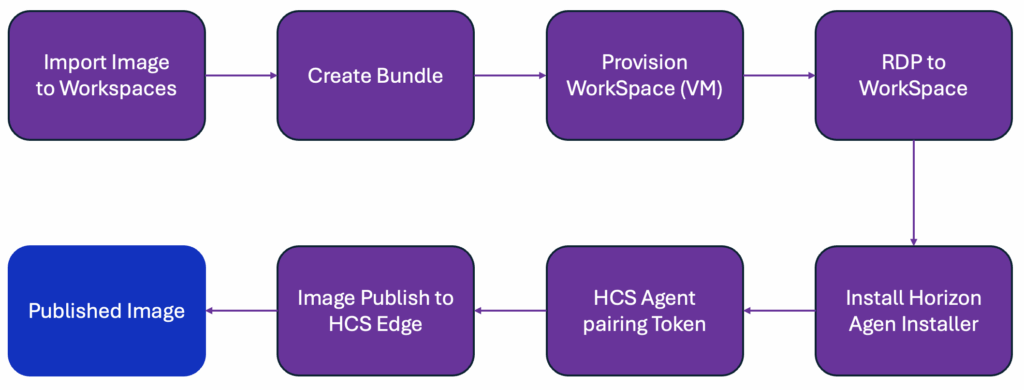
In Horizon Cloud on Amazon Workspaces Core, there are two methods available for importing images to the Edge environment from an Amazon EC2 custom instance or a Workspaces Core custom image. This post outlines the steps for importing a Windows 11 (BYOL) image using the Amazon EC2 custom instance method.
Note: As of June 2025, the image import process from Amazon EC2 custom instances includes automated installation of the Horizon Agent Installer (HAI) as part of image import workflow. However, when importing an image from a Workspaces Core custom image, HAI must be installed manually. Please also refer to docs.comnissa.com for the detail of managing images for Amazon WorkSpaces Core deployments.
Before importing the image, you must complete atleast 1 Edge deployment in your Horizon Cloud Org (tenant). Please follow my previous post, if you have not deployed the Horizon Cloud on Amazon Workspace Core yet.
The image creation steps for Horizon Cloud on Amazon WorkSpaces Core is slightly different than the image creation steps for Horizon 8 POD. However you can reference the Horizon 8 image steps in my previous post if needed.
Image creation tasks
- Obtain windows 11 ISO image
- Create or utilize existing S3 bucket and upload the windows 11 ISO image
- Create IAM role for importing image with EC2 image builder
- Create Infrastructure Configuration for importing image with EC2 image builder
- Import image with EC2 image builder
- Create image and bundle
- Intall HAI (Horizon Agen Installer)
- Import Horizon Cloud Next-gen Edge Pairing code in to image VM
- Publish image
Image creation workflow
Creating S3 bucket and upload the windows 11 ISO image
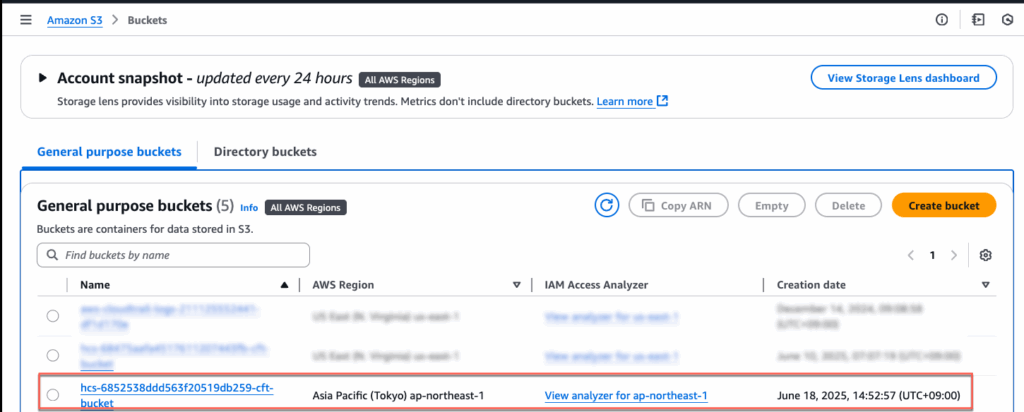
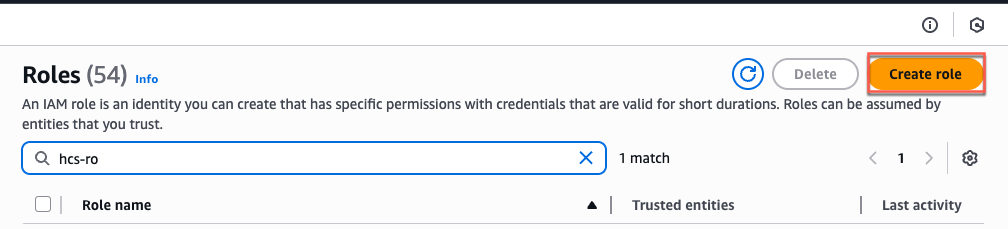
1. Login to AWS console and find [S3] service > find a bucket name starts with “hcs-“. This bucket is created as part of Edge deployment. I am using this bucket to save the time.
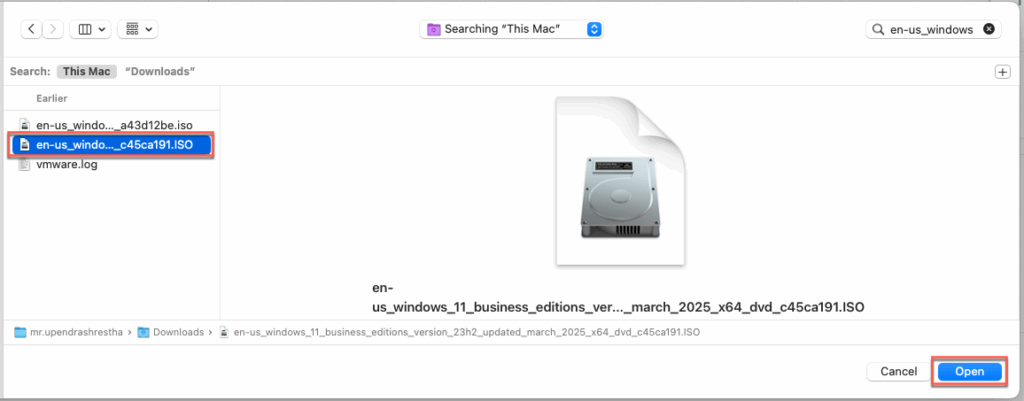
Select [Upload] to upload the windows 11 ISO image > [Add files] > locate the downloaded Windows 11 ISO image > select [Upload].
If you would like to create separate bucket for images, that is also fine. You can follow my previous blog post.
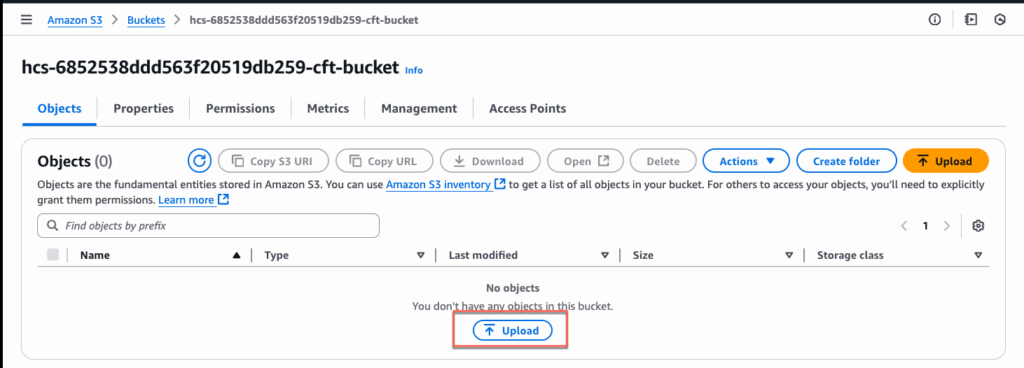
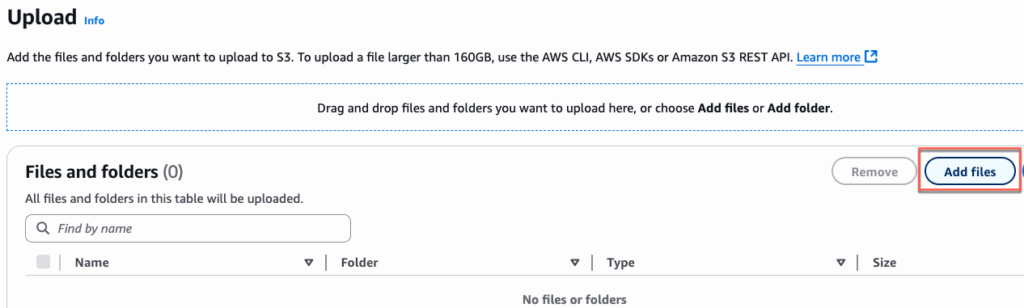

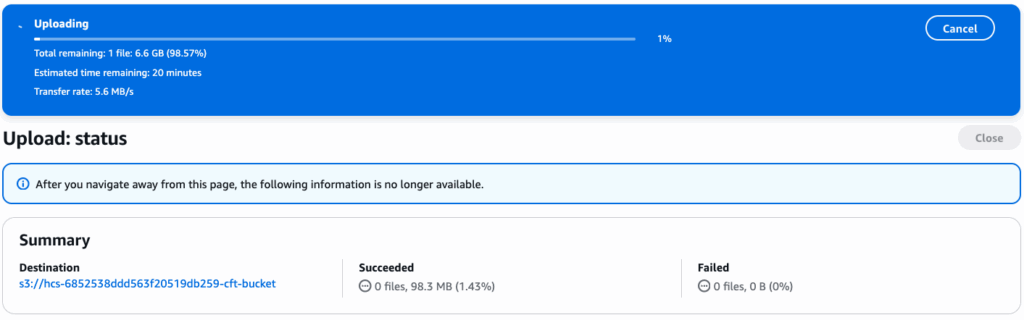
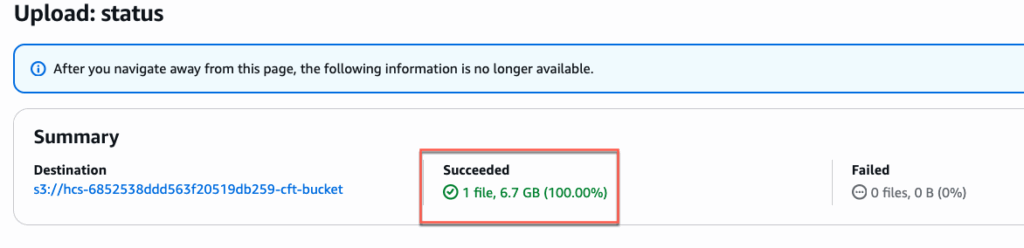
Concfirm that the ISO image upload is completed.
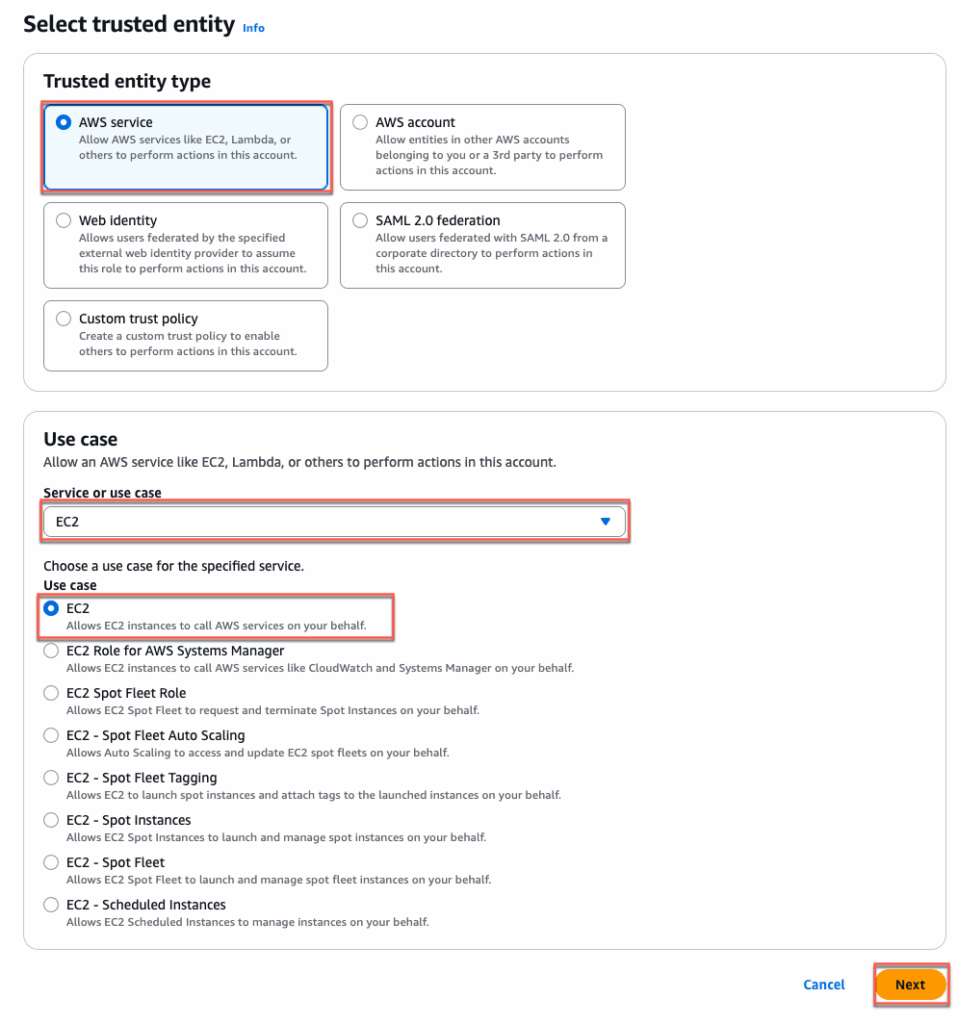
Create IAM role for importing image with EC2 builder
2. In AWS console, navigate to [IAM] > [Role] > [Create Role] > Select [AWS Service] as trusted entity > select [EC2] in use case > [Next]
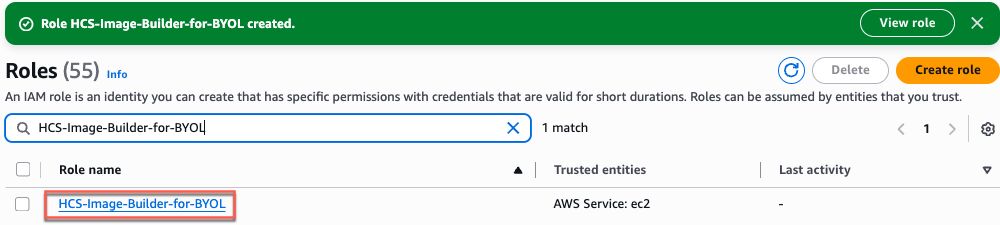
Select below permissions from the drop down > give the name to the role > [Create Role] > confirm the role has been created successfully.
AmazonSSMManagedInstanceCore
EC2InstanceProfileForImageBuilder EC2InstanceProfileForImageBuilderECRContainerBuilds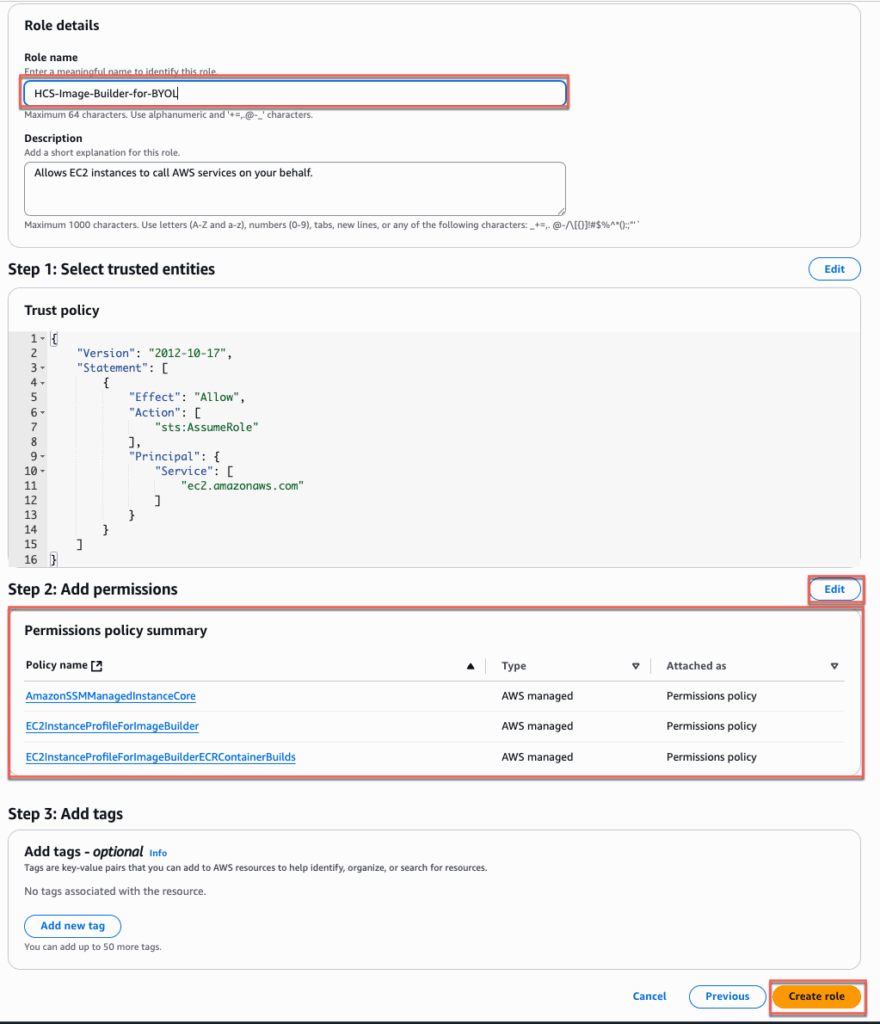
Creating Infrastructure Configuration for importing image with EC2 image builder
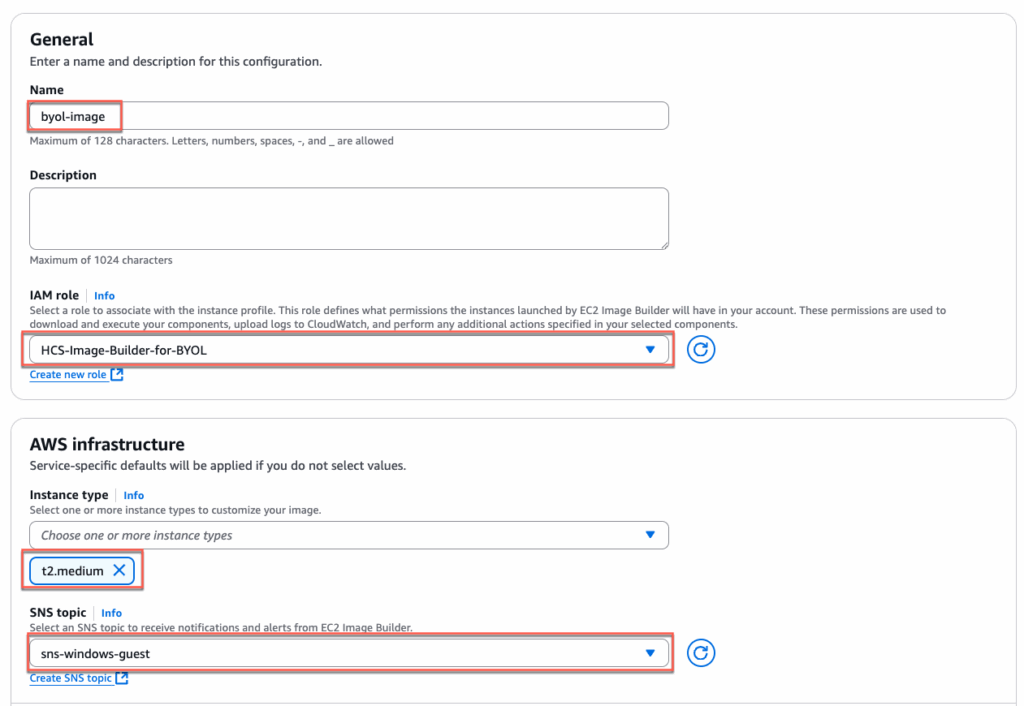
3. Find [EC2 Image Builder] in AWS console and navigate to [Infrastructure Configuration] in the left pane of console > select [Create Infrastructure Configuration]


In general section, give the [Name] of your choice > select the [IAM role] you created in previous section > define [AWS infrastructure] as you needed > create [SNS topic] with default setting.
In VPC, Subnet and Security Group section, select the VPC, Subnet and Security Group as per your setup > [Create]
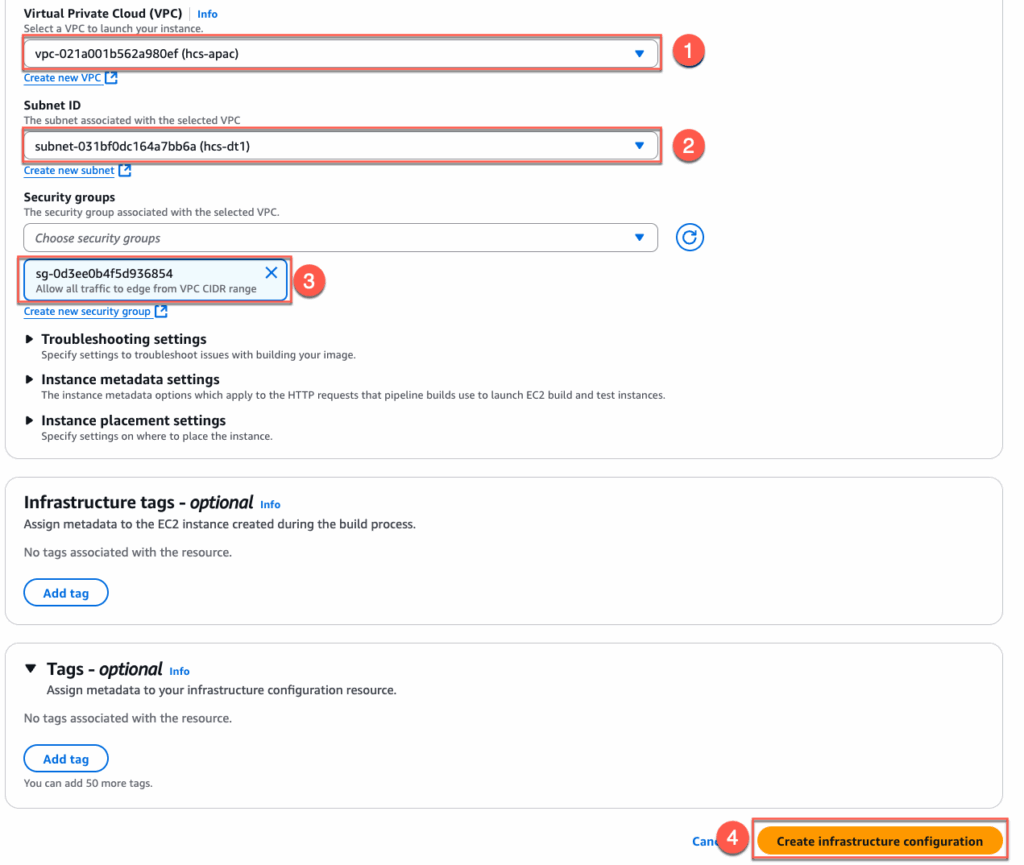
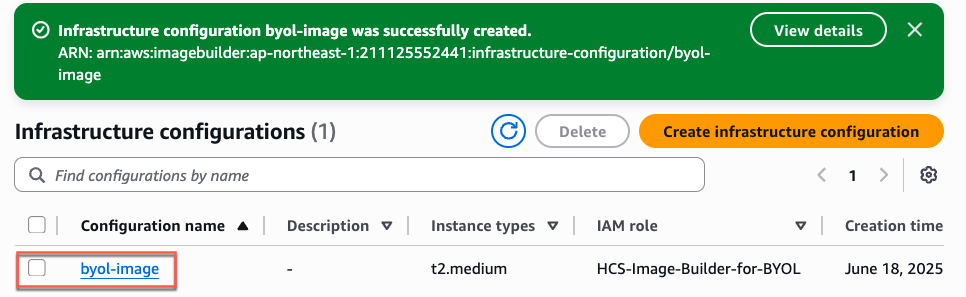
Confirm that [Infrastructure Configuration] is successfully configured.
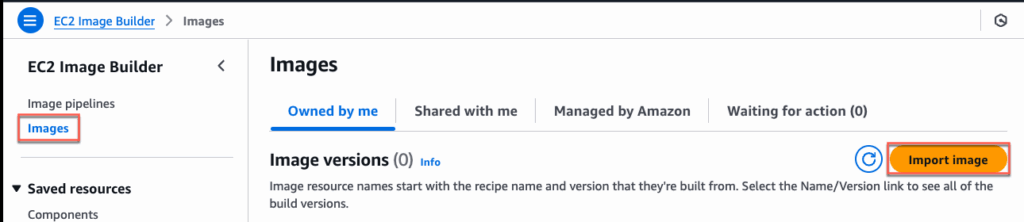
Import image with EC2 Image Builder
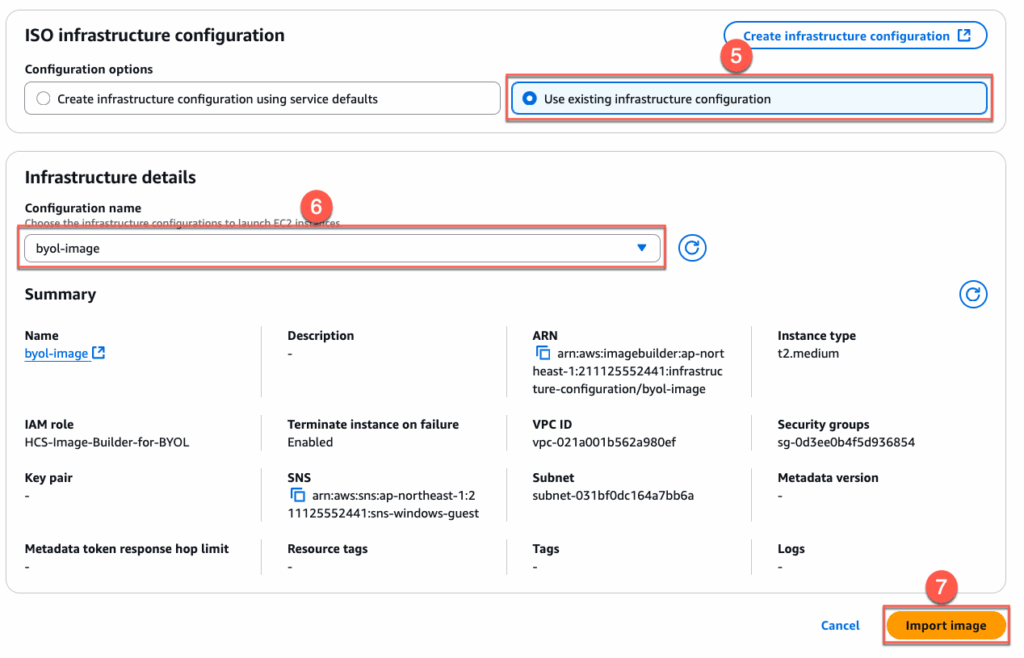
4. Select [Images] in EC2 image builder > [Import image] > give the [Name] and [version] > In Base image operating system section, select [ISO Import] > Browse S3 bucket and located the previously uploaded Windows 11 ISO image.
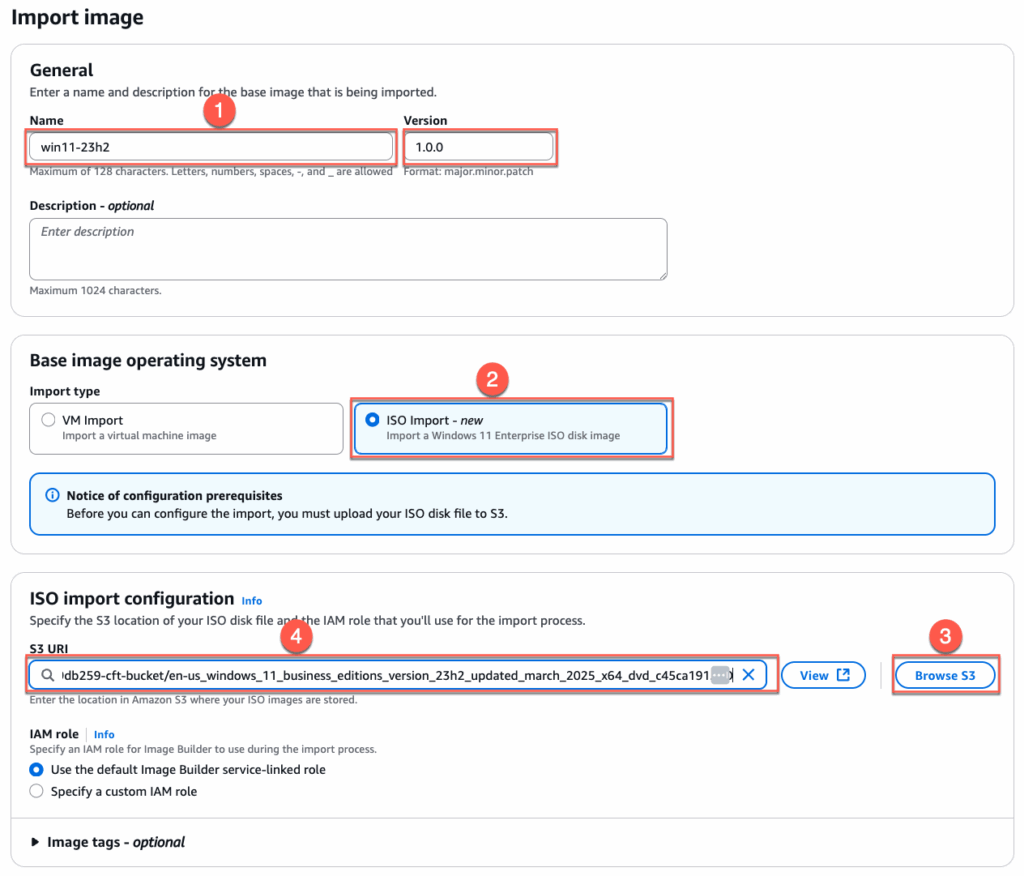
Select the previously created [Infrastructure Configurations] from the drop down > [Import Image]
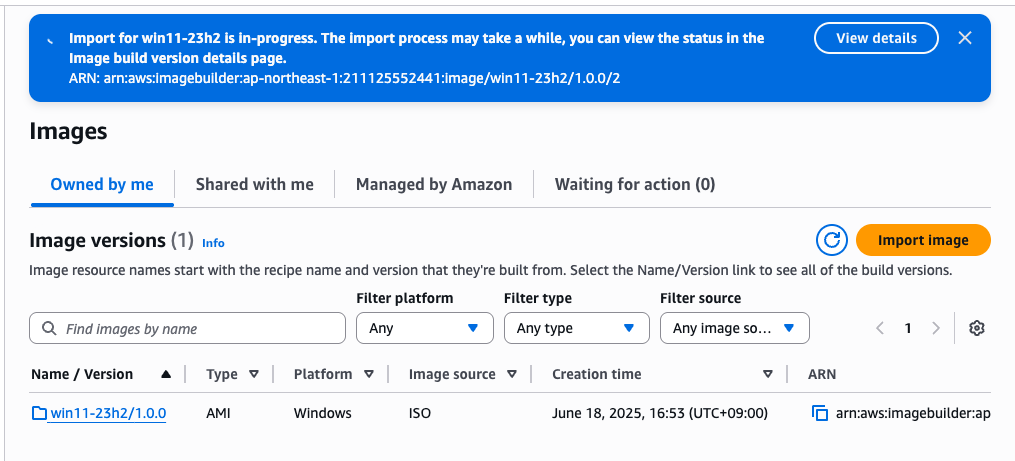
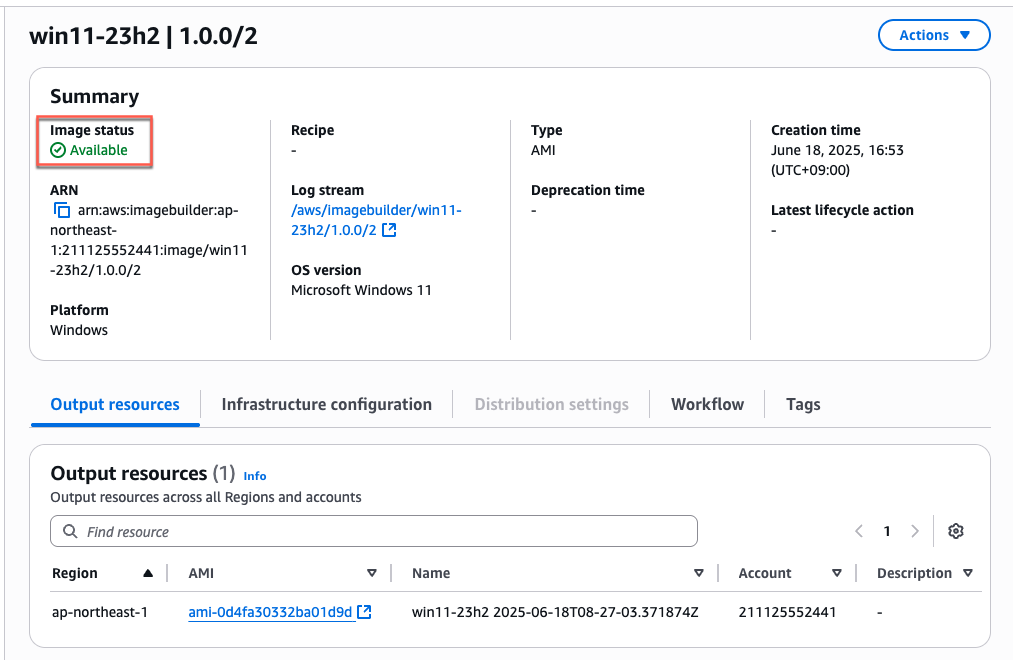
Importing image has been started. This may take some time depending on the ISO image file size. Wait until ISO image file to be uploaded successfully.

Importing image to Amazon Workspaces
5. We will execute below script to import the image to Amazon workspace. Open the AWS Cloud shell and execute the script.
aws workspaces import-workspace-image --ec2-image-id <your ami id> --ingestion-process BYOL_REGULAR_BYOP --image-name <your-image-name> --image-description <your-image-description>
--ec2-image-id          replace the ami id from previous step
--image-name            you can give any name
--image-description     you can give any description
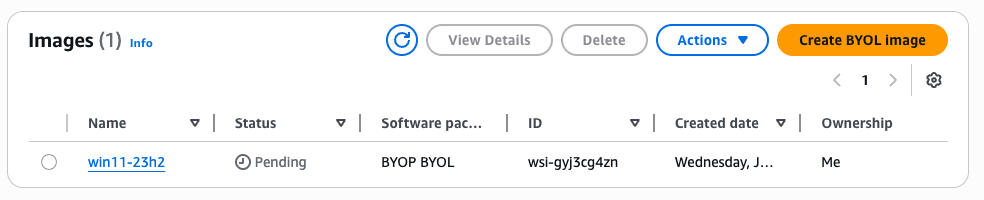
Note: if the script is executed successfully, it returns the [ImageId] as seen in above screenshot “ImageId”: “wsi-gyj3cg4zn”
Navigate to Amazon Workspaces Console > [Images] > find a newly created image named “Windows11” > click in image name hyperlink > you will see image creation is in [pending] state. This may take up 30+ mins.
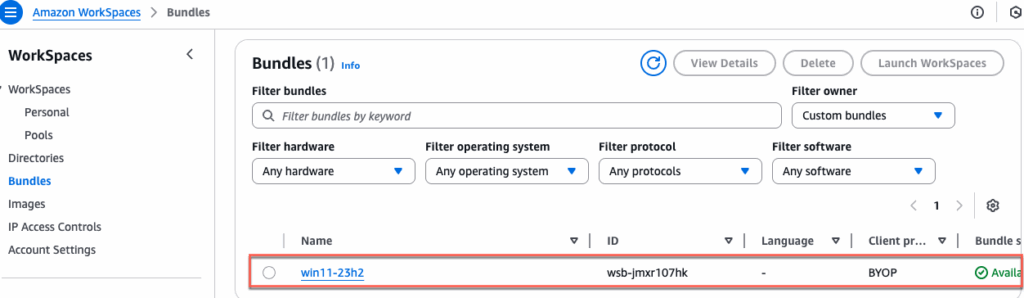
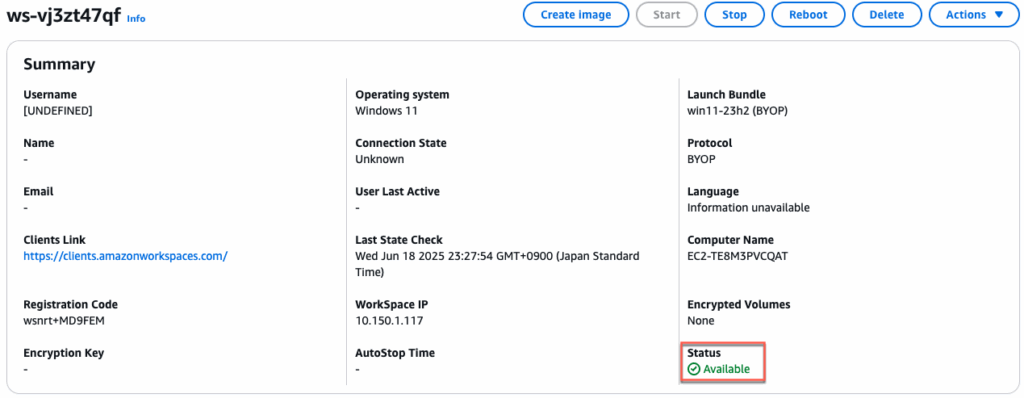
6. Confirm image status is now [Available] > select the image > [Actions] > [Create Bundle].

Give the [Name] and [Description] to the bundle > choose the appropriate [Bundle Hardware type] and [Storage] > select [Create Bundle] > confirm that a bundle has been created successfully and status is [Available].

Creating a Workspace (machine) on which we install Horizon Agent
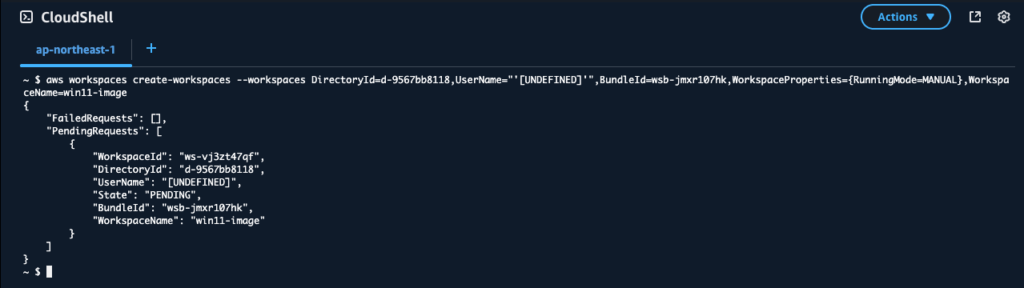
7. We will use Amazon Cloud-shell command to create the Workspace. Replace [DirectoryId], [BundleId] and [WorkspaceName] matching with your configuration. Open the Cloud-shell from AWS console and execute the command.
Note: you could create the Workspace from console UI as well but it only allows you to select the monthly billing. For the test purpose, may not want to opt for monthly billing. If you create the workspace machine with cloud-shell, it allows you to choose the hourly billing option while creating the automated desktop pool in Horizon admin console.
Script format:
aws workspaces create-workspaces --workspaces DirectoryId=<your-directory-id>,UserName="'[UNDEFINED]'",BundleId=<bundle-name-in workspace>,WorkspaceProperties={RunningMode=MANUAL},WorkspaceName=<name-of-your-choice>
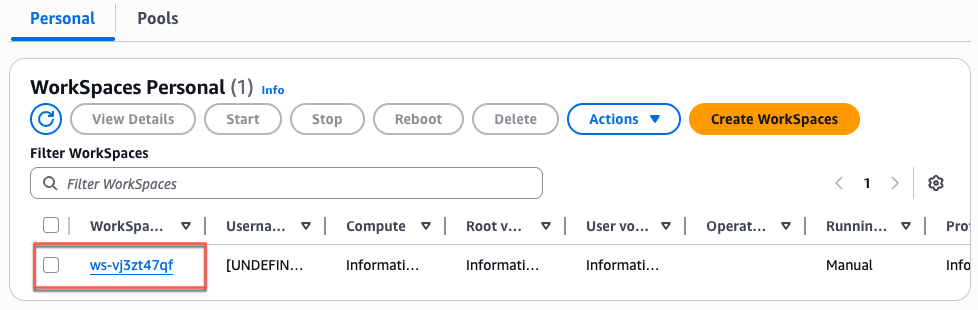
8. Navigate to Workspaces > [Personal] an confirm workspace (machine) creation is in pending stat. It may take some time until the status become [Available]. Once the status becomes [Available], note down the IP address allocated to workspace.

Installing Horizon Agent in Workspace machine
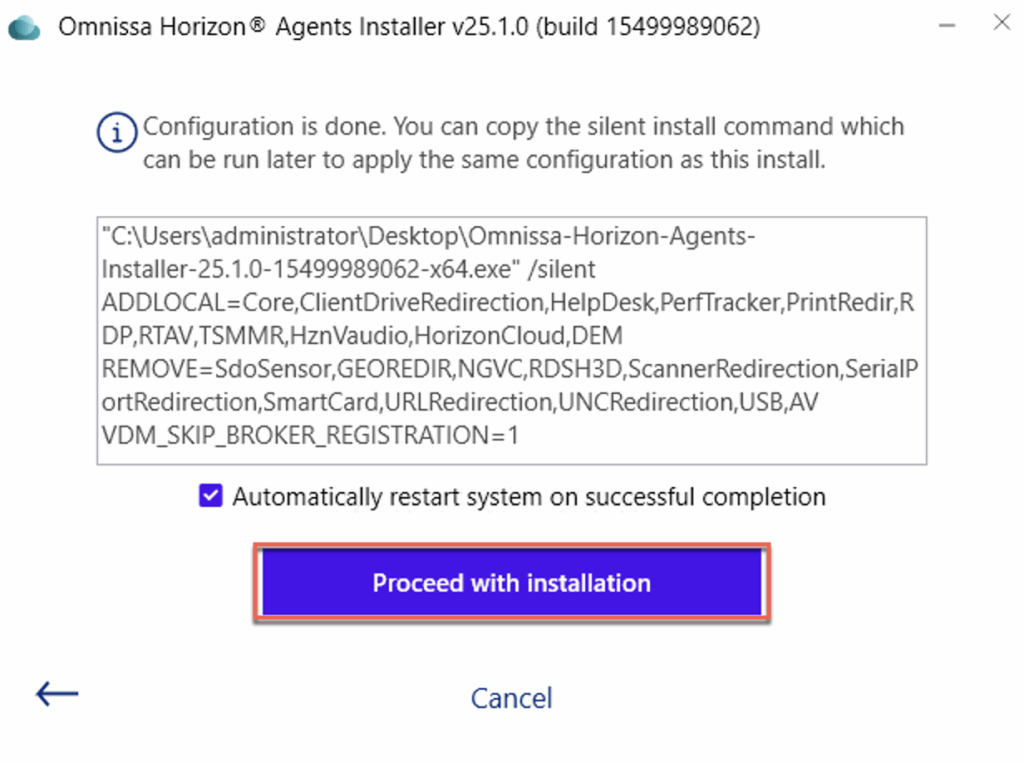
9. RDP to Workspace machine from one of the EC2 instance by using domain administrator credential > download or copy the Horizon Cloud Horizon Agent installer to Workspace machine. Keep in mind that Horizon8 and Horizon Cloud has separate agent installer.
Note: To be able to RDP to Workspace machine you need to add the RDP rule on security group which is associated with bundle network interface. Follow this link for detail.
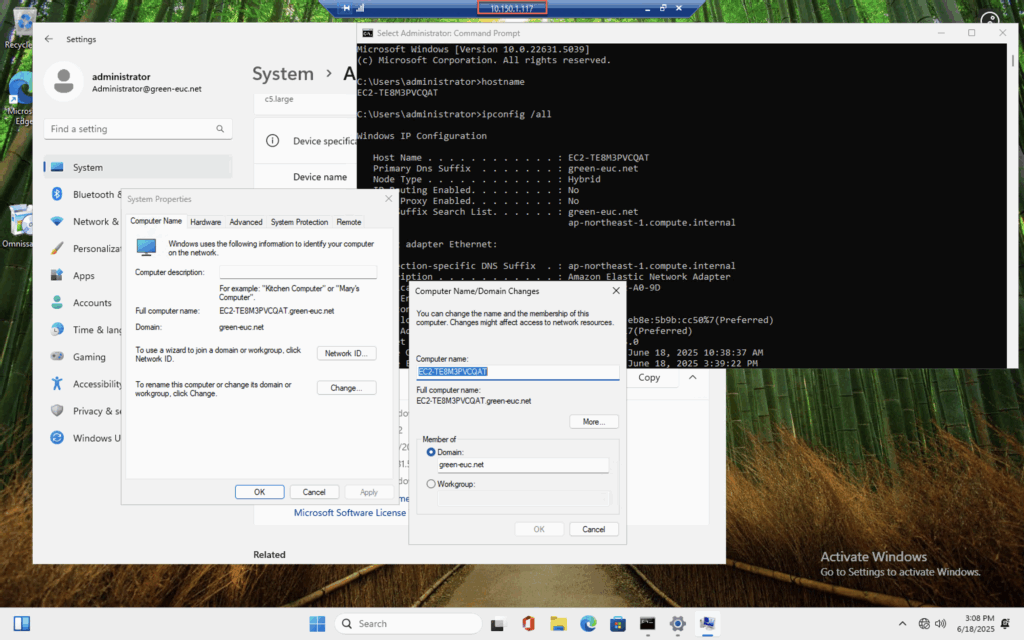
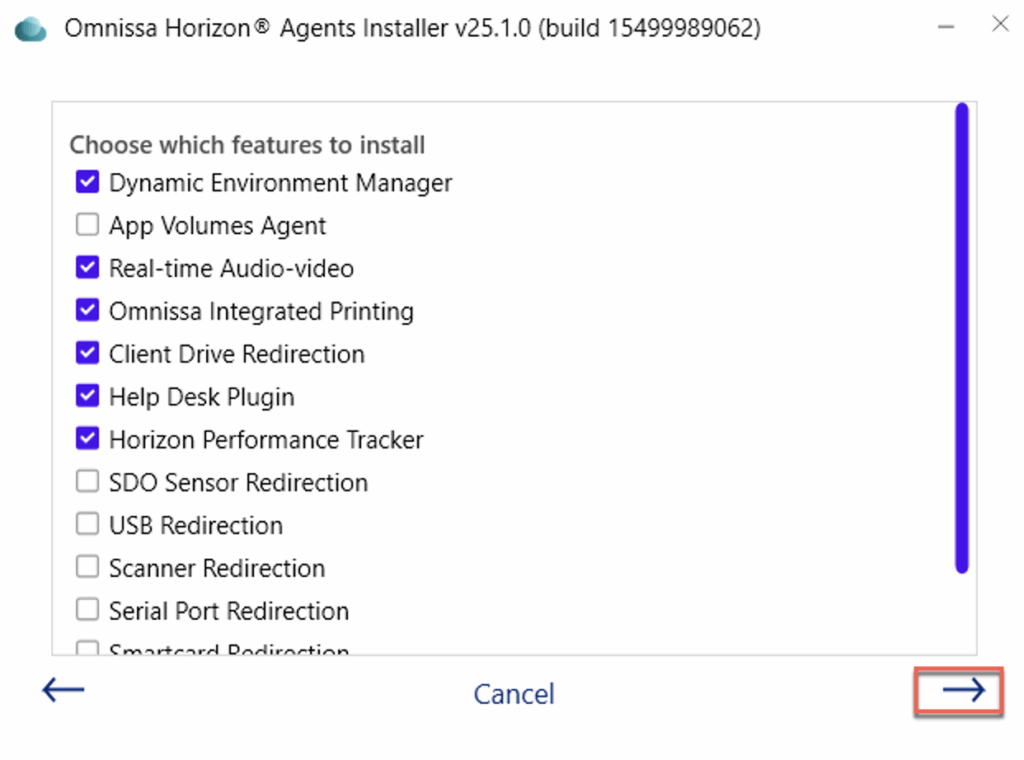
Execute the Omnissa Horizon Cloud Horizon Agent installer and follow the on screen instructions.

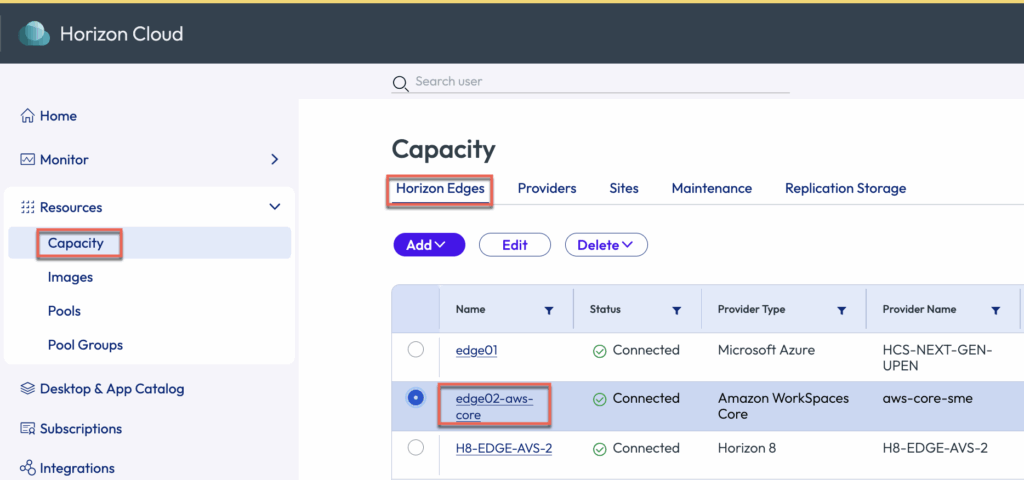
10. Navigate to Horizon Cloud Universal Console > [Capacity] > click on the WorkSpace Core Edge [Name]> [Copy Agent Pairing Spec]
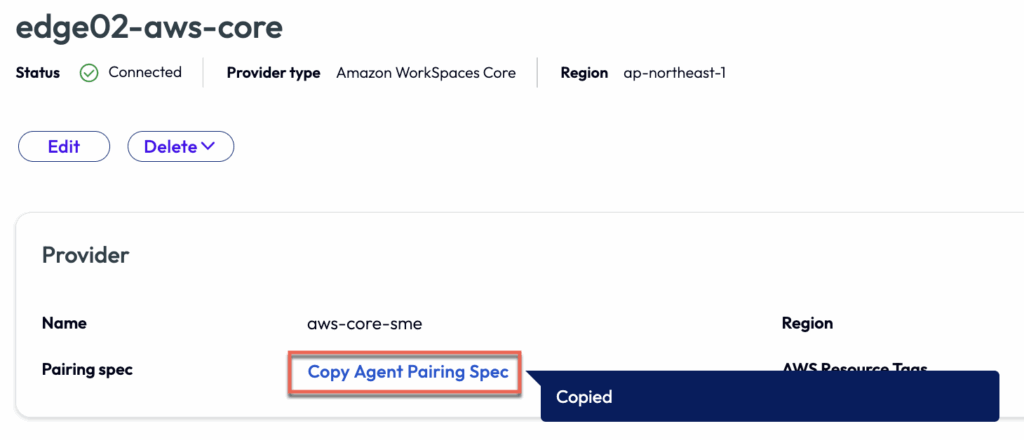
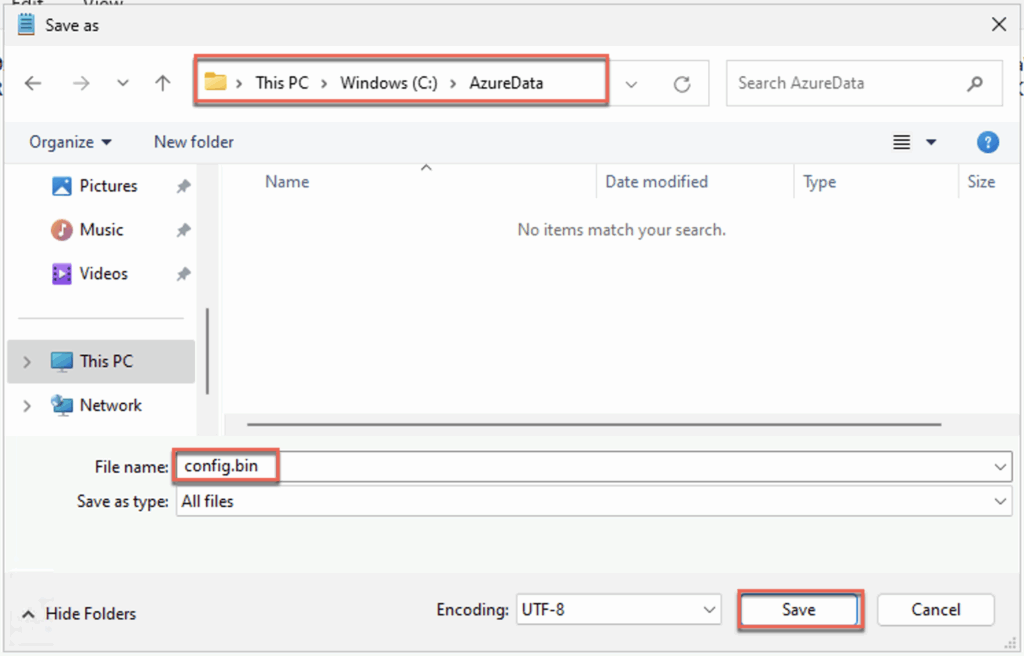
11. Return to WorkSpace Machine > Create a folder with name “AzureData” under [C: drive] > create a txt file inside the [AzureData] folder and paste the Agent Pairing Spec copied in step-10 > save file as [config.bin].


12. Execute below command to change the ownership of the file to system by running the following script in Admin Power shell mode. Detail of this steps can be found on docs.omnissa.com.
   $owner = New-Object System.Security.Principal.NTAccount("NT AUTHORITY\SYSTEM")
   $acl = get-acl "$Env:SystemDrive\AzureData\Config.bin"
   $acl.SetOwner($owner)
   set-acl $Env:SystemDrive"\AzureData\Config.bin" $acl

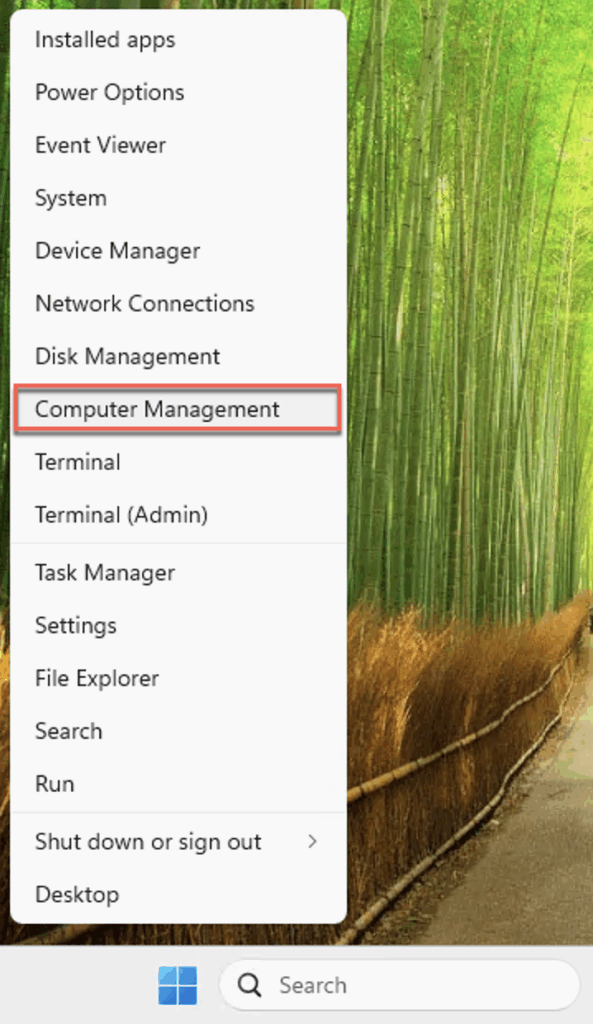
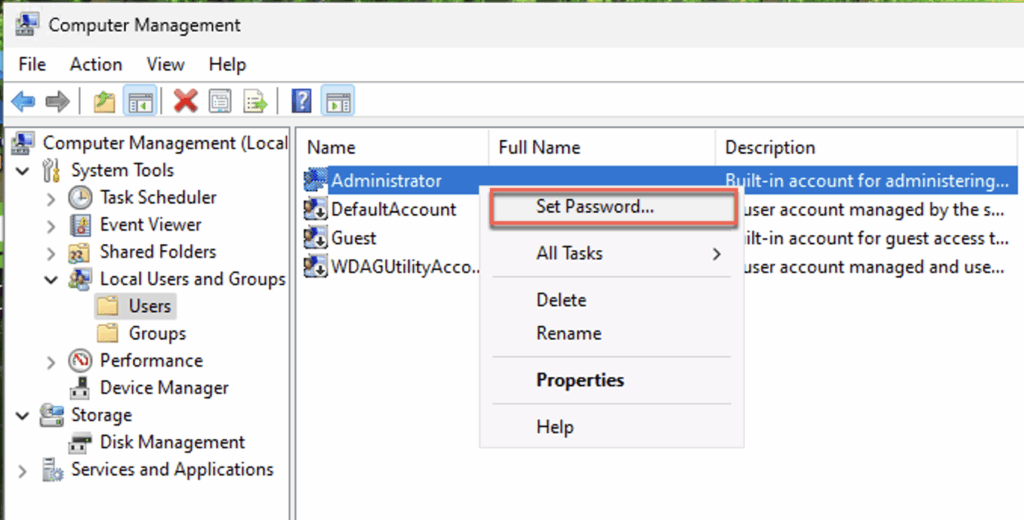
13. Set the local administrator password in WorkSpace machine.
Navigate to [Computer Management] > [Local Users and Groups] > [Users] > [Administrator] >
Note: When we create the WorkSpace machine, local administrator password is either not set or set randomly but we don`t know the password. As WorkSpace is created as domain joined machine, I` m able to RDP with domain admin account. As we need local administrator username and password while publishing the image to Horizon Cloud Edge, we are setting local administrator password into WorkSpace machine.


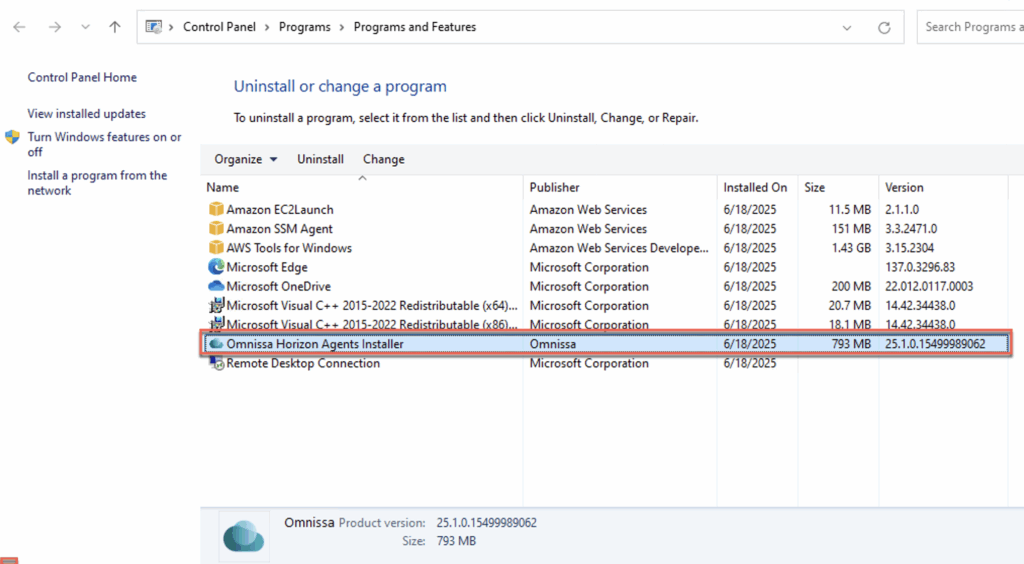
12. Create an image from the Workspace where we have installed the Horizon Cloud HAI and placed the Agent Pairing Token.
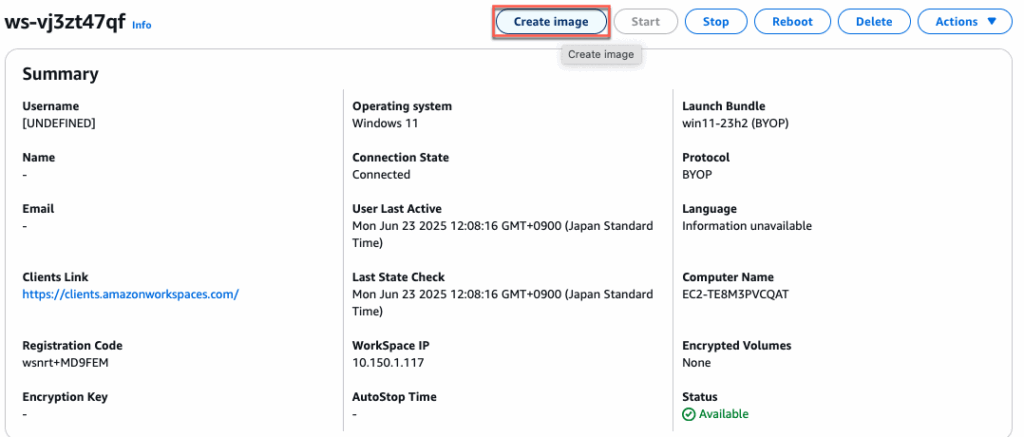
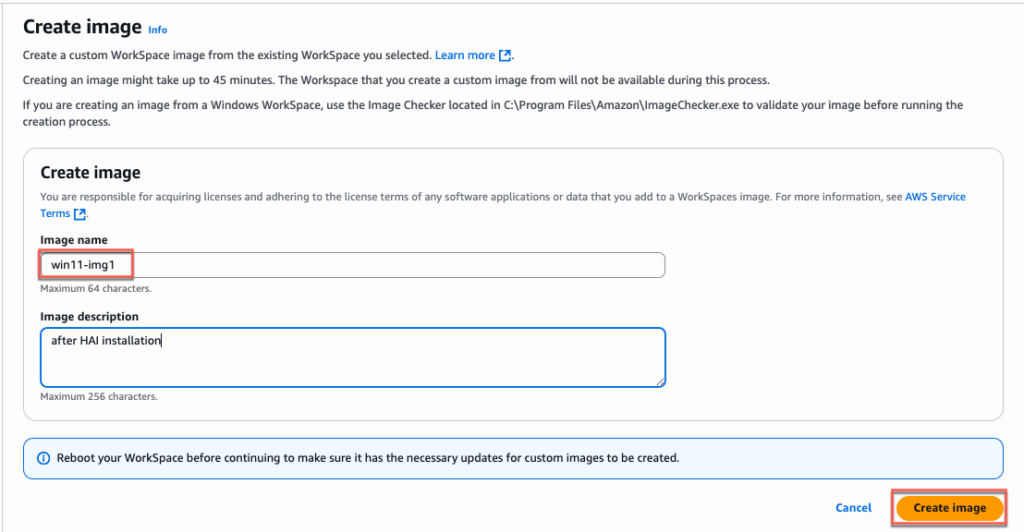
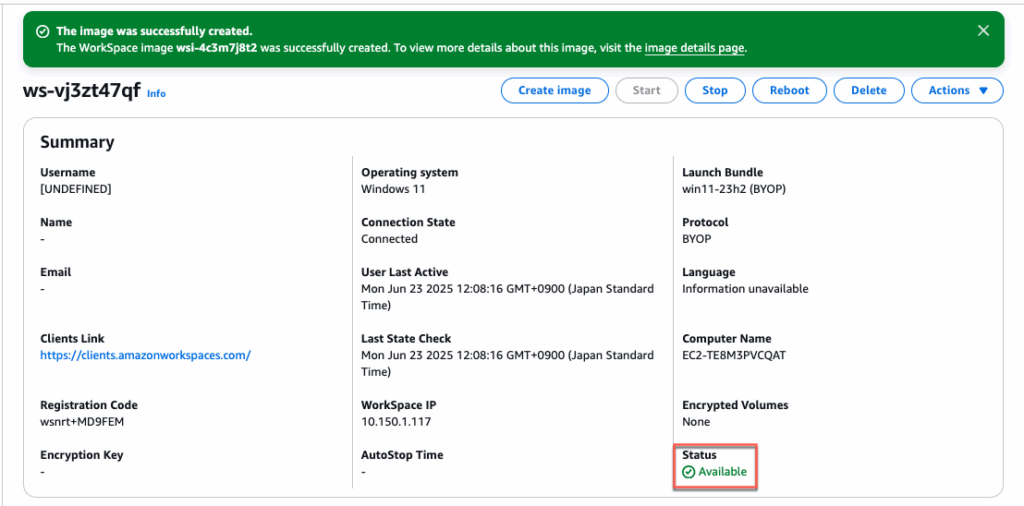
Confirm that the image is created successfully and status is [Available].

Note: This is the image we will import to Horizon Cloud Edge in later step.
Importing image to Horizon Cloud on Amazon WorkSpaces Core Edge
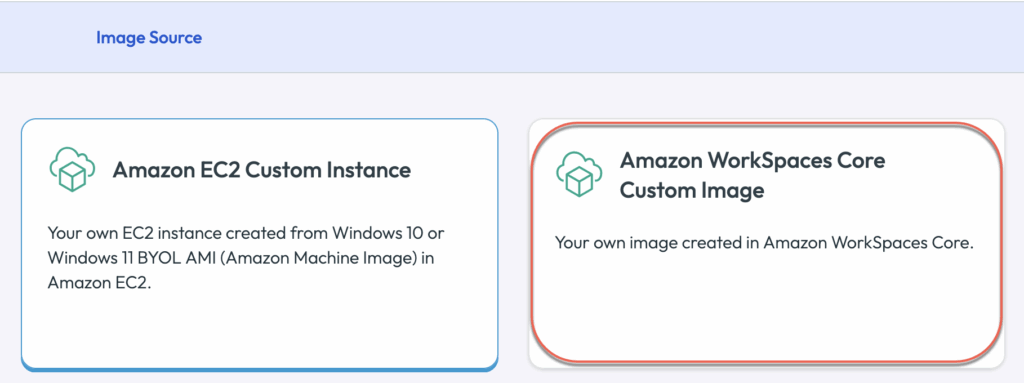
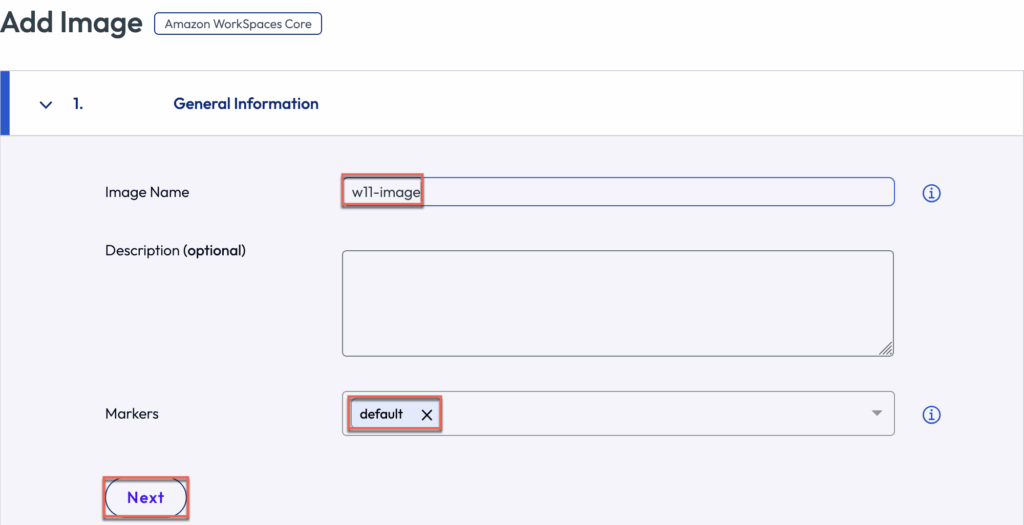
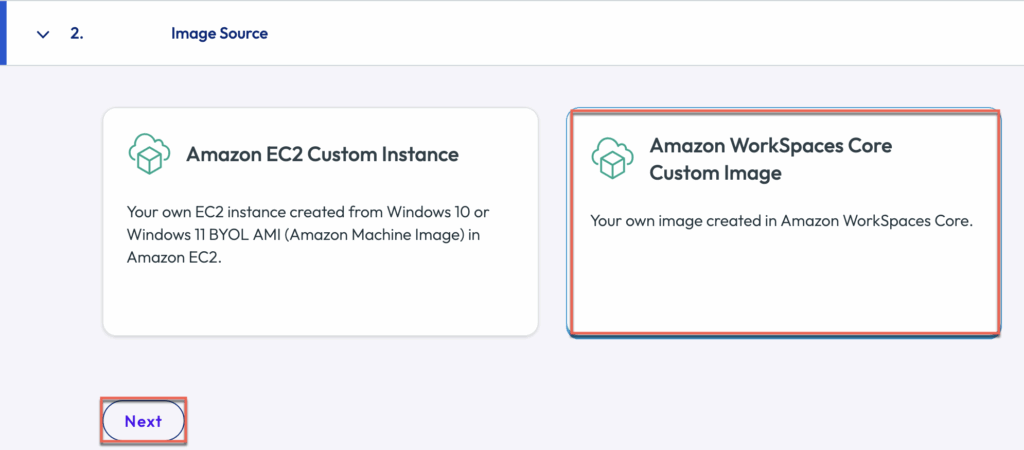
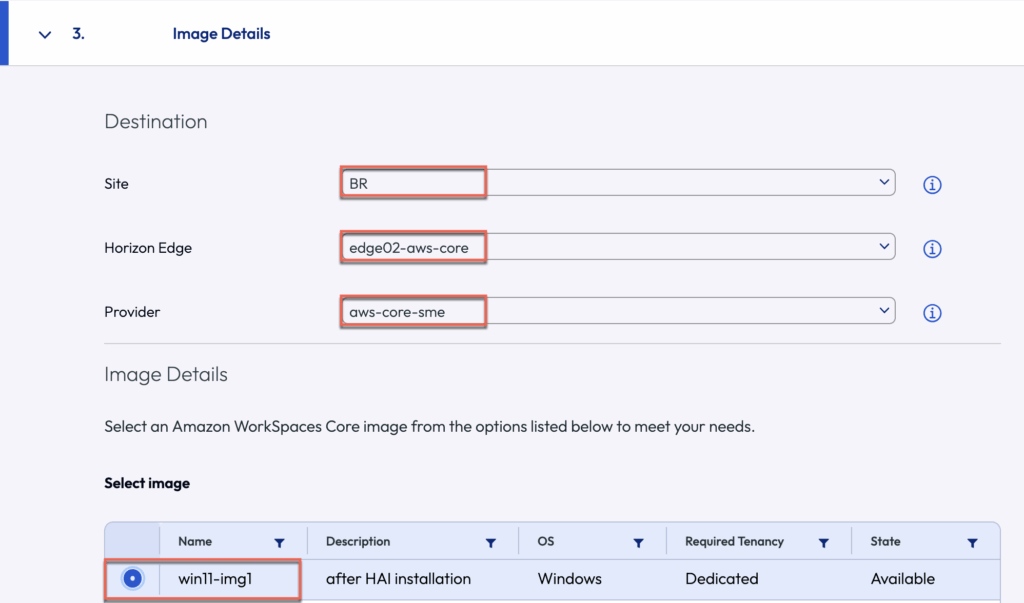
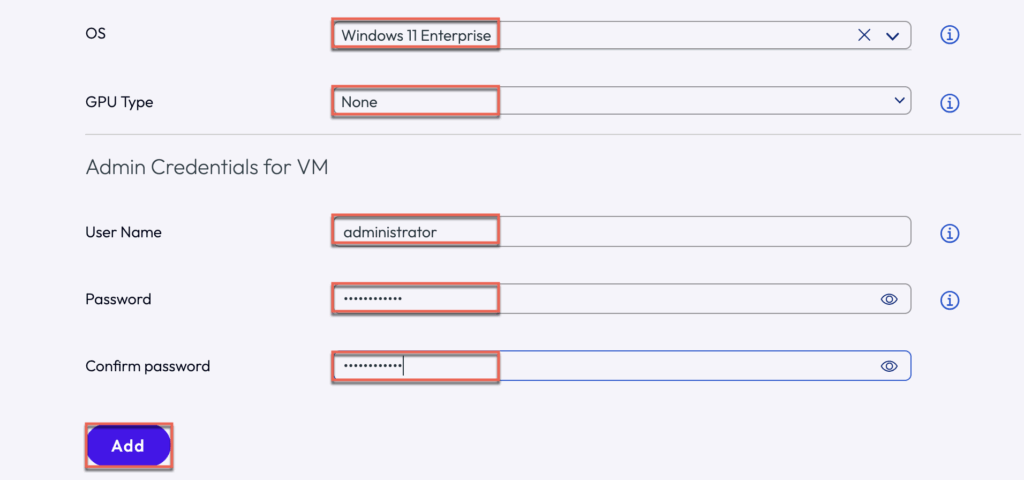
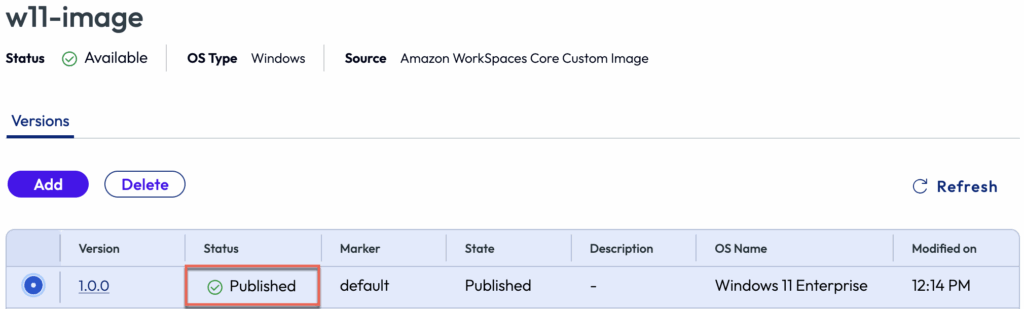
13. Login to Horizon Cloud Universal Console > [Image] > [Add] > [Amazon WorkSpaces Core] > give a name of your choice to image > [Next] > [Amazon WorkSpaces Core Custom Image] > [Next] and follow the on screen steps > [Add]
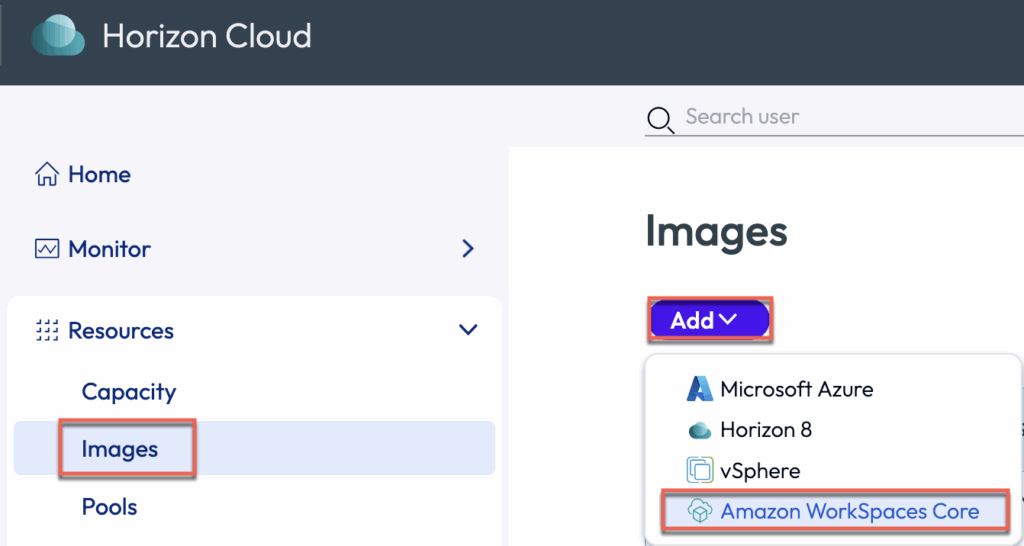
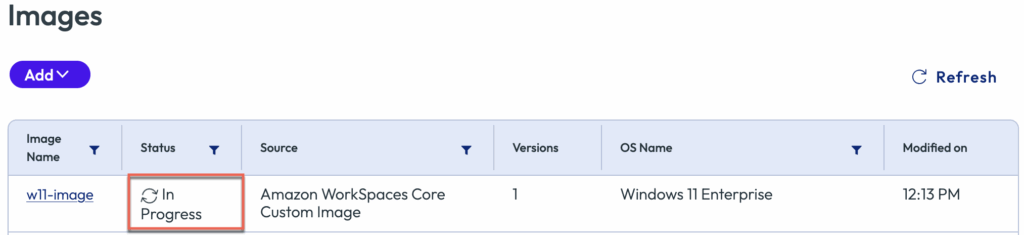
Confirm that an image is added and published successfully.
Creating a Desktop Pool from Amazon WorkSpaces Core image
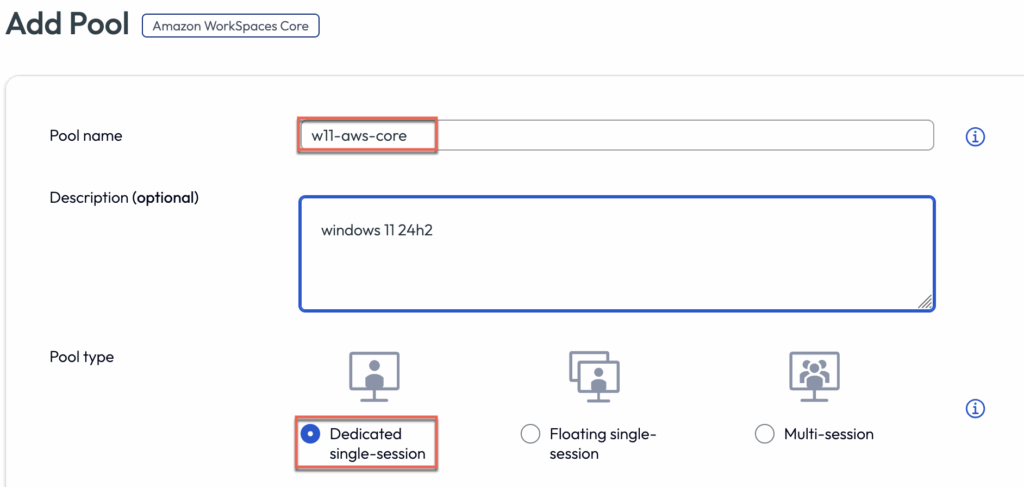
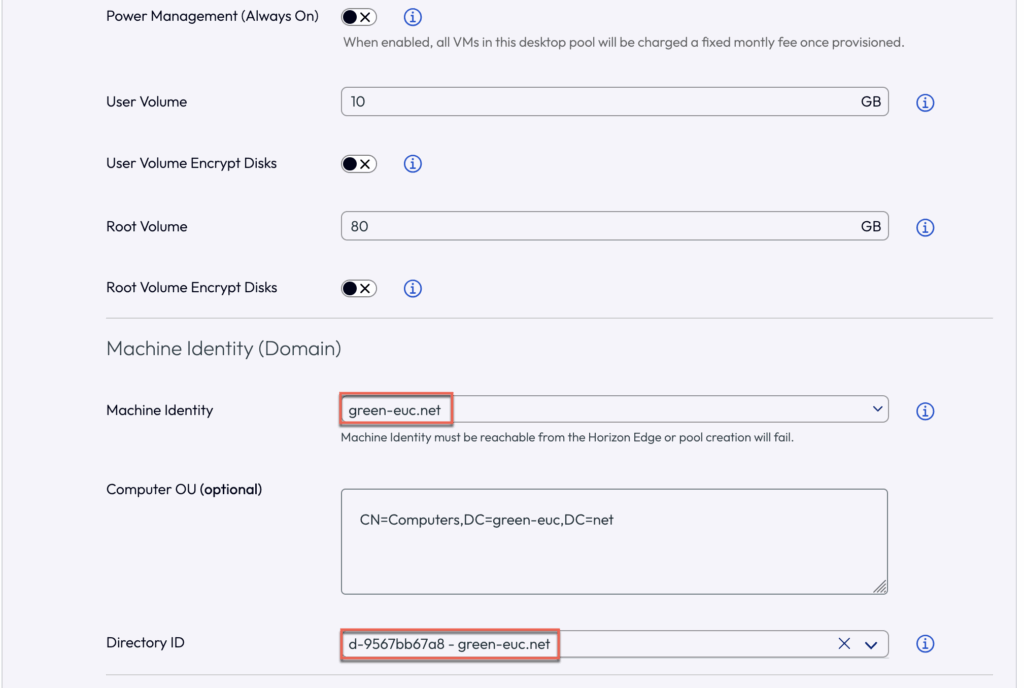
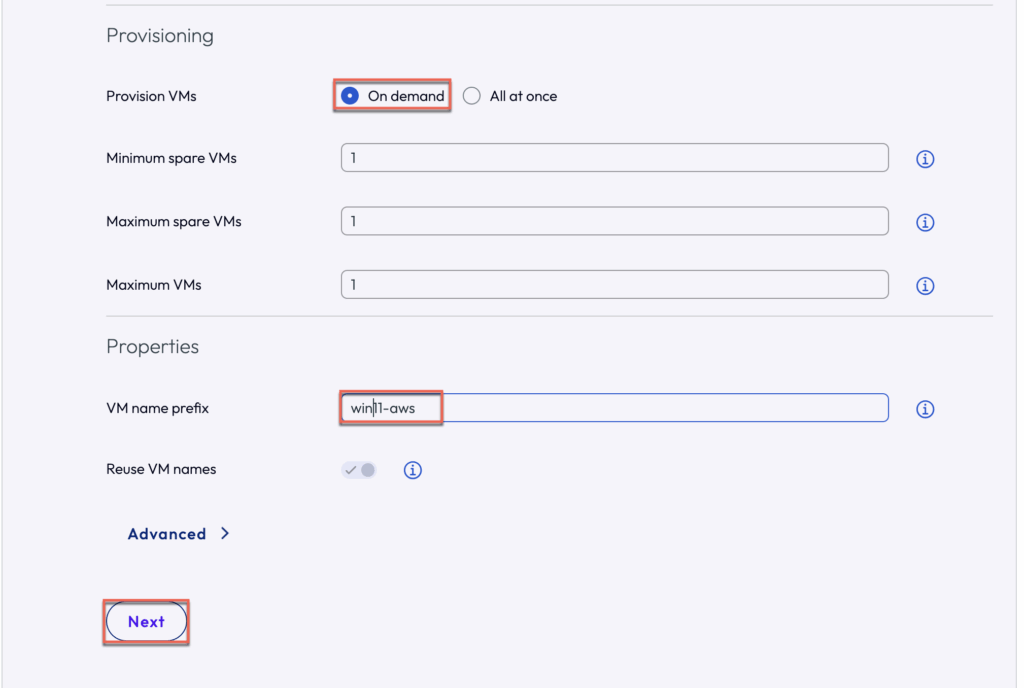
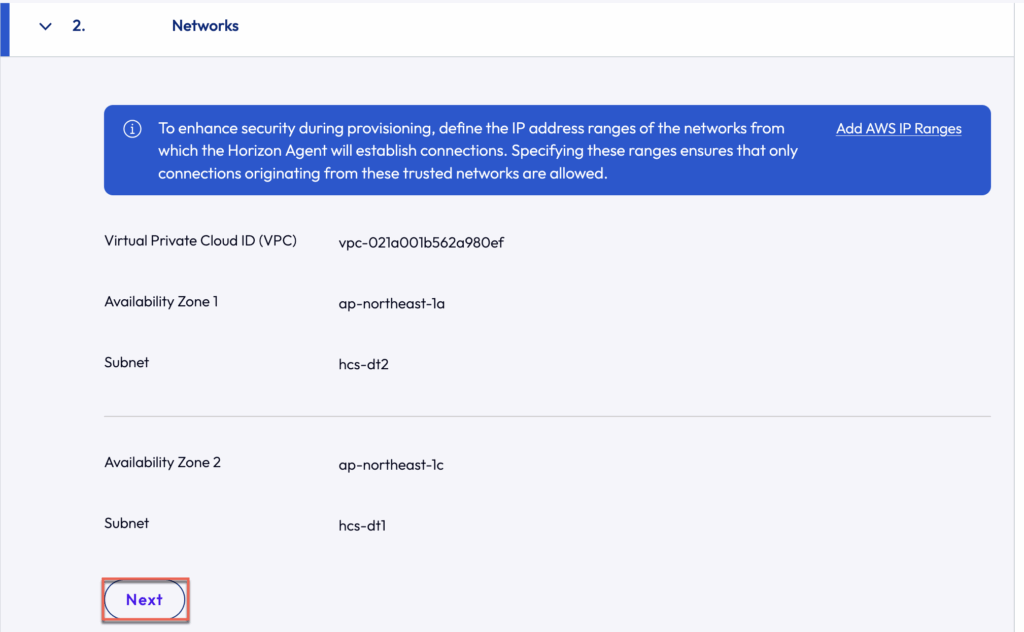
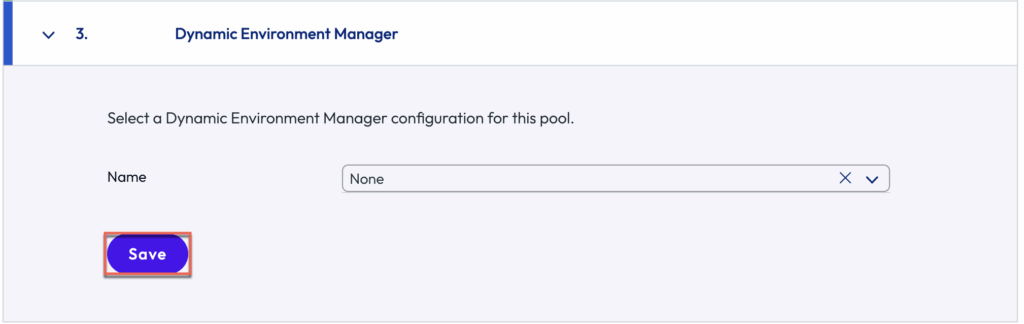
14. Navigate to [Pools] > [Add] > [Amazon WorkSpaces Core] > give the name of your choice to the pool > select / define the other parameters as needed and [Save] at the end.
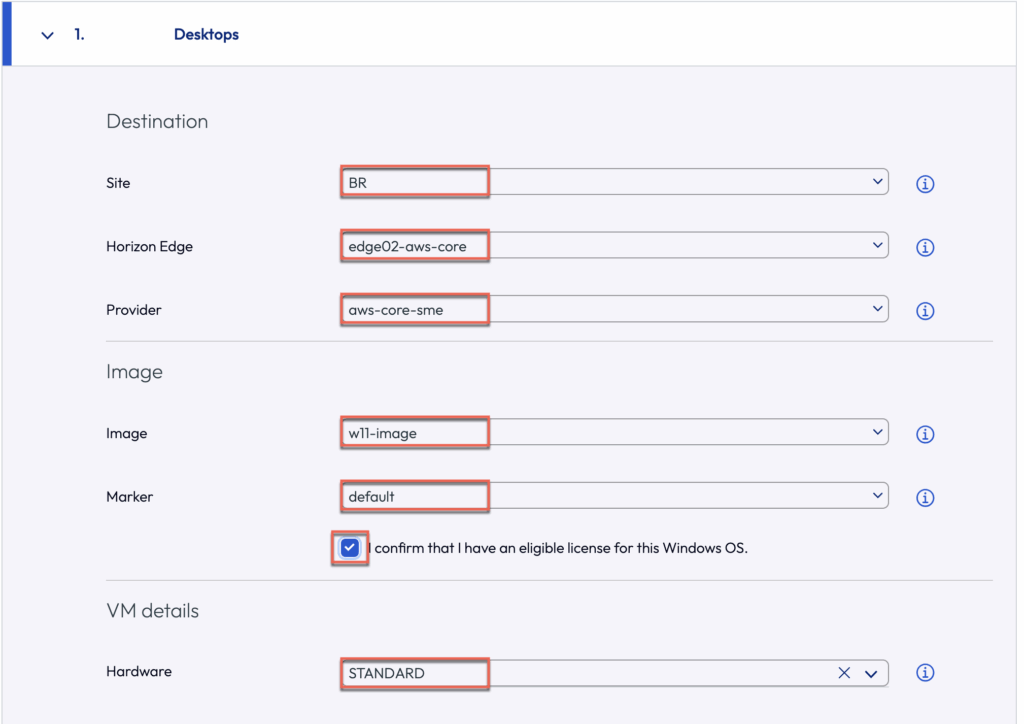
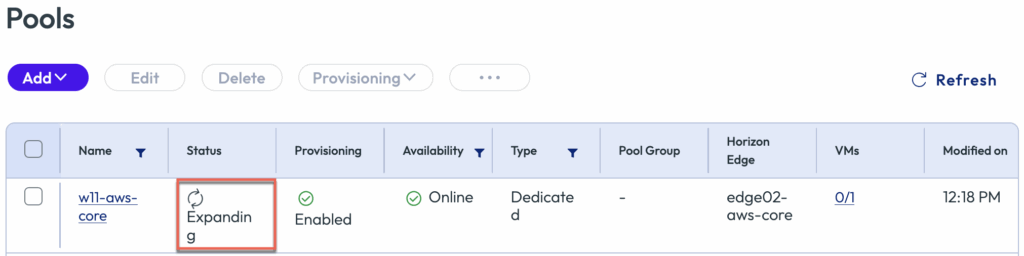
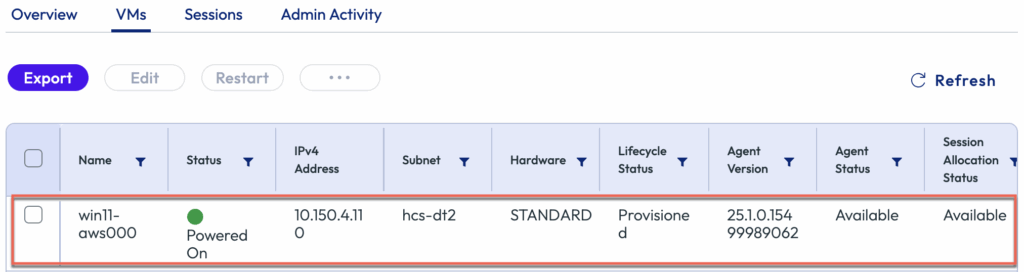
Confirm that a pool has been created successfully and VM inside the pool is Powered ON, Agent Status is Available.
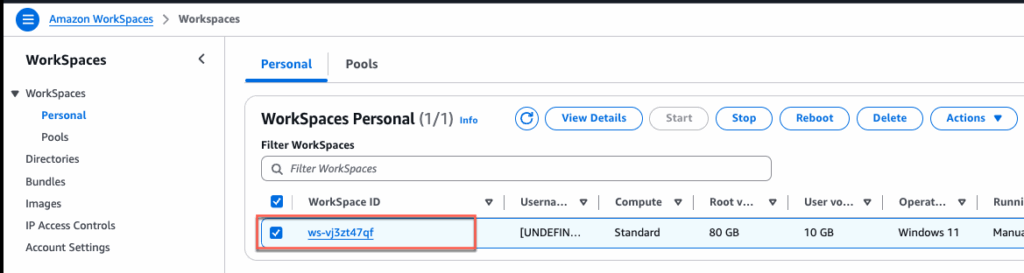
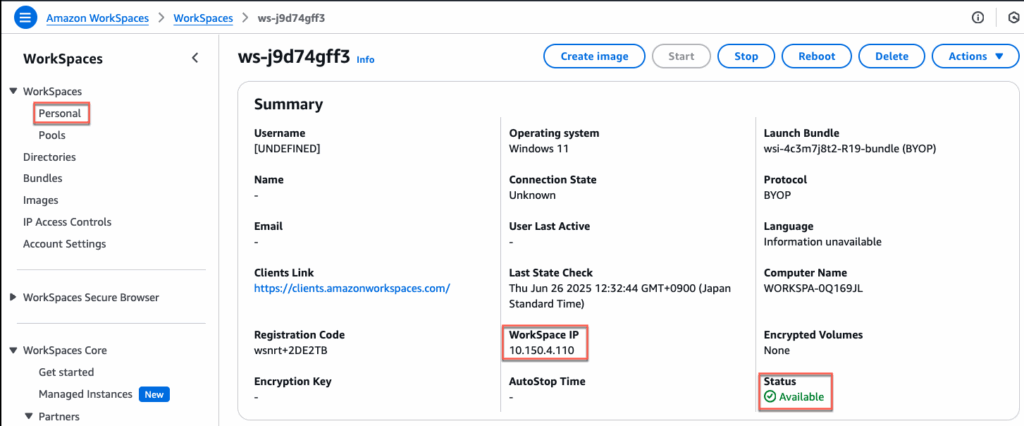
If you could like to confirm the VM (workspace) status in AWS Workspace Console, navigate to [Personal] > select the newly created VM and confirm that details.
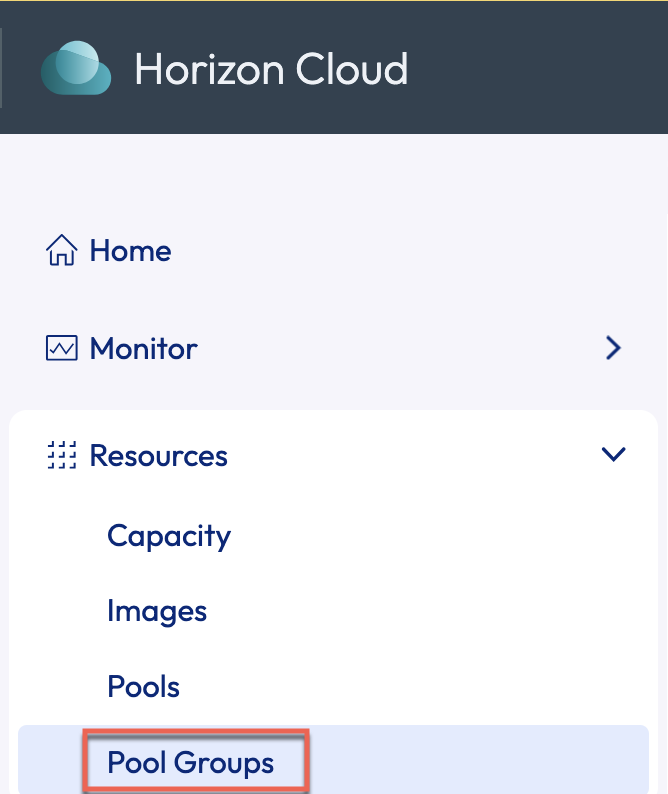
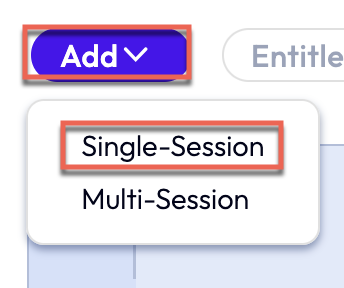
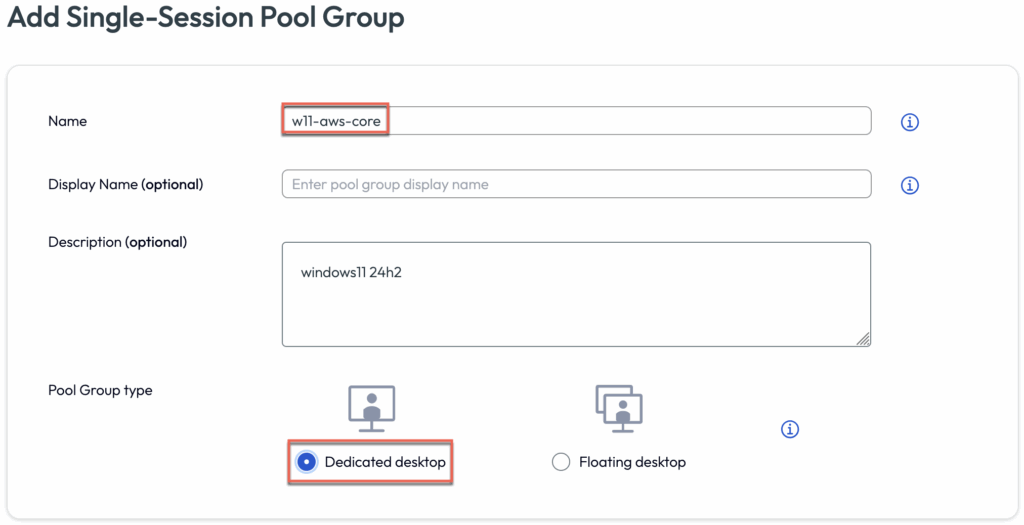
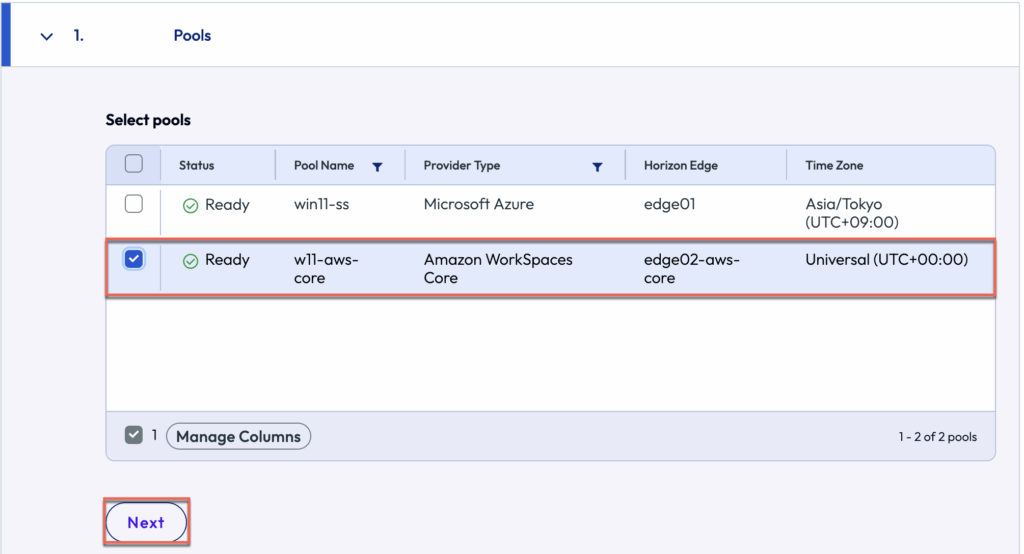
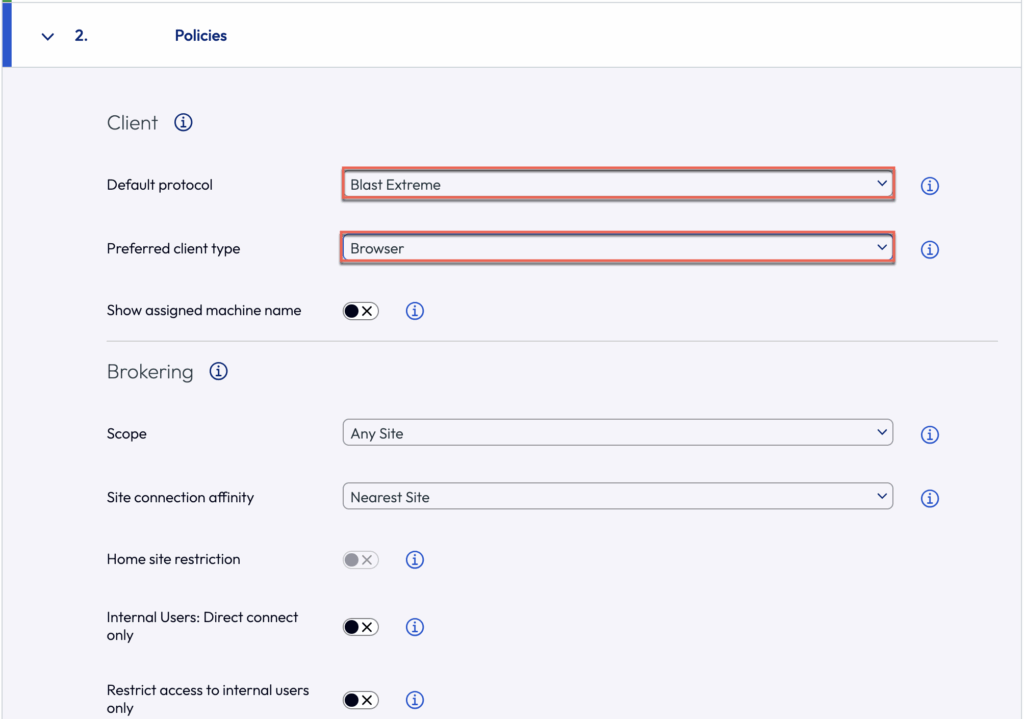
Creating a Pool Group
15. Select [Pool Group] > [Add] > [Single Session] > give the name of your choice to the pool group > select the newly created pool in previous step > define the [Policies] as needed > [Save] at the end.
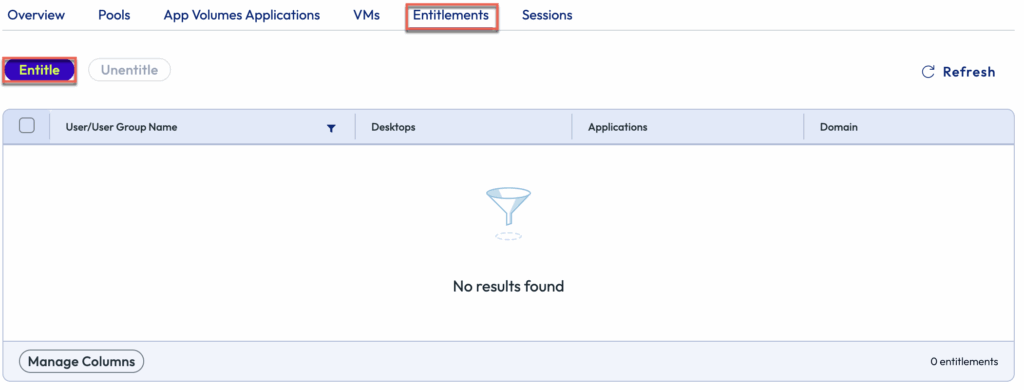
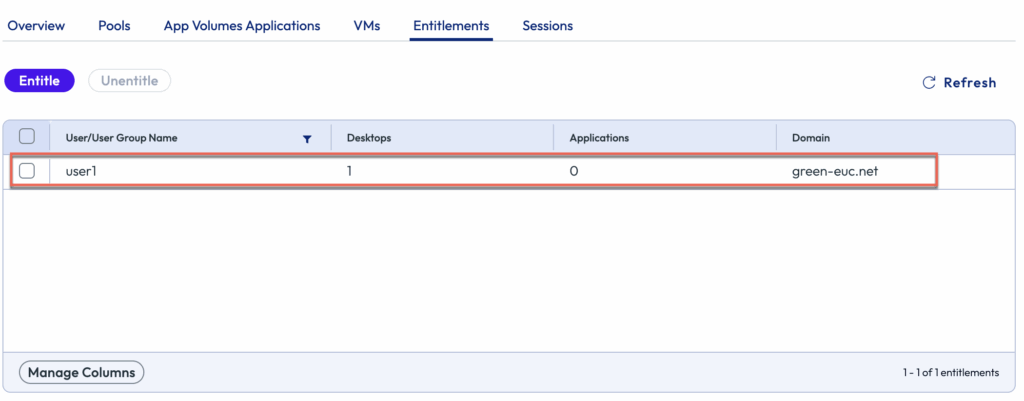
16. Entitle the users/groups to the Pool Group.
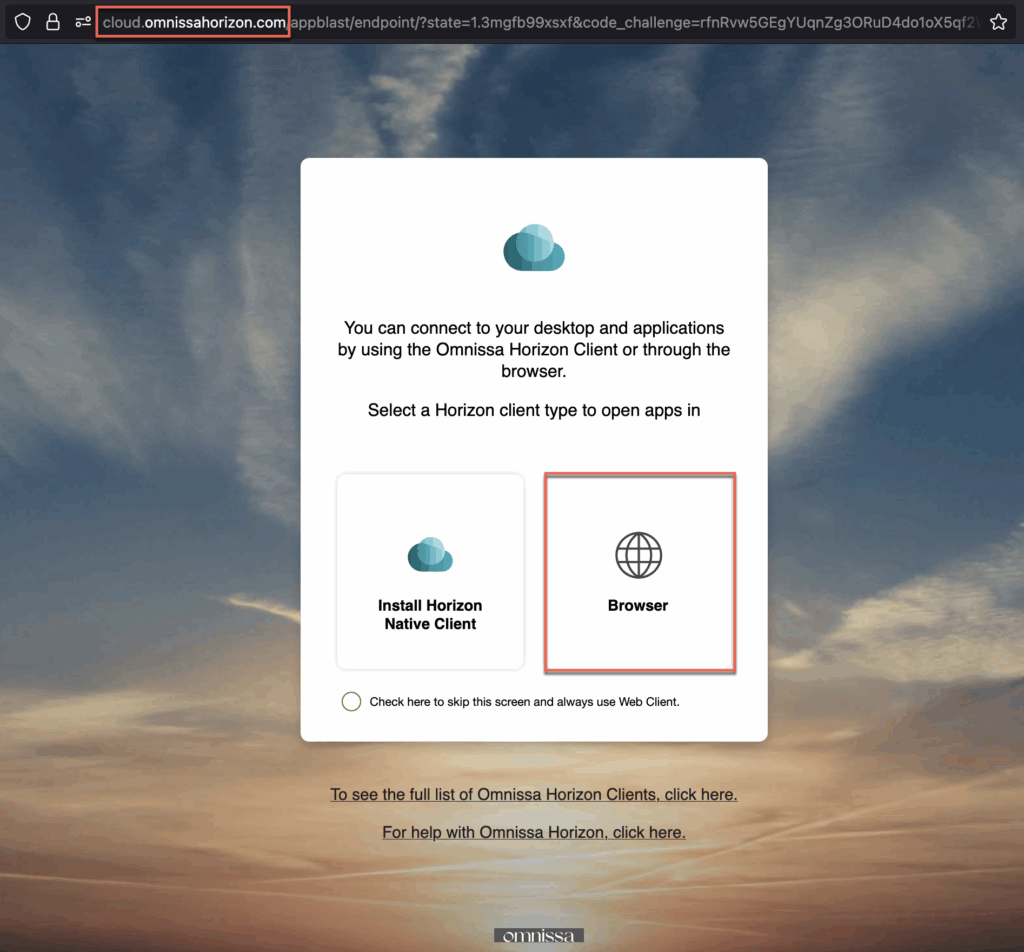
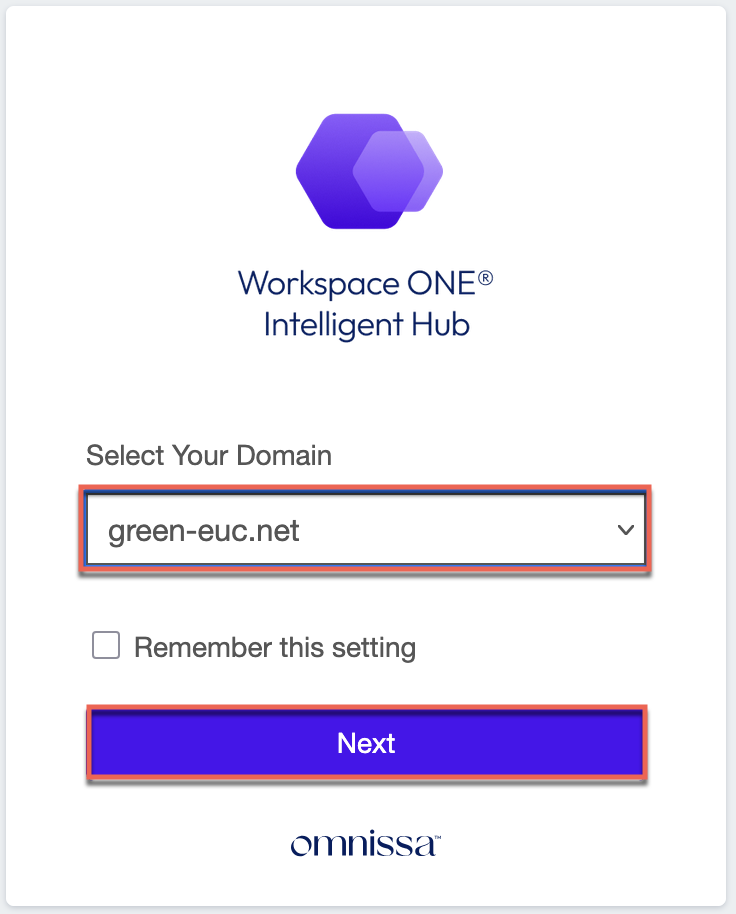
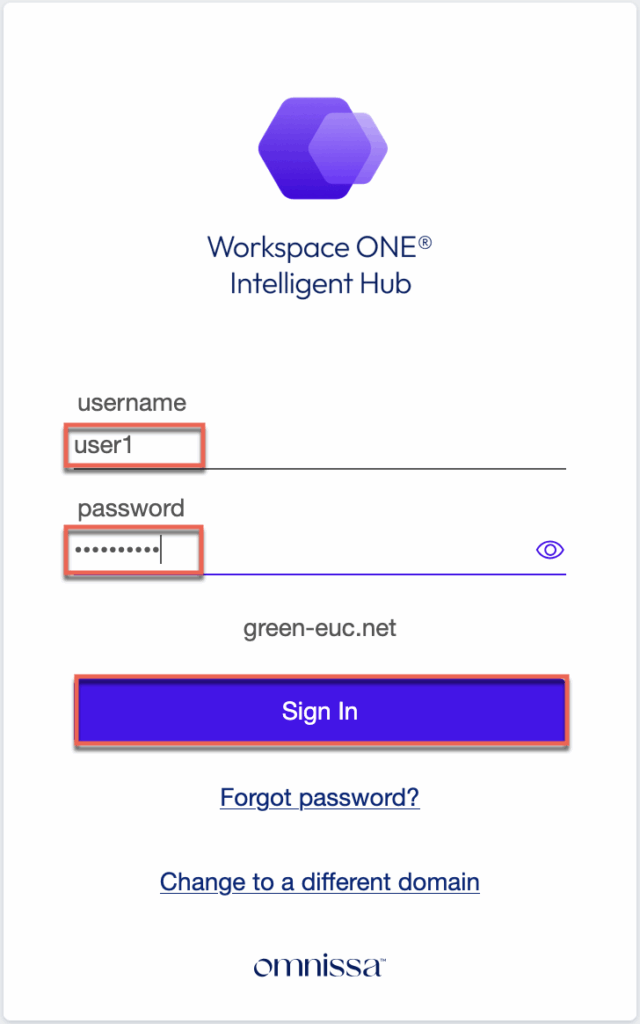
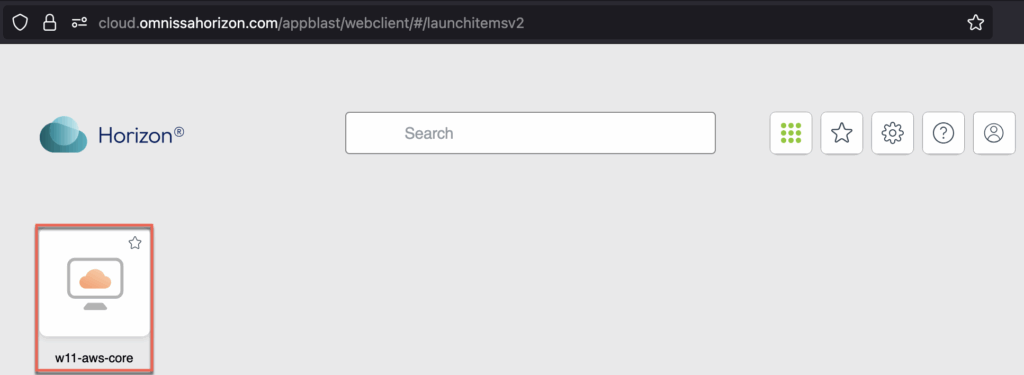
17. Accessing the desktop. Either you can access with Internet Browser (aka HTML access) or with Horizon native client. I am using HTML access for the testing.
Access URL: https://cloud.omnissahorizon.com


![]()